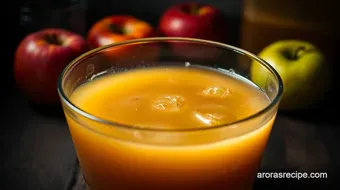
Classic Hard Apple Cider – Homemade & Naturally Fermented
Discover my classic hard apple cider recipe with natural fermentation and simple ingredients. Perfect for cozy gatherings—easy to brew at home!

- Starting Your Hard Apple Cider Journey: Why This Recipe Hits Different
- Classic Hard Apple Cider – Homemade & Naturally Fermented Recipe Card
- Where The Hard Apple Cider Story Begins: A Sip of History
- What's On Your Side When You Make This Hard Apple Cider Recipe?
- Why Make This Homemade Hard Apple Cider Over Store-Bought?
- Essential Ingredients Guide for Your Hard Apple Cider Recipe
- Mastering the Professional Cooking Method for Your Hard Apple Cider Recipe
- Additional Recipe Information for Your Homemade Hard Apple Cider
- Frequently Asked Questions
Starting Your Hard Apple Cider Journey: Why This Recipe Hits Different
Okay, real talk—have you ever wondered how folks make that crisp, tangy hard apple cider you sip on at fall festivals or chill with on a backyard hangout? i remember my first attempt at a homemade hard apple cider .
Honestly, it was a bit of a mess at first—bubbles overflowing, sticky counters—the whole nine yards. but, man, once that cider fermentation process kicked in and bubbles danced in my airlock, i was hooked.
That natural fizz, the fruity sparkle, and the sweet-tart balance? nothing beats it.
If you’re here looking for a straightforward but detailed diy apple cider recipe , you’re in the right place. whether you’re thinking about trying easy hard cider brewing for the first time or want to perfect your technique using the best yeast for hard cider, this guide breaks it all down.
No fancy jargon, just the real deal to get your apple cider brewing equipment out and start fermenting apple juice into something truly special.
Classic Hard Apple Cider – Homemade & Naturally Fermented Recipe Card
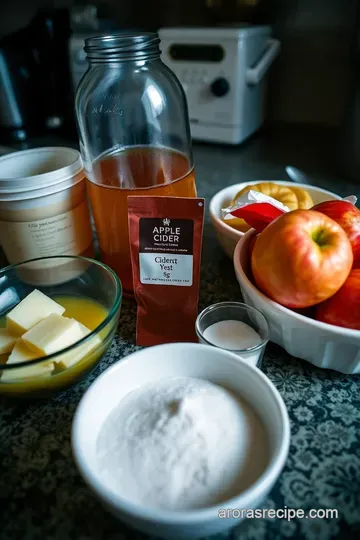
⚖️ Ingredients:
- 1 gallon (3.8 L) 100% pure apple juice or fresh-pressed apple cider (no preservatives)
- 1 packet (5 g) cider yeast (e.g., Lalvin EC-1118 or Nottingham Ale yeast)
- 1 cup (200 g) granulated sugar or honey (optional)
- 1 teaspoon yeast nutrient (optional)
- 1 cinnamon stick or 1/2 teaspoon ground cinnamon (optional)
🥄 Instructions:
- Sanitize Equipment: Thoroughly clean and sanitize all fermentation vessels, utensils, and bottles.
- Prepare the Must: Pour the apple juice into the fermentation vessel. If using sugar or honey, dissolve it in a small amount of warm juice or water, then add along with yeast nutrient and cinnamon. Mix gently.
- Pitch the Yeast: Sprinkle the yeast on top of the juice (or rehydrate as per instructions), seal the vessel, and attach the airlock filled with water.
- Primary Fermentation: Store the fermenter in a dark, cool room (60–70°F / 15–21°C) and ferment for 7–14 days until bubbling slows significantly.
- Monitor Fermentation: Use a hydrometer if possible; fermentation is complete when the specific gravity remains steady for 2–3 days.
- Secondary Fermentation (Optional): Siphon the cider into a sanitized secondary vessel to clarify and age for an additional 1–2 weeks.
- Bottling: Sanitize bottles and carefully siphon the cider to avoid disturbing sediment, then seal with caps or corks.
- Carbonation (Optional): Add priming sugar (approximately 1 oz per gallon) before bottling for natural carbonation.
- Age and Chill: Store bottled cider in a cool, dark place for 1–2 weeks to mature and carbonate, then chill and serve.
Where The Hard Apple Cider Story Begins: A Sip of History
Here’s the cool thing: cider has been around for centuries. the traditional english cider recipe is like a time capsule passed down through generations, and american-style hard cider evolved with settlers who pressed their own apples right in their backyards.
Back then, folks didn’t rely on store-bought cider; they made it—often fermenting apple juice naturally with wild yeasts or a simple packet of cider yeast.
Today, homebrewing hard apple cider has exploded in popularity. because it’s approachable and fun, lots of people are exploring cider fermentation temperature control, experimenting with cider flavor variations, and even trying secondary fermentation cider techniques to sharpen their creations.
Plus, with the rise of fruit cider recipes , including pear blends or spiced hard cider recipes, making cider at home is more exciting than ever.
What's On Your Side When You Make This Hard Apple Cider Recipe?
Aside from being super fun, this recipe offers some sweet benefits that would make any apple lover smile. first off, it’s a natural fermentation cider —meaning no weird preservatives or artificial junk, just good ol’ apple cider ingredients and yeast doing their thing.
From a health perspective, hard cider packs some surprising perks. compared to many sugary cocktails, it often has less added sugar especially if you go for a dry vs sweet cider style.
Plus, apple cider nutrition facts highlight antioxidants from the fruit itself, giving your body a little boost as you enjoy a sip.
Another win? the sheer versatility. this recipe yields roughly a gallon of cider—about 8-10 servings—enough for a small party or to roll out for special occasions.
Think autumn whiskey alternative, cool backyard bbq, or holiday gathering. you’ll also find this easy hard cider brewing process has a manageable time commitment—about 20 minutes of prep and then patient waiting for the magic of fermentation to unfold over 2-3 weeks.
Why Make This Homemade Hard Apple Cider Over Store-Bought?
Aside from being able to brag that you made it, there’s a real advantage to home fermentation. you call the shots on sweetness, spice, and even carbonation.
For example, want a light fizz? the hard cider carbonation method using priming sugar and bottle conditioning cider creates a bubbly experience like no other.
Also, controlling the apple cider brewing equipment and yeast nutrient for cider means fewer surprises—no off flavors or preservatives that mask fresh apple tastes.
You also skip the guesswork about homemade cider alcohol content since you can measure and tweak with tools like a hydrometer for cider brewing.
Honestly, i find the journey from gathering apple juice (or pressing your own apples cider) through fermenting, bottling, and savoring each crisp glass incredibly rewarding.
It’s a project and a hobby rolled into one.
Let's dive right into what you'll need to get started with this classic hard apple cider recipe . ready to roll up your sleeves and mix up your first batch? keep reading for a simple ingredients list that'll have you on your way to making juicy, fruity sparkling cider in no time.
Essential Ingredients Guide for Your Hard Apple Cider Recipe
Alright, buddy, if you’re diving into homebrewing hard apple cider , you gotta nail the ingredients first. honestly, the difference between a meh batch and one that makes you wanna do a happy dance often boils down to what goes into your fermenter.
So, grab your notebook and let’s break down the essentials.
Premium Core Components: What’s Really Going In?
First things first, getting your apple cider ingredients right is clutch. for a gallon of cider, you’ll want around 1 gallon (3.
8 l) of preservative-free apple juice or fresh-pressed cider —no potassium sorbate allowed! that stuff kills your yeast and ruins the whole cider fermentation process .
I learned that the hard way, trust me.
Sugar’s optional depending on your style (dry vs sweet cider vibes). if you want to crank up the alcohol content, toss in about 1 cup (200 g) of granulated sugar or honey .
Honey? oh yeah, it adds this rustic, almost floral note. maple syrup can work too if you wanna turn heads with some unique flavor—never tried it? totally worth a shot.
For yeast, make sure you grab a good one. cider yeast like lalvin ec-1118 or nottingham ale yeast is your best bet for consistent results.
Those bad boys handle fermentation smoothly and bring out clear apple notes. without the right yeast, you're just fermenting sugar water, no kidding.
Don’t forget a pinch of yeast nutrient —like 1 teaspoon per gallon. It’s like a multivitamin for your yeast. Keeps things healthy and avoids funky off-flavors.
Quick store tip—keep all your ingredients chilled and sealed tight. Apple juice can sit in the fridge for about a week, but once you open it, no messing around. Fresh is best.
Signature Seasoning Blend: Because Cider Needs Personality
Now, for the magic touch. my go-to is a classic cinnamon stick or 1/2 teaspoon ground cinnamon . it’s subtle but warms the cider beautifully—think of that cozy autumn glow.
If you want a spiced hard cider recipe , you can add cloves, nutmeg, or even a splash of ginger.
Honestly, play around here.
Herbs? totally underappreciated. a little rosemary or thyme can make a fascinating pairing, especially if you’re mixing with pear juice for an apple and pear cider mix .
These herbs bring aroma layers that dance with the fruitiness.
Don’t sweat if you want to experiment with regional stuff either. english ciders often lean drier while american-style hard cider tends to be fruitier and sometimes sweeter.
You can switch up your spices based on that.
Smart Substitutions: Because Life Happens
Maybe you don’t have the perfect cider yeast, or your local store is dry of the right supplies. don’t panic! you can use champagne yeast or even ale yeast in a pinch.
Just be aware the flavor profile will shift slightly.
For sugar, honey or maple syrup in cider brewing works wonders. They give extra depth but ferment differently, so keep an eye on fermentation timing.
If you're prepping during apple off-season, frozen or pasteurized juice works, but avoid preservatives! seasonally, i often press my own apples (you know, press your own apples cider style), freeze the juice, and ferment later.
Makes it feel like a cider-nerd hack.
Kitchen Equipment Essentials: More Than Just a Jar
You’ll need a 1-gallon glass carboy or food-grade fermenting bucket with a well-fitting lid and airlock. the airlock is non-negotiable —it lets co2 escape during fermentation but keeps nasties out.
My first batch blew the lid off because i skipped this step. spoiler: messy.
Sanitizer is key. Use Star San or a mild bleach solution, and clean everything before and after. Yeast loves a clean environment as much as your taste buds.
A hydrometer for cider brewing helps you track sugar levels and estimate alcohol by volume. It’s like having a crystal ball for fermentation progress.
For bottling, make sure your bottles and caps or corks are sanitized and ready. if you want sparkling cider, add cider priming sugar carefully—too much, and you risk bottle explosions.
Been there, sticky everywhere. be safe!
Storage? chill your finished cider between 60– 70° f (15– 21° c) during fermentation, then move bottles to a cool, dark spot for cold storage for cider maturation .
Patience here = clear hard cider tips paying off!
Making a great homemade hard apple cider isn’t rocket science, but it’s not just dumping juice in a jar either.
The devil—and the delight—is in the details: right ingredients, good yeast, smart seasonings, and proper gear make your cider shine.
Next up, i’ll walk you through the step-by-step hard apple cider recipe itself. we’re talking how to ferment apple juice safely, get that perfect sparkle, and avoid common pitfalls in home fermentation sanitation and troubleshooting cider fermentation.
Stick around, it’s gonna be fun!

Mastering the Professional Cooking Method for Your Hard Apple Cider Recipe
Alright, let’s dive into the nitty-gritty of making a homemade hard apple cider that actually tastes like the good stuff you find at a craft cider house.
I’ve messed around with so many diy apple cider recipes, and the key to success? nailing the professional cooking method —which basically means good prep, smart timing, and flawless fermentation.
Essential Preparation Steps: Mise en Place for Cider Making
You might know mise en place from fancy kitchens, but it’s just a fancy way of saying “get everything ready before you start.
” with a hard apple cider recipe , that means prepping your apple cider ingredients like apple juice, yeast, and sugar, plus sanitizing all your gear—like the fermentation bucket and airlock.
Trust me, sanitation isn’t just a buzzword here. when i first started homebrewing hard apple cider , i underestimated this and lost a batch to contamination.
So, spray or soak your tools in sanitizer (like star san or a bleach solution) and rinse well. no shortcuts!
Also, plan your time wisely. fermentation can take anywhere from 7 to 14 days at a temperature of 60– 70° f (15– 21° c) , and if you do a secondary ferment (which i recommend if you want clearer cider), add another week or two.
So don’t get impatient and rush your bottles—patience is key.
Step-by-Step Process: Follow the Flow with Precision
Here’s your no-fuss, numbered guide, straight from my kitchen experiments:
- Sanitize everything . Utterly everything.
- Pour your preservative-free apple juice into a 1-gallon fermentation vessel .
- Optional: Dissolve 1 cup of sugar or honey in a bit of warm juice and add it in for a boozier cider.
- Add 1 teaspoon yeast nutrient if you have it—this really boosts your yeast health.
- Sprinkle the cider yeast (I love Lalvin EC-1118, but Nottingham Ale yeast also rocks) over the surface.
- Seal the container with an airlock filled with water.
- Store the fermenter in a spot that stays around 65° F ( 18° C) .
- Keep an eye on the bubbling in your airlock—it should start in 24- 72 hours .
- After about 7-14 days , when bubbles slow down, check with a hydrometer if you can—it’ll tell you if fermentation is done (look for a steady gravity reading).
- Optional: Rack your cider into a fresh vessel for secondary fermentation to clear the sediment for another 1-2 weeks .
- Bottle carefully, adding a small amount of cider priming sugar (about 1 oz per gallon) if you want a sparkling finish.
- Store bottles in a cool, dark place for 1-2 weeks to carbonate.
Expert Techniques: What the Pros Know (And You Should Too)
A biggie in the cider fermentation process is controlling oxygen exposure. oxygen kills off your yeast and can lead to funky flavors.
That’s why those airlocks are your best friends—they let co2 out but keep nasty air out.
Also, temperature is everything. i’ve had batches go south when the basement heated up in summer or got too cold in winter.
Stick to that 60– 70° f range for happy yeast. and don’t forget: yeast nutrient really helps, especially with store-bought juice that might be low on the good stuff.
If your cider ends up cloudy or too sweet, no stress. cloudiness can happen if you skip the secondary fermentation.
As for sweetness, it might mean the yeast got tired or the apple cider yeast used wasn’t the best match (hint: ec-1118 is pretty dependable).
Oh! And when bottling, make sure not to shake the sediment—disturbing it leads to murky cider and bad mouthfeel.
Success Strategies: Locking Down That Great Taste
Honestly, the biggest mistake is rushing. Fermentation isn’t a race. Give it time, check your numbers (hydrometer FTW!), and keep things clean.
And if you want to make-ahead, cider is pretty forgiving. once bottled, it can sit in cold storage for months, aging and mellowing beautifully.
I love experimenting with spiced hard cider recipes during fall — a cinnamon stick here, a hint of clove there — heaven.
Pro tip: If you want fizz without bottled explosions, don’t add too much cider priming sugar and store your bottles cooler after carbonation starts.
So yeah, getting this natural fermentation cider right takes a little patience and care—but the payoff? crisp, fruity cider with your own twist on flavour.
Whether you’re into traditional english cider recipes or you prefer an american-style hard cider , this method has you covered.
Next up, I’ll share additional information on aging your cider, perfecting clarity, and fun pairing ideas to make your homemade cider party-ready. Stick around — it’s gonna be good!
Additional Recipe Information for Your Homemade Hard Apple Cider
Alright, so you’ve got your hard apple cider recipe down, and you’re ready to level up a bit. making this tasty drink is a blast, but there’s always some tricks i’ve picked up over the years that make the whole brewing thing smoother and tastier.
Pro Tips & Secrets from the Homebrew Frontline
First off, don’t skip on sanitation. honestly, i learned the hard way that a little yeast infection in the batch means trashing the whole gallon.
I like using a food-safe sanitizer — it’s not glamorous but super effective. also, start your fermentation at about 65– 70° f to keep the yeast happy.
Using the best yeast for hard cider really matters: lalvin ec-1118 is like the rockstar of cider yeast — tough, fast, and reliable.
Want to save time? use glass carboys for fermenting; they’re easier to clean and you can see how the bubbles go.
Also, if you’re aiming for a crisp finish, let your cider do a secondary fermentation in a clean vessel — it clears up those pesky bits and mellows flavors.
I like to toss in a cinnamon stick during this phase for a subtle spice kick (think classic spiced hard cider recipe vibes).
Oh, and topping up your mix with a teaspoon of yeast nutrient? game changer. it keeps yeast active and smooths the taste.
Tossing a bit of honey instead of plain sugar brings a floral sweetness that’s just magic.
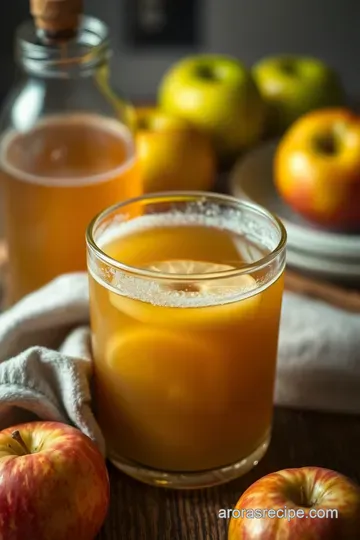
Perfect Presentation: Because Looks Matter
It’s cider — so why not make it pop visually? pour your finished cider into clear glasses to show off that beautiful amber sparkle.
Tulip-shaped glasses trap the fruity aromas, making you appreciate every sip.
For garnish, try a thin apple slice with a cinnamon stick on the side. it not only looks great but gives you a hint of that spice smell before your first taste.
Color combos? rusty oranges and deep reds are perfect in fall — a sprinkle of crushed cranberries or a sprig of rosemary on the side adds a nice earthiness visually and in aroma.
Storage & Make-Ahead Guide — Keep Your Cider Fresh and Fizzy
So, you’ve got your batch. what now? cold storage for cider maturation in your fridge or a cool basement spot at around 50° f slows fermentation to a crawl, keeping your cider fresh for weeks.
If you’re aiming for bubbly, add your cider priming sugar right before bottling (about 1 oz per gallon) and practice safe bottle conditioning cider techniques.
Trust me, nothing kills the vibe like a cider bottle explosion. keep a close eye on pressure and don’t store them too warm!
Your homemade cider alcohol content will generally clock about 5–7% abv, depending on sugar levels, so treat it like you would any adult beverage—store safely, chill well, and consume within a couple months for the best taste.
Creative Variations to Try Next Time
Believe me, once you’ve nailed the basic cider, you wanna mix it up! adding a maple syrup in cider brewing session? yes, please.
Sweet and woody all at once. or try blending apples with pears for a mellow apple and pear cider mix that’s super smooth.
If you’re into dry cider, just skip the extra sugar. On the sweeter side, honey or natural cane sugar work wonders.
For a seasonal twist, infuse your ferment with cloves, nutmeg, or ginger for a warm, cinnamon spiced cider perfect for those crisp autumn nights.
Regional touch? a traditional english cider recipe usually uses tannin-rich crabapples, which gives a more complex dryness compared to the fruitier american-style hard cider .
Nutrition & Why Hard Apple Cider Can Be a Treat
Cider is surprisingly light — an 8 oz serving has roughly 120 calories, mostly from natural sugars. It’s naturally gluten-free and can offer some vitamins from apple juice, mainly antioxidants.
If you’re tracking health, keep the sugar additions low or use natural sweeteners. homemade cider also lacks preservatives, meaning you’re sipping on a pretty natural drink sans weird chemicals.
But always respect portion guidance — it’s still booze, so pace yourself.
Wrapping It Up
Honestly, there’s something magical about crafting your own cider from apple juice through the whole cider fermentation process . it’s like you’re bringing a bit of orchard sunshine into your home, one bubbly glass at a time.
With these tips, whether you’re into quick easy hard cider brewing or want to experiment with natural fermentation cider , you really can make something special.
Keep your gear clean, play with flavors, and have patience – that’s the secret sauce.
So go ahead — grab your apple cider brewing equipment , get that yeast working its magic, and share the goodness.
Because hey, nothing beats serving up a fresh-glassy, slightly sparkling homemade cider to friends. cheers to your cider adventures!
Frequently Asked Questions
What are the key steps in making a hard apple cider recipe at home?
Making hard apple cider involves sanitizing your equipment, mixing preservative-free apple juice with yeast (and optionally sugar or honey), then fermenting the mixture for 1-2 weeks in a cool, dark place. After fermentation slows, you can rack it off the sediment, bottle, and optionally carbonate with priming sugar before ageing. Patience and proper sanitation are essential to avoid off-flavours or spoilage.
How long does the fermentation process take for homemade hard apple cider?
Primary fermentation usually takes about 7 to 14 days, depending on your temperature and yeast activity. Some ciders benefit from an additional 1 to 2 weeks of secondary fermentation or ageing to clarify and mellow the flavours. Overall, expect about 3 weeks from start to when it’s ready to drink, so it’s a bit like waiting for a good Sunday roast – worth the wait!
Can I make a sparkling or carbonated hard apple cider with this recipe?
Absolutely! To get that fizzy sparkle, add a measured amount of priming sugar (around 1 ounce per gallon) just before bottling. This sugar feeds the yeast inside sealed bottles, creating natural carbonation similar to classic British sparkling ciders. Just make sure fermentation is fully complete before bottling to avoid exploding bottles – safety first, especially if you’re a fan of hoppy ales and don’t want cider bombs!
What variations or flavour twists can I try with this hard apple cider recipe?
Feel free to spice things up by adding cinnamon, cloves, nutmeg, or ginger for a warming autumnal feel. You can also blend apple juice with pear or berry juices for a fruitier profile. For a drier cider, simply skip added sugar or honey. It’s like adding your own playlist to a classic Britpop tune — personal and distinctive!
How should I store homemade hard apple cider and how long will it keep?
Store your bottled cider in a cool, dark cupboard or fridge to preserve freshness and prevent off-flavours. Properly fermented and bottled cider can last several months if kept sealed and chilled. If you’re planning to keep it longer, refrigeration is best – think of it as tucking it in for a nap until you’re ready to enjoy.
Is homemade hard apple cider healthy and what should I know about its nutritional content?
Hard apple cider typically has around 120 calories per 8 oz serving with 5–7% alcohol by volume. While it contains no fat or protein, it does contain sugars naturally from apples, and any added sugars or honey increase calorie content. Enjoy in moderation like a nice pint down the local – it’s a refreshing treat, but best savoured responsibly.
Previous Recipe: French Onion Meatloaf – Juicy Comfort with a Savoury Twist
Next Recipe: Spiced Kala Chana Recipe: My Favorite Hearty Black Chickpea Curry