Classic Homemade Matzo – Crisp and Light Traditional Unleavened Bread
Discover my easy homemade matzo recipe for crisp, light unleavened bread. Perfect for Passover or anytime you want traditional Jewish matzah made fresh.

- Let’s Talk Matzo Magic: Why This Classic Matzo Recipe is a Game Changer
- Classic Homemade Matzo – Crisp and Light Traditional Unleavened Bread Recipe Card
- Essential Ingredients Guide for Your Perfect Matzo Recipe
- Mastering the Professional Cooking Method for Classic Homemade Matzo
- Pro Tips & Secrets for the Best Matzo Recipe
- Perfect Presentation Tips
- Storage & Make-Ahead Hacks
- Creative Variations to Try
- Your Complete Nutrition Lowdown
- Wrapping It Up
- Frequently Asked Questions
Let’s Talk Matzo Magic: Why This Classic Matzo Recipe is a Game Changer
Oh man, i’ll never forget the first time i tried my hand at a homemade matzo recipe . it was passover, and i figured, why not dive into the deep end and make my own matzo from scratch? i mean, how hard could unleavened bread be? spoiler alert: it’s actually pretty simple! but that first crunch when i bit into my freshly baked, crispy, thin matzah? totally worth every minute of the hustle.
If you’ve ever felt intimidated by jewish foods like matzah ball soup or wondered how traditional matzah holds its charm, stick around.
I’m gonna share some stories, history, and tasty reasons why making this classic homemade matzo is a must. plus, it’s kind of amazing how this humble cracker connects us with generations and reminds us what food storytelling is all about.
A Bite of History: Matzo Origins and Why It Matters
Here’s the deal: matzo isn’t just bread. it’s packed with meaning. rooted deeply in jewish tradition, especially during passover , it symbolizes the speed with which the israelites fled egypt—no time to let the dough rise.
That’s why you see it in almost every passover matzah recipe and on every seder plate. this unleavened bread isn’t just a dish; it’s a symbol of freedom and survival.
Now, while the traditional matzo recipe uses only flour and water, it’s become a kitchen classic worldwide—used as a vessel for dipping, scooping, or stack-crunching alongside your favorite jewish dishes.
From the simple matzah ball soup bowls to innovative twists like herb-infused matzo, its popularity hasn’t waned. honestly, it’s like a crunchy little time machine you eat!
Why You Should Make This Matzo Recipe Today
Look, i get it. sometimes nerding out on matzo meal or reading about jewish matzo ball soup recipes sounds complicated.
But this homemade matzo isn’t just easy , it’s quick—about 30 minutes from mixing to that crispy, golden finish. no fancy equipment, no funky ingredients, and definitely zero yeast drama.
Even my grandma, who’s a champ at chicken matzah ball soup , was impressed when i whipped these up.
Budget-wise? super forgiving. a couple cups of all-purpose flour and water (plus a pinch of salt if you’re feeling wild) are all you need.
It yields around six crunchy sheets, perfect for sharing. so, whether you’re planning a jewish feast , prepping for passover recipes , or simply craving some authentic matzo ball soup sides, homemade matzo makes a mean base without breaking the bank.
What Makes This Matzo Recipe So Special?
There’s something insanely satisfying about biting into homemade matzo —that paper-thin crunch carries so much history yet feels fresh and light. But beyond taste, there are real perks:
- Health Benefits: Made from simple ingredients, no additives, and naturally low in fat. You’re basically getting clean carbs, minus the preservatives. It’s a modest but wholesome snack or meal companion.
- Versatility: Use it as a cracker, tear it into soups, or stack it with spreads—everything from charoset to your favorite hummus works.
- Perfect for Passover and beyond: While essential for Passover matzah recipes , this bread transcends holidays. On lazy weekends or family dinners, it adds that nostalgic touch.
- Unique Compared to Store-Bought: No weird preservatives, and you control thickness, flavor, and even add-ons if you want (think sesame seeds or herbs).
Honestly, making your own matzo feels like joining a secret club—part tradition, part kitchen experiment. and every time i roll out the dough, i catch myself smiling.
It’s not just bread; it’s a little celebration of culture and simplicity.
So, ready to roll up your sleeves? next up, i’ll lay out all the simple ingredients you’ll need to get started on your very own crisp and light traditional unleavened bread .
Trust me, once you try this matzo ball soup companion, store-bought just won’t cut it anymore. let’s jump into it!
Classic Homemade Matzo – Crisp and Light Traditional Unleavened Bread Recipe Card
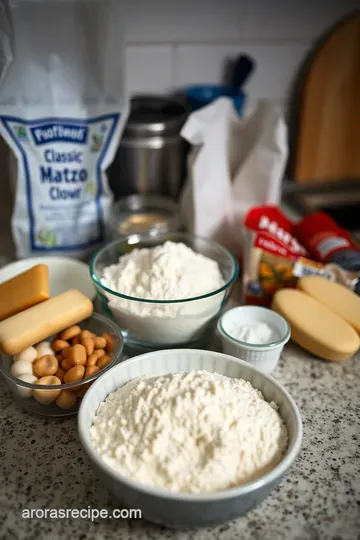
⚖️ Ingredients:
- 2 cups all-purpose flour, plus extra for dusting
- ¾ cup cold water
- ½ teaspoon salt (optional, traditional matzo may omit salt)
🥄 Instructions:
- Preheat the oven to 475°F (245°C) and line baking sheets with parchment paper or silicone mats.
- In a large bowl, combine flour and salt. Gradually add cold water, stirring until a rough dough forms; knead lightly without over-kneading.
- Divide the dough into 6 equal portions and roll each into a very thin 8x10 inch rectangle or circle, approximately 3mm thick.
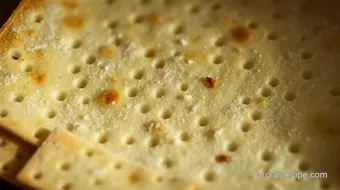
- Dock the rolled dough by piercing thoroughly with a fork or dough docker to prevent puffing.
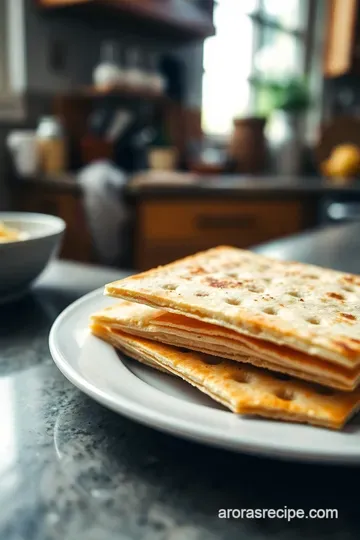
- Place the dough on the prepared baking sheet and bake for 4-5 minutes, then rotate the tray and bake for an additional 2-3 minutes until crisp and lightly golden. Remove and cool on a wire rack.
- Repeat with the remaining dough pieces.
Essential Ingredients Guide for Your Perfect Matzo Recipe
Alrighty, so you’re ready to roll up your sleeves and dive into making homemade matzo . honestly, this classic jewish staple might look simple, but the ingredients and how you treat them totally make or break your matzo experience.
Having made my share of matzah ball soups and dived headfirst into various jewish food traditions over the years, here’s the real scoop on what matters most.
Premium Core Components: What You Really Need
Starting with the basics , we’re talking about 2 cups (250g) all-purpose flour , ¾ cup (180ml) cold water , and optionally ½ teaspoon salt .
Yeah, it’s pretty humble, but quality shines through here, so let’s get picky.
First off, for your flour, grab something fresh and preferably unbleached , because it’s gonna impact that nutty, slightly toasted flavor in the final matzo.
You don't want that old flour that’s been taking up residency in your pantry for ages. the last time i used stale flour, my matzah ball soup just didn’t have that oomph.
Speaking of pantry life, flour should be stored in an airtight container in a cool, dry place—ideally used within 6 months for ultimate freshness.
Cold water? sounds meh but trust me, cold water keeps the dough from warming up , which is key because you gotta rush through this or risk fermentation (and that’s a no-no for unleavened bread).
Keep your water in the fridge and use it straight from there.
If you’re wondering about salt, the traditional passover matzo is salt-free to keep kosher, but a pinch does nothing but enhance flavor if you’re just cooking for kicks.
Just don’t be shy about skipping it if you want authenticity.
Signature Seasoning Blend: Not Exactly Needed… But!
Now, hear me out: traditional matzo dough is super simple—no herbs or spices added. but, if you’re channeling your inner chef for a twist or want to dial up a homemade matzo for a chicken matzah ball soup night, sprinkling on some za’atar, sesame seeds, or poppy seeds just before baking is chef’s kiss .
It adds this wow factor.
In the world of matzah ball soup recipes , aromatics like dill and fresh parsley are your go-to for that signature herby profile.
Also, if you’ve ever made a motzabal recipe or similar middle eastern dips, you know those herbs bring life to the table.
Adding these as accompaniments—rather than in the dough itself—is usually the winning move.
Smart Substitutions: When Life Throws You a Curveball
Okay, so say you’re in a pinch and need to swap something out (hey, it’s happened to me):
- No all-purpose flour? Bread flour totally works—it’ll make your matzo a touch chewier. Not bad if you like some texture!
- Want to go healthier? Swap half the all-purpose with whole wheat for a nuttier taste and more fiber—your heart will thank you.
- No cold water in the fridge? Use filtered or spring water at room temp only if you plan to work lightning fast, or else the dough can toughen up.
- Need to keep it kosher for Passover? Skip any salt or seasonings, stick to basics.
Got leftover matzo? Crush it into matzo meal for future recipes like matzoh ball soup or breading—two birds, one stone!
Seasons change, and so can your ingredients. when cucumbers and fresh dill are abundant, use them to elevate your traditional matzo ball soup recipe sides.
During fall, warming cinnamon-spiced apples with your passover matzo elevate the whole dining experience.
Kitchen Equipment Essentials: Tools to Rock Your Baking Game
You don’t need a fancy kitchen here, but these are essentials that made my life easier when attempting the best matzo ball soup recipe and pairing it with freshly baked matzo:
- Rolling pin — Properly rolling out your dough thin (around 3mm thick) is key. Trust me, it takes a little arm workout but gets easier.
- Baking sheet or pizza stone — Using a stone gives this rustic crispness, but a plain old baking sheet lined with parchment works too.
- Fork or dough docker — Don’t underestimate this tool. Piercing the dough prevents those annoying bubbles; been there, popped that.
- Parchment paper or silicone mat — For an easier clean-up and no sticking dance.
And listen, if you don’t have a rolling pin, improvise with a wine bottle or even a sturdy glass. cooking is about creativity sometimes! store your baking tools close, keep them clean and ready—makes the whole cooking time smoother.
Okay, now that we've nailed down your ingredients , their quality, and the tools you’ll need, you're halfway there. the rest? it’s all about timing, quick hands, and some loving patience in the kitchen.
Ready to get that dough mixing, rolling, and baking? let’s dive into the step-by-step instructions next and get that authentic matzah ball craving satisfied!
Mastering the Professional Cooking Method for Classic Homemade Matzo
Alright, so you wanna get serious about making the best matzo recipe at home? whether you're cooking for passover or just craving that crispy, light unleavened bread, going pro in the kitchen doesn't mean you need michelin star skills.
Let me spill some tea from my own kitchen journey—making jewish matzo ball soup recipe with homemade matzo has its quirks, but once you nail the method, it's pure magic.
Essential Prep: The Power of Mise en Place
One thing i learned the hard way is this: mise en place ain't just fancy chef talk—it's your life saver here.
Before you dive into mixing or rolling, gather everything. flour? check. cold water? check. fork or dough docker? double check.
Why? well, matzo dough demands quickness. the yeast-free dough must stay unleavened , so you gotta work fast. set out your bowls, your rolling pin, baking sheets lined with parchment or silicone mats (trust me, cleanup is a breeze).
Have your oven preheated to a blistering 475° f ( 245° c) before you start rolling.
Time management is everything here. you’re juggling dough division, rolling, docking, and baking in batches. so, i set timers and pace myself to avoid any "oh no, it's starting to rise!" moments.
Plan to spend about 15 minutes actively prepping, then multiple 6-8 minute baking rounds. organization keeps stress away.
Safety-wise—hot ovens and tossing dough on sheets—stay focused. Use oven mitts, don’t rush pulling trays out, and keep your counter clear of clutter.
Step-By-Step: The Baking Ballet
Ready to roll? Literally.
-
Mix the dough : combine 2 cups of flour with a pinch of salt (optional) in your bowl. add ¾ cup cold water slowwwly and stir till it looks shaggy.
Knead lightly—the magic’s in quick, gentle kneading, not overdoing it.
-
Divvy Up : Split the dough like a pizza into 6 equal parts. Too big? You’ll struggle rolling ultra-thin sheets!
-
Roll Thin : Aim for about 3 millimeters thick—that’s roughly the thickness of a couple of credit cards stacked. Thin dough = crunchy matzo, no excuses here.
-
Dock like your life depends on it : prick the dough all over with a fork or dough docker so no airbubbles puff up mid-bake.
If you skip this, you’ll get weird lumps—def not what we want.
-
Into the oven : place sheets on the tray, bake at a fiery 475° f ( 245° c) for 4- 5 minutes.
Peek through the oven door (if you can without losing heat!) then rotate the tray and bake 2-3 more minutes.
Watch out for light golden edges —that’s your cue to yank them out.
-
Cool Down : Let matzo cool on a rack so they stay crisp and don’t steam themselves soft.
I used to mess up timing here—either underbaking and getting soft crackers or burning ‘em. Visual clues (light gold, crisp feel) are your best guides.
Expert Hacks You’ll Love
Professional kitchens swear by these tricks. first, remember, matzo dough doesn’t chill like many doughs. you gotta mix and roll fast—like a speed demon.
I usually time myself with my phone, about 3 minutes max from dough to rolled sheet.
Quality checkpoints? the dough should look rustic but not crumbly. it’s simple but has to hold together without cracking too much.
Also, make sure your oven is piping hot—crispness depends on those high embers of heat , no lower than 475° f ( 245° c).
Troubleshooting? if your matzo tastes stale or lacks crunch, the baking temp might have been too low. if it puffs up, you missed the docking.
If too thick, just try thinner next time. honestly, each batch is a little practice round.
How To Guarantee Success Every Time
Common mistake alert—don’t over-knead or the dough acts weird and hard to roll. Also, skipping the docking step can ruin the whole vibe.
Want perfect matzo every time? Store it airtight once cooled or it’ll turn soft before you get a chance to serve it with your Chicken Matzah Ball Soup .
Oh, and quick pro tip—this recipe is great for make-ahead. bake your sheets a day ahead and store sealed. they stay crunchy and fresh, ready for your traditional matzo ball soup recipe or even fun spins like motzabal recipe spreads.
Honestly, after a few tries, you realize matzo is more than food—it’s history, heart, and a bit of hustle in every crisp bite.
Okay, now that we've gotten the cooking method down pat, stick with me. up next: additional information where i’ll share more tricks, tasty serving ideas, and creative variations you won’t wanna miss.
Stay tuned!

Pro Tips & Secrets for the Best Matzo Recipe
Okay, real talk—making your own matzo might seem super simple, but there's a few tricks i picked up that totally level up the whole experience.
First off, work like lightning . seriously. traditional unleavened bread means you’ve gotta mix, roll, and bake fast, or else the dough starts to rise and you lose that iconic crispiness.
I remember the first time i made this, i was chatting with my mom on the phone and totally lost track of time—the matzo came out cakey instead of crunchy.
Rookie mistake!
Another thing— roll it thinner than you think you should . the thinner the dough, the crunchier the matzah. i always aim for around 3mm, and don’t stress about perfect shapes.
Rustic and a little wonky looks great and tastes just as good.
Wanna save time? you can roll out the dough all at once and stack the sheet pieces with parchment in between, then just pop batches into the hot oven quickly.
Also, docking (pricking holes all over with a fork) is non-negotiable . without it, your matzo will puff up like pita bread, and that’s just not the vibe of a traditional matzah ball soup side.
Speaking of which, homemade matzo goes insanely well broken into jewish matzo ball soup —trust me, it’s comfort food at its finest.
Perfect Presentation Tips
Now, let’s get fancy for a minute. the thing about matzo is it’s pretty plain by itself, so the secret to presentation is all about what you serve it with and how you plate it.
Try breaking matzo into irregular shapes and layering it on a rustic wooden board with bowls of charoset, butter, or your favorite dips.
The contrast between the matzah’s pale golden color and vibrant sides (think bright red charoset or green herb dips) makes your spread pop.
For soups—especially the classic chicken matzah ball soup —a big, wide bowl with matzah crackers artfully stacked alongside the bowl adds texture and that homemade feel.
Want to get even more colorful? sprinkle herbs like fresh dill or parsley on your matzo before baking next time.
Just a bit of green on a golden background makes all the difference.
Storage & Make-Ahead Hacks
Here’s the deal—matzah keeps best when it stays dry and crisp. once it cools, stash it in an airtight container or resealable bag, and it'll last up to two weeks.
Life hack? if you wanna make a batch ahead for passover or other occasions, you can freeze the sheets wrapped tightly in foil.
When you want to eat, just thaw at room temp—don’t microwave!
If matzo loses its crunch after a few days (been there), pop it in a 300° F oven for about 5 minutes to refresh the crispiness. Easy peasy.
Creative Variations to Try
Honestly, the traditional matzo is awesome on its own, but if you’re looking for some fun spins, try this:
- Toss a little za’atar or rosemary into your dough for an herbal twist that brings some Middle-Eastern flair.
- Mix in seeds like sesame or poppy before baking for extra crunch and flavor.
- For a healthier vibe, swap half the all-purpose flour for whole wheat. The nutty notes go great with savory soups.
- Want something seasonal? Add a pinch of cinnamon and nutmeg for a subtle holiday flavor.
Oh, and if you’re into dietary swaps, gluten-free flour blends can work, but watch the drying time since they tend to behave differently. Easy enough to experiment with!
Your Complete Nutrition Lowdown
I know, you’re probably wondering—what’s in this dough besides flour and water? well, it’s pretty straightforward. one matzo sheet clocks in around 120 calories with carbs dominating the picture—perfect for energy without too much fat or sugar.
If you add salt, you get a bit more sodium, so consider your seasoning.
This simple, lean bread is great for people watching fat intake or those who prefer a lighter carb source. plus, it’s traditionally kosher for passover, so it’s a win if you’re embracing jewish foods or just curious about traditions.
Pair your matzo with protein-rich dishes like chicken matzah ball soup, and you have a balanced meal ready to go.
Wrapping It Up
Honestly, making your own matzo recipe is more than just cooking; it's a bit like connecting with a piece of history, culture, and family stories.
Whether you’re breaking your homemade matzah into a jewish soup matzah ball, or enjoying it alongside passover classics, you’re creating memories—and who doesn’t love that?
Give this recipe a chance, even if you think it looks a bit too easy or plain. there’s something magical about baking your way into tradition with a crispy sheet of matzah in hand.
Trust me—it’s one of those little joys that feels like a big deal. so go on, get rolling, baking, and enjoy every crunchy bite!
Frequently Asked Questions
What is the best way to make a homemade matzo recipe crisp and light?
To get that classic matzo crunch, it's key to roll the dough very thin—around 3mm thick—and dock it thoroughly with a fork to prevent air pockets. Baking at a high temperature (475°F or 245°C) for a short time also helps achieve the perfect crispness without drying the matzo out. Quick mixing and baking keep it unleavened.
Can I make variations to the classic matzo recipe for different flavors or dietary needs?
Absolutely! You can swap out some or all of the all-purpose flour for whole wheat flour to add more fiber and a nuttier taste. For a flavour twist, try adding dried herbs like rosemary or za’atar into the dough, or sprinkle seeds such as sesame or poppy before baking. These small changes keep it kosher and refreshing without losing tradition.
How should I store homemade matzo to keep it fresh and crunchy?
Once your matzo sheets have cooled completely, store them in an airtight container or resealable bag to maintain their crispness. Keep them in a cool, dry place away from moisture and humidity, which can make the matzo soggy. Properly stored, homemade matzo can stay fresh for several days.
Is it difficult for beginners to make matzo at home using this recipe?
Not at all! This matzo recipe is designed to be straightforward with just flour, water, and optional salt. The biggest challenge is working quickly to prevent any fermentation, but with a little practice, even those new to baking will find it manageable. Remember, imperfections in shape are totally normal and part of the charm.
What nutritional information should I consider when making this matzo recipe?
A single matzo sheet contains roughly 120 calories, 4 grams of protein, and minimal fat, making it a relatively light bread option. Using whole wheat flour can boost fiber content, and omitting salt keeps sodium low, which is good if you’re watching salt intake. It’s a clean, simple bread perfect for those mindful of pure ingredients.
Can I use different types of flour for the matzo dough?
Yes! While all-purpose flour is traditional and yields a crisp matzo, bread flour works well too and creates a slightly chewier texture due to its higher protein content. Just keep in mind that whole wheat or other flours might need a little extra water or a touch more rolling to reach the right thinness and crispness.
Previous Recipe: Classic Blueberry Buttermilk Cake – Easy Blueberry Cake Recipes to Try
Next Recipe: My Easy Kimchi Bokkeumbap Recipe: Flavorful Korean Fried Rice at Home