Chicken Pot Pie Crust: Buttery & Flaky

- Time: Active 15 minutes, Passive 30 minutes, Total 45 minutes
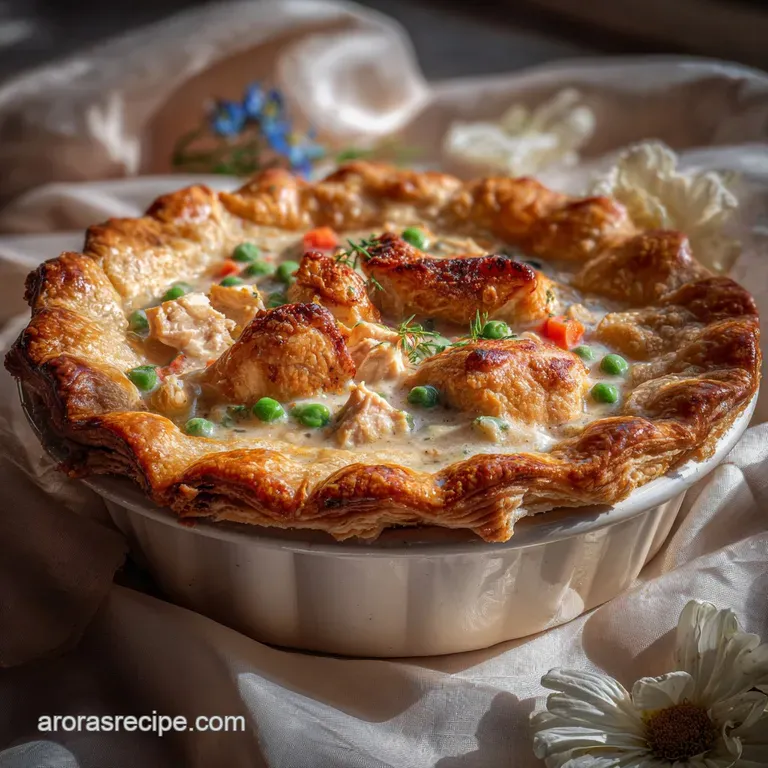
- Flavor/Texture Hook: Shatteringly crisp, buttery, and golden brown
- Perfect for: Cozy Sunday suppers, rainy Nashville afternoons, or hearty family gatherings
- The Secret to a Shatteringly Flaky Chicken Pot Pie Crust
- Everything You Need to Know About This Recipe Specs
- Component Analysis for the Perfect Pastry Finish
- The Essential Elements for Your Homemade Dough Base
- Tools of the Trade for Professional Pastry Results
- Step by Step Guide to Crafting the Ultimate Top
- Pro Strategies for Avoiding Common Kitchen Disasters
- Scaling the Recipe for Any Crowd
- Creative Ingredient Swaps and Savory Flavor Variations
- Best Practices for Proper Storage and Reheating Methods
- Classic Sides That Pair Beautifully With This Dish
- Chicken Pot Pie Crust FAQs
- 📝 Recipe Card
The Secret to a Shatteringly Flaky Chicken Pot Pie Crust
The first time I tried to make a pot pie from scratch, it was a Nashville humidity nightmare. I followed a recipe that called for "room temperature" butter, and by the time I was done, I had a greasy, leaden disk that tasted more like a floury biscuit than a pastry.
The aroma of the filling was there, but that satisfying "snap" when your fork hits the top? Totally missing. I ended up scraping the filling out and throwing the top in the trash. It was a humbling moment for a home cook who prides herself on comfort food.
Since then, I’ve spent years tinkering with ratios and temperatures to get that classic, golden brown finish that actually stands up to a bubbling stew beneath it. This specific Chicken Pot Pie Crust is my "holy grail" version.
It doesn't rely on shortening or anything artificial just the magic of cold fat and a little bit of science to ensure every bite provides a velvety interior and a crisp, flaky exterior.
You don't need to be a professional pastry chef to get this right, but you do need to follow a few non negotiable rules. We’re talking about frozen butter, ice cold water, and a very light touch. If you’ve ever felt intimidated by dough, put those worries aside.
We're going to walk through exactly how to handle this so you never have to settle for a soggy, store-bought lid ever again. Honestly, once you hear that first "shatter" of the crust under your spoon, there’s no going back.
Everything You Need to Know About This Recipe Specs
The Science of the Steam Pocket: When frozen butter hits the hot oven, the water inside the fat evaporates instantly, creating tiny steam pockets that lift the flour into distinct, flaky layers. This prevents a dense texture and ensures the pastry remains light despite the heavy filling.
- Lamination: Folding the dough creates "sheets" of fat between layers of flour.
- Gluten Control: Using an acid like vinegar inhibits gluten strands from getting too long and tough.
- Maillard Reaction: The heavy cream wash encourages deep browning and a savory aroma.
- Thermal Shock: Keeping ingredients cold until the very last second is what guarantees the "shatter" effect.
| Method | Prep Time | Texture Result | Best Use Case |
|---|---|---|---|
| Hand Rubbed | 20 minutes | Large, rustic flakes | Thick, chunky stews |
| Food Processor | 10 minutes | Uniform, sandy crumb | Individual pot pies |
| Grated Butter | 15 minutes | Incredible lift and height | This specific recipe |
If you are planning a big family feast and need more sides, this crust pairs beautifully with a hearty spread. You might even want to serve it alongside my Sourdough Stuffing Recipe if you're going for a full on comfort food extravaganza. Both dishes rely on that perfect balance of textures to keep people coming back for seconds.
Component Analysis for the Perfect Pastry Finish
| Ingredient | Science Role | Pro Secret |
|---|---|---|
| All Purpose Flour | Structure provider | Sift it twice to ensure no clumps interfere with the fat. |
| Frozen Butter | Steam leavening | Grate it while frozen to keep the pieces small and cold. |
| Apple Cider Vinegar | Gluten relaxant | It prevents the dough from becoming "bouncy" or tough. |
While we're talking about savory favorites, if you're in the mood for something with a bit more of a kick after you've mastered this dough, you should definitely try my Honey Chipotle Chicken Crispers recipe. It’s a completely different vibe, but that crunch is just as addictive as this flaky crust.
The Essential Elements for Your Homemade Dough Base
Gathering high-quality ingredients is the first step toward success. Don't skip the "ice" part of the ice water; it really matters for the final texture.
- 320g all purpose flour Why this? Provides the perfect protein balance for structure without being too tough. (Substitute: Pastry flour for a more tender, crumbly finish)
- 1.5 tsp fine sea salt Why this? Essential for highlighting the buttery notes of the pastry. (Substitute: Table salt, but use slightly less)
- 1 tsp granulated sugar Why this? Promotes browning and balances the savory flavors. (Substitute: Omit for a strictly savory profile)
- 226g frozen unsalted butter Why this? The high fat content is what creates those famous flaky layers. (Substitute: high-quality lard for an even flakier, old school texture)
- 8 tbsp ice water Why this? Binds the dough without melting the fat particles. (Substitute: Cold vodka for an even more brittle crust)
- 1 tsp apple cider vinegar Why this? Breaks down gluten for a more tender "short" crust. (Substitute: White vinegar or lemon juice)
- 1 large egg Why this? Part of the wash for a professional, glossy shine. (Substitute: Just heavy cream, though it will be less glossy)
- 1 tbsp heavy cream Why this? Adds fat to the egg wash for deep, mahogany browning. (Substitute: Whole milk)
- 1 pinch flaky sea salt Why this? Provides a final "pop" of flavor on the top surface. (Substitute: Kosher salt)
Tools of the Trade for Professional Pastry Results
You don't need a kitchen full of gadgets, but a few specific tools make the process of handling Chicken Pot Pie Crust much easier. A box grater is actually my favorite way to incorporate the butter because it keeps everything uniform without overworking the dough with your warm hands.
A large metal mixing bowl is better than glass or plastic because you can pop it in the freezer for 10 minutes before you start. This keeps the ingredients chilled for longer. You'll also want a sturdy rolling pin and a pastry brush for that final wash.
If you don't have a pastry brush, the back of a spoon or even a clean paper towel can work in a pinch, though the finish might be a little less even.
Chef's Tip: Freeze your flour! Put your measured flour in the freezer for 30 minutes before starting. This ensures the butter stays solid the entire time you're working it.
step-by-step Guide to Crafting the Ultimate Top
- Grate the butter. Use a box grater to shred the 226g frozen unsalted butter into a chilled bowl. Note: This creates uniform "petals" of fat that distribute perfectly.
- Mix dry ingredients. Whisk 320g all purpose flour, 1.5 tsp fine sea salt, and 1 tsp granulated sugar in a large bowl.
- Incorporate the fat. Toss the grated butter into the flour mixture using a fork. Work quickly until it looks like coarse pebbles.
- Prepare the liquid. Combine 8 tbsp ice water with 1 tsp apple cider vinegar in a small measuring cup.
- Hydrate the dough. Drizzle the liquid over the flour one tablespoon at a time. Stop as soon as the dough holds together when squeezed.
- Chill the mass. Wrap the dough tightly in plastic and refrigerate for at least 30 minutes. Note: This allows the flour to fully hydrate and the butter to firm back up.
- Roll it out. On a floured surface, roll the dough to about 1/8 inch thickness. Ensure it's 1 inch wider than your pie dish.
- Drape and vent. Place the dough over your filling and cut 4-5 slits in the center. Steam needs to escape or the crust will get soggy.
- Apply the wash. Whisk the 1 large egg and 1 tbsp heavy cream, then brush it generously over the top. Sprinkle with flaky sea salt for texture.
- Bake to finish. Bake at 400°F for 30 minutes until the surface is golden and sizzles around the edges.
Pro Strategies for Avoiding Common Kitchen Disasters
The "Soggy Bottom" Syndrome
One of the most frustrating things is a crust that looks beautiful on top but is a wet mess where it touches the filling. This usually happens because the filling was too hot when the crust was applied, or there wasn't enough steam ventilation.
If the filling is steaming hot, it will melt the butter in the crust before it even hits the oven, ruining those layers we worked so hard to create.
| Problem | Root Cause | Solution |
|---|---|---|
| Crust Shrinks | Overworked gluten | Let the dough rest in the fridge for 30 mins before rolling. |
| Greasy Texture | Butter melted too early | Freeze the butter and keep the water ice cold. |
| Tough/Hard Crust | Too much water | Add water one tablespoon at a time only until it barely holds. |
Overworking the Dough
If you treat this dough like bread and knead it, you're going to end up with a hockey puck. The goal is to keep the butter in distinct pieces. When you see streaks of yellow butter in your rolled out dough, that’s actually a good thing! Those are your future flakes.
If the dough becomes a uniform, smooth color, you’ve mixed it too much.
Common Mistakes Checklist:
- ✓ Using "cold" tap water instead of actual ice water (it's not cold enough!)
- ✓ Adding the crust to a boiling hot filling (let the filling cool slightly first)
- ✓ Forgetting to vent the top with slits (the steam will trapped and make it mushy)
- ✓ Skipping the egg wash (you'll lose that beautiful golden sheen)
- ✓ Rolling the dough too thick (it won't cook through and will stay gummy)
Scaling the Recipe for Any Crowd
When you need to feed a crowd, scaling up this Chicken Pot Pie Crust is fairly straightforward. If you're doubling the recipe for two large pies, I recommend making two separate batches of dough rather than one giant one.
Large masses of dough are harder to keep cold, and you're more likely to overwork the flour while trying to incorporate all that butter.
For those cooking for just one or two, you can easily halve the recipe. However, since the recipe calls for one egg for the wash, just beat the egg in a small bowl and use half for the wash, or save the rest for your breakfast. When scaling down, use a smaller bowl to ensure the butter to flour ratio stays consistent and doesn't get lost in the bottom of a huge container. If you're looking for a faster meal on a busy night, you might even consider my Chicken Fried Rice recipe, which is much quicker but still hits that comfort food spot.
| Servings | Flour Amount | Butter Amount | Pan Size |
|---|---|---|---|
| 4 People | 160g | 113g | 9 inch round |
| 8 People | 320g | 226g | 9x13-inch rectangular |
| 12 People | 480g | 339g | Two 9 inch rounds |
Creative Ingredient Swaps and Savory Flavor Variations
The beauty of a homemade crust is that you can customize the flavor profile to match your filling. If you're making a turkey pot pie with Thanksgiving leftovers, adding dried sage or thyme directly into the flour mixture creates a wonderful aromatic experience.
The Sharp Cheddar Variation
For a truly decadent twist, fold in 1/2 cup of finely grated sharp cheddar cheese after you've incorporated the butter but before adding the water. The cheese melts into the layers, creating a crispy, "Cheez It" like vibe that is absolutely incredible with a creamy chicken filling.
Just be sure the cheese is very cold before adding it.
The Savory Herb Infusion
If you want a more refined look, you can "laminate" fresh parsley or sage leaves into the dough. Roll the dough out halfway, lay the leaves on top, fold it over, and finish rolling. The leaves will be visible through the golden crust after baking, making it look like it came straight from a high end bistro.
Best Practices for Proper Storage and Reheating Methods
This dough is a meal prepper's dream. You can make the dough base up to 3 days in advance and keep it wrapped tightly in the fridge. In fact, I think the texture actually improves after a 24 hour rest because the flour has more time to hydrate.
Storage:Fridge: Wrapped dough lasts 3 days. Baked pie remains good for 4 days. Freezer: Unbaked dough disks can be frozen for up to 3 months. Wrap them in plastic and then a layer of foil.
Zero Waste Tip: Don't throw away those dough scraps! Roll them out, sprinkle with cinnamon sugar or more flaky salt and Parmesan, and bake them alongside the pie. They make the best little "chef’s snack" while you wait for dinner to finish.
You can also save the vegetable peels from your filling to make a quick stock for your next soup.
Reheating: Never use the microwave if you want to keep that crunch. A microwave will turn your beautiful crust into a rubbery lid. Instead, pop a slice in a 350°F oven or toaster oven for 10-12 minutes.
This will re crisp the fats and bring that "shatter" back to life.
Classic Sides That Pair Beautifully With This Dish
While a pot pie is technically a full meal in a bowl, a few thoughtful sides can really balance the richness of the butter. I usually go for something acidic or bright to cut through the heavy cream and pastry.
A simple arugula salad with a sharp lemon vinaigrette is my go to. The peppery bite of the greens is the perfect foil for the savory chicken. If you want something a bit heartier, roasted balsamic Brussels sprouts add a nice sweetness. And if you're looking for a breakfast version of this comfort, check out my Homemade Keto Southwest recipe — it has that same savory, satisfying energy but in a morning friendly format.
No matter what you serve it with, the star is always going to be that crust. There is something so rewarding about making your own pastry from scratch. It’s a little bit of Nashville soul in every bite, and once you master this technique, you'll be the designated pot pie maker for every family gathering.
Trust me, it’s a title worth having!

Chicken Pot Pie Crust FAQs
What type of pie crust is best for chicken pot pie?
A flaky, buttery pastry crust is ideal. This provides a delightful contrast to the creamy filling and holds its structure well. Many recipes, like this one, use a traditional all-butter crust for optimal flavor and texture.
Should I pre-bake my crust for chicken pot pie?
No, typically you do not pre-bake the top crust. The crust bakes along with the filling. Pre-baking could lead to an overly dry or burnt top before the filling is fully heated.
Can I use a store-bought pie crust for chicken pot pie?
Yes, you can use store-bought crust. While homemade offers superior flavor and texture, pre-made crusts like Pillsbury can be a convenient shortcut. Just ensure it's thawed properly according to package directions before using.
What can I use instead of a traditional pie crust for chicken pot pie?
Biscuits, puff pastry, or a mashed potato topping work well. For a different texture, dollop biscuit dough on top, use store-bought puff pastry for extra flakiness, or create a savory mashed potato layer.
How do I prevent my chicken pot pie crust from getting soggy?
Ensure the filling is not too wet and vent the top crust. Allow your filling to cool slightly before adding the crust, and cut several slits in the top to let steam escape. This is key to achieving that desired shatteringly crisp finish, much like the technique used in Homemade Stuffing: Classic Sage Onion with a Crispy Crust.
What's the secret to a really flaky pot pie crust?
Keep your fat (butter) very cold and avoid overworking the dough. Using frozen grated butter and ice-cold water creates steam pockets as it bakes, resulting in distinct, flaky layers. The less you handle the dough, the more tender it will be.
Can I make the pie crust dough ahead of time for chicken pot pie?
Yes, the dough can be made 1-2 days in advance. Wrap the dough tightly in plastic wrap and refrigerate. Letting it rest allows the gluten to relax and the flour to hydrate, often leading to a more tender crust.
Chicken Pot Pie Crust

Ingredients:
Instructions:
Nutrition Facts:
| Calories | 365 kcal |
|---|---|
| Protein | 5.1 g |
| Fat | 24.6 g |
| Carbs | 31.2 g |
| Fiber | 1.1 g |
| Sugar | 0.6 g |
| Sodium | 442 mg |
