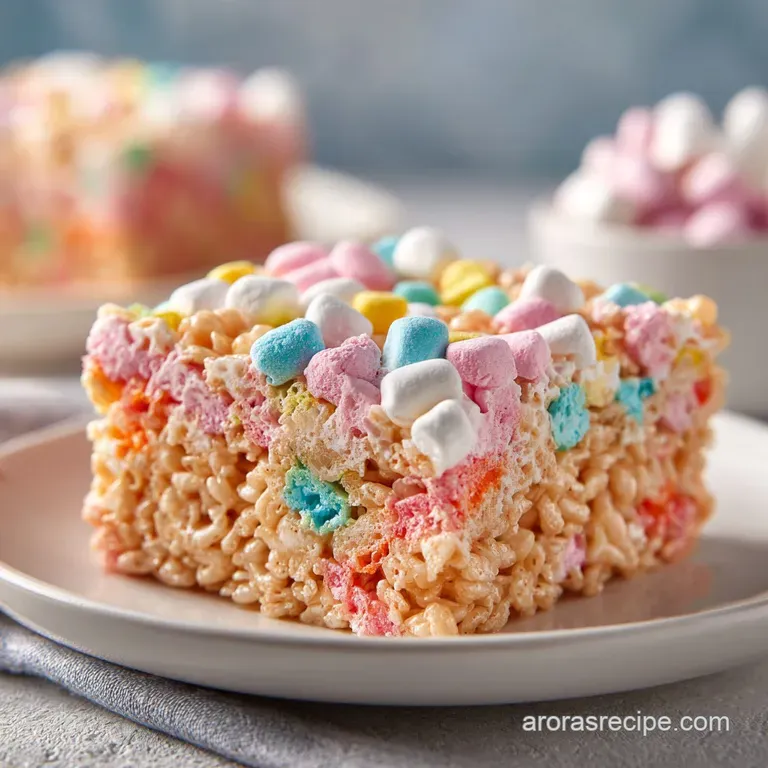
Rice Krispie Treat with Marshmallows: Gooey and Soft
- Time: Active 10 minutes, Passive 5 minutes, Total 15 minutes
- Flavor/Texture Hook: Irresistibly gooey and buttery with a crispy, salted finish
- Perfect for: Family gatherings, stress free snacking, and last minute potlucks
- Core Mechanics of Soft Treats
- Essential Pantry Component Analysis
- Selecting Your High Quality Elements
- Essential Tools for Busy Cooks
- The Master Method for Success
- Fixing Common Texture Problems Quickly
- Customizing Your Sweet Treats Easily
- Debunking the Myths of Homemade Cereal Bars
- Storage and Waste Reduction Strategies
- Serving Style and Occasion Ideas
- Recipe FAQs
- 📝 Recipe Card
Core Mechanics of Soft Treats
Getting that perfect "pull" in your treat depends entirely on temperature control. When we melt marshmallows, we are essentially working with a stabilized foam of sugar and gelatin.
If you blast that foam with high heat, the moisture evaporates, and the sugar begins to crystallize, leading to a treat that could break a tooth. By keeping the heat low and stopping just before every last lump is gone, we preserve that moisture.
This is why these treats stay soft on the counter while others turn into rocks within an hour.
Another big factor is the ratio of fat to sugar. The butter doesn't just add flavor; it acts as a lubricant for the marshmallow strands. This prevents the cereal from getting soggy while creating a velvety coating that helps the bars hold their shape without being overly dense. If you’ve ever had a Anasazi Beans and Rice recipe, you know that the right balance of fat and starch is what makes a meal satisfying. The same logic applies here in the dessert world.
- Phase Transition: Using low heat prevents the gelatin in the marshmallows from toughening up.
- Residual Thermal Energy: Turning off the stove early allows the final lumps to melt gently, keeping the mixture fluid.
- Aqueous Suspension: The addition of vanilla extract and salt helps break up the sweetness, making the flavors pop.
- Non Compression Technique: Leaving air pockets between the cereal grains ensures a light, shatter crisp bite.
| Method | Time | Texture | Best For |
|---|---|---|---|
| Stovetop | 15 minutes | Stretchy & Velvety | Maximum flavor control |
| Microwave | 8 minutes | Soft but less chewy | Quick weeknight cravings |
| Brown Butter | 20 minutes | Nutty & Sophisticated | Special holiday batches |
The stovetop method remains the gold standard because you can see the exact moment the marshmallows reach that 90% melt state. In the microwave, things happen fast, and it is very easy to accidentally "cook" the marshmallows into a hard candy state.
Taking those extra five minutes over a low flame pays off in a texture that is noticeably superior.
Essential Pantry Component Analysis
When we look at the ingredient list, it seems almost too simple. But in a minimal tool kitchen, the quality of these few items carries the whole dish. You don't need a pantry full of specialized powders; you just need the basics done right.
Using unsalted butter allows you to control the seasoning precisely with sea salt, which is a much better way to cut through the heavy sugar than using pre salted sticks.
| Ingredient | Science Role | Pro Secret |
|---|---|---|
| Unsalted Butter | Provides fat for a velvety mouthfeel | Use European style for higher fat content |
| Mini Marshmallows | Acts as the structural adhesive | Fresh bags only; stale ones won't melt right |
| Sea Salt | Balances the high sugar concentration | Use fine grain so it dissolves instantly |
| Vanilla Extract | Adds aromatic depth to the sugar | Stir in last to keep the flavor from evaporating |
Every single one of these components plays a part in the final structural integrity of the bar. For instance, the mini marshmallows melt faster and more evenly than the giant ones, which prevents you from having to keep the pot on the heat for too long.
Selecting Your high-quality Elements
For this batch, we are sticking to the reliable quantities that fit a standard square pan. This keeps the math easy and the results consistent every single time you head to the kitchen.
- 1/2 cup (113g) unsalted butter: Why this? Provides the rich, homestyle base that keeps treats soft.
- 10 oz (283g) mini marshmallows: Why this? These form the melted "glue" for the cereal.
- 4 cups (200g) mini marshmallows: Why this? Kept separate to fold in for gooey pockets.
- 6 cups (160g) Rice Krispies cereal: Why this? The essential airy, toasted crunch.
- 1.5 teaspoons pure vanilla extract: Why this? Adds that classic, nostalgic aroma.
- 1/2 teaspoon fine sea salt: Why this? Brightens the flavors and balances sweetness.
If you find yourself out of unsalted butter, you can use salted butter, but you must omit the extra sea salt listed in the recipe. Otherwise, the treats will end up tasting more like a savory snack than a dessert. For a different twist on pantry staples, you might look at Greek rice inspiration for other ways to use simple grains in your daily cooking.
Essential Tools for Busy Cooks
One of the reasons I love this recipe is that it doesn't require a stand mixer or a fancy oven. It is a "one pot" wonder that even the most cramped kitchen can handle. You really only need two primary items to be successful: a large, heavy bottomed pot and a sturdy silicone spatula.
The heavy bottomed pot is crucial because it distributes heat evenly across the base. Thin pots tend to have "hot spots" that can scorch the butter or the sugar in the marshmallows. If the sugar burns, it turns bitter, and there is no coming back from that.
A silicone spatula is your best friend here because the mixture is incredibly sticky; wood or metal spoons can be a nightmare to clean once the marshmallow sets.
1. The Large Heavy Pot
You want something with high sides so that when you pour in the six cups of cereal, you have plenty of room to stir without making a mess on your stove. A 5 quart Dutch oven or a large stockpot works perfectly.
2. The Silicone Spatula
Look for a one piece silicone spatula. The flexible edge helps you scrape every bit of gooey goodness from the bottom of the pot, and since it's heat resistant, you don't have to worry about it melting while you work over the burner.
The Master Method for Success
- Line a 9x9 inch square baking pan with parchment paper. Note: Leave an overhang to lift the treats out later.
- Lightly grease the parchment and your spatula with a bit of butter.
- Melt the 1/2 cup of unsalted butter in your large pot over low heat until it begins to foam.
- Add the 10 oz of mini marshmallows and the sea salt.
- Stir constantly until the marshmallows are 90% melted.
- Remove the pot from the heat immediately to prevent overcooking.
- Stir in the vanilla extract until the mixture is smooth and fragrant.
- Add the Rice Krispies cereal and the remaining 4 cups of marshmallows.
- Fold gently until the cereal is evenly coated and sticky.
- Transfer to the pan and press very lightly until the surface is even.
- Let them sit at room temperature for 30 minutes until they are firm and cool.
The magic happens in that final fold. By adding those extra four cups of marshmallows at the very end, after the pot is off the heat, they don't fully melt. They just soften and get "webby," creating those wonderful white pockets of goo that make this the ultimate Rice Krispie Treat with Marshmallows.
Fixing Common Texture Problems Quickly
Even with the simplest recipes, things can go sideways if the kitchen is too hot or the ingredients are a bit past their prime. The most common issue people face is a treat that is too hard. Usually, this is because the heat was too high or the cereal was packed into the pan with too much force.
Remember, we are aiming for "light and airy," not "compact and dense."
If your treats feel like they are falling apart, it usually means there wasn't enough marshmallow to coat the cereal, or the mixture cooled down too much before it hit the pan. If the mixture gets cold, it loses its "stick," and the cereal won't bond. You have to work quickly once that vanilla is stirred in!
Avoiding Hard and Brittle Bars
The main culprit here is heat. If you boil the butter and marshmallows, you are essentially making hard candy. Keep that flame low so low you might think it's not doing anything at first. Patience is the secret ingredient here.
Managing Excessively Sticky Squares
If you find the bars are sticking to your hands like crazy when you try to eat them, they might need more time to set, or the humidity in your kitchen might be very high. A quick 10 minute stint in the fridge can help "set" the sugars so they are easier to handle, but don't leave them in there too long or they will get tough.
| Problem | Root Cause | Solution |
|---|---|---|
| Treats are too hard | Overheated sugar or over packed pan | Use low heat and a very light touch |
| Squares are falling apart | Not enough melted marshmallow | Ensure a full 10 oz bag is used for the base |
| Cereal tastes stale | Old cereal or humid storage | Use a fresh box and store in an airtight container |
Common Mistakes Checklist
- ✓ Never use old, crusty marshmallows from the back of the pantry.
- ✓ Avoid high heat at all costs; low and slow wins the race.
- ✓ Don't skip the salt; it is the only thing balancing the sugar.
- ✓ Stop pressing the mixture once it reaches the corners of the pan.
- ✓ Let the treats cool completely at room temperature before slicing.
Customizing Your Sweet Treats Easily
Once you have the base down, you can start having some real fun. The beauty of a homestyle recipe is that it is a canvas for whatever you have in the cupboard. Since this is a minimal tool recipe, we want to keep the additions simple things you can just toss in during the final fold.
If you are scaling this up for a large party (like a double batch), use a 9x13 pan. Just remember that when you double the recipe, the marshmallows take a bit longer to melt, so stay vigilant with that stirring spoon!
If you are scaling down for just a couple of people, you can halve everything and use a small loaf pan, but be careful not to overcook the smaller amount of butter.
- Toffee Crunch: Add 1/2 cup of toffee bits during the final fold.
- Chocolate Drizzle: Melt 1/4 cup of chocolate chips and zig zag it over the top once set.
- Peanut Butter Swirl: Stir 2 tablespoons of creamy peanut butter into the melted marshmallows.
- Sprinkle Party: Add a handful of rainbow sprinkles for a birthday vibe.
| Batch Size | Pan Size | Cook Time | Yield |
|---|---|---|---|
| Half Batch | Loaf Pan | 3 minutes | 8 small squares |
| Standard | 9x9 Square | 5 minutes | 16 squares |
| Double | 9x13 Pan | 8 minutes | 24-32 squares |
When doubling, keep the salt and vanilla at about 1.5 times the original amount rather than a full double. This prevents the flavor from becoming too overwhelming.
Debunking the Myths of Homemade Cereal Bars
There are a lot of "old wives' tales" when it comes to no bake desserts. One big one is that you have to use a specific brand of cereal for the best crunch. Honestly, most store brand puffed rice works just fine as long as the box is fresh. The "crunch" comes more from how you store them than the brand name on the box.
Another myth is that you need to refrigerate these to get them to set. In reality, room temperature is much better. The fridge can draw out moisture and make the cereal lose its snap. Unless your house is 90 degrees, leave them on the counter to firm up naturally.
It takes about 30 minutes, which is just enough time to clean up your pot and spatula!
Finally, some people think you need corn syrup for a "professional" stretch. You absolutely don't. The mini marshmallows have everything you need. Adding corn syrup often makes them too sweet and can lead to a greasy texture that sits heavy on the tongue.
Stick to the butter and marshmallow combo for that clean, homestyle flavor.
Storage and Waste Reduction Strategies
Storing your Rice Krispie Treat with Marshmallows correctly is the difference between a great snack tomorrow and a disappointment. These treats do not like air. As soon as they are cool and sliced, get them into an airtight container.
If you have to layer them, put a piece of parchment paper between the layers so they don't fuse back into one giant block.
- Countertop: 2 to 3 days in an airtight container.
- Freezer: Up to 6 weeks. Wrap individual squares in plastic wrap, then place in a freezer bag.
- Thawing: Let them sit at room temperature for 15 minutes. Never microwave them to thaw!
For a zero waste kitchen, don't throw away the "scraps" from the edges or the bottom of the cereal box. Those tiny broken bits of cereal are perfect for topping yogurt or mixing into a bowl of oatmeal.
If you have leftover melted marshmallow in the pot, swirl in a little bit of warm milk to make a "marshmallow latte" treat for yourself while you wait for the bars to set. It’s a little kitchen win that makes the cleanup much more enjoyable.
Serving Style and Occasion Ideas
These treats are the ultimate "crowd pleaser" because they fit almost any situation. For a casual family dinner, just stack them on a plate in the center of the table. They are hearty enough to stand on their own but light enough that you don't feel weighed down after eating one.
If you're hosting a more formal gathering, you can cut them into smaller, bite sized "truffle" squares and place them in mini cupcake liners.
I love serving these alongside a big glass of cold milk or a steaming cup of black coffee. The bitterness of the coffee perfectly offsets the intense sweetness of the marshmallows. For a summer BBQ, they are great because they won't melt like chocolate heavy desserts might.
Just keep them in the shade so the marshmallow "glue" stays stable.
At the end of the day, the best way to serve a Rice Krispie Treat with Marshmallows is simply to share it. There is something about the pull of a fresh, gooey bar that brings out the kid in everyone.
Whether you’re five or ninety five, that first bite of buttery, crispy sweetness is a universal language of comfort. So, grab your biggest pot, find those marshmallows, and get to stirring. Your kitchen is about to become the most popular room in the house.

Recipe FAQs
Can you use marshmallows for rice krispie treats?
Yes, marshmallows are the essential binder for this recipe. You need 10 ounces to create the melted base and an additional 4 cups of mini marshmallows to fold in later for texture.
Can you eat Rice Krispies with diabetes?
No, this recipe contains high levels of processed sugar and refined carbohydrates. These ingredients cause rapid spikes in blood glucose levels, making them unsuitable for those managing diabetes.
How to make rice crispy squares with regular marshmallows?
Substitute standard marshmallows by weight to match the 10-ounce requirement for melting. Use a sharp, greased knife to cut larger marshmallows into smaller pieces, which helps them melt evenly without requiring higher heat.
What is the trick to making rice crispy treats?
Use low heat and avoid packing the mixture into the pan. Cooking over low heat prevents the sugar from crystallizing into a hard texture, and using a light touch when spreading the mixture ensures you keep the air pockets that make the treats soft.
Is it true I must melt the marshmallows completely until they are liquid?
No, this is a common misconception. You should remove the pot from the heat when the marshmallows are only 90% melted to prevent the sugar from burning or becoming overly stiff.
How to prevent Rice Krispie treats from becoming hard?
Remove the pot from the heat as soon as the marshmallows are 90% melted. If you enjoyed learning how to control texture by managing residual heat, you can apply similar timing precision to our creamy homemade fudge to achieve the perfect consistency.
How to store leftovers so they stay soft?
Seal the treats in an airtight container immediately after they cool. Exposure to air causes the marshmallows to lose moisture and turn hard, so keeping them in an airtight environment is critical for maintaining their texture for up to three days.
Classic Marshmallow Rice Krispie Treats
Ingredients:
Instructions:
Nutrition Facts:
| Calories | 186 kcal |
|---|---|
| Protein | 1.2 g |
| Fat | 5.9 g |
| Carbs | 33.3 g |
| Fiber | 0.1 g |
| Sugar | 18.3 g |
| Sodium | 150 mg |
