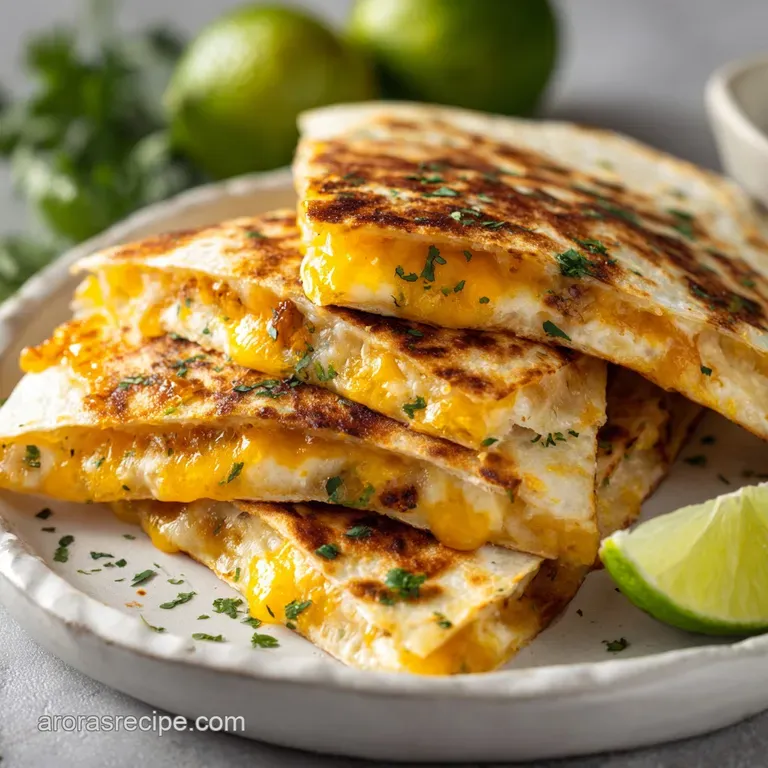
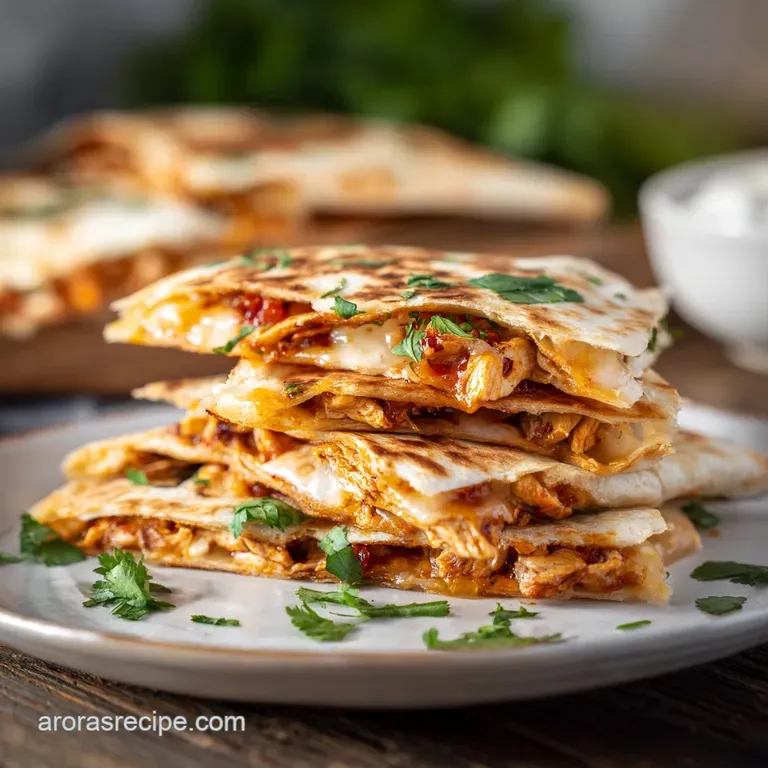
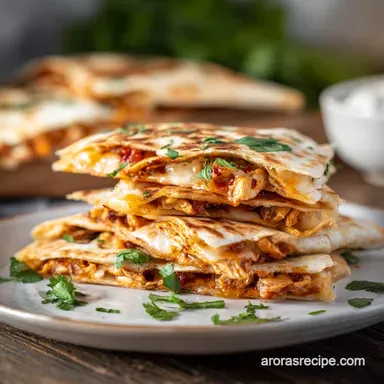
Easy Chicken Quesadillas
- Time: Active 10 mins, Passive 10 mins, Total 20 mins
- Flavor/Texture Hook: Shatter crisp tortilla shells with a cheesy, spiced chicken filling
- Perfect for: Busy weeknight dinners, game day snacks, or budget conscious meal prep
- The Secret to Perfectly Crispy Chicken Quesadillas
- The Physics of the Melt
- Component Analysis for Peak Flavor
- Budget Smart Staples for Success
- Layering for Maximum Flavor Impact
- Troubleshooting Your Tortilla Flops
- Smart Methods for Any Batch Size
- Debunking Tortilla Truths
- Keeping Leftovers Crispy and Fresh
- Sides to Round Out Dinner
- Very High in Sodium
- Recipe FAQs
- 📝 Recipe Card
The Secret to Perfectly Crispy Chicken Quesadillas
The first time I tried making these in my tiny Nashville apartment, I made the classic mistake of cranky heat and way too much oil. The result? A soggy, greasy mess that fell apart before it even hit the plate.
I remember standing over the stove, the smell of burnt flour filling the air, thinking there had to be a better way to get that elusive "shatter" when you bite into the edge. I wanted that down home comfort without the restaurant price tag or the heavy gut punch of deep fried food.
After a few trials (and many failed tortillas), I realized the secret isn't just about what’s inside, but how you treat the outside. When you hear that first sizzle as the tortilla meets the pan, you want it to be a gentle hiss, not a violent pop.
It’s about building layers of flavor the bite of the red onion, the sweetness of the diced peppers, and that smoky taco seasoning all held together by a blend of cheeses that act like culinary glue.
These days, I lean on these as my ultimate "emergency" dinner. Whether you're using leftovers from a Sunday roast or a 280g portion of shredded rotisserie chicken, this recipe is your roadmap to a reliable, homemade win.
Trust me on this: once you master the low and slow crisping method, you’ll never settle for a limp, microwave version again. Let's crack on with the details so you can get that velvety cheese pull tonight.
The Physics of the Melt
Starch Gelatinization: Low, steady heat allows the starches in the flour tortilla to dehydrate and crisp up slowly, creating a rigid structure that provides that signature shatter.
Fat Emulsification: Combining Monterey Jack with Sharp Cheddar ensures a balance between high moisture melting (Jack) and fat rich flavor (Cheddar), preventing the filling from becoming oily or separated.
Steam Management: Dicing the 75g of red bell pepper and 40g of onion finely ensures they soften quickly without releasing excessive moisture that could steam the tortilla from the inside out.
| Thickness | Internal Temp | Rest Time | Visual Cue |
|---|---|---|---|
| 1.5 cm (Folded) | 74°C (165°F) | 2 mins | Cheese bubbles at the edges |
| 2 cm (Stacked) | 74°C (165°F) | 3 mins | Tortilla is deep golden brown |
| 1 cm (Thin) | 74°C (165°F) | 1 min | Edges are rigid and flaky |
Choosing the right thickness is vital for even heating. If you pack the 280g of chicken too tightly in the center, the cheese on the edges will burn before the middle is hot. I always aim for a flat, even layer that stops about 1 cm from the edge to allow for "melt spread."
Component Analysis for Peak Flavor
| Ingredient | Science Role | Pro Secret |
|---|---|---|
| Flour Tortillas | Structural Base | Room temp tortillas fold without cracking compared to cold ones. |
| Shredded Cheese | Binding Agent | Grate your own from blocks to avoid the starchy anti caking agents. |
| Taco Seasoning | Flavor Catalyst | The salt in the mix draws out just enough moisture from the veg to soften them. |
| Rotisserie Chicken | Protein Foundation | Use a mix of white and dark meat for the best fat to lean ratio. |
I’ve found that the brand of tortilla matters less than the temperature. If you’re working with 25cm flour tortillas, give them 10 seconds in the microwave first. This makes the gluten more pliable, so when you fold them over that pile of 280g of seasoned chicken, they don't split down the middle.
Budget Smart Staples for Success
- 2 cups shredded rotisserie chicken (approx 280g): A massive time saver. Why this? Pre cooked and seasoned meat ensures a juicy, tender filling every single time.
- Substitute: Leftover boiled chicken breast or canned chicken (drained well).
- 0.5 cup red bell pepper, finely diced (approx 75g): Adds crunch and vitamin C. Why this? Red peppers are sweeter than green, providing a nice contrast to the salty cheese.
- Substitute: Canned mild green chilis for a smokier, softer texture.
- 0.25 cup red onion, minced (approx 40g): Provides a sharp, aromatic backbone. Why this? Mincing ensures you don't get a giant raw crunch in one bite.
- Substitute: Yellow onion or even 1 tsp of onion powder in a pinch.
- 1 tbsp taco seasoning: The primary flavor driver. Why this? It’s an all in-one spice solution that keeps the ingredient list short.
- Substitute: A mix of cumin, chili powder, and garlic powder.
- 2 cups shredded cheese (Monterey Jack and Sharp Cheddar blend): The "glue." Why this? Jack melts beautifully; Cheddar provides the sharp, salty punch we love.
- Substitute: Any "Mexican Blend" or even a mild Gouda for extra creaminess.
- 4 25cm flour tortillas: The crispy vessel. Why this? Flour tortillas offer a better "crunch" than corn for this specific style.
- Substitute: Whole wheat tortillas, though they stay slightly softer.
- 1 tbsp neutral oil: For the pan. Why this? Higher smoke point than butter, so you don't get bitter, burnt flavors.
- Substitute: Non stick cooking spray for a lower calorie option.
- 2 tbsp fresh cilantro, chopped: For a burst of freshness. Why this? Cuts through the richness of the cheese and chicken.
- Substitute: Fresh parsley or scallions if you're a cilantro hater.
- 1 lime, cut into wedges: For acidity. Why this? Brightens the entire dish and balances the fats.
- Substitute: A splash of bottled lime juice or even apple cider vinegar.
Using rotisserie chicken is a brilliant shortcut. It’s a lifesaver, much like my Chicken Fried Rice recipe, which also utilizes leftover proteins for a fast meal.
Layering for Maximum Flavor Impact
1. The Flavor Foundation (Prep)
In a large mixing bowl, toss the 280g of shredded chicken with the 75g of diced bell peppers, 40g of minced red onion, and 15ml of taco seasoning. Note: Mixing before adding to the tortilla ensures every bite is perfectly seasoned.
2. The Cheese Base
Lay your 25cm tortillas flat and sprinkle about 30g of the cheese blend over one half of each tortilla. Note: This creates a barrier that prevents the chicken juices from soaking into the bottom crust.
3. The Filling Distribution
Evenly divide the chicken and vegetable mixture over the cheese covered half of the tortillas. Note: Keep the filling about 1 cm away from the edge to prevent it from falling out during the flip.
4. The Top Seal
Sprinkle the remaining cheese over the chicken mixture. Note: The "double cheese layer" (bottom and top) acts like glue to hold the tortilla shut.
5. The Fold
Fold the empty half of the tortilla over the filling and press down firmly with your palm. Note: Compression is key for heat transfer.
6. The Pan Heat Up
Add 15ml of oil to a large skillet over medium heat. Cook 2 minutes until the oil shimmers slightly. Note: Don't let the oil smoke, or the tortillas will taste bitter.
7. The Initial Sear
Place one or two quesadillas in the pan (don't overcrowd). Cook 3-4 minutes until the bottom is golden and crisp. Note: Use a spatula to press down occasionally to ensure even browning.
8. The Gentle Flip
Carefully flip the quesadillas. Cook 3 more minutes until the cheese is completely melted and the second side is golden. Note: If the tortilla browns too fast, turn the heat down to medium low.
9. The Controlled Char
If you want extra "shatter," give each side an additional 30 seconds of over high heat searing right at the end. Watch for the cheese to sizzle at the edges.
10. The Rest and Slice
Transfer to a cutting board and let rest for 2 minutes. Slicing with a pizza cutter ensures clean edges. Serve with cilantro and lime wedges.
Troubleshooting Your Tortilla Flops
The Sogginess Struggle
If your quesadillas feel limp rather than crunchy, it's usually a moisture issue. This happens if the vegetables aren't diced small enough or if you used too much oil. The tortilla essentially steams instead of searing.
| Problem | Root Cause | Solution |
|---|---|---|
| Sappy/Soggy Tortilla | Too much oil or wet filling | Use only 15ml oil; pat chicken dry before mixing. |
| Burned Shell, Cold Center | Heat is too high | Lower heat to medium low; cover pan with a lid for 1 min. |
| Filling Falls Out | Overstuffing or no "top glue" | Leave 1cm border; ensure cheese is on top and bottom. |
Common Mistakes Checklist
- ✓ Grate your own cheese to avoid the powdery coating on pre shredded bags.
- ✓ Don't skip the rest period; 2 minutes lets the cheese set so the filling doesn't slide out.
- ✓ Preheat the pan for a full 3 minutes before adding the first tortilla.
- ✓ Use a heavy skillet (like cast iron) for the most even heat distribution.
- ✓ Avoid high heat; medium is the "sweet spot" for melting cheese without burning flour.
Smart Methods for Any Batch Size
If you're cooking for one, it's easy to scale this down. Just use 70g of chicken and 1 tortilla. For the egg wash trick often used in baking, you don't need it here the cheese does all the binding. If you’re scaling up for a crowd, the stovetop can get tedious.
I recommend the oven method for more than 4 people to keep everyone eating at the same time.
| Method | Time | Texture | Best For |
|---|---|---|---|
| Stovetop Skillet | 10 mins | Maximum shatter crisp | 1-2 people; individual portions |
| Oven Baked | 15 mins | Even browning; softer | Large families; hands off cooking |
| Air Fryer | 8 mins | Super crispy edges | Reheating or single snacks |
When scaling up to 8 or more servings, don't just double the oil in the pan. Use a light brush of oil on the outside of the tortillas and bake them on a sheet tray at 200°C. Flip them halfway through for the best results.
Debunking Tortilla Truths
One of the biggest myths is that you need a mountain of butter to get a golden crust. In reality, butter contains water which can actually soften the tortilla. A neutral oil provides a much cleaner crunch and allows the flavor of the 15ml of taco seasoning to shine through.
Another misconception is that more cheese equals a better quesadilla. If you go overboard, the fat separates and makes the bottom of the tortilla greasy. The 2 cup (approx 225g) measurement for 4 tortillas is the "golden ratio" for holding the 280g of chicken together without the mess.
Keeping Leftovers Crispy and Fresh
Storage: Keep any leftover wedges in an airtight container in the fridge for up to 3 days. To keep them from getting "sweaty," place a paper towel in the container to absorb excess moisture.
Freezing: You can freeze these! Assemble them but don't cook them. Wrap tightly in plastic wrap and freeze for up to 2 months. Cook directly from frozen in a skillet over low heat until the center is hot.
Zero Waste: Don't throw away those cilantro stems! Mince them finely and add them to the chicken mix for extra punch. If you have leftover filling, it’s a great addition to my Classic Ground Turkey recipe for a Tex Mex twist the next day.
Sides to Round Out Dinner
To turn this into a full Nashville style feast, I love serving these with a big bowl of cilantro lime rice or a simple black bean salad. The acidity of the lime wedges is non negotiable it cuts right through the richness of that sharp cheddar.
Chef's Tip: If you want a restaurant style finish, whisk a little chipotle powder into some sour cream for a smoky dipping sauce. It takes about 30 seconds and changes everything.
If you're looking for something with a bit more sauce to go alongside, this meal pairs surprisingly well with my Thai Coconut Curry Chicken recipe. While it's a different flavor profile, the creamy texture of the curry sauce is a dream for dipping the crispy edges of a chicken quesadilla. Just remember to keep the dipping sauce on the side so you don't lose that hard earned crunch!

Very High in Sodium
1250 mg mg of sodium per serving (54% of daily value)
The American Heart Association recommends limiting sodium intake to about 2,300mg per day for overall cardiovascular health.
Tips to Reduce Sodium in Your Chicken Quesadillas
-
DIY Chicken-25%
Skip the rotisserie chicken, which is often high in sodium, and bake or poach your own chicken breast. Season with salt free spices. This will reduce sodium and allow you to control the salt content. It will reduce the sodium approximately 25%.
-
Low-Sodium Cheese-15%
Opt for low-sodium or reduced sodium cheese varieties like Swiss or mozzarella instead of Monterey Jack and Sharp Cheddar. This can make a significant difference in the overall sodium content. This will reduce the sodium approximately 15%.
-
DIY Taco Seasoning-10%
Prepare your own taco seasoning blend using chili powder, cumin, paprika, garlic powder, onion powder, and oregano. This allows you to control the amount of sodium added, and eliminates hidden sources of sodium.
-
Fresh Herbs & Spices
Enhance the flavor of your quesadillas with a variety of fresh herbs and spices like garlic, cumin, chili powder, or smoked paprika. These can add depth of flavor without adding any sodium. They have zero sodium.
-
Rinse Veggies-5%
Rinsing your pre-chopped red bell peppers and red onions before use can help to eliminate some of the potential added sodium from processing. This can reduce the sodium approximately 5%.
Recipe FAQs
What should I put in my chicken quesadilla?
Shredded cooked chicken, shredded cheese, and diced aromatics. Use a blend of Monterey Jack for melt and Cheddar for flavor, seasoned well with taco seasoning.
How do you make quesadillas easily?
Cook them low and slow over medium low heat. Use a light coating of neutral oil in a preheated skillet, pressing down gently to ensure even heat transfer for a crisp tortilla.
Do you cook chicken before adding to quesadillas?
Yes, the chicken must be fully cooked first. Utilizing pre-cooked rotisserie chicken saves significant time and guarantees a tender filling that won't dry out during the final searing process.
What is a good filling for quesadillas?
A balanced mix of protein, fat, and moisture is ideal. For texture, add finely diced peppers and onions; for flavor, use a good taco seasoning blend; and for binding, use a double layer of cheese.
Is it true you must use high heat for crispy tortillas?
False. High heat causes the tortilla to burn before the internal cheese fully melts. Achieving a shatter crisp requires steady medium low heat, which allows the starch to dehydrate slowly, similar to the technique used in our Thanksgiving Stuffing Recipe for achieving the perfect crust.
What cheese ratio maximizes the "cheese pull" effect?
Use a 50/50 blend of a high moisture melting cheese and a sharp flavored cheese. Monterey Jack provides the stretch, while Sharp Cheddar brings the necessary flavor punch without becoming greasy when melted.
How can I improve the texture of leftover quesadillas?
Reheat them uncovered in a dry, medium hot skillet. Avoid microwaving, as that traps steam and makes them soggy; direct heat crisps the exterior back up quickly.
Easy Chicken Quesadillas Recipe
Ingredients:
Instructions:
Nutrition Facts:
| Calories | 606 calories |
|---|---|
| Protein | 41g |
| Fat | 30g |
| Carbs | 40g |
| Fiber | 2g |
| Sugar | 3g |
| Sodium | 1250mg |
