Homemade Rye Bread: Crusty and Chewy
- Time: Active 20 minutes, Passive 3 to 12 hours, Total 65 minutes (active prep + baking)
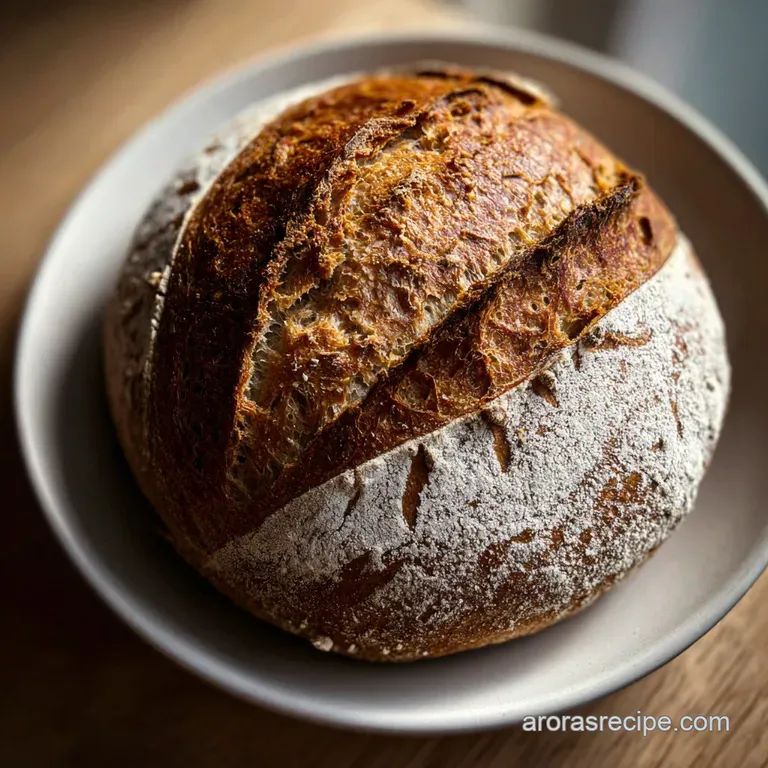
- Flavor/Texture Hook: Crusty exterior with a soft, chewy, caraway scented crumb
- Perfect for: Weekend family brunches, Reuben sandwiches, or beginner bakers
- The Best Homemade Hearty Rye Bread Recipe
- Why This Specific Method Works
- Components of a Perfect Loaf
- Minimal Tools for Maximum Results
- Step by Step Instructions
- Success Strategies and Fixes
- Adjusting the Batch Size
- Debunking Common Rye Legends
- Freshness and Waste Reduction
- Serving and Pairing Suggestions
- Recipe FAQs
- 📝 Recipe Card
The Best Homemade Hearty Rye Bread Recipe
The smell of caraway seeds hitting a hot oven is, quite honestly, the scent of my childhood. Growing up in the Midwest, Sunday mornings weren't complete without a thick slice of rye bread toasted until the edges were dark gold, then smothered in salted butter.
I remember my grandmother’s kitchen always having that faint, pleasant tang of yeast and vinegar. She never used a stand mixer or any complicated gadgets; she just had a sturdy wooden spoon and a bowl that had seen decades of dough.
That’s the vibe we are going for here uncomplicated, reliable, and deeply satisfying.
Most people feel intimidated by rye because they expect it to behave like white bread, but it’s a different beast entirely. It’s stickier, heavier, and feels more like working with damp clay than a bouncy balloon. But that weight is exactly what gives it that signature chew we love.
Whether you’re planning to build the world's best ham sandwich or you just want a piece of toast that actually fills you up, this method is designed to fit into a busy life. We let time do the heavy lifting so you don't have to spend an hour kneading until your arms ache.
This specific approach focuses on a long, slow fermentation. By letting the dough sit, the flavors develop a depth you simply can’t get from a quick rise loaf. You'll get those tiny bubbles in the crust and a complex aroma that makes your house smell like a professional bakery.
We're skipping the "fancy" and sticking to what works: good flour, a bit of acid, and the patience to let the yeast do its job. It’s homestyle baking at its most honest, and I promise, once you pull that first steaming loaf out of the Dutch oven, you'll never go back to the plastic wrapped stuff from the store.
Why This Specific Method Works
Understanding the "why" behind the dough helps you relax and enjoy the process instead of worrying about every little bubble. Rye is a unique grain that doesn't play by the same rules as wheat.
- Acidic Strength: The apple cider vinegar isn't just for flavor; it lowers the pH of the dough, which helps the rye starches stay stable and prevents the bread from becoming gummy or "muddy" inside.
- Pentosans over Gluten: Unlike wheat, rye relies heavily on complex sugars called pentosans for structure; the slow rise allows these to hydrate fully, creating that iconic chewy texture.
- Honey Hydration: Using honey instead of granulated sugar keeps the crumb moist for days because honey is hygroscopic, meaning it literally pulls moisture from the air into your bread.
- Enzyme Control: The long fermentation period manages "amylase" activity in the rye flour, ensuring the bread rises steadily without collapsing into a flat pancake.
| Method Type | Total Active Time | Texture Result | Best Use Case |
|---|---|---|---|
| Fast Method | 10 mins | Lighter, airy, less flavor | Quick toast or snacks |
| Classic (This Recipe) | 20 mins | Dense, chewy, complex | Reubens and hearty meals |
| Sourdough Rye | 45 mins | Very sour, very heavy | Traditional European style |
Choosing the right method depends on your schedule, but the classic approach we are using here hits the sweet spot between effort and flavor. It gives you the professional "bakery" results without the need to maintain a sourdough starter for weeks on end.
Components of a Perfect Loaf
The magic of a great rye bread recipe lies in the balance of flours and the aromatics that define its personality. We aren't just throwing things in a bowl; we are building layers of flavor.
| Component | Role in Recipe | Pro Secret |
|---|---|---|
| Rye Flour | Provides earthy flavor and dense structure | Use "Dark Rye" for a more intense, nutty profile |
| Bread Flour | Supplies the gluten needed for the bread to rise | Don't swap for All Purpose if you want a tall loaf |
| Caraway Seeds | The signature "rye" aroma and crunch | Toast them in a dry pan for 2 mins before adding |
| Apple Cider Vinegar | Regulates rye enzymes and adds a subtle tang | Helps the crust stay crisp while the middle stays soft |
Each ingredient serves a functional purpose. For instance, the bread flour provides the "skeleton" of the loaf, while the rye provides the "soul." Without the bread flour, a 100% rye loaf can be very difficult for beginners to handle because it lacks the elastic strength we are used to in modern baking.
Minimal Tools for Maximum Results
You don't need a kitchen full of expensive machinery to make high-quality bread. In fact, some of the best loaves I've ever made came out of a simple cast iron pot.
- Large Mixing Bowl: A wide bowl gives you room to stir that "shaggy mass" without flinging flour all over your counters.
- Sturdy Wooden Spoon: Rye dough is thick and sticky; a flimsy spatula might snap under the pressure.
- Damp Cloth or Plastic Wrap: Crucial for keeping the dough from drying out and forming a "skin" during the long rise.
- Dutch Oven or Heavy Pot: This traps steam, which is the secret to getting that shatteringly crisp, professional looking crust.
- Parchment Paper: Makes transferring the sticky dough into a hot pot much safer and prevents the bottom from burning.
If you don't have a Dutch oven, you can use a regular baking sheet, but I’d recommend placing a pan of water on the bottom rack of the oven to create some steam. It won't be quite the same, but it'll get you close to that bakery finish.
step-by-step Instructions
Follow these steps closely, but don't be afraid to trust your senses. The dough will talk to you through its texture and scent.
- Prepare the dry base. In your largest bowl, whisk together 150g rye flour, 350g bread flour, 10g fine sea salt, and 1 tbsp caraway seeds until perfectly combined.
- Activate the liquids. In a separate jar, whisk 25g honey and 1 tsp apple cider vinegar into 350ml warm water (aim for 95°F). Stir in 7g instant yeast and let it sit for a minute until it looks slightly creamy.
- The Shaggy Mass Phase. Pour the liquid mixture into the dry ingredients. Stir with your sturdy spoon until no dry flour streaks remain. Note: It will look messy and feel very sticky; this is exactly what you want.
- Mixing. Continue stirring for about 2 minutes to ensure the honey and yeast are evenly distributed. Do not try to knead this like normal bread; it's too sticky for that.
- The Fermentation Journey. Cover the bowl with a damp cloth. Leave it in a draft free spot for 3 to 12 hours. Watch for it to double in size and look bubbly.
- Preheat and Prep. Place your Dutch oven in the oven and preheat to 450°F (230°C). Sprinkle 1 tbsp cornmeal onto a piece of parchment paper.
- Shape the loaf. Gently scrape the dough onto the parchment. With floured hands, pat it into a rough oval or round shape. Don't overwork it or you'll lose the air bubbles.
- The over High heat Bake. Carefully lift the parchment and dough into the hot Dutch oven. Cover with the lid. Bake for 30 minutes until the structure is set and the aroma fills the room.
- The Final Crisp. Remove the lid. Brush the top with a whisked large egg (for shine) if desired. Bake for another 15 minutes until the crust is deep mahogany and sounds hollow when tapped.
- The Cooling Test. This is the hardest part: let it cool for at least 1 hour before slicing. Note: Slicing too early causes the steam to escape, which makes the bread gummy.
Success Strategies and Fixes
Rye can be a bit temperamental if the temperature in your house fluctuates or if your flour is older. Don't panic if things don't look like a textbook on the first try.
The Bread Feels Gummy
If the center of your loaf feels wet or sticky after cooling, it usually means the rye enzymes weren't kept in check. This often happens if the vinegar was skipped or if the bread was sliced while still hot. Always wait for a full cool down! If you're looking for something with a different structure, you might find my soft naan recipe a bit more forgiving for your first few tries at bread making.
Handling the Stickiness
Rye dough is notoriously difficult to handle with bare hands. The trick is to use water or flour but not too much flour, or you'll dry out the loaf. I prefer keeping a small bowl of water nearby to dip my fingers in while shaping. It keeps the dough from clinging to your skin like glue.
| Problem | Root Cause | Solution |
|---|---|---|
| Flat Loaf | Over proofing or weak flour | Use Bread Flour (high protein) and watch the rise |
| Cracked Crust | No steam in the oven | Use a covered Dutch oven or a pan of water |
| No Flavor | Short rise time | Let it ferment for the full 12 hours if possible |
Common Mistakes Checklist:
- ✓ Never skip the vinegar; rye needs that acidity to maintain its internal structure.
- ✓ Don't add extra flour just because it's sticky; rye is supposed to be hydrated.
- ✓ Ensure your water is 95°F; too hot and you'll kill the yeast, too cold and it won't wake up.
- ✓ Always preheat your baking vessel for at least 30 minutes to ensure a good "oven spring."
- ✓ Resist the urge to peek during the first 20 minutes of baking to keep the steam trapped.
Adjusting the Batch Size
Whether you are baking for a big family gathering or just yourself, this recipe scales quite well as long as you keep the ratios in mind.
- Sizing Down (Half Loaf): Use a smaller 2 quart pot. Reduce the baking time by about 10 minutes. Since you can't easily use half an egg for the wash, just whisk the egg and use a tablespoon of it, or skip the wash entirely.
- Sizing Up (Double Batch): Don't just double the salt and caraway. Use 1.5x the salt (about 15g) and 1.5x the caraway to keep the flavor from becoming overpowering. It’s better to bake two separate loaves than one giant one, as the center of a double sized rye loaf often struggles to cook through before the crust burns.
- Baking Adjustments: If you double the recipe and bake both at once, make sure your oven has enough airflow. You might need to rotate the pots halfway through the 45 minute bake time.
If you find yourself with extra flour and want to try another project, my easy pizza dough is a great way to use up that bread flour while you wait for your rye to ferment.
Debunking Common Rye Legends
There is a lot of misinformation out there about working with rye flour. Let's clear some of that up so you can bake with confidence.
Myth: You have to knead rye dough for 10 minutes to develop gluten. Actually, rye has very little gluten forming protein (glutenin). Over kneading rye doesn't make it bouncier; it just makes it stickier and more difficult to handle.
The "no knead" stirring method is actually better for rye's specific protein structure.
Myth: Dark rye bread only gets its color from the flour. While dark rye flour helps, most commercial "black" rye breads use molasses, cocoa powder, or even coffee to get that deep color. Our recipe uses honey and a over high heat bake to get a natural, mahogany crust without artificial additives.
Myth: Caraway seeds are mandatory for it to be called rye. Not at all! Many European rye breads are plain. However, in the American Midwest, the caraway flavor is so synonymous with rye that it feels "off" without it. Feel free to leave them out if you aren't a fan of that licorice like note.
Freshness and Waste Reduction
This bread is a workhorse, but like all homemade baked goods, it doesn't have the preservatives of store-bought loaves. You have to treat it right to keep it tasty.
Storage Guidelines Keep your rye bread in a paper bag or wrapped in a clean tea towel for the first 24 hours. This keeps the crust crisp. After that, move it to a sealed container or a reusable bread bag. It will stay fresh on the counter for about 3 days.
If you want to keep it longer, slice it first and freeze it. You can pop a frozen slice directly into the toaster, and it tastes just like it was baked that morning. It will last in the freezer for up to 3 months.
Zero Waste Ideas Don't you dare throw away those end pieces! If the loaf gets a little too hard, rye makes the absolute best croutons for a creamy potato soup or a borscht. Just cube the bread, toss with olive oil and a little extra salt, and bake at 350°F until crunchy.
Alternatively, you can pulse the dry bread in a food processor to make savory breadcrumbs. Rye breadcrumbs are incredible when used as a topping for mac and cheese or as a binder for a hearty Midwestern meatloaf.
Serving and Pairing Suggestions
A loaf this good deserves to be the star of the show. While a simple swipe of butter is classic, there are so many ways to enjoy a hearty rye.
The most obvious choice is a classic Reuben sandwich. Pile on the corned beef, Swiss cheese, sauerkraut, and Russian dressing. The sturdy structure of this bread holds up perfectly to the moisture of the kraut without falling apart.
For a simpler lunch, try it with a sharp cheddar cheese and some thin slices of green apple the sweetness of the apple plays beautifully against the earthy caraway seeds.
If you are serving this with dinner, it pairs exceptionally well with heavy stews, pot roasts, or a thick split pea soup. The density of the bread makes it the perfect vessel for soaking up savory broths. For a breakfast twist, try topping a toasted slice with cream cheese, smoked salmon, and a few capers.
The tang of the rye and the creaminess of the cheese are a match made in heaven. No matter how you serve it, this bread brings a sense of comfort and tradition to the table that everyone will appreciate.

Recipe FAQs
Is rye bread better for you than white bread?
Yes, generally speaking. Rye bread has a lower glycemic index and higher fiber content than standard white bread, which helps promote more stable energy levels throughout the day.
What flour is used for rye bread?
Use a blend of rye flour and bread flour. This recipe specifically requires 150g of rye flour combined with 350g of bread flour to ensure the loaf has the necessary structure and gluten strength to rise properly.
Can rye bread help control diabetes?
Yes, due to its fiber density. The high fiber content in rye flour slows glucose absorption in the bloodstream, making it a more favorable choice for blood sugar management compared to refined grains.
Is rye bread good for kidney patients?
Consult your medical provider first. While rye is a whole grain, kidney patients often need to manage phosphorus and potassium intake, which can vary based on individual dietary restrictions.
How to achieve the best rise for this dough?
Allow the dough to double in size in a warm, draft free area. Depending on your ambient kitchen temperature, this fermentation phase can take anywhere from 3 to 12 hours. If you enjoyed mastering yeast proofing here, you will find that same patience is key to developing flavor in other enriched doughs.
Is it true I should use boiling water to activate the yeast?
No, this is a common misconception. Boiling water will kill the yeast instantly. Always use warm water measured at 95°F to ensure the yeast remains active and effective.
How to tell when the shaggy mass is ready for fermentation?
Stir until no dry streaks remain. The final consistency should be sticky and clay like; once you reach this uniform state, cover the bowl with a damp cloth immediately to begin the fermentation journey.
Homemade Crusty Rye Bread
Ingredients:
Instructions:
Nutrition Facts:
| Calories | 143 kcal |
|---|---|
| Protein | 4.7 g |
| Fat | 1.0 g |
| Carbs | 28.5 g |
| Fiber | 2.4 g |
| Sugar | 1.5 g |
| Sodium | 285 mg |
