Instant Pot Beef Roast: Fork-Tender Perfection
- Time: Active 15 minutes, Passive 80 minutes, Total 95 minutes
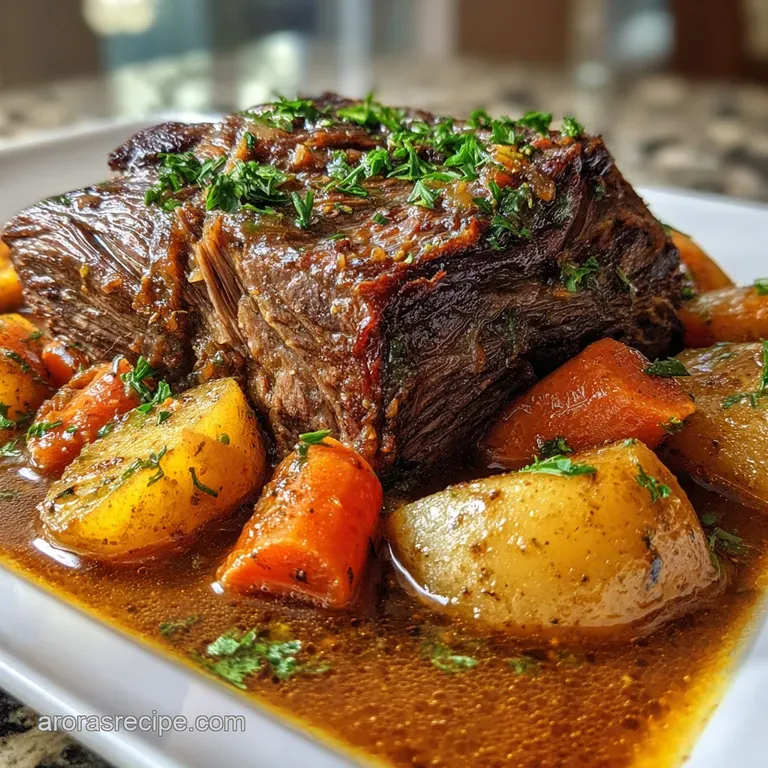
- Flavor/Texture Hook: Savory, velvety beef with buttery Yukon Gold potatoes
- Perfect for: A comforting Sunday family dinner or stress free meal prep
- Perfect Comfort with this Instant Pot Beef Roast
- Science Behind the Fall Apart Meat Texture
- Timings and Checkpoints for Your Meal Plan
- The Components of a Rich Savory Roast
- Tools Needed for a Successful Pressure Braise
- The Complete Step By Step Searing Guide
- Fixing Tough Meat and Thin Gravy Issues
- Adaptations for Different Flavors and Diets
- Freezing and Reviving Your Savory Leftovers
- Perfect Pairings for a Sunday Style Meal
- Recipe FAQs
- 📝 Recipe Card
Perfect Comfort with this Instant Pot Beef Roast
The sizzle of beef hitting hot avocado oil is the soundtrack to my favorite kind of Sunday. There’s something about that sharp, savory aroma of browning meat that immediately pulls everyone into the kitchen, asking when we’re eating.
Growing up in Nashville, my grandmother used to spend all day tending to a heavy cast iron pot in the oven, but we’ve found a way to get those same results without the eight hour wait.
We’ve all been there staring at a cold, tough slab of meat wondering if it’ll ever actually become tender. This Instant Pot Beef Roast recipe is my absolute go to because it takes the guesswork out of the equation.
You get that rich, deep flavor and a gravy so silky it coats the back of a spoon, all while you’re actually enjoying your afternoon instead of hovering over a stove.
I’ve made every mistake in the book, from forgetting to deglaze the pot (hello, "Burn" signal) to rushing the pressure release and ending up with dry meat. But after dozens of trials, I’ve locked in the exact rhythm that works.
We’re going to walk through the prep flow together so you can nail that "shatter at-the touch-of a-fork" texture that makes this dish a legend in our house.
Science Behind the Fall Apart Meat Texture
Understanding the "why" helps us avoid those rubbery results that sometimes plague a quick beef roast.
- Collagen Conversion: High pressure environments accelerate the breakdown of tough collagen into gelatin, which creates that velvety mouthfeel and keeps the muscle fibers lubricated.
- Pressure Equilibrium: The sealed environment prevents moisture from evaporating, essentially "forcing" seasoning and steam into the center of the 3.5 lbs beef chuck roast.
- Acidic Catalysis: Adding 1 tablespoon of balsamic vinegar doesn't just add flavor; the acidity helps weaken the protein bonds, speeding up the tenderizing process.
| Roast Thickness | Target Internal Temp | Rest Time | Visual Finished Cue |
|---|---|---|---|
| 2 inches | 200°F - 205°F | 10 minutes | Fibers pull apart with a gentle tug |
| 3 inches | 202°F - 208°F | 15 minutes | Meat wobbles and looks moist, not stringy |
| 4 inches | 205°F - 210°F | 15 minutes | Fat has completely rendered into the sauce |
The beauty of the 3.5 lbs beef chuck roast is that it's marbled enough to handle the intense heat of the pressure cooker without drying out. If you've ever tried this with a leaner cut like a round roast, you know it can get "woody" or tough. Stick with the chuck for that classic, buttery feel.
Timings and Checkpoints for Your Meal Plan
When you're planning your afternoon, it's helpful to know exactly where your focus needs to be. This isn't just a "dump and start" meal; the searing phase is where we build the foundation for the entire flavor profile.
If you skip the sear, you lose the Maillard reaction that chemical magic that turns plain meat into a savory explosion.
| Cooking Method | Total Time | Meat Texture | Effort Level |
|---|---|---|---|
| Instant Pot | 1 hour 35 mins | Fall apart tender | Medium (Initial Searing) |
| Standard Oven | 4 hours 30 mins | Traditional crust | High (Checking moisture) |
| Stovetop Braise | 5 hours | Very soft/shredded | High (Constant monitoring) |
Right then, let's talk about the flow. You'll spend about 15 minutes on the "active" side chopping the 1 large yellow onion, smashing the 4 garlic cloves, and getting that 3.5 lbs beef chuck roast seasoned with your 1 teaspoon of coarse salt and 0.5 teaspoon of cracked black pepper.
After that, the pot takes over for the long 80 minute cook time, giving you plenty of space to set the table or just relax with a glass of tea.
The Components of a Rich Savory Roast
Every ingredient in this recipe serves a specific purpose, from the 2 cups of low sodium beef broth that provides the braising liquid to the 2 tbsp of arrowroot powder that gives us our final silken finish.
| Ingredient | Science Role | Pro Secret |
|---|---|---|
| Beef Chuck Roast | Collagen Source | Look for "Choice" grade with heavy white marbling for the softest result. |
| Balsamic Vinegar | pH Adjuster | It cuts through the heavy fat of the beef, brightening the entire flavor profile. |
| Arrowroot Powder | Thickening Agent | Unlike flour, it stays clear and glossy, creating a professional looking gravy. |
| Yukon Gold Potatoes | Starch Stability | These hold their shape under pressure better than Russets, which tend to disintegrate. |
For the aromatics, we're using 2 sprigs of fresh rosemary and 4 sprigs of fresh thyme. These woody herbs can handle the high pressure environment without turning bitter. If you use delicate herbs like parsley or cilantro inside the pot, they’ll just turn to grey mush.
Save those for a fresh garnish at the very end.
- 4 cloves garlic, smashed (Substitute
- 1 tsp garlic powder, but fresh is far superior here)
- 2 tbsp arrowroot powder (Substitute
- 1.5 tbsp cornstarch for a similar glossy finish)
- 1 tbsp balsamic vinegar (Substitute
- Red wine vinegar or a splash of dry red wine)
Tools Needed for a Successful Pressure Braise

You don't need a kitchen full of gadgets, but a few specific items make this much easier. A 6 quart or 8 quart Instant Pot is the standard here. I personally use the Duo model, but any electric pressure cooker works as long as it has a "Sauté" function.
You'll also want a pair of sturdy tongs. Flipping a 3.5 lbs beef chuck roast isn't for the faint of heart, and you don't want it splashing hot oil everywhere. For the finish, a small whisk is essential for mixing the arrowroot powder with a little water to create the "slurry" that thickens the sauce into gravy.
Chef Tip: Freeze your beef for about 20 minutes before seasoning. It firms up the exterior just enough to let you get a much harder, crustier sear without overcooking the inside of the meat.
The Complete step-by-step Searing Guide
1. The Maillard Foundation
Season the 3.5 lbs beef chuck roast generously with the 1 tsp coarse salt and 0.5 tsp cracked black pepper. Set the Instant Pot to "Sauté" (High) and add the 2 tbsp avocado oil. Wait for the oil to shimmer before adding the meat.
Note: This ensures the meat doesn't stick and develops a deep brown crust.
2. The Great Sear
Sear the beef for about 4 minutes on each side. Don't rush this! You want a dark, mahogany color. Remove the meat and set it on a plate. Look for the brown bits on the bottom—that's your "flavor gold."
3. Sauté the Aromatics
Add the 1 large yellow onion and 4 cloves garlic to the pot. Sauté for 3 minutes until the onions are softened and translucent. Use a wooden spoon to scrape up some of the beef bits as they release liquid.
4. Deglazing the Flavor
Pour in the 1 tbsp balsamic vinegar and about 1/2 cup of the 2 cups low sodium beef broth. Scrape the bottom of the pot vigorously until every brown bit is dissolved. Note: This step is critical to prevent the "Burn" warning later.
5. Setting the Braise
Add the remaining broth back into the pot. Place the seared beef back in, along with the 2 sprigs fresh rosemary and 4 sprigs fresh thyme. Lock the lid.
6. The Pressure Phase
Set the Instant Pot to "Manual" or "Pressure Cook" on High for 60 minutes. Once the timer ends, let the pressure release naturally for 15 minutes until the pin drops on its own. Note: Natural release keeps the juices inside the meat so it stays tender.
7. The Garden Additions
Open the lid and add the 1 lb baby Yukon Gold potatoes and 4 large carrots. Lock the lid again and cook on "High Pressure" for an additional 5 minutes. Quickly release the pressure this time.
8. The Silken Gravy
Remove the meat and vegetables to a platter. Switch the pot back to "Sauté." In a small bowl, whisk the 2 tbsp arrowroot powder with 2 tbsp cold water. Stir this slurry into the bubbling liquid.
9. Thickening the Sauce
Whisk the sauce for 2 minutes until it turns glossy and thick. Taste and add a pinch more salt if needed.
10. The Final Rest
Slice or shred the beef and pour the gravy over everything. Let it sit for 5 minutes before serving so the meat can absorb the sauce.
Fixing Tough Meat and Thin Gravy Issues
Sometimes, things don't go exactly as planned. If your meat comes out tough, it almost always means it needs more time, not less. It’s a bit counter intuitive, but in a pressure cooker, "tough" usually means the collagen hasn't finished melting yet.
Why Your Roast is Still Tough
If you pull the lid off and the 3.5 lbs beef chuck roast feels like a bouncy ball, it simply needs more time. Put the lid back on and pressure cook for another 10-15 minutes. The pressure cooker is very forgiving with "overcooking" chuck roast because of its high fat content.
| Problem | Root Cause | Solution |
|---|---|---|
| Tough meat | Insufficient cook time | Cook for 10-15 additional minutes on high pressure. |
| Thin, watery gravy | Slurry wasn't cooked | Ensure the liquid is at a full boil before adding arrowroot. |
| Mushy vegetables | Added too early | Only cook veggies for 5 mins at the very end of the process. |
Common Mistakes Checklist
- ✓ Pat the beef completely dry with paper towels before searing (moisture creates steam, not a crust).
- ✓ Never skip the natural pressure release; a quick release on a large roast will literally "boil" the moisture out of the fibers.
- ✓ Cut your 4 large carrots into large chunks; small coins will vanish into the sauce.
- ✓ Deglaze with a wooden spoon metal can scratch some pot linings and doesn't scrape as effectively.
Adaptations for Different Flavors and Diets
You can easily tweak this Instant Pot Beef Roast recipe to fit what you have in the pantry. If you aren't a fan of rosemary, try using a bay leaf and some dried oregano for a more Mediterranean vibe.
For those following a keto lifestyle, just swap the 1 lb baby Yukon Gold potatoes for radishes or large chunks of cauliflower the radishes actually lose their "bite" and taste remarkably like potatoes when pressure cooked!
If you prefer a different method, you might want to look at my Instant Pot Pot Roast recipe which uses a slightly different spice blend. For those who want more of a French flair, my Instant Pot Beef Bourguignon recipe is a fantastic alternative that utilizes red wine for a deeper, more complex sauce.
| Original Ingredient | Substitute | Why It Works |
|---|---|---|
| Arrowroot Powder | Cornstarch | Similar thickening power. Note: Cornstarch can be slightly more opaque. |
| Avocado Oil | Ghee | High smoke point and adds a rich, buttery flavor to the sear. |
| Beef Broth | Red Wine (1 cup) + Water (1 cup) | Adds acidity and a deep burgundy color to the gravy. |
If you want...
- Extra Umami: Add 1 tablespoon of Worcestershire sauce or soy sauce during the deglazing step.
- A Spicier Kick: Add 1 teaspoon of red pepper flakes or a dollop of horseradish to the finished gravy.
- Lower Carb: Replace the carrots and potatoes with celery root and whole mushrooms.
Freezing and Reviving Your Savory Leftovers
This roast actually tastes better the next day as the flavors have more time to mingle. If you're cooking for one or two, you can easily freeze half of the recipe for a rainy day.
Storage: Keep leftovers in an airtight container in the fridge for up to 4 days. The fat will solidify on top; just stir it back in when reheating. For freezing, place the sliced meat and gravy in a freezer safe bag, removing as much air as possible. It will stay fresh for up to 3 months.
Zero Waste: Don't throw away those onion ends or carrot peels! I keep a "stock bag" in my freezer. Throw all your veggie scraps in there, and when it’s full, you can simmer them with some water to make your own beef or vegetable broth for the next round of cooking.
Reheating: The best way to reheat is on the stovetop over low heat. Add a splash of water or broth if the gravy has thickened too much in the fridge. Avoid the microwave if possible, as it can make the beef feel a bit rubbery.
Perfect Pairings for a Sunday Style Meal
While the potatoes and carrots make this a "one pot wonder," I always love a little something green on the side to balance out the richness. A simple side of steamed green beans with a squeeze of lemon or a crisp garden salad works wonders.
If you’re looking for a more indulgent meal, serve the roast and its velvety gravy over a bed of creamy polenta or wide egg noodles. The noodles are particularly good at catching every last drop of that balsamic infused sauce. I also highly recommend a piece of crusty sourdough bread.
You’re going to want it to "mop up" the plate trust me, leaving any of that gravy behind is a tragedy.
Myths about Pressure Cooking Beef
"Searing meat seals in the juices." This is one of those old kitchen tales that just won't die. Searing is entirely about flavor (the Maillard reaction) and color. The moisture content is actually managed by the pressure and the release method, not the initial sear.
"You can't overcook meat in an Instant Pot." You absolutely can. While chuck roast is forgiving, if you leave it for two hours, the fibers will eventually become mushy and lose their structure. Stick to the 60-80 minute range for a 3.5 lbs beef chuck roast to maintain that perfect "shred able" texture.

Recipe FAQs
How long do you cook a beef roast in the Instant Pot?
60 to 80 minutes on high pressure. For a 3.5 lbs chuck roast, start with 60 minutes, followed by a 15-minute natural pressure release, then add vegetables and cook for another 5 minutes. This ensures fork tender results.
How long does it take for beef to cook in an Instant Pot?
About 1 hour and 35 minutes total. This includes the initial 60 minutes of high pressure cooking, a 15-minute natural release, and a final 5-minute high pressure cook for vegetables, plus time for the pot to come to pressure.
Why is my roast beef tough in Instant Pot?
Likely due to insufficient cook time or improper pressure release. Toughness usually means the collagen hasn't fully broken down, so it needs more time. Always use natural pressure release for at least 15 minutes for large roasts; a quick release can dry out the meat.
Is it better to slow cook or pressure cook pot roast?
Pressure cooking is generally faster and yields tender results. While slow cooking produces great results over many hours, the Instant Pot uses high pressure to break down connective tissues rapidly, achieving fall apart tender meat in a fraction of the time, perfect for dishes like our Instant Pot Chuck Roast.
What cut of beef is best for Instant Pot roast?
Chuck roast is ideal for Instant Pot roasts. Its high fat content and marbling allow it to stay moist and become incredibly tender under high pressure, unlike leaner cuts which can become dry and tough. This cut is perfect for achieving that classic slow cooked flavor quickly.
How do you thicken gravy for Instant Pot roast?
Use an arrowroot slurry or cornstarch. Whisk 2 tablespoons of arrowroot powder or 1.5 tablespoons of cornstarch with 2 tablespoons of cold water, then stir it into the simmering liquid in the Instant Pot on "Sauté" mode. Whisk for a few minutes until glossy and thick, similar to making Beef Broth Gravy.
What are good side dishes for Instant Pot beef roast?
Classic comfort sides pair perfectly. Potatoes and carrots are often cooked with the roast, but consider serving with simple steamed green beans, a crisp salad, or crusty bread to soak up the rich gravy.
For a more substantial meal, mashed potatoes or egg noodles are also excellent choices that complement the hearty beef.
Instant Pot Beef Roast

Ingredients:
Instructions:
Nutrition Facts:
| Calories | 592 kcal |
|---|---|
| Protein | 44 g |
| Fat | 39 g |
| Carbs | 18 g |
| Fiber | 3 g |
| Sugar | 4 g |
| Sodium | 475 mg |
