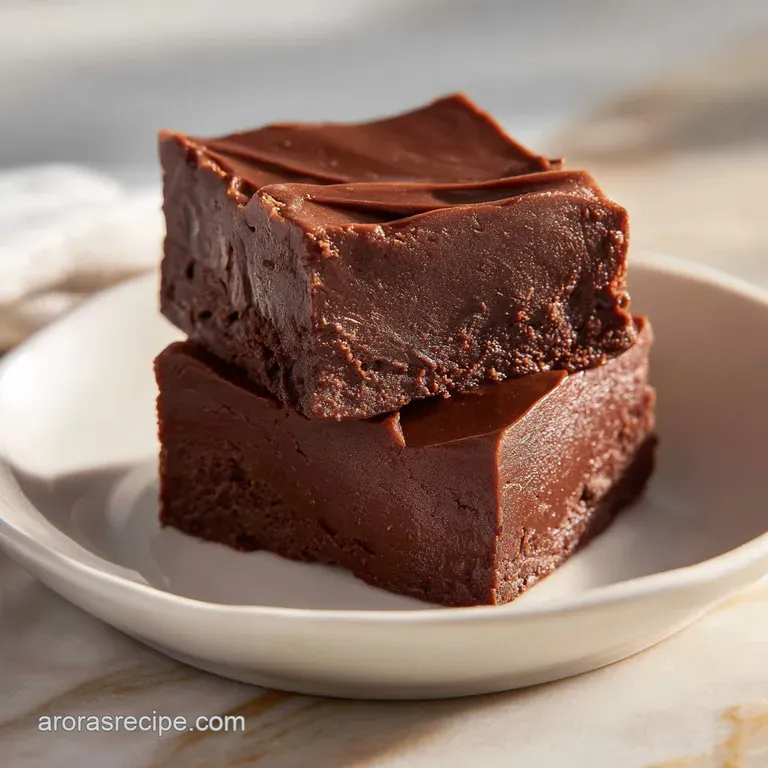
Jet Puffed Fudge Recipe: Easy Marshmallow Creme
- Time: Active 10 minutes, Passive 15 minutes, Total 25 minutes
- Flavor/Texture Hook: Dense, buttery chocolate with a cloud like melt on-the tongue finish
- Perfect for: Holiday gifting, Midwestern potlucks, and stress free dessert platters
- Creating the Perfect Velvety Jet Puffed Fudge Recipe at Home
- Why This Recipe Always Sets Successfully
- Simple Pantry Essentials for Success
- Simple Tools for Stress Free Cooking
- Mastering the Step-by-Step Boil and Fold
- Fixing Common Texture and Setting Issues
- Simple Swaps for Different Dietary Needs
- Smart Storage and Freezing for Longevity
- Hearty Serving Ideas for Holiday Platters
- Scaling the Recipe for Large Crowds
- Recipe FAQs
- 📝 Recipe Card
Creating the Perfect Velvety Jet Puffed Fudge Recipe at Home
There is a specific, heavy aroma that fills a Midwestern kitchen when a batch of chocolate is bubbling on the stove. It is thick, sugary, and carries a hint of toasted vanilla that tells everyone in the house to stay close to the kitchen.
For me, that smell is synonymous with rainy Sunday afternoons and my grandmother’s battered aluminum saucepan. I remember the first time I tried to make this myself, I was so worried about the "soft ball stage" that I overcooked it into something resembling a chocolate brick.
Since then, I have learned that the beauty of this specific method lies in its reliability. We are going for a texture that is firm enough to slice into neat, sharp squares but soft enough that it feels like silk when you take a bite.
It is a hearty, no nonsense dessert that relies on pantry staples rather than fancy equipment or culinary degrees. If you can stir a pot and set a timer, you can master this.
We are going to focus on the "boil and fold" technique, which is the secret to that glossy finish. Forget the fussy candy thermometers that always seem to calibrate differently every time you use them. This recipe is all about visual cues and timing.
By the time we are done, you'll have a batch of fudge that puts those dry, crumbly store-bought tins to shame. Trust me, once you see how easy it is to get that professional sheen, you will never go back to the boxed stuff.
Why This Recipe Always Sets Successfully
The success of this dish comes down to a few key chemical reactions that happen right in your saucepan. We aren't just melting ingredients; we are creating a stable emulsion of fat and sugar that stays smooth even after it cools. This is a great alternative to more complex bakes like my Foolproof Classic Hootenanny recipe, which relies on steam and eggs for lift, whereas this fudge relies on sugar suspension.
- Crystallization Control: The marshmallow creme acts as an interfering agent, which prevents large sugar crystals from forming and making the fudge gritty.
- Evaporation Balance: Using evaporated milk provides a concentrated protein source that binds the fats from the butter and chocolate chips together.
- Sugar Saturation: Bringing the mixture to a full rolling boil for a specific window ensures the sugar is fully dissolved without burning the milk solids.
- Fat Stabilization: The high fat content from the 0.75 cup of unsalted butter creates a barrier that keeps the texture supple and prevents it from drying out.
The Physics of the Fluff
Marshmallow creme contains gelatin and corn syrup, which wrap around sugar molecules like a protective blanket. This prevents them from "finding each other" and re crystallizing into a sandy texture as the fudge cools. It is essentially an insurance policy for a smooth mouthfeel.
| Method | Total Time | Texture | Best For |
|---|---|---|---|
| Stovetop (Classic) | 25 minutes | Dense and velvety | Traditional holiday gifting |
| Microwave (Quick) | 12 minutes | Softer, more airy | Last minute cravings |
| Slow Cooker | 2 hours | Ultra smooth, less risk of burning | Large batch meal prep |
Choosing the stovetop method outlined here gives you the most control over the final set. While the microwave is faster, the stovetop allows the sugar to develop a deeper, more complex caramel like undertone that really brings out the notes in the semi sweet chocolate chips.
Simple Pantry Essentials for Success
Selecting the right ingredients is the difference between fudge that tastes like a professional bakery and fudge that just tastes like sugar. I always tell my friends to use the best chocolate chips they can find because that flavor is the star of the show. If you want to expand your holiday spread, this fudge sits beautifully on a table next to a savory Sourdough Stuffing Recipe for that perfect sweet and salty balance.
| Ingredient | Science Role | Pro Secret |
|---|---|---|
| Evaporated Milk | Emulsifier | Never swap for regular milk; the water content is too high and will ruin the set. |
| Marshmallow Creme | Texture Stabilizer | Scrape the jar completely; that extra bit of "fluff" ensures the velvety finish. |
| Semi sweet Chips | Structure | Use chips with at least 50% cacao for a deep flavor that isn't cloying. |
- 3 cups Granulated white sugar: The base of the structure. Why this? Provides the crystalline lattice needed for a firm set. (Substitute: Caster sugar for even faster dissolving)
- 0.75 cup Unsalted butter: Adds richness and a buttery finish. Why this? Unsalted allows you to control the flavor profile exactly. (Substitute: Salted butter, but omit any extra salt)
- 0.66 cup Evaporated milk: The liquid binder. Why this? It has 60% of water removed, making it ultra creamy. (Substitute: Heavy cream for an even richer result)
- 7 oz Jet Puffed Marshmallow Creme: The secret to the smooth set. Why this? Prevents graininess better than actual marshmallows. (Substitute: 1.5 cups mini marshmallows melted slowly)
- 12 oz Semi sweet chocolate chips: The flavor core. Why this? Chips contain stabilizers that help the fudge hold its shape. (Substitute: Dark chocolate chunks for a less sweet version)
- 1 tsp Pure vanilla extract: The aromatic enhancer. Why this? Rounds out the sharp sweetness of the sugar. (Substitute: Almond extract for a nutty twist)
- 1 cup Chopped walnuts: For crunch and contrast. Why this? Offsets the soft texture with a satisfying bite. (Substitute: Pecans or toasted hazelnuts)
Simple Tools for Stress Free Cooking
You don't need a kitchen full of gadgets for this jet puffed fudge recipe. In fact, a minimalist approach usually works best because things move quickly once that boil starts. I once tried using a thin, cheap pot and ended up with scorched milk at the bottom, so a heavy bottomed saucepan is my only non negotiable.
- Heavy bottomed saucepan: This distributes heat evenly so the milk solids don't burn.
- Wooden spoon or silicone spatula: You need something sturdy to fold in the heavy chocolate chips at the end.
- 9x9 inch baking pan: This provides the perfect thickness for 48 bite sized servings.
- Parchment paper: Essential for lifting the entire block of fudge out for easy slicing.
- Digital timer: Accuracy is more important than a thermometer here.
Chef's Tip: Grease your measuring cup with a little bit of butter or non stick spray before adding the marshmallow creme. It will slide right out of the cup without sticking to the sides, saving you a messy cleanup.
Mastering the step-by-step Boil and Fold
Before you turn on the stove, make sure your pan is prepped and your chocolate and nuts are measured out. This recipe waits for no one once the sugar reaches its peak temperature. We want a smooth, coordinated flow from the stove to the cooling rack.
- Prep the pan. Line a 9x9 inch pan with parchment paper, leaving an overhang on two sides to use as "handles" later.
- Combine the base. Place 3 cups sugar, 0.75 cup butter, and 0.66 cup evaporated milk in your heavy saucepan.
- Heated stirring. Cook over medium heat, stirring constantly until the butter is completely melted and the sugar is no longer visible.
- The full boil. Bring the mixture to a full rolling boil (one that doesn't stop when you stir it). Cook for exactly 5 minutes while stirring frequently to prevent scorching.
- Remove from heat. Pull the pan off the burner immediately after the timer beeps. Note: Carrying over even 30 seconds of extra heat can make the fudge dry.
- Add the fluff. Stir in the 7 oz Jet Puffed Marshmallow Creme and 12 oz chocolate chips. Stir until the mixture is glossy and uniform with no streaks of white creme.
- Flavor and crunch. Fold in the 1 tsp vanilla extract and 1 cup chopped walnuts until evenly distributed.
- The pour. Scrape the mixture into the prepared pan and smooth the top with your spatula. Work quickly before it starts to set.
- Cooling phase. Let it sit at room temperature for at least 2 hours or until completely firm to the touch.
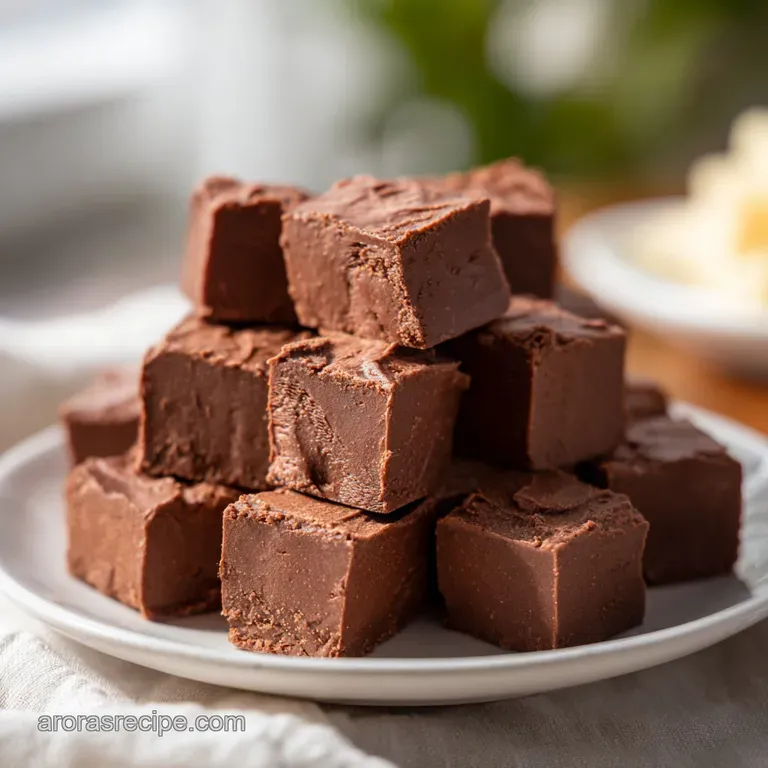
- The slice. Lift the fudge out using the parchment handles and cut into 48 even squares using a sharp, warm knife.
Fixing Common Texture and Setting Issues
Fudge can be a bit temperamental if the humidity is high or the boil wasn't quite right. Don't panic if your first batch isn't perfect; usually, it's a simple fix for next time. One mistake I once made was trying to double the recipe in a small pot, which messed up the evaporation rate and left me with chocolate soup.
Why Your Fudge Feels Grainy
Graininess happens when sugar crystals "seed" the mixture. This usually occurs if you scrape the sides of the pot where undissolved sugar resides. If this happens, you can actually melt the fudge back down with a tablespoon of heavy cream and a tiny bit more marshmallow creme to smooth it out.
Why the Texture Is Too Soft
If your jet puffed fudge recipe doesn't firm up after 4 hours, it likely didn't reach a high enough temperature during the boil. This often happens if the "rolling boil" was just a few bubbles rather than a vigorous, frothing action. You can still use it!
It makes a fantastic frosting or a decadent ice cream topping.
| Problem | Root Cause | Solution |
|---|---|---|
| Fudge is oily | Butter separated during the boil | Stir more vigorously while boiling to keep the emulsion stable. |
| Hard and crumbly | Boiled for too long | Reduce boil time by 30-60 seconds in your next batch. |
| Sticky surface | High humidity in the kitchen | Let it set in the fridge instead of on the counter. |
Common Mistakes Checklist
- ✓ Never scrape the sides of the pan when pouring the fudge into the cooling dish.
- ✓ Do not substitute sweetened condensed milk for evaporated milk; they are not interchangeable.
- ✓ Ensure the boil is "rolling" (vigorous) before you start the 5 minute timer.
- ✓ Use a fresh jar of marshmallow creme; old, crusty creme won't emulsify properly.
- ✓ Let the fudge set at room temperature for the best texture before moving to the fridge.
Simple Swaps for Different Dietary Needs
While this is a classic Midwestern homestyle treat, you can easily tweak it to fit your needs. For instance, if you're planning a full menu, this fudge pairs surprisingly well with the savory notes of a Homemade Keto Southwest recipe if you're hosting a brunch where you want a mix of healthy and indulgent options.
dairy-free Adjustations
You can swap the butter for a high-quality vegan butter stick and the evaporated milk for a heavy coconut cream. Note that this will introduce a slight tropical flavor, but the chocolate usually masks most of it. Use dairy-free chocolate chips to complete the swap.
Nut Free Variations
Simply omit the walnuts and replace them with crushed pretzels or even dried cranberries. This adds that necessary texture without the allergen risk. If you want that nutty flavor without the actual nuts, a half teaspoon of imitation almond extract does wonders.
Choosing Your Sweetener
While granulated white sugar is the standard, some people like to use half brown sugar for a deeper, penuche style flavor. Note: This will make the fudge slightly softer and more moisture heavy, so you might need to boil it for an extra 30 seconds.
Smart Storage and Freezing for Longevity
Because of the high sugar and fat content, this fudge has a pretty impressive shelf life. I like to keep mine in a tin lined with wax paper to prevent the squares from sticking together. It is a hearty snack that stays good through the entire holiday season if you treat it right.
Storage Guidelines Store your fudge in an airtight container at room temperature for up to 2 weeks. If your kitchen is particularly warm, move it to the fridge, where it will stay fresh for up to 3 weeks.
Always place a layer of parchment or wax paper between layers of fudge to prevent them from fusing into one giant chocolate block.
Freezing and Thawing Yes, you can freeze this! Wrap the entire block (or individual squares) tightly in plastic wrap, then place it in a heavy duty freezer bag. It will stay velvety and delicious for up to 3 months. To serve, thaw it in the fridge overnight.
Avoid thawing at room temperature as condensation can form on the surface, making it sticky.
Zero Waste Tip Don't throw away the "scraps" from the edges when you trim the fudge for serving. Crumble those bits over vanilla bean ice cream or fold them into brownie batter for a "double chocolate" surprise. You can even melt the scraps down with a little milk to make a rich chocolate sauce.
Hearty Serving Ideas for Holiday Platters
Presentation is everything when it comes to homestyle baking. To get those professional looking squares, I always use a ruler to mark the edges before I start cutting. It makes a huge difference on a platter when everything is uniform. If you are looking for other classic holiday staples, consider serving this alongside a Duck and Dumpling recipe for a truly traditional winter feast.
- The Sea Salt Sprinkle: Hit the top of the fudge with a pinch of flaky sea salt (like Maldon) right after pouring it into the pan. It shatters the sweetness and brings out the cocoa notes.
- Holiday Gift Tins: Line a small tin with festive tissue paper and nestle 4-6 squares inside. It's a stress free gift that everyone actually wants.
- Coffee Pairing: Serve a single square with a dark, bitter roast coffee. The contrast between the velvety sugar and the acidic coffee is pure bliss.
If you find yourself with leftovers, try dipping the squares into melted dark chocolate for a "double dipped" truffle effect. It's a simple way to take a basic jet puffed fudge recipe and turn it into something that looks like it came from a high end candy shop.
Honestly, don't even bother with the low-fat versions of these ingredients the fat is what carries the flavor and gives you that iconic, hearty Midwestern finish we all love.
Scaling the Recipe for Large Crowds
When the holidays roll around, one batch is never enough. However, candy making is sensitive to volume changes. If you are scaling down to a half batch, use an 8x4 inch loaf pan to maintain the thickness. Reduce the boil time by about 1 minute since the smaller volume will heat up and evaporate much faster.
If you are doubling the recipe for a big party, be careful. I highly recommend making two separate batches rather than one giant one. A double batch in one pot often results in uneven heating, and the center may not reach the proper temperature while the bottom burns.
If you must double it, use a very wide, heavy pot to increase the surface area and keep the salt and vanilla at 1.5x the original amount rather than a full 2x to avoid overpowering the chocolate.

Recipe FAQs
Can I substitute evaporated milk with regular milk?
No, avoid substitution. Evaporated milk is concentrated due to water removal, which is crucial for the proper sugar saturation and creamy binding of this fudge.
How do I prevent my fudge from becoming grainy?
Stop stirring the pot sides after the boil starts. Undissolved sugar clinging to the sides acts as seed crystals, causing graininess when the fudge cools.
How long must the mixture boil for a perfect set?
Cook the mixture for exactly 5 minutes once it reaches a full rolling boil. This specific time ensures enough water evaporates to achieve the correct sugar concentration.
How can I make this fudge recipe dairy-free?
Substitute the butter with vegan butter and use heavy coconut cream for the milk. The fat content is key; if you enjoyed controlling the fat ratios in our Tataki Sauce Recipe, aim for a similar rich replacement here.
What is the function of the marshmallow creme in this recipe?
It acts as a texture stabilizer to guarantee a velvety mouthfeel. The gelatin and corn syrup interfere with sugar crystallization, preventing the fudge from becoming hard or gritty.
How should I properly store leftover fudge?
Store it tightly wrapped in an airtight container at room temperature for up to two weeks. If your kitchen is warm, the refrigerator is safer, but room temperature yields the best sliceable texture.
What should I do if the fudge doesn't firm up after cooling?
Reheat the soft fudge gently with a tablespoon of heavy cream and an extra teaspoon of marshmallow creme. If you enjoyed mastering the heat control principles here, apply that same gentle reheating logic to prevent further damage.
Jet Puffed Fudge Recipe

Ingredients:
Instructions:
Nutrition Facts:
| Calories | 142 calories |
|---|---|
| Protein | 0.9 g |
| Fat | 6.7 g |
| Carbs | 21.0 g |
| Fiber | 0.6 g |
| Sugar | 19.2 g |
| Sodium | 8 mg |
