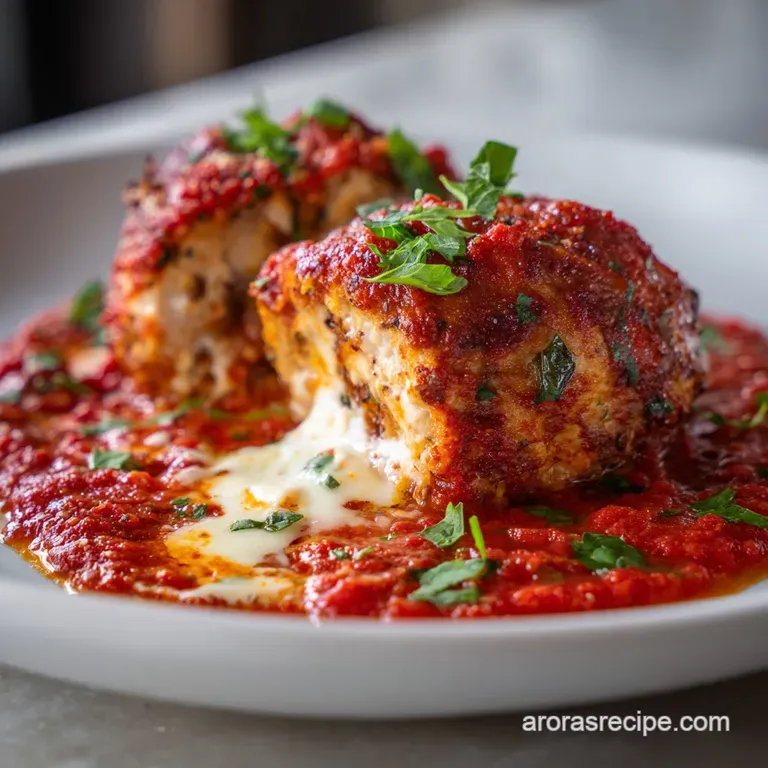
Chocolate Cupcakes: Rich and Moist
- Time: Active 15 minutes, Passive 20 minutes, Total 35 minutes
- Flavor/Texture Hook: Velvety, moist crumb with a cloud like chocolate buttercream finish.
- Perfect for: Midwestern potlucks, birthday parties, or a stress free weekend baking project.
- Why Blooming Cocoa Makes Great Chocolate Cupcakes
- Key Numbers For Baking Chocolate Cupcakes
- Essential Ingredients For Moist Chocolate Cupcakes
- The Best Tools For Chocolate Cupcakes
- How To Bake Fluffy Chocolate Cupcakes
- Common Mistakes Making Easy Chocolate Cupcakes
- Scaling the Recipe for Any Crowd
- Common Kitchen Myths Debunked
- How To Store Your Chocolate Cupcakes
- Decorating Your Homemade Chocolate Cupcakes
- Recipe FAQs
- 📝 Recipe Card
Why Blooming Cocoa Makes Great Chocolate Cupcakes
You might wonder why we bother with boiling water in a cake batter. It seems a bit odd, doesn't it? Well, it is the secret to getting that deep, dark flavor without needing a massive amount of expensive chocolate bars. When you pour that hot liquid over the cocoa powder, it "blooms" the cocoa.
This process dissolves the solids and releases the flavor trapped inside the cocoa fats. It is like the difference between eating a cold piece of bread and a warm, toasted slice. The aroma just opens up.
The texture of these Chocolate Cupcakes stays so moist because we use oil instead of just butter in the sponge. While butter tastes lovely, it can make a cake feel quite firm when it cools down. Oil is a liquid at room temperature, so your cupcakes stay soft and velvety for days.
In the Midwest, where we love a good bake sale, having a cupcake that stays fresh on a table for a few hours is a must.
Another heavy hitter here is the buttermilk. It brings a gentle tang that balances out the sugar, but its real job is reacting with the baking soda. That reaction creates tiny bubbles that help the cupcakes rise into a light, airy structure rather than a dense brick. It is homestyle baking at its most clever.
Finally, we have the sugar. It isn't just there for sweetness. Sugar is a tenderizer. It interferes with the gluten formation in the flour, ensuring that every bite is soft and "shatter on-your tongue" tender.
By whisking the dry ingredients together first, we ensure that the leavening agents are perfectly distributed, so you won't end up with one cupcake that is flat and another that looks like a volcano.
- The Bloom Effect: Boiling water melts the cocoa fats, releasing intense aromatic compounds.
- Acid Base Balance: Buttermilk reacts with baking soda to create a light, bubbly lift.
- Moisture Retention: Vegetable oil stays liquid at room temperature for a softer crumb.
- Gluten Control: Sugar and fat coat flour proteins to prevent a tough, bready texture.
| Cooking Method | Total Time | Texture Outcome | Best For |
|---|---|---|---|
| Standard Oven | 35 minutes | Uniform rise, moist | Classic birthday parties |
| Convection | 32 minutes | Crispier edges | High volume batch baking |
| Toaster Oven | 35 minutes | Slightly denser | Small batches of 6 |
Right then, choosing the right method is usually about what you have on hand. For most of us in a standard kitchen, the regular oven setting at 175°C is going to give you that perfectly rounded top we all love.
Key Numbers For Baking Chocolate Cupcakes
When you are looking at the ingredients, it is easy to think they are all just tossed in for flavor. But in a hearty recipe like this, every single gram is doing some heavy lifting. We are talking about a delicate balance of hydration and structure. If you change one thing, it ripples through the whole batch.
| Component | Scientific Role | Pro Secret |
|---|---|---|
| Cocoa Powder | Provides structure and flavor | Use natural cocoa for a better reaction with soda |
| Buttermilk | Tenderizes gluten and provides acid | Room temperature prevents the batter from curdling |
| Boiling Water | Hydrates cocoa and thins batter | Pour it in last to avoid "cooking" the egg |
| Large Egg | Binds the fats and liquids | A room temp egg emulsifies much smoother |
The way the boiling water interacts with the cocoa is honestly fascinating. Most folks skip this and just whisk everything together, but you'll notice a massive difference in how glossy the batter looks. That gloss is a sign that the cocoa is fully hydrated and the fats are properly dispersed.
You'll also want to make sure your butter for the frosting is truly softened. Not melted, mind you, but soft enough that your finger leaves an easy dent. This is the foundation of a silky buttercream. If the butter is too cold, you'll be fighting lumps until the cows come home.
Essential Ingredients For Moist Chocolate Cupcakes
Let's talk about the shopping list. You probably have most of this in your pantry already, which is the beauty of a stress free recipe. I always keep a bag of all purpose flour and a tin of cocoa powder ready for whenever the craving hits.
- 1.5 cups (190g) all purpose flour: Why this? Provides the perfect protein balance for a soft yet sturdy crumb.
- 1 cup (200g) granulated sugar: Why this? Adds sweetness and keeps the cupcakes incredibly moist and tender.
- 0.5 cup (45g) unsweetened natural cocoa powder: Why this? Natural cocoa is acidic, which helps the baking soda do its job.
- 1 tsp baking powder & 0.5 tsp baking soda: Why this? The duo ensures a reliable rise and a beautiful rounded top.
- 0.5 tsp salt: Why this? You need salt to brighten the chocolate and cut through the sugar.
- 1 large egg: Why this? Acts as the glue that holds our cupcake structure together perfectly.
- 0.5 cup (120ml) full fat buttermilk: Why this? The acid tenderizes the flour for a velvety texture.
- 0.25 cup (60ml) vegetable oil: Why this? Keeps the cake moist even after a few days in the fridge.
- 2 tsp vanilla extract: Why this? Vanilla actually makes chocolate taste more like chocolate. Don't skip it.
- 0.5 cup (120ml) boiling water: Why this? Dissolves the cocoa powder to release the maximum flavor profile.
- 1 cup (225g) unsalted butter: Why this? The base for a rich, homestyle buttercream frosting.
- 3 cups (360g) powdered sugar: Why this? Sifted sugar gives you that smooth, professional bakery finish.
- 3 tbsp heavy cream: Why this? Adjusts the consistency of the frosting to make it pipeable.
| Original Ingredient | Substitute | Why It Works |
|---|---|---|
| Buttermilk | Milk + 1 tsp Lemon Juice | The acid mimics the buttermilk's reaction. |
| Vegetable Oil | Melted Coconut Oil | Similar fat content, but adds a hint of coconut. |
| Heavy Cream | Whole Milk | Works fine, but the frosting won't be quite as rich. |
If you are out of buttermilk, don't panic. Just put a teaspoon of lemon juice or white vinegar into a half cup of regular milk and let it sit for five minutes. It’ll curdle slightly, and that’s exactly what you want. It works like a charm in a pinch.
The Best Tools For Chocolate Cupcakes
You don't need a kitchen full of fancy gadgets to make these. A simple bowl and a whisk will do for the batter. In fact, I prefer whisking by hand for the cupcakes because it prevents over mixing.
If you work the batter too hard, you'll develop too much gluten, and you'll end up with something that tastes more like a muffin than a light cupcake.
For the frosting, a stand mixer or a good hand mixer is a real life saver. You want to beat that butter until it is pale and airy, which takes a bit of elbow grease if you're doing it by hand. A standard 12 cup muffin tin is the traditional choice here.
I like the ones with a non stick coating, but paper liners are really the way to go for easy cleanup and a classic look.
Make sure you have a way to boil water quickly, whether it is a kettle or a small saucepan. And don't forget a cooling rack. Letting the cupcakes sit in the hot tin for too long will make the bottoms soggy from the steam. We want them to breathe so the edges stay just right.
How To Bake Fluffy Chocolate Cupcakes

- Prep your station. Preheat your oven to 175°C and line a 12 cup muffin tin with paper liners. Note: Preheating is vital for that immediate rise when the batter hits the heat.
- Whisk dry elements. In a large mixing bowl, whisk together the flour, granulated sugar, cocoa powder, baking powder, baking soda, and salt. Whisk until no large lumps remain and the color is uniform.
- Mix wet ingredients. In a separate bowl, whisk the egg, buttermilk, oil, and vanilla extract. Ensure the egg is fully incorporated into the milk.
- Combine the mixtures. Pour the wet mixture into the dry ingredients and whisk by hand until just combined. Note: A few small lumps are fine; don't overwork the batter here.
- The bloom step. Slowly pour the boiling water into the batter, whisking gently. The batter will be thin, smooth, and very glossy.
- Fill the liners. Divide the batter into the prepared liners, filling each only 2/3 full. Note: Overfilling leads to "mushroom tops" that spill over the edges.
- Bake to perfection. Bake for 18 to 22 minutes until a toothpick inserted into the center comes out clean.
- Cool completely. Move the cupcakes to a wire rack. Note: Frosting a warm cupcake will result in a melted, greasy mess.
- Whip the butter. Beat softened butter until pale and airy. This usually takes about 3 minutes of high speed mixing.
- Finish the frosting. Gradually add powdered sugar and cocoa powder. Add heavy cream and salt, beating on high for 2 minutes until light, fluffy, and perfectly pipeable.
Chef's Tip: If you want an even deeper flavor, use a strong cup of hot coffee instead of the boiling water. It doesn't make the cupcakes taste like coffee, but it intensifies the chocolate in a way that is just brilliant. This is a trick I use for my homemade hot chocolate too, and folks always ask what the secret is!
Common Mistakes Making Easy Chocolate Cupcakes
One of the most common issues folks have is the "sinking middle." This usually happens if you open the oven door too early to peek. The sudden drop in temperature causes the delicate air bubbles to collapse before the structure has set. Resist the urge!
Wait until at least the 18 minute mark before you even think about opening that door.
Another pitfall is using cold ingredients. If your egg and buttermilk are straight from the fridge, they won't emulsify properly with the oil and sugar. You might end up with a batter that looks curdled or cupcakes that have a greasy, uneven texture. Just set them out on the counter an hour before you start.
It makes a world of difference.
Why did my cupcakes sink?
This is almost always due to underbaking or opening the oven door too soon. If the center hasn't reached about 98°C, the structure isn't strong enough to hold up the weight of the dome. Another culprit could be expired baking soda.
If your soda is more than six months old, it might have lost its "oomph."
How do I avoid tough cupcakes?
The "tough" texture comes from over mixing. Once you add the flour to the wet ingredients, you want to be as gentle as possible. Switch from a vigorous whisk to a folding motion with a spatula if you are worried. Stop the second you see no more dry flour streaks.
| Problem | Root Cause | Solution |
|---|---|---|
| Dry Crumb | Overbaking | Check at 18 mins with a toothpick. |
| Flat Tops | Too much liquid | Measure the boiling water precisely. |
| Grainy Frosting | Sugar not sifted | Always sift your powdered sugar first. |
- ✓ Use room temperature eggs and buttermilk for a smooth emulsion.
- ✓ Sift the cocoa powder to prevent tiny bitter lumps in your sponge.
- ✓ Don't overfill the liners - 2/3 full is the magic number.
- ✓ Let the cupcakes cool entirely on a rack before you even touch the frosting.
- ✓ Use a cookie scoop to fill the liners evenly for uniform baking.
If you find yourself with extra frosting, don't toss it! It is actually amazing when spread between two cookies or even used as a dip for pretzels. If you enjoy a good cocoa based treat, you might find that the frosting technique here is very similar to what I use for my Texas sheet cake recipe, which is another Midwestern staple that never fails to please a crowd.
Scaling the Recipe for Any Crowd
If you are baking for a big school event, you can easily double this recipe. Just be careful with the spices and leavening. When doubling, I usually only use 1.5 times the salt to keep the flavor balanced. You'll likely need to bake in batches unless you have a massive oven.
Don't try to cram two trays on the same rack, or the air won't circulate properly, and you'll get uneven baking.
For a small household, you can halve the recipe. Since it calls for one egg, just whisk the egg in a small bowl and use about half of it (roughly 2 tablespoons). Use a smaller bowl for mixing so you don't lose half your batter to the sides of a giant container.
The baking time remains roughly the same, but start checking a few minutes early just in case.
When doubling, I find it helps to reduce the liquid just a tiny bit, maybe by 10%, to ensure the structure remains stable. Larger batches of batter can sometimes get a bit heavy. Also, if you're doubling the frosting, make sure your mixer can handle that much volume, or do it in two separate goes to keep it light and airy.
Common Kitchen Myths Debunked
Many people believe that "more leavening equals more lift." This is a total myth. If you add too much baking soda, the cupcakes will rise too fast, the bubbles will pop, and the whole thing will collapse into a flat, soapy tasting mess. Stick to the measurements; they are there for a reason!
Another one I hear a lot is that you must use expensive "European style" butter for frosting. While that butter is delicious on toast, for a standard American buttercream, regular unsalted butter from the grocery store works perfectly fine.
The key is the aeration beating it until it is light rather than the price tag on the wrapper.
Finally,, some folks think you need a specific "cake flour" for these. While cake flour can make a sponge very delicate, it can also make it too fragile to hold up a heavy swirl of buttercream. All purpose flour is the "Goldilocks" choice here.
It has enough protein to give the cupcake a bit of backbone while still being tender enough for a dessert.
How To Store Your Chocolate Cupcakes
Since these are oil based, they actually stay moist longer than butter based cakes. You can keep them in an airtight container at room temperature for up to 3 days. If it's a particularly humid week in the Midwest, you might want to pop them in the fridge after day two to keep the buttercream from getting too soft.
For long term storage, these freeze beautifully. I recommend freezing the cupcakes without the frosting if possible. Just wrap them individually in plastic wrap and then put them in a freezer bag. They'll stay fresh for up to 3 months.
When you're ready for a treat, let them thaw on the counter for an hour, and they'll taste like they just came out of the oven.
If you have leftover frosting, you can store it in the fridge for a week or the freezer for a month. Just make sure to bring it back to room temperature and give it a good whip with a whisk before using it.
It might look a little separated when it thaws, but a vigorous stir will bring it right back to that silky consistency.
Decorating Your Homemade Chocolate Cupcakes
Now for the fun part! You don't need to be a professional decorator to make these look great. A simple star tip (like a Wilton 1M) is my go to. Start in the center, spiral outward, and then spiral back up toward the middle. It creates that classic "bakery swirl" that always looks impressive.
If you don't have piping bags, a simple sandwich bag with the corner snipped off works in a pinch. You won't get the fancy ridges, but a smooth mound of frosting is just as tasty. For a homestyle look, I sometimes just use an offset spatula to swirl the frosting on top and then top it with some colorful sprinkles or a single maraschino cherry.
| Fresh Version | Shortcut Version | Flavor Impact |
|---|---|---|
| Real Buttermilk | Water + Vinegar | Fresh version is much creamier |
| Natural Cocoa | Pre mixed Cocoa | Fresh version has a deeper "dark" note |
| Sifted Sugar | Straight from Bag | Sifted version is significantly smoother |
If you want to get really fancy, try filling the centers. Once the cupcakes are cool, use a small knife to carve out a little hole in the middle. Fill it with some salted caramel, marshmallow fluff, or even a bit of extra frosting. Put the "lid" back on and frost over it.
It is a wonderful surprise for whoever takes that first bite. These little touches are what turn a simple afternoon project into something folks will talk about at the next neighborhood gathering. Right then, I think you're ready to get baking. Just remember to keep it stress free and enjoy the process!

Recipe FAQs
Why did my cupcakes sink in the middle?
Opening the oven door too early causes this. A sudden temperature drop collapses the structure before it sets, so avoid peeking until at least the 18-minute mark.
How to ensure a smooth batter consistency?
Use room temperature ingredients like your egg and buttermilk. Cold items prevent proper emulsification, leading to a curdled look; if you enjoyed mastering this stable emulsion, you can use the same technique in our simple dip recipe.
Is it necessary to use boiling water in the batter?
How to tell when the cupcakes are finished baking?
Insert a toothpick into the center of the cupcake. If the toothpick comes out clean or with just a few moist crumbs, they are ready to pull from the 350°F oven.
Should I frost the cupcakes while they are warm?
No, wait until they are completely cooled. Frosting a warm cupcake causes the butter in the buttercream to melt, resulting in a runny, messy finish instead of a fluffy topping.
How to fill the cupcake liners properly?
Fill each liner only 2/3 full. This prevents the batter from overflowing the muffin tin and ensures each cupcake rises into a perfect, uniform shape.
Is it true I can substitute cold milk for the buttermilk?
No, this is a common misconception. Buttermilk provides the necessary acidity to react with the baking soda, which is vital for the proper rise and tender texture of these cupcakes.
Moist Chocolate Cupcakes
Ingredients:
Instructions:
Nutrition Facts:
| Calories | 454 kcal |
|---|---|
| Protein | 3.9 g |
| Fat | 21.4 g |
| Carbs | 62.8 g |
| Fiber | 1.8 g |
| Sugar | 48.2 g |
| Sodium | 158 mg |
