Ahi Tuna Tataki: Perfectly Seared Steaks at Home
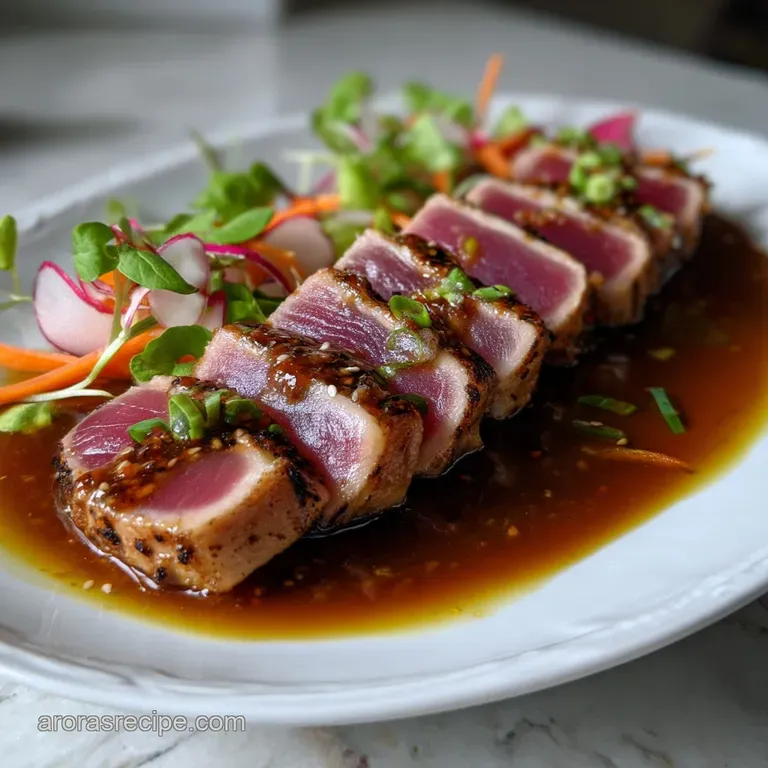
Coastal Classic: Perfectly Pan-Seared Ahi Tuna Tataki with Zesty Soy-Ginger Dressing
I swear, the sound of that quick, sizzling sear on a beautiful piece of Ahi Tuna is one of the most satisfying things in the kitchen. When the edges turn crispy and golden brown, releasing that slightly nutty aroma into the air, you know you’re moments away from magic.
It smells like a fancy five star sushi bar in your own home.
Honestly, this Ahi Tuna recipe is my secret weapon for entertaining or just when I’m feeling lazy but want a serious flavour reward. Restaurant quality fish preparation can be intimidating, but I can promise you that learning how to cook Ahi Tuna is shockingly fast.
It takes less active time than microwaving leftover pasta.
So, ditch the menu prices and let's make this unbelievably elegant Pan-Seared Ahi Tuna Steak Dinner Ideas happen. I’ve refined this technique over years of trial and error (yes, I’ve accidentally made tuna jerky before never again!), and these steps focus purely on what works, every single time.
The Art of Tataki: Why the Sear Matters
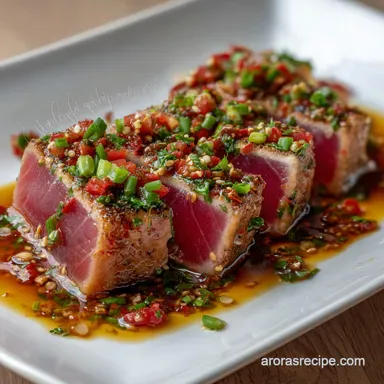
This preparation highlights the sheer, stunning quality of the fish by lightly kissing the exterior with heat. The Japanese technique of tataki is all about contrast: a hot, savoury, crunchy crust wrapped around a cold, buttery, pristine raw centre.
If you go too slow or your pan isn't hot enough, you ruin the definition, turning the whole beautiful block grey. We are aiming for a quarter inch sear maximum, leaving the rest untouched and perfectly ruby red.
Beyond the Restaurant: Achieving Sashimi Quality at Home
Listen, the single most important rule when you want to cook Ahi Tuna like this? You must buy sashimi grade fish. Since you will barely apply heat, you need to trust your supplier implicitly. Building a sophisticated Sauce For Seared Ahi Tuna requires the utmost faith in the main ingredient.
My trick is to find a reputable fishmonger and simply ask, "Is this safe to eat raw?" If they look shifty, walk away.
What is Ahi Tuna, and Why is it the Star of This Dish?
Ahi Tuna also known as Yellowfin Tuna is the undisputed champion for searing because it’s lean, firm, and boasts a powerful, meaty flavour. Unlike Atlantic Tuna, which can be oilier, Ahi holds its shape perfectly, making it ideal for the block cut required for tataki.
When you get a really good piece of Ahi Tuna, it requires minimal seasoning; its flavour profile is already complex and delicious, ready to shine in this Ahi Tuna Steak Recipe . Learning to cook ahi tuna properly allows its natural buttery texture to emerge.
Ingredients You Need for Ahi Tuna

Gathering your gear is half the battle. This pan-seared Ahi Tuna relies on the freshest ingredients, so don't skimp on the ginger or the lime juice.
Main Ingredients Notes
- Sashimi Grade Ahi Tuna Steak (Block): Look for a uniform, dense block, ideally 1.5 inches thick. This geometry is crucial for the searing process, giving you distinct sides to work with. If it's a tapered, odd shape, it won't cook evenly.
- Black Sesame Seeds: These aren’t just pretty; they provide a slight, delicious crunch and nutty flavour that complements the fish beautifully.
- Fresh Lime Juice: Key to that zesty Soy-Ginger dressing. Please, do not use the stuff from a plastic bottle. Fresh is always best.
Easy Substitutions and Swaps
Sometimes you’re missing one crucial item, right? Don't panic. Here are the swaps that actually work:
| Ingredient Missing | Viable Substitution | Why It Works |
|---|---|---|
| Black Sesame Seeds | White Sesame Seeds or Poppy Seeds | Still provides the necessary crunch and contrast for the crust. |
| Rice Vinegar | Apple Cider Vinegar (use slightly less) | Offers necessary sharpness and acidity without overpowering the dressing. |
| Honey/Maple Syrup | Small Pinch of Sugar (dissolved) | Balances the intense saltiness of the soy sauce and acidity of the lime. |
| Neutral Oil for Searing | Ghee or Avocado Oil | You need a high smoke point fat to handle the intense heat required for the sear. |
Essential Equipment
You absolutely need a cast iron skillet for the best results. Seriously, this isn't negotiable if you want a perfect crust. Cast iron retains and distributes heat more evenly than anything else, which is necessary when trying to cook Ahi Tuna quickly and fiercely. You also need a sharp knife.
I repeat: A sharp knife is non-negotiable for slicing the delicate, cooked Ahi.
How to Make Ahi Tuna step-by-step
Let's crack on. This is the fun part, but it requires speed and focus. The actual cooking time for the Ahi Tuna is under five minutes!
Preparation Steps
- Dressing Duty First: Whisk the soy sauce, fresh lime juice, rice vinegar, sesame oil, finely grated ginger, minced garlic, honey, and chili flakes in a small bowl. Give it a minute, then taste it. It should be bright, tangy, salty, and a tiny bit spicy. Set aside to let the flavours marry.
- Dry, Dry, Dry: Pat that beautiful Ahi Tuna block until it is bone dry. Then, lightly oil all four sides. This helps the sesame crust adhere and prevents steaming.
- Crust Creation: Mix the salt, pepper, and sesame seeds on a flat plate. Roll the four large length sides of the tuna block firmly into the mixture, pressing gently to make sure the sesame coating is thick and even.
Cooking Process
- Heat Inferno: Place your cast iron skillet over high heat. Add the Neutral Oil (at least 2 tablespoons). Wait until the oil is shimmering and you see wisps of smoke it must be aggressively hot.
- Sear Hard and Fast: Using tongs, carefully place the coated Ahi Tuna block into the screaming hot pan. Hear that satisfying hiss? That’s what you want. Sear for exactly 45 to 60 seconds.
- Rotate: Rotate the block and sear the next three sides, 45 60 seconds each. Crucial: Never leave the tuna lying flat in the pan, or the heat will creep into the centre. Quick movements are key to cook Ahi Tuna perfectly.
- Rest Time: Immediately remove the seared fish and let it rest on a cutting board for five minutes. Do not skip this. Resting stabilizes the crust and allows the internal temperature gradient to settle.
Expert Tips for Success
When I first started doing this, I constantly overcooked the centre because I was afraid of the heat. But trust me, you need the heat to be high. It creates a thermal barrier quickly. If your pan is large enough, don't crowd it. Also, if you want another great Asian inspired flavour bomb for your next batch, try this Tuna Steak Marinade: Umami Rich Ginger Ninja Recipe next time!
Chef’s Note: The tuna should be screaming cold when it hits the searing pan. If the block is room temperature, the sear time will be too long, and you'll end up with a pink centre rather than a vibrant raw one.
Common Mistakes to Avoid
- Overcrowding the Pan: Trying to sear multiple smaller pieces at once lowers the pan temperature immediately, leading to a grey, sad sear. Cook only one block at a time.
- Skipping the Rest: If you slice the tuna right after searing, the juices (what little there are in this lean fish) will run, and the beautiful crust you worked so hard for will flake off. You must let it rest. Rest allows the crust to firm up properly for a clean slice.
- Ignoring the Dryness: Wet fish plus hot oil equals spluttering, steaming, and a terrible texture. I’ve said it before, but always pat your Ahi Tuna until it’s unbelievably dry.
Storage, Freezing, and Reheating
You’re probably going to eat all of this, let’s be real. But if you do have leftovers, you need to store them safely since the fish was kept raw in the centre.
How to Store Leftovers
Because this uses sashimi grade fish, its shelf life is short once prepped. Seal the leftover sliced Ahi Tuna tightly in an airtight container and store it in the coldest part of your refrigerator (usually the back shelf). Consume within 24 hours.
Honestly, it's best eaten within a few hours of slicing.
Freezing Instructions
Do not freeze seared Ahi Tuna. The unique characteristic of this dish is the texture difference between the crisp exterior and the raw interior. Freezing and thawing will destroy the texture, turning the inner portions mushy and the outer sear stale.
Recipe For Ahi Tuna Steaks like this should always be made fresh.
Best Reheating Methods
You don't reheat this. Serve it cold or at room temperature. If you try to reheat the slices, you will fully cook the interior, which defeats the entire purpose of the tataki preparation. Instead, serve leftover slices draped over a light salad or added cold to a bowl of broth.
What to Serve With This Dish
For a light but satisfying meal, I love serving this stunning Ahi Tuna with a great side dish like my Super Creamy Garlic Hummus Without Tahini Easy 15Minute Recipe . The creamy, savory hummus contrasts beautifully with the acidic dressing. Another great option is a simple bed of sticky rice, or perhaps a sharp, refreshing cucumber and radish salad. This Ahi Tuna Steak Dinner Ideas is versatile, but try to keep the sides light and bright.

Recipe FAQs
What grade of Ahi Tuna should I purchase for this recipe?
You must purchase sushi grade or sashimi grade Ahi Tuna (also known as Yellowfin or Bigeye) for this recipe. Since the center remains raw, the fish must be frozen quickly after harvest and handled specifically to ensure it is safe for consumption raw. Do not substitute with regular grocery store tuna steak.
Why did my searing crust not form properly, or why did the spices burn?
A proper crust requires very high heat and minimal moisture. Ensure the tuna is completely patted dry before applying the seasoning blend; any residual water will steam the surface instead of searing it.
If the spices burn, the pan may be too hot or you might be using too much oil; reduce the temperature slightly and keep the oil just at its smoke point.
Is it safe to freeze the leftover seared Ahi Tuna Tataki?
While you can freeze cooked or seared fish, it is highly discouraged for Tataki due to the texture degradation. Freezing and thawing will dramatically compromise the delicate, buttery texture of the raw center, resulting in a mushy consistency. It is best to consume Tataki within 24 hours of preparation.
How do I ensure the center of the tuna remains perfectly cool and raw?
Before searing, place the tuna loin in the freezer for about 10-15 minutes; this helps insulate the center and keeps it very cold. When searing, the cooking time should be very brief about 60 to 90 seconds total using extremely high heat to cook only the exterior perimeter quickly.
The quick chill prevents the heat from penetrating the precious interior.
Can I substitute Soy Sauce with something else in the Soy-Ginger Dressing?
Yes, if you require a gluten-free option, Tamari is an excellent 1:1 substitute that maintains a similar savory depth. For a reduced sodium version, use low-sodium soy sauce. If avoiding soy altogether, coconut aminos can provide a slightly sweeter, though less intense, alternative.
How thick should the Ahi tuna loin be for the best searing results?
The ideal thickness for a proper sear-to-raw ratio is 1.5 to 2 inches (3.8 to 5 cm). A thinner cut may cook through completely before the crust forms, while a thicker cut requires a longer sear, increasing the risk of overcooking the margins. Consistency in thickness is key for uniform searing.
Pan Seared Ahi Tuna Steak Tataki
Ingredients:
Instructions:
Nutrition Facts:
| Calories | 346 kcal |
|---|---|
| Protein | 14.7 g |
| Fat | 18.9 g |
| Carbs | 26.2 g |
