Homemade Stuffing: the Proper Sage Onion Classic with a Crispy Top
- Elevating Your Roast Dinner: The Proper Pub-Style Sage and Onion Stuffing (A Crispy Classic)
- The Science of Sensation: Why This Stuffing Stands Out
- Securing the Essentials: Ingredients for the Best Homemade Stuffing
- The Method: How to Create Your Crispy Pub-Style Stuffing
- Mastering the Bake: Chef's Tips and Troubleshooting Stuffing Fails
- Practical Prep: Making Homemade Stuffing Ahead and Storage Guide
- Finishing Touches: The Best Pairings for Sage and Onion Stuffing
- Recipe FAQs
- 📝 Recipe Card
Elevating Your Roast Dinner: The Proper Pub-Style Sage and Onion Stuffing (A Crispy Classic)
The aroma of proper homemade stuffing baking is the immediate trigger for my brain to declare it officially "dinner time." We’re talking about that rich, buttery scent of slow cooked onions mingling beautifully with potent, fresh sage.
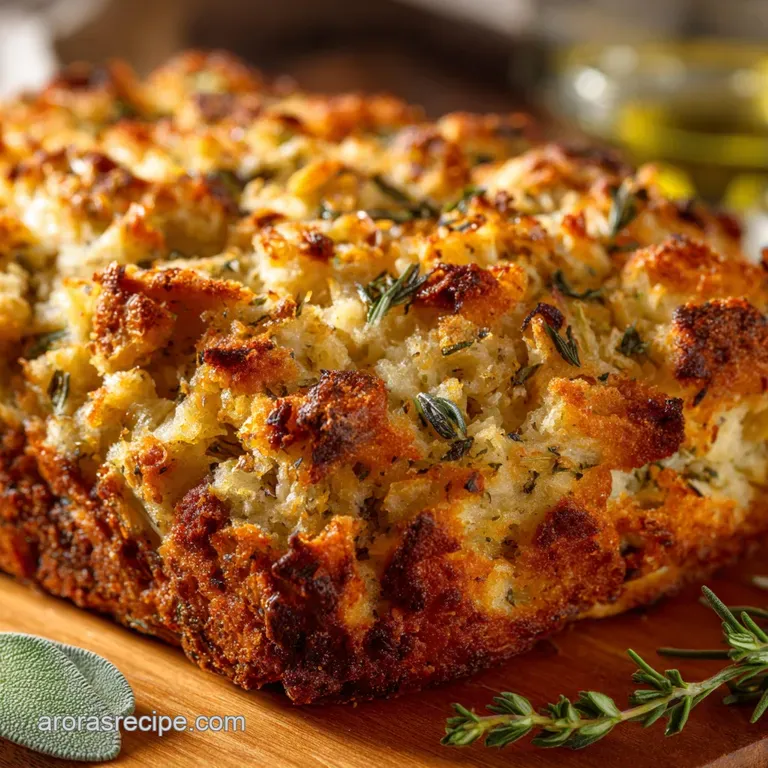
When you finally scoop it out, you want the edges to be gloriously golden and shatteringly crisp, giving way to an interior that is unbelievably moist and tender.
Forget those dry, crumbly boxes from the store; making traditional stuffing from scratch is shockingly simple and uses ingredients you probably already have lying around. It’s the ultimate comfort side, cheap to produce, and perfect for flexing your home cook muscles without breaking a sweat.
It’s a foundational recipe every serious cook needs in their arsenal.
Today, we are diving deep into the secrets of achieving the perfect traditional stuffing recipe —the kind that elevates a simple roast chicken or turkey dinner into a genuine feast.
Let’s crack on and guarantee you a deeply flavoured, perfectly textured, homemade stuffing in the oven that will steal the show.
The Science of Sensation: Why This Stuffing Stands Out
This isn't just about mixing things in a bowl; we are engineering textural perfection here. The trick to the best homemade stuffing recipe with bread is controlling moisture and fat content, ensuring maximum flavor payoff in every bite.
This is the logic that separates the pros from the people who end up with sad, wet mush.
Defining the Classic: Stuffing vs. Dressing
Here in my kitchen, we call it stuffing, end of story. Technically, "stuffing" is cooked inside the cavity of the bird, soaking up those glorious drippings, while "dressing" is cooked outside in a separate dish.
Because cooking stuffing inside the bird can sometimes be a food safety nightmare and prevents us from getting that perfect crisp top we are making a baked homemade stuffing dish today. It delivers all the flavor without any of the worry.
Why 'Pub-Style' Means Maximum Flavor
When I say "pub-style," I mean rich . This recipe leans heavily on a proper amount of unsalted butter and fresh herbs. The butter does double duty: it provides that deep, satisfying flavor, and it helps coat the bread cubes, sealing them off slightly so they don't instantly disintegrate when the stock is added.
A Quick Look at the Stuffing Timeline
The most crucial stage of making classic stuffing is the prep, specifically the bread drying time. You absolutely need hard, dry bread cubes that behave like sponges, ready to soak up all that rich liquid and flavor. That day or two of air drying is non-negotiable for perfect texture.
Achieving the Golden Crisp Top Crust
Ever wondered why some stuffing looks pale and flat? It's usually because the top surface lacks fat. We address this by reserving a couple of tablespoons of cold butter and dotting it across the top just before baking.
That cold butter melts slowly, basting the crust as it bakes , resulting in that glorious golden brown, crispy finish we all crave.
The Role of Fat and Stock for Perfect Internal Moisture
Hot stock is essential for dissolving the butter and aromatics, ensuring even distribution of moisture throughout the mixture. Using hot stock also helps the dry bread absorb the liquid quickly and consistently.
The fat (butter) is critical because it prevents the starch in the bread from becoming a gluey, wet mess; it keeps the individual cubes defined and moist.
Optimizing the Sage and Onion Ratio
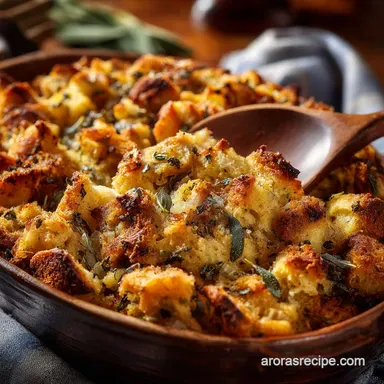
Sage is the star of this show, but it can be overpowering if you use dried stuff exclusively. We use a generous amount of fresh sage and thyme. Trust me on this: slow sautéing the onions and celery (our mirepoix) until they are completely translucent concentrates their sweetness, which balances the earthy bitterness of the sage beautifully.
Securing the Essentials: Ingredients for the Best Homemade Stuffing
This recipe relies on simple, high-quality basics. If you stick to fresh herbs and a proper artisan bread, you are already halfway to success.
Choosing the Right Bread Base (Stale is Best)
I use sourdough or a good quality white sandwich loaf because they hold their structure well, even when soaked. Stale bread is mandatory. If you use fresh bread, the moisture in the loaf will combine with the added stock, guaranteeing a very sad, soggy result. Dry it out properly!
Fresh Herbs vs. Dried: Achieving Peak Herbaceousness
While dried herbs are great for convenience, fresh herbs offer brightness and depth that dried simply can’t match in a recipe this focused. We use lots of fresh sage and thyme, which is the heart and soul of this traditional stuffing recipe .
Binding Agents: The Secret to Structure and Flavor
We use eggs and stock to bind the mixture. The eggs provide structure, ensuring the stuffing holds its shape when sliced, and they also add richness. The hot stock dissolves the butter and transfers the vegetable flavors into the bread cubes.
Troubleshooting Ingredient Swaps (Focusing on Bread and Fat types)
If you need to make quick swaps, here are my tried and true fixes that maintain texture and flavour:
| Ingredient | Viable Substitute | Notes |
|---|---|---|
| Sourdough/White Bread | gluten-free loaf or Cornbread | Must be cubed and dried completely! |
| Unsalted Butter | high-quality olive oil or Rendered Bacon Fat | Adjust salt levels if using bacon fat. |
| Chicken/Turkey Stock | Vegetable Broth or Water + Better Than Bouillon | Ensure it’s low sodium so you control the seasoning. |
| Fresh Sage/Thyme | 1 tsp Dried Sage + 1/2 tsp Dried Thyme | Add dried herbs directly to the sautéed aromatics. |
The Method: How to Create Your Crispy Pub-Style Stuffing
This is where the magic happens, but remember: be gentle. Over mixing leads to disaster.
Preparing the Aromatics and Toasting the Bread
First things first: the bread. Cut it into uniform cubes (about the size of large croutons) and let it dry out overnight on a tray. If you are in a rush, a quick 15 minutes in a warm oven will make them crisp and ready.
Next, we sauté. Melt the majority of that glorious butter and slowly cook the diced onions and celery until they are completely translucent this takes about ten minutes and is non-negotiable for sweet flavour concentration.
Stir in the garlic and fresh herbs and cook for just sixty seconds until you smell that incredibly nutty, potent aroma.
Combining and Testing for Ideal Consistency
Transfer the dried bread cubes to your biggest mixing bowl. Pour the hot, buttery aromatic mixture over the bread and toss gently to coat everything. Then, combine the hot stock and the lightly whisked eggs.
When adding the liquid, pour about 90% of the stock egg mix over the bread. Gently fold it with a spatula. The ideal consistency is moist but still loose; you should see some defined bread cubes. If it looks like watery porridge, you've added too much stock.
Chef's Note: If you want to take this classic base and turn it into brilliant appetizers, roll some of the mixture into balls and bake them separately. They make fantastic Stuffing Balls: Proper Sausage Sage Recipe for a Crisp Finish .
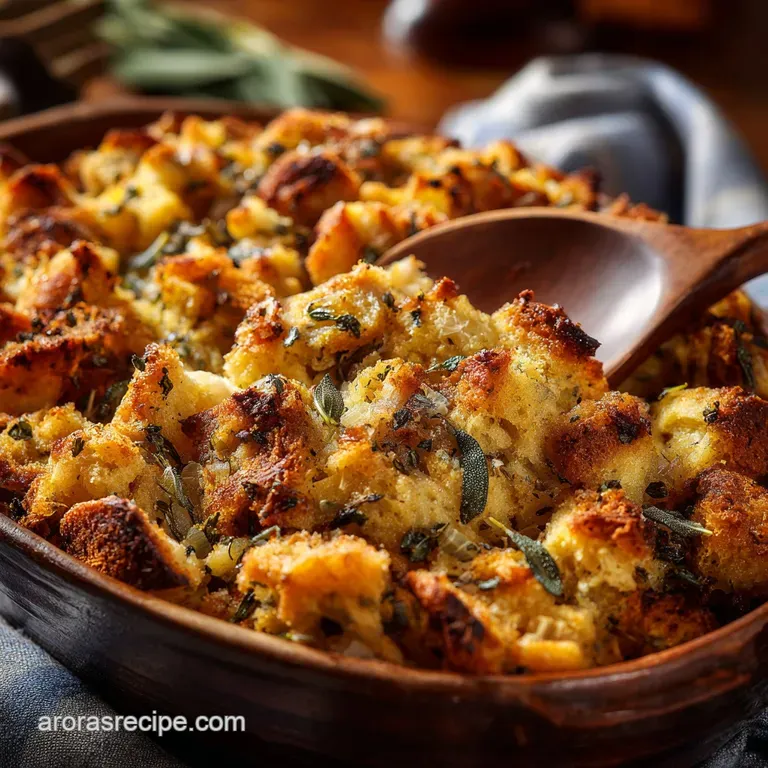
The Critical Baking Stages (Covered vs. Uncovered)
Transfer the mixture to a 9x13-inch baking dish. Do not press it down. Loose filling is key to great texture. Dot the top with the remaining cold butter. Bake uncovered at 375°F (190°C) for the full 40– 45 minutes.
We skip the covering step here because the butter dots provide enough moisture, and we are aiming for maximum crust development.
Temperature Checks for Absolute Perfection
For food safety, especially if you added sausage or other meats, the internal temperature of the stuffing should hit 165°F (74°C). For this purely vegetarian base, you simply need to ensure the interior is steaming hot and set, not runny.
Mastering the Bake: Chef's Tips and Troubleshooting Stuffing Fails
We’ve all been there: reaching into the oven only to find either a brick of dryness or a disappointing wet mess. These tips fix the most common catastrophes.
Diagnosing and Fixing Soggy Stuffing
The cause: Under dried bread or too much liquid added upfront. The fix: If your stuffing is too wet before baking, mix in a handful of plain, dried Panko breadcrumbs or 1/4 cup of dried bread cubes right before it goes into the oven.
The Panko will absorb the excess moisture during the bake, firming up the mixture nicely.
The Ultimate Trick for a Super Crispy Crust
If 35 minutes have passed and the top isn't as golden as you'd like, brush the surface lightly with one more tablespoon of melted butter, then crank the oven temperature up to 425°F (220°C) for the last 5 minutes.
Watch it closely, as this method works incredibly fast.
Ensuring Even Flavor Distribution
You must season the vegetables generously before adding the liquid. Seasoning the wet mixture later won't integrate as well. Taste and adjust the salt and pepper in the sautéed aromatics —if they taste slightly too salty, they are probably perfect for flavouring the mountain of bland bread.
Avoiding Over Mixing (Preventing Gluey Texture)
The minute you add the stock, starch molecules in the bread activate. If you stir too vigorously or too long, the starch turns into a sticky glue. Use a gentle folding motion with a spatula and stop the minute you achieve even moistness.
Practical Prep: Making Homemade Stuffing Ahead and Storage Guide
Stuffing is an ideal make-ahead dish, which is a total lifesaver during the holidays. Proper planning ensures fresh flavors and perfect texture.
Chilling and Storing the Unbaked Mixture
You can fully assemble this stuffing up to the point of baking (Step 12). Cover the dish tightly with plastic wrap and refrigerate for up to 2 days. When ready to bake, let it sit out on the counter for 30 minutes to take the chill off.
You may need to add an extra 5– 10 minutes to the total baking time since it’s starting cold.
Best Practices for Freezing Baked Stuffing
Stuffing freezes brilliantly! Once fully baked and cooled, wrap the entire dish (or individual portions) tightly in two layers of foil and one layer of plastic wrap. It keeps well for up to 3 months.
To reheat, thaw overnight in the fridge, remove the plastic, and reheat covered with the foil at 350°F (175°C) until piping hot throughout (about 25– 30 minutes).
Finishing Touches: The Best Pairings for Sage and Onion Stuffing
This classic homemade stuffing for turkey pairs perfectly with virtually anything roasted. If you're looking for something different, consider using this base as a topping for a creamy casserole. It gives the soft dish a necessary textural crunch it's brilliant with something like a Broccoli Cheese Casserole With Stuffing: Ultra Creamy Crispy Topping .
Serve generous portions alongside rich, dark gravy and a tart cranberry sauce. The richness of the butter and sage requires that acidic counterpoint to truly sing. Honestly, though, sometimes I just make a big batch of this stuffing, warm up some gravy, and call it a light supper. It’s that good.

Recipe FAQs
Why did my homemade stuffing come out dry and crumbly?
Dryness is usually due to insufficient liquid or overbaking uncovered. Ensure you use enough high-quality broth to fully moisten the bread mixture before baking, aiming for a texture that holds its shape when gently squeezed.
If baking separately, cover the dish tightly with foil for the majority of the cooking time to trap steam and moisture, removing the foil only for the last 15 minutes to develop that glorious crispy top crust.
How do I prevent my stuffing from becoming soggy or dense?
Sogginess happens when the bread cubes are too small, allowing them to absorb too much liquid and collapse. Use day-old or properly toasted 1 inch bread cubes that can hold their structure.
Crucially, avoid over packing the stuffing into the baking dish, as this compacts the ingredients and prevents proper air circulation, resulting in a steamed, dense texture.
Should I bake the stuffing inside the turkey or separately?
For optimal results and food safety, it is highly recommended to bake stuffing separately in a casserole dish. When baked inside the turkey, the stuffing must reach an internal temperature of 165°F (74°C), which often leads to an overcooked turkey breast.
Baking it separately also allows you to control the moisture levels and guarantees a beautifully crispy, golden top.
What is the best type of bread to use for classic sage and onion stuffing?
A sturdy, rustic loaf such as sourdough, French baguette, or country white bread works exceptionally well. These breads have the structure necessary to hold their shape after absorbing the cooking liquid without disintegrating.
Avoid very soft, pre-sliced sandwich bread, which will easily turn into a paste like consistency when mixed with the stock.
Can I make this Sage and Onion stuffing vegetarian or vegan?
Yes, this recipe is highly adaptable. Simply replace the traditional chicken or turkey stock with a robust, flavorful vegetable broth to maintain the necessary moisture.
If the recipe calls for butter to sauté the onions and celery, substitute it with a high-quality vegan butter alternative or olive oil.
How long does homemade stuffing keep, and how should I store leftovers?
Leftover stuffing should be cooled rapidly and refrigerated within two hours of cooking. Properly stored in an airtight container, it will remain safe and flavorful for 3 to 4 days.
When reheating, ensure the stuffing reaches an internal temperature of 165°F (74°C) to eliminate any potential bacteria.
Can I prepare the stuffing mixture ahead of time?
You can mix all the dry ingredients, herbs, and sautéed aromatics (onions, celery) the day before and store them separately. However, it is best to add the stock and any eggs just before baking.
Adding the liquid too far in advance can result in overly mushy bread cubes, compromising the texture of the final bake.
Pub Style Homemade Stuffing Recipe
Ingredients:
Instructions:
Nutrition Facts:
| Calories | 614 kcal |
|---|---|
| Protein | 7.7 g |
| Fat | 54.1 g |
| Carbs | 24.2 g |
