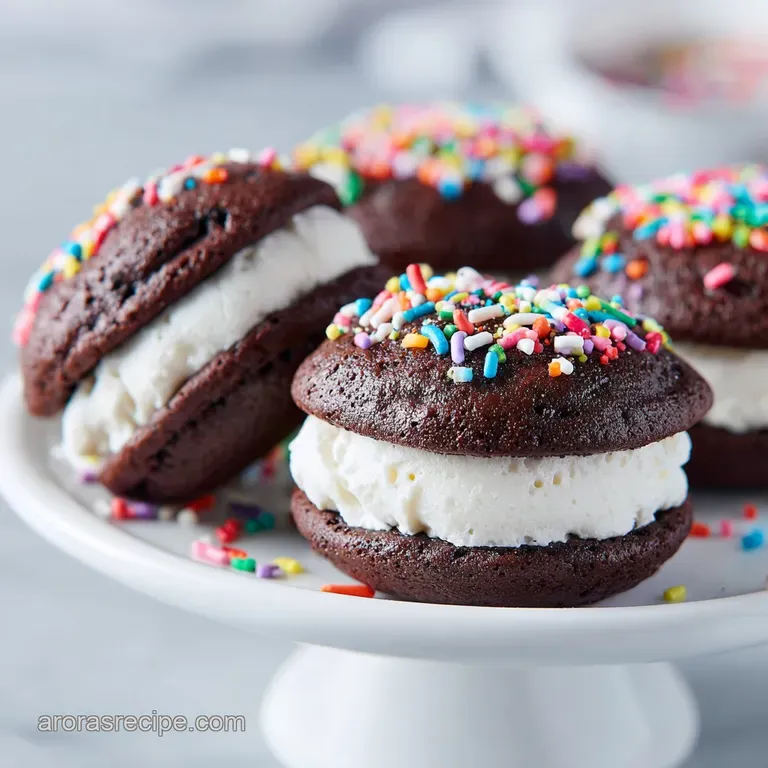
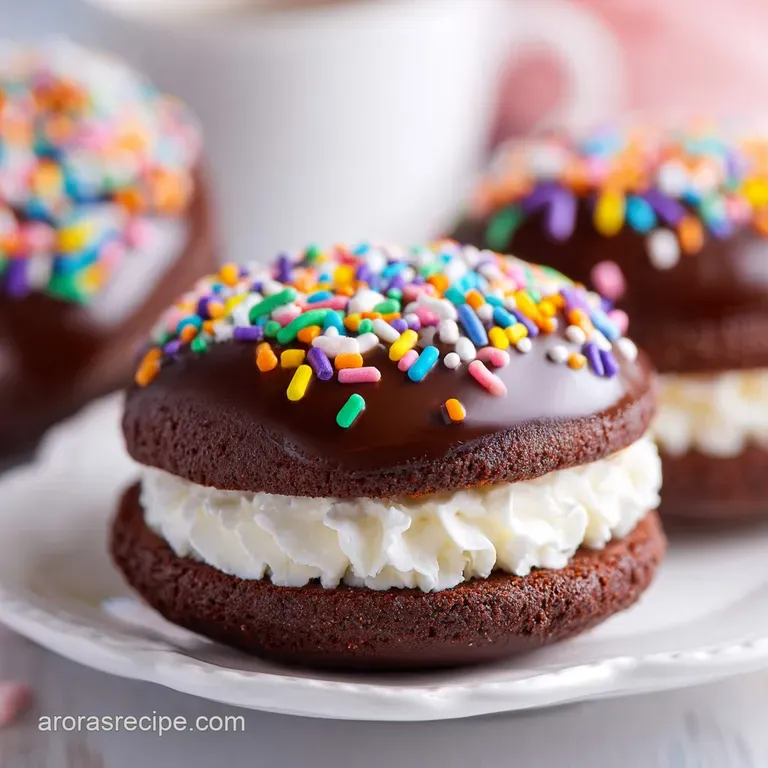
Wickedly Good Whoopie Pies: Soft and Rich
- Time: Active 20 minutes, Passive 10 minutes, Total 30 minutes
- Flavor/Texture Hook: Velvety dark chocolate cakes paired with a fluffy, pillowy marshmallow cream.
- Perfect for: Weekend bake sales, hearty Midwestern potlucks, or a stress free family dessert.
- Baking the Best Wickedly Good Whoopie Pies
- Why These Chocolate Sandwiches Stay Soft
- Making Sense of Your Baking Numbers
- Selecting the Right Elements for Success
- Simple Tools for Stress Free Baking
- Mixing and Assembling the Perfect Treat
- Fixing Common Problems and Simple Mistakes
- Smart Ingredient Swaps and Fun Variations
- Storing Your Treats to Keep Fresh
- How to Serve Your Homestyle Desserts
- Recipe FAQs
- 📝 Recipe Card
Baking the Best Wickedly Good Whoopie Pies
The moment that deep, earthy scent of Dutch process cocoa hits the hot air of your kitchen, you know you're in for something special. It is a warm, enveloping aroma that reminds me of snowy Sunday afternoons in the Midwest, where the oven stayed on all day just to keep the house cozy.
I remember the first time I pulled these out of the oven; the tops had this beautiful, subtle crackle, and they were so light they practically bounced when I touched them. There is something deeply satisfying about a dessert that looks like a giant cookie but eats like a decadent piece of handheld cake.
We are keeping things totally stress free here because, honestly, life is complicated enough without wrestling with a temperamental pastry dough. These are the kind of treats that don't care if they aren't perfectly circular or if the filling oozes a little bit out the side. In fact, that's part of their charm.
We're going for a homestyle feel that values a hearty bite and a silky finish over fancy decorations. You'll get that iconic contrast between the dark, almost black cake and the snowy white filling that has defined this classic for generations.
You don't need a professional pastry degree to get these right on the first try, but a few smart choices with your ingredients will make a massive difference. We are focusing on getting that specific texture somewhere between a soft baked cookie and a sponge cake that makes wickedly good whoopie pies so addictive.
By the time we’re done, you’ll have a dozen of these beauties ready to be wrapped in plastic and tucked into lunchboxes or shared over a big pot of coffee with friends.
Why These Chocolate Sandwiches Stay Soft
If you’ve ever had a dry, crumbly whoopie pie, you know why the science matters. To get that signature velvety crumb, we rely on a few key reactions that happen the moment the batter hits the heat. The biggest secret is the interaction between the buttermilk and the leavening agents.
Because buttermilk is acidic, it reacts immediately with the baking soda to create tiny bubbles of carbon dioxide. This lifts the heavy cocoa batter, ensuring the cakes don't turn into dense hockey pucks.
Another reason this recipe is a winner is the specific way we handle the fats. We aren't just melting butter; we are aerating it. When you beat room temperature butter with granulated sugar, the sharp edges of the sugar crystals carve tiny tunnels into the fat. These tunnels trap air, which expands in the oven.
This is how the layers stay separate and the cakes maintain their domed shape without spreading into flat pancakes on your baking sheet.
Acidic Reaction: The buttermilk tenderizes the gluten in the flour, resulting in a crumb that feels like silk on the tongue.
Aeration Stability: Beating the butter for a full 3 minutes creates a structural web that prevents the cakes from collapsing after cooling.
Cocoa Neutralization: Using Dutch process cocoa means the acidity is already neutralized, allowing the chocolate flavor to be more intense and the color to stay dark.
Moisture Retention: The marshmallow fluff in the filling acts as a stabilizer, keeping the center airy while preventing the cakes from drying out.
| Feature | Fast Method (Cake Mix) | Classic Method (This Recipe) |
|---|---|---|
| Texture | Spongy and very light | Dense, velvety, and hearty |
| Flavor | Sweet with artificial notes | Deep, dark chocolate and real butter |
| Prep Time | 10 minutes | 20 minutes |
While a cake mix shortcut can work when you're in a massive rush, it often lacks the structural integrity to hold the marshmallow filling. The classic scratch method gives you a sturdier cake that can handle being handled.
You want that satisfying "thump" when you set a whoopie pie down, knowing it isn't going to crumble into a million pieces.
Making Sense of Your Baking Numbers
When you’re in the middle of a baking session, having clear targets makes everything feel more manageable. I like to keep a few specific benchmarks in mind so I’m not constantly second guessing if the oven is too hot or if the cakes are actually done.
For this recipe, we are looking for a total bake time of 10 minutes at 350°F (180°C). If you go much longer, you risk losing that moisture that makes them "wickedly good."
If you need to scale this recipe up for a big school event or a family reunion, it’s quite simple. Doubling the recipe works perfectly, though I suggest keeping the salt and spices at about 1.5 times the original amount to avoid over seasoning.
If you're cutting it in half because you just want a small treat for two, beat your egg in a small bowl first and then measure out exactly half by weight or volume. This ensures the fat to flour ratio stays spot on.
1. The Temperature Checkpoints
Keeping your butter at the right consistency is the difference between success and a greasy mess. You want it soft enough that your finger leaves an indent, but not so soft that it’s shiny or melting. This usually means taking it out of the fridge about 45 minutes before you start.
If your kitchen is particularly warm, 30 minutes might be plenty.
2. The Doneness Cues
You’ll know the cakes are ready when the tops look matte rather than shiny and they spring back immediately when gently pressed with a fingertip. If the indent stays, give them another 60 seconds. We want them to be just set so they stay tender.
3. Scaling for Large Crowds
When baking in batches, always let your baking sheets cool down between rounds. Putting cold batter on a hot sheet will cause the bottoms to spread too fast, ruining that perfect dome shape. A quick rinse under cool water and a wipe with a towel does the trick if you only have one or two pans.
Selecting the Right Elements for Success
The ingredients for these whoopie pies are mostly pantry staples, but how you choose them matters for the final result. I always reach for Dutch process cocoa because it gives that dark, professional look without the harshness of natural cocoa. It’s a smart splurge that pays off in every single bite.
If you're on a tight budget, store brand all purpose flour works just as well as the expensive stuff here because we aren't looking for high protein content.
| Component | Role in Recipe | Pro Secret |
|---|---|---|
| Dutch process Cocoa | Provides deep color and mellow chocolate flavor | Sift it twice to remove every single stubborn lump |
| Buttermilk | Tenderizes the crumb and activates the baking soda | Use full fat for the most decadent, silky texture |
| Marshmallow Fluff | Creates a stable, airy, and sweet filling | Beat it with softened butter until it looks like a cloud |
If you find yourself without buttermilk, don't panic. You can make a quick substitute by adding a tablespoon of lemon juice or white vinegar to a cup of regular milk and letting it sit for five minutes. It won't be quite as thick as the real deal, but it provides the necessary acidity to get that rise.
It's a stress free fix that keeps you from having to run to the store in the middle of your bake.
For the filling, stick to unsalted butter so you can control the saltiness yourself. A tiny pinch of salt in the filling actually helps cut through the sweetness of the powdered sugar and fluff, making the whole thing taste more balanced.
It’s those little homestyle tweaks that take a recipe from good to something people will actually ask you for.
The Ingredient List: 420g all purpose flour (The structural base) 100g Dutch process cocoa powder (The flavor engine) 1.5 tsp baking powder (For lift) 1 tsp baking soda (For browning and height) 1 tsp salt (To balance the sugars) 170g unsalted butter, room temperature (The moisture) 400g granulated
sugar (For sweetness and texture) 1 large egg (The binder) 1 tbsp vanilla extract (For aroma) 240ml buttermilk (The tenderizer) 215g marshmallow fluff (The filling base) 225g unsalted butter, softened (For the cream) 180g powdered sugar (For stability) 1 tsp vanilla extract (For the filling)
Simple Tools for Stress Free Baking
You don't need a kitchen full of gadgets to make a great dessert. A sturdy stand mixer, like a KitchenAid, is a massive help for creaming the butter and sugar, but a hand mixer works just as well it just takes a bit more elbow grease. The one tool I really insist on is a 2 tablespoon cookie scoop.
It ensures every single cake is exactly the same size, which means they all finish baking at the exact same time.
Parchment paper is another non negotiable for me. These cakes are soft and can be a bit sticky on the bottom when they first come out of the oven. If you try to bake them directly on a greased pan, you might end up with half the cake stuck to the metal.
Parchment allows them to slide right off, keeping those beautiful flat bottoms intact for easy sandwiching.
Chef Tip: If you don't have a cookie scoop, use two spoons and try to keep the mounds about the size of a golf ball. Just remember that uneven sizes will lead to uneven baking!
Mixing and Assembling the Perfect Treat
- Preheat your oven to 350°F (180°C) and line baking sheets with parchment paper or silicone mats. Note: This ensures the cakes don't stick and rise evenly.
- In a medium bowl, sift together the 420g flour, 100g cocoa powder, 1.5 tsp baking powder, 1 tsp baking soda, and 1 tsp salt. Note: Sifting prevents dry pockets of cocoa in your batter.
- In a stand mixer, beat 170g of butter and 400g granulated sugar on high for 3 minutes until pale and voluminous.
- Add the egg and 1 tablespoon of vanilla extract, beating until the mixture reaches a whipped cream consistency.
- Set mixer to low. Add the dry ingredient mixture in three parts, alternating with the 240ml buttermilk, mixing only until streaks disappear.
- Using a 2 tablespoon cookie scoop, drop batter onto prepared sheets. Bake for 10 minutes until domes are springy.
- Transfer to a wire rack to cool completely. Note: Filling a warm cake will cause the marshmallow fluff to melt and slide off.
- Prepare the filling by beating the remaining 225g of butter, 215g marshmallow fluff, 180g powdered sugar, and 1 tsp vanilla until aerated and fluffy.
- Spread or pipe a generous amount of filling onto the flat side of one cooled cake.
- Top with another cake and press gently until the filling reaches the edges.
Fixing Common Problems and Simple Mistakes
Even the most seasoned home cooks run into trouble sometimes. The most common issue I see with whoopie pies is the "sticky top" syndrome. This usually happens if you wrap them too tightly in plastic while they are still slightly warm, or if your kitchen is very humid.
If this happens, a light dusting of cocoa powder or powdered sugar can fix the stickiness without ruining the flavor.
Another thing to watch for is over mixing. Once you add the flour to the wet ingredients, you want to be as gentle as possible. If you over work the batter, you'll develop too much gluten, and your "wickedly good whoopie pies" will turn out tough and bread like rather than soft and cakey.
Stop the mixer the second you don't see any more white streaks of flour.
Why Your Cakes Are Flat
If your cakes are spreading out into thin puddles instead of holding their dome, your butter was likely too warm. When the butter is already near its melting point before it hits the oven, it can't hold those air bubbles we worked so hard to create.
Try chilling the batter for 15 minutes before scooping if your kitchen is hot.
Why the Filling is Runny
A runny filling is usually the result of butter that was too soft or not enough powdered sugar. If your kitchen is warm, the marshmallow fluff can become very fluid. You can fix this by popping the bowl of filling into the fridge for 10 minutes and then beating it again.
It should stiffen up enough to hold its shape between the cakes.
| Problem | Root Cause | Solution |
|---|---|---|
| Dry/Crumbly Cake | Over baked or too much flour | Reduce bake time by 1 min and check flour measurements |
| Filling Squishing Out | Filling is too warm or too soft | Chill filling for 15 mins before assembling |
| Cakes Sticking to Pan | No parchment used or under baked | Use parchment paper and ensure tops spring back |
Common Mistakes Checklist:
- ✓ Always sift your cocoa powder to avoid bitter, dry lumps in the cake.
- ✓ Don't skip the 3 minute creaming time for the butter and sugar.
- ✓ Use room temperature buttermilk to prevent the butter from seizing up.
- ✓ Wait until the cakes are 100% cool before adding the filling.
- ✓ Avoid over crowding the baking sheet; leave at least 2 inches between cakes.
Smart Ingredient Swaps and Fun Variations
One of the best things about this recipe is how adaptable it is. If you're looking for a budget friendly twist, you can actually use this same filling technique for other desserts. For instance, this marshmallow cream is incredible when paired with a lemon pie recipe if you want to experiment with a citrusy sandwich. The acidity of the lemon would play beautifully against the sweetness of the fluff.
If you aren't a fan of marshmallow fluff, you can swap it out for a classic cream cheese frosting. It changes the flavor profile to something a bit more tangy and sophisticated, though it won't have that same "cloud like" bounce that the original filling offers.
Just keep in mind that cream cheese filling must be refrigerated, whereas the marshmallow version is a bit more stable at room temperature for short periods.
1. The Peanut Butter Twist
For the chocolate and peanut butter lovers, you can fold 1/2 cup of creamy peanut butter into the filling after you've beaten the butter and fluff together. It adds a hearty, salty kick that balances the rich Dutch cocoa perfectly. This is a massive hit at any Midwestern potluck.
2. The Mocha Variation
If you want to deepen the chocolate flavor, add a teaspoon of instant espresso powder to your dry ingredients. You won't necessarily taste the coffee, but it acts like a highlighter for the cocoa, making the chocolate flavor pop in a way that feels much more expensive than it actually is.
3. Using Cake Mix as a Base
If you're in a total time crunch, you can use a dark chocolate cake mix. Just reduce the water called for on the box by half and add an extra egg to make the batter thick enough to scoop. It won't have the same velvety crumb as the scratch version, but it'll get the job done in a pinch!
| Original Ingredient | Substitute | Why It Works |
|---|---|---|
| Dutch process Cocoa | Natural Cocoa Powder | Use 1/4 tsp extra baking soda to neutralize the acidity |
| Buttermilk | Milk + Lemon Juice | Provides the necessary acid for the rise. Note: Slightly thinner batter |
| Marshmallow Fluff | Cream Cheese Frosting | Tangier flavor. Note: Requires constant refrigeration |
A quick note on the cocoa swap: if you use natural cocoa (like Hershey’s regular), your cakes will be lighter in color and have a slightly more "fruity" chocolate taste. The Dutch process is what gives that classic deep mahogany look, but both will taste great.
Storing Your Treats to Keep Fresh
Whoopie pies are one of those rare desserts that often taste better the next day. As they sit, the moisture from the filling migrates slightly into the cake, making the whole thing incredibly soft and cohesive. I usually wrap each one individually in plastic wrap.
This prevents them from sticking to each other and keeps the air out, which is the enemy of a soft cake.
In the fridge, they will stay fresh for up to 5 days. If you're planning on keeping them longer, they actually freeze beautifully. Just place the wrapped pies in a freezer safe bag. When you're ready for a treat, let them thaw on the counter for about 30 minutes.
It's the perfect way to have a "wickedly good" dessert ready whenever the craving hits.
To reduce waste, if you have extra filling left over, don't throw it away! It makes an incredible dip for pretzels or graham crackers. You can also store the leftover filling in an airtight container in the fridge for up to a week.
Just give it a quick whip with a fork before using it again to bring back that airy texture.
How to Serve Your Homestyle Desserts
While these are traditionally a "grab and go" kind of snack, there are ways to make them feel a bit more special. Serving them with a cold glass of milk is the classic way, but they are also fantastic alongside a hot cup of black coffee.
The bitterness of the coffee cuts right through the sweet marshmallow center, making for a very grown up treat.
If you’re serving these at a party, I like to cut them in half. It shows off that beautiful white and black contrast and makes them a bit easier for people to nibble on while they mingle. Plus, whoopie pies are quite filling one of these is a very hearty serving!
1. The Dessert Platter
Arrange the pies on a large wooden board with some fresh raspberries or strawberries. The tartness of the fruit provides a nice break from the rich chocolate. It looks beautiful and takes almost zero effort to put together.
2. The Frozen Treat
On a hot summer day, try eating one of these straight from the freezer. The filling gets a bit chewy, almost like a marshmallow flavored ice cream. It's a fun way to change up the experience and is always a hit with kids.
3. Debunking the Dry Cake Myth
Many people think whoopie pies are supposed to be dry like a cookie, but that’s just a sign of over baking. A true whoopie pie should be moist and tender. Searing the outside doesn't "trap moisture"; instead, the high fat content from the butter and the moisture from the buttermilk are what keep it soft.
If your cakes are dry, check your oven temperature it might be running hotter than the dial says!

Recipe FAQs
Where can I buy Wicked Whoopies?
Purchase them directly through the official Wicked Whoopies website or their physical retail stores in Maine. They offer a variety of classic flavors available for nationwide shipping.
Where are Wicked Whoopie pies made?
They are handcrafted in Maine. The company maintains a dedicated bakery space where they produce their signature pies in small batches.
Which pie is best for diabetics?
None of these are suitable for a diabetic diet. The recipe relies on significant amounts of granulated sugar, marshmallow fluff, and powdered sugar, which will cause a rapid spike in blood glucose levels.
Do Wicked Whoopie pies need to be refrigerated?
Yes, refrigeration is recommended to maintain quality. Keeping them in the fridge helps them stay fresh for up to 5 days, though they should be wrapped individually to prevent the cake from drying out.
How to achieve the perfect springy cake texture?
Bake the cakes at 350°F (175°C) for exactly 10 minutes. Pull them from the oven as soon as the domes feel springy to the touch to ensure they remain soft rather than dry.
Is it true I should use a high speed mixer for the cake batter?
Yes, use a stand mixer on high for the initial step. You must beat the 170g of butter and granulated sugar for 3 minutes until the mixture is pale and voluminous to create the correct base structure.
How to prevent the cakes from sticking to the pan?
Line your baking sheets with parchment paper or silicone mats before dropping the batter. Never place the batter directly onto an unlined pan, as the delicate cakes will adhere to the surface during the 10-minute bake time.
Wickedly Good Whoopie Pies

Ingredients:
Instructions:
Nutrition Facts:
| Calories | 644 calories |
|---|---|
| Protein | 6.9 g |
| Fat | 28.8 g |
| Carbs | 95.7 g |
| Fiber | 2.6 g |
| Sugar | 63.2 g |
| Sodium | 375 mg |
