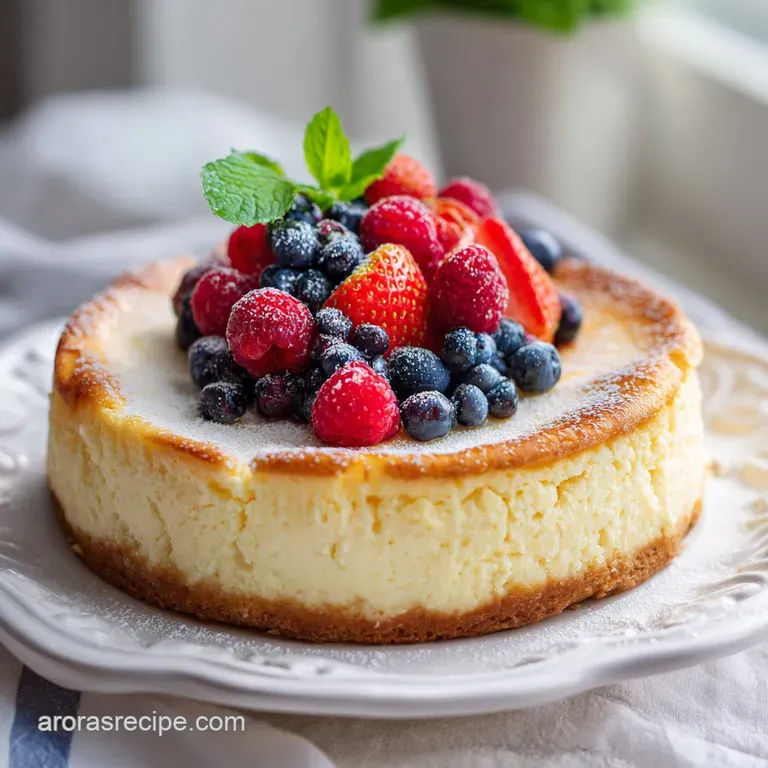
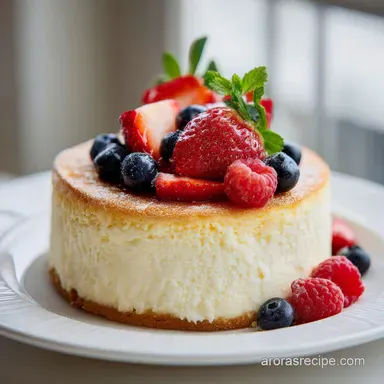
Classic Cheesecake: Creamy and Silky
- Time: Active 20 minutes, Passive 75 minutes, Total 95 minutes
- Flavor/Texture Hook: A velvety, melt on-the tongue filling paired with a buttery, salt kissed graham cracker crust.
- Perfect for: Holiday gatherings, Sunday family dinners, or whenever you need a reliable crowd pleaser.
- Master This Reliable Classic Cheesecake Recipe
- Why This Works
- Stats for This Creamy Bake
- Choosing Quality Items for Success
- Simple Tools for Smooth Batter
- Steps to Reach Velvety Perfection
- Fixing Common Cake Texture Issues
- Creative Swaps for Different Flavors
- Storing and Saving Every Bite
- Best Ways to Present Slices
- Recipe FAQs
- Troubleshooting Common Issues
- Recipe FAQs
- 📝 Recipe Card
Master This Reliable Classic Cheesecake Recipe
The first time I pulled a perfectly smooth cheesecake out of my oven, I felt like I had won the lottery. There is something about the way the light hits that ivory surface, without a single crack or blemish, that makes all the patience worth it.
I remember my grandmother always making a version of this for our Midwestern family reunions. The smell of toasted graham crackers and sweet cream would fill her kitchen, and we all knew we had to wait until the next day to sneak a slice. That anticipation is part of the magic.
This classic cheesecake recipe is designed for the home cook who wants that heavy, New York style density without spending hours wrestling with a leaking water bath. I have spent years figuring out how to get that signature tang and silky finish using simple, honest ingredients you can find at any local grocery store.
We are talking about block cream cheese, real sour cream, and a splash of lemon to brighten everything up. It is hearty, honest, and completely stress free once you know the rhythm of the steps.
If you have ever felt intimidated by the idea of a baked dessert, let those worries go. We are going to focus on the things that actually matter, like the temperature of your ingredients and the way you mix them. This is not about being fancy, it is about creating a dessert that people will talk about for weeks.
You do not need a culinary degree to make this, just a bit of patience and a good springform pan. Let's get into what makes this work so well every single time.
Why This Works
Low Speed Emulsification: Mixing the cream cheese and sugar on low speed prevents excess air from being trapped in the batter, which is the primary cause of rising and subsequent cracking as the cake cools.
Carryover Heat Management: Turning off the oven and cracking the door allows the internal temperature to stabilize slowly, ensuring the proteins set firmly without the shock of cold air causing the structure to collapse.
Acidic Structural Integrity: The inclusion of lemon juice and sour cream does more than add flavor, it helps denature the egg proteins at a controlled rate, leading to a tighter, more velvety crumb.
Fat to Protein Ratio: Using full fat block cream cheese and sour cream provides the necessary lipid structure to support the weight of the cake, preventing it from becoming grainy or weeping moisture.
| Thickness | Internal Temp | Rest Time | Visual Cue |
|---|---|---|---|
| 2 Inches | 145°F (63°C) | 1 hour | Edges set, 2 inch center jiggle |
| 2.5 Inches | 150°F (66°C) | 1.5 hours | Matte surface, slight wobble |
| 3 Inches | 155°F (68°C) | 2 hours | Firm perimeter, center jiggles like flan |
The jiggle is the most important part of knowing when to stop. If you wait until the center is firm, you have overbaked it, and it will likely crack as it cools down. Think of it like a custard, it needs that residual heat to finish the job while it sits in the cooling oven.
Stats for This Creamy Bake
When we talk about a recipe like this, consistency is our best friend. This dish serves 12 people comfortably, making it the ideal choice for a larger family gathering or a potluck.
The total time involved is about 95 minutes of actual kitchen work and baking, though you do need to account for the overnight chill. That chilling time is when the flavors really settle and the texture transforms from a soft mousse into a dense, sliceable dream.
| Ingredient | Science Role | Pro Secret |
|---|---|---|
| Cream Cheese | Primary Structure | Use block form only; tub varieties contain too much air and water for baking. |
| Sour Cream | Moisture & Tang | Acts as a softener for the cheese proteins, creating a creamier mouthfeel. |
| Large Eggs | Binding Agent | Add them last to minimize air bubbles; they are the "glue" that holds the fat together. |
It is tempting to try and speed things up by using warm ingredients or skipping the cooling phase, but I have learned the hard way that cheesecake obeys the laws of physics. Each component has a job to do.
The sugar isn't just for sweetness, it actually interferes with the egg proteins to keep them from getting too rubbery.
Choosing Quality Items for Success
Before you start, make sure every single cold item is sitting on your counter. I usually pull my cream cheese and eggs out at least two hours before I plan to bake. Cold cream cheese is the enemy of a smooth batter, it will leave tiny lumps that no amount of mixing can fully erase later.
- 1.5 cups Graham cracker crumbs: These provide the structural base. Why this? Essential for that classic, sandy, nostalgic crunch.
- 5 tbsp Unsalted butter, melted: This acts as the glue for your crust. Why this? Provides a rich, buttery flavor without adding extra salt.
- 2 tbsp Granulated sugar: Used in the crust for a bit of caramelization. Why this? Helps the crumbs bind together during the initial bake.
- 0.25 tsp Sea salt: A tiny pinch to balance the sweetness. Why this? Cuts through the richness of the butter and sugar.
- 32 oz Full fat block cream cheese: The heart of the recipe. Why this? Provides the dense, creamy foundation required for this style.
- 1 cup Granulated sugar: For the filling sweetness. Why this? Dissolves into the cheese for a smooth, grit free texture.
- 1 cup Full fat sour cream: Adds moisture and a hint of acidity. Why this? Softens the heavy cheese for a velvety finish.
- 1 tbsp Vanilla bean paste: For deep, aromatic flavor. Why this? Offers those beautiful black specks and a more intense aroma than extract.
- 1 tsp Fresh lemon juice: To brighten the palate. Why this? Provides the necessary acid to balance the heavy fats.
- 4 Large eggs: The structural backbone. Why this? Sets the custard like filling so it holds its shape.
| Original Ingredient | Substitute | Why It Works |
|---|---|---|
| Graham Crumbs | Digestive Biscuits | Similar texture but slightly less sweet. |
| Vanilla Bean Paste | Pure Vanilla Extract | Use 1:1 ratio. Note: You will lose the visual bean specks. |
| Sour Cream | Full fat Greek Yogurt | Similar acidity and fat content. Note: May produce a slightly tangier cake. |
If you are hosting a holiday dinner, this cake pairs beautifully with a Sweet Potato Casserole for a truly hearty spread. Both dishes share that comforting, traditional feel that makes a meal feel special.
Simple Tools for Smooth Batter
You do not need a kitchen full of gadgets to pull this off, but a few specific items make the process much easier. A 9 inch springform pan is non negotiable here. Because the cake is so delicate, you cannot flip it out of a regular cake pan. The removable sides are what allow you to showcase that beautiful crust.
I also highly recommend using a stand mixer if you have one. It allows for a very consistent, slow speed which is crucial for keeping air out of the batter. If you only have a hand mixer, just be sure to use the lowest setting possible and keep the beaters submerged.
A flexible silicone spatula is also a must for scraping down the sides of the bowl. You would be surprised how much unmixed cream cheese hides at the bottom!
Finally,, a wire rack for cooling is helpful to allow air to circulate under the pan. This helps the crust stay crisp rather than steaming against the counter. For those who enjoy the flavors of autumn, you might also like my moist pumpkin bread which features a similar creamy frosting profile and uses many of the same basic baking tools.
Steps to Reach Velvety Perfection

- Preheat your oven to 325°F (160°C). Mix the graham cracker crumbs, melted butter, 2 tbsp sugar, and salt until it resembles wet sand. Note: Ensuring the butter is fully incorporated prevents a greasy crust.
- Press the mixture firmly into the bottom and 1 inch up the sides of a 9 inch springform pan. Use the bottom of a flat measuring cup to get a tight, even layer.
- Bake the crust for 10 minutes until fragrant and slightly golden. Remove from oven and let it cool completely on a wire rack.
- Lower the oven temperature to 300°F (150°C). Note: This lower temp is key for a creamy, crack free interior.
- In a stand mixer fitted with a paddle attachment, beat the 32 oz softened cream cheese and 1 cup sugar on low speed until perfectly smooth and emulsified.
- Add the sour cream, vanilla, and lemon juice. Mix on low speed until combined, scraping down the sides of the bowl frequently.
- Add eggs one at a time, mixing on the lowest speed just until the yellow disappears to avoid incorporating air.
- Pour the batter into the cooled crust. Bake at 300°F for 65-75 minutes until the edges are set but the center still has a slight wobble.
- Turn off the oven and crack the door slightly. Allow the cheesecake to cool inside the oven for 1 hour to prevent cracking from temperature shock.
- Remove from oven, cool to room temperature on a wire rack, then refrigerate for at least 6 hours until firm and chilled through.
Fixing Common Cake Texture Issues
One of the most frustrating things is pulling a cake out only to see a giant canyon forming down the middle. This usually happens because the cake was shocked by a sudden change in temperature or it stuck to the sides of the pan as it shrunk. As the cake cools, it naturally contracts.
If the edges are stuck to the metal, the center has to pull apart, creating a crack.
Solving Surface Cracks
If your cake cracks, it is usually a sign of overbaking or cooling too fast. The low and slow method we use here, combined with the oven door crack trick, minimizes this. If it happens anyway, do not panic!
A simple fruit topping or a thin layer of sweetened sour cream can hide any imperfections while adding another layer of flavor.
| Problem | Root Cause | Solution |
|---|---|---|
| Lumpy Filling | Cold Cream Cheese | Ensure cheese is room temp; beat cheese alone before adding sugar. |
| Soggy Crust | Butter Leaking | Wrap the bottom of the pan in foil; ensure crumbs are pressed tight. |
| Grainy Texture | Overbaked Eggs | Remove from oven while the center is still wobbly; use a thermometer. |
Handling a Lumpy Batter
If you notice lumps after adding the eggs, you cannot simply keep mixing, or you will incorporate too much air. Instead, try passing the batter through a fine mesh sieve into a new bowl. This will catch the bits of unblended cheese and give you that silk like finish you are after.
Common Mistakes Checklist
- ✓ Always use room temperature ingredients (cheese, eggs, and sour cream).
- ✓ Avoid over mixing once the eggs are added to prevent air bubbles.
- ✓ Do not open the oven door during the first 60 minutes of baking.
- ✓ Let the cake cool in the oven with the door cracked for a full hour.
- ✓ Use a thin knife to run around the edge of the pan after the oven cooling phase.
- ✓ Chill the cake for at least 6 hours before attempting to slice it.
Creative Swaps for Different Flavors
While I love a classic cheesecake recipe as it is, sometimes you want to mix things up. You can easily swap the graham crackers for crushed Oreo cookies or ginger snaps for a different crust profile.
If you use Oreos, you might want to reduce the added sugar in the crust slightly since the cookies are already quite sweet.
For a citrus twist, increase the lemon juice to a tablespoon and add a teaspoon of fresh lemon zest. This creates a much brighter, more summer appropriate dessert. If you want something richer, you can replace the vanilla bean paste with a bit of almond extract, though a little goes a long way with almond.
Decision Shortcut
- If you want a denser, New York style, use all cream cheese and skip the sour cream.
- If you want a lighter, mousse like texture, fold in two whipped egg whites at the very end.
- If you want a shorter prep time, use a pre made graham cracker crust (though it won't be as thick).
| Method | Time | Texture | Best For |
|---|---|---|---|
| Oven Bake | 75 mins | Dense & Creamy | Traditional Celebrations |
| Stovetop (Steamed) | 50 mins | Soft & Custard like | Small batches/No oven |
Storing and Saving Every Bite
Cheesecake is actually one of the best desserts for making ahead because it needs that time in the fridge to set properly. I actually think it tastes better on day two once the vanilla and lemon have had time to fully infuse into the cream.
Storage: Keep the cake in the refrigerator, tightly covered with plastic wrap or in an airtight container, for up to 5 days. If you have already sliced it, place a piece of parchment paper against the cut sides to keep them from drying out.
Freezing: This cake freezes beautifully. Wrap the whole cake (or individual slices) in a double layer of plastic wrap and then a layer of aluminum foil. It will stay fresh for up to 3 months. To thaw, simply place it in the fridge overnight.
Do not thaw at room temperature, as this can cause the texture to become mushy.
Zero Waste: If you have leftover crust crumbs that didn't make it into the pan, save them in a jar. They make an excellent topping for yogurt or vanilla ice cream. Any small broken bits of cheesecake can be folded into a batch of brownie batter for "cheesecake swirled brownies."
Best Ways to Present Slices
To get those clean, professional looking slices, you need a sharp knife and a tall glass of hot water. Dip the knife into the water, wipe it dry with a clean towel, and make one clean cut. Repeat this process for every single slice.
It sounds tedious, but it prevents the cheese from sticking to the blade and tearing the next piece.
I like to serve this plain to let the quality of the cheese shine, but a simple berry compote or a drizzle of salted caramel never hurts. In the Midwest, we often serve it with a big dollop of whipped cream on the side. Whatever you choose, make sure the cake is cold when you serve it.
A room temperature cheesecake loses that satisfying, dense bite that makes it a classic.
Debunking Baking Myths
One common myth is that you must use a water bath to prevent cracks. While a water bath provides moisture, you can achieve the same results by using a lower oven temperature and controlled cooling. Another myth is that you can substitute low-fat cream cheese. Please don't!
The structure depends on the fat content; low-fat versions often have fillers that result in a rubbery texture. Finally,, some say you should beat the batter until it is fluffy. In reality, fluffiness comes from air, and air causes cracks. You want a smooth, heavy batter, not a light one.
Enjoy your baking! This recipe is a labor of love, but the look on your friends' faces when they take that first bite is worth every minute of waiting. It is hearty, sweet, and exactly what a dessert should be.
Recipe FAQs
Troubleshooting Common Issues
| Issue | Solution |
|---|---|
| Use a different size pan for this recipe | You can use a 10 inch springform pan, but you will need to reduce the baking time by about 10-15 minutes since the cake will be thinner. If you use an 8 inch pan, you will likely have leftover batter, |
| Cheesecake still soft after 6 hours | If the cake feels overly soft, it might not have reached the correct internal temperature during baking, or your refrigerator might not be cold enough. Ensure you are using full fat ingredients, as st |
| Possible to over beat the cream cheese | Yes. While you want the cheese to be smooth, beating it too long or at too high a speed can incorporate too much air or even cause the fats to separate. Stop as soon as the mixture is smooth and emuls |
| How can I tell if my cream cheese is soft enough | Your finger should be able to press into the block with zero resistance, leaving a deep indentation. If the center of the block still feels firm or cold, it isn't ready. You can speed this up by cutti |

Recipe FAQs
Is it necessary to use a water bath to prevent cracks?
No, this is a common misconception. You can achieve a flawless surface by simply cooling the cake inside the turned off oven with the door cracked for one hour, which prevents the rapid temperature drop that causes structural stress.
How to ensure the cream cheese mixture is perfectly smooth?
Beat the cream cheese and sugar on low speed until fully emulsified. If you enjoyed mastering this stable emulsion technique, you can apply the same principle to our creamy homemade fudge to achieve a uniform, professional texture.
Why is room temperature essential for the ingredients?
Yes, temperature alignment is critical. Using room temperature cream cheese, eggs, and sour cream ensures they incorporate without lumps and prevents the batter from seizing during the initial mixing phase.
How to tell if the cheesecake is fully baked?
Check for a slight wobble in the center after 65-75 minutes. The edges should appear set and stable, while the middle remains soft; do not overbake, or the texture will become grainy rather than velvety.
Is it true that I should slice the cake immediately after it cools?
No, this is a common misconception. You must refrigerate the cake for at least 6 hours, preferably overnight, to allow the fats to set completely, which ensures clean, professional looking slices.
How to keep the crust from becoming soggy?
Bake the crust for 10 minutes until fragrant before adding the filling. Letting it cool completely on a wire rack before pouring in the batter creates a moisture barrier that keeps the graham cracker base firm.
How to avoid bubbles in the finished cake?
Mix on the lowest speed after adding the eggs. Adding eggs one at a time and stopping the moment the yellow color disappears prevents excess air from being whipped into the batter, which is the primary cause of rising and subsequent cracking.
Classic Cheesecake Recipe
Ingredients:
Instructions:
Nutrition Facts:
| Calories | 494 kcal |
|---|---|
| Protein | 7.9 g |
| Fat | 37.4 g |
| Carbs | 32.1 g |
| Fiber | 0.4 g |
| Sugar | 23.5 g |
| Sodium | 342 mg |
