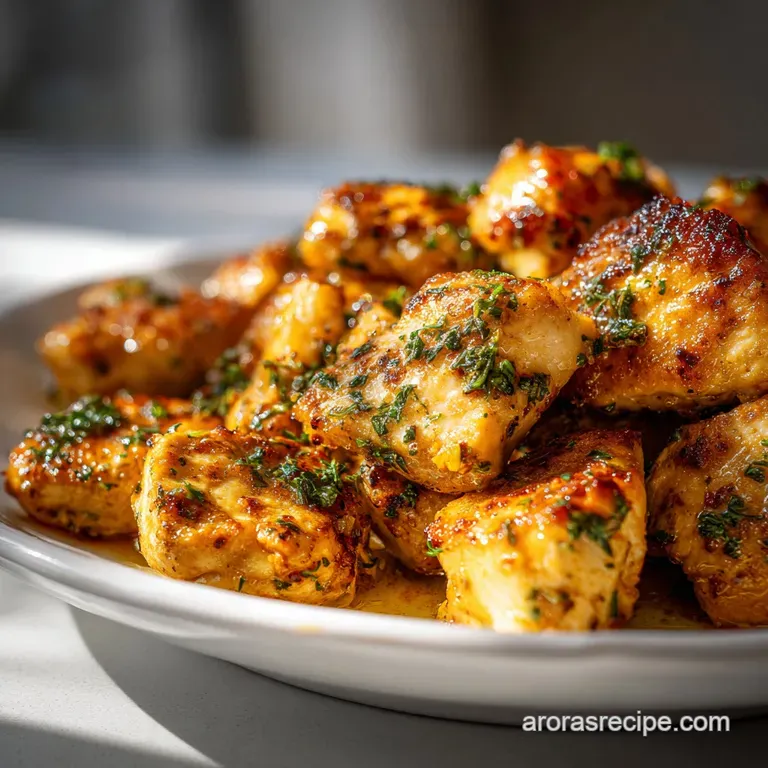
Garlic Butter Chicken Bites: Silky Glaze
- Time: Active 10 minutes, Passive 0 minutes, Total 20 minutes
- Flavor/Texture Hook: A shatter crisp exterior with a velvety, garlicky butter glaze
- Perfect for: Busy weeknights where you need a high protein dinner in under 20 minutes
- Searing the Best Garlic Butter Chicken Fast
- The Physics of the Golden Crust
- Timing and Prep Decision Guide
- Choosing the Best Flavor Components
- Essential Skillets for Browning Meat
- Step-by-Step Skillet Searing Method
- Fixing Searing and Texture Errors
- Creative Swaps and Side Dishes
- Freshness and Temperature Control Tips
- Plating for a Nashville Kitchen
- Recipe FAQs
- 📝 Recipe Card
Searing the Best Garlic Butter Chicken Fast
The sound of 1.5 lbs of chicken cubes hitting a hot cast iron skillet is honestly my favorite kitchen soundtrack. I remember the first time I tried making this; I was in such a rush that I dumped all the meat in at once. Instead of a sizzle, I got a sad, grey hiss as the chicken started steaming in its own juices.
It was a rubbery mess, and I learned right then that patience is the secret ingredient to a proper sear.
We've all been there, staring at a pack of chicken breasts wondering how to make them not taste like cardboard. This Garlic Butter Chicken is the answer because it relies on high heat and a massive hit of fresh garlic.
You're looking for that mahogany crust that shatters slightly when you bite into it, giving way to a succulent, tender center. It's the kind of meal that makes my Nashville kitchen smell like a high end steakhouse.
Trust me on this, the magic happens in those last sixty seconds when the lemon juice hits the pan. It deglazes all those browned bits the fond and swirls them into the butter. You aren't just making dinner; you're building layers of flavor in a single pan.
Let's get into how we make that happen every single time without the stress.
The Physics of the Golden Crust
Maillard Reaction: High heat causes proteins and sugars to react, creating a complex, savory brown crust on the meat's surface. Fat Emulsification: Adding chilled butter to a hot pan at the end creates a thick, glossy sauce rather than a broken, oily mess.
- Surface Dryness: Moisture is the enemy of a sear; removing water allows the temperature to rise fast enough for browning.
- Thermal Mass: Using a heavy skillet maintains a consistent temperature even when cold meat is added, preventing the temperature dip that causes steaming.
- Carryover Cooking: Chicken continues to cook after leaving the pan, so pulling it at the right moment ensures the center remains juicy.
- Acid Balance: Lemon juice cuts through the heavy milk solids of the butter, brightening the overall flavor profile.
| Method | Cook Time | Texture | Best For |
|---|---|---|---|
| Fast Skillet | 10 minutes | Crispy & Seared | Weeknight speed |
| Classic Oven | 25 minutes | Soft & Juicy | Hands off cooking |
| Air Fryer | 12 minutes | Very Crunchy | Low oil prep |
Making a quick decision on your method depends on your tools, but the skillet is the gold standard for that deep, rich crust. It’s a technique I also use for my Steak and Mushrooms recipe to get that restaurant style finish.
Timing and Prep Decision Guide
| Component | Science Role | Pro Secret |
|---|---|---|
| Avocado Oil | High Smoke Point | Allows for a 400°F sear without the oil burning or smoking out your kitchen. |
| Chilled Butter | Emulsion Agent | Chilled fat melts slowly, allowing it to bond with the lemon juice for a velvety finish. |
| Garlic Cloves | Aromatic Base | Using six whole cloves provides a deep umami punch that mellows as it hits the hot fat. |
| Smoked Paprika | Color Catalyst | Beyond flavor, the pigments in paprika help the chicken achieve a deep mahogany hue faster. |
Understanding these components helps you move faster in the kitchen. You aren't just tossing things in a pan; you're managing a series of chemical reactions that result in a better meal.
Choosing the Best Flavor Components
- 1.5 lbs chicken breasts: Cut these into uniform 1 inch cubes so they cook at the exact same rate. Why this? Larger pieces take too long to sear through the middle.
- 1 tsp kosher salt: This draws out just enough surface moisture to help with the crust. Why this? Table salt is too fine and can easily over salt the dish.
- 0.5 tsp cracked black pepper: Provides a biting heat that balances the rich butter.
- 0.5 tsp smoked paprika: Adds a hint of woodsy flavor without needing a grill.
- 2 tbsp avocado oil: Essential for over high heat cooking because it doesn't break down like olive oil.
- 4 tbsp unsalted butter: Must be cubed and chilled until the very moment you need it.
- 6 cloves garlic: Freshly minced is non negotiable here; the jarred stuff just doesn't sizzle right.
- 1 tbsp fresh lemon juice: The acidity acts as a "reset button" for your palate against the fat.
- 2 tbsp fresh Italian parsley: Adds a burst of color and a grassy freshness to finish.
- 0.25 tsp red pepper flakes: Just enough to provide a back of-the throat warmth.
| Original Ingredient | Substitute | Why It Works |
|---|---|---|
| Avocado Oil | Grapeseed Oil | Both have high smoke points (400°F+) which prevents acrid flavors during searing. |
| Chicken Breasts | Chicken Thighs | Thighs are higher in fat; they stay juicier but take 2-3 minutes longer to cook. |
| Lemon Juice | White Wine Vinegar | Provides the necessary acidity to cut the butter. Note: Slightly more aggressive tang. |
If you find yourself out of fresh parsley, don't sweat it. You can skip it, though the dish will look a little less vibrant on the plate.
Essential Skillets for Browning Meat

You really want a heavy bottomed skillet for this. A cast iron pan (like a Lodge) is my top pick because it holds heat like a champ. When you drop that chicken in, the pan temperature doesn't plummet, which is how we get that "shatter" texture on the outside.
If you don't have cast iron, a heavy stainless steel pan works well too, but stay away from thin non stick pans for this specific recipe. High heat can actually damage the coating on cheaper non stick surfaces, and you won't get nearly as much browning.
A good chef's knife is also your best friend here. Since we're cutting 1.5 lbs of chicken into 1 inch cubes, you want clean cuts. Tearing the meat with a dull blade creates jagged edges that cook unevenly and look messy.
Keep your station organized have your garlic minced and your butter cubed before the heat even goes on. This dish moves fast once it starts.
step-by-step Skillet Searing Method
- Prep the meat. Pat the 1.5 lbs of chicken cubes completely dry with paper towels. Note: This is the most important step for a good sear.
- Season thoroughly. Toss the chicken with 1 tsp kosher salt, 0.5 tsp pepper, and 0.5 tsp smoked paprika in a bowl until coated.
- Heat the pan. Place your skillet over medium high heat and add 2 tbsp avocado oil. Wait until the oil shimmers and barely wisps smoke.
- Sear the first batch. Add half the chicken to the pan in a single layer. Cook for 2-3 minutes without moving them until a deep brown crust forms.
- Finish the sear. Flip the pieces and cook for another 2 minutes. Remove to a plate and repeat with the remaining chicken.
- Sauté the aromatics. Lower the heat to medium. Add 6 cloves of minced garlic and 0.25 tsp red pepper flakes to the residual oil. Stir for 30 seconds until fragrant.
- Deglaze the skillet. Pour in 1 tbsp lemon juice, scraping up the browned bits from the bottom of the pan with a wooden spoon.
- Create the emulsion. Add the 4 tbsp of chilled, cubed butter one piece at a time. Whisk or stir constantly until a thick, glossy sauce forms.
- Combine and coat. Toss the cooked chicken and any juices back into the pan. Stir for 1 minute to coat every piece in the garlic butter.
- Garnish and serve. Remove from heat and sprinkle with 2 tbsp chopped Italian parsley. Serve immediately while the sauce is silky and hot.
Chef's Tip: If the sauce looks like it's separating or "breaking" (becoming oily), add a teaspoon of water and whisk vigorously. The water helps re bind the fat and liquids into a smooth glaze.
Fixing Searing and Texture Errors
Why Your Chicken Is Rubbery
If the chicken feels bouncy or tough, it usually means it was steamed rather than seared. This happens if you crowd the pan or if the chicken was still wet when it hit the oil. The moisture creates a jacket of steam around the meat, preventing the Maillard reaction and essentially boiling the protein.
| Problem | Root Cause | Solution |
|---|---|---|
| Grey, pale meat | Overcrowded pan | Work in batches; leave space between cubes for steam to escape. |
| Bitter aftertaste | Burnt garlic | Add garlic only at the end and keep the heat medium low. |
| Greasy sauce | Butter was too warm | Use chilled butter and whisk it in off the heat if necessary. |
Common Mistakes Checklist
- ✓ Skipping the paper towel pat down (moisture kills the sear).
- ✓ Moving the chicken too early; let it sit to build that crust.
- ✓ Using "pre minced" garlic from a jar which lacks the punch of fresh cloves.
- ✓ Cooking the chicken all the way through in the first step (it finishes in the sauce).
- ✓ Using high heat for the butter phase; high heat breaks the emulsion.
Creative Swaps and Side Dishes
This dish is incredibly versatile. For a complete meal, I love serving these bites over a bed of Chicken Fried Rice recipe. The garlic butter seeps into the rice and creates something truly special. If you're looking for something lighter, toss some asparagus spears into the pan right after you remove the chicken. They'll cook in the garlic infused oil in about 4 minutes and pick up all those savory flavors.
If you want a different flavor profile entirely, you can swap the lemon juice for a splash of heavy cream and a handful of parmesan cheese. It turns the garlic butter into a quick alfredo style glaze that kids absolutely love.
Or, keep it spicy by doubling the red pepper flakes and adding a teaspoon of honey at the end for a "hot honey" garlic vibe that is very popular here in Nashville.
| Servings | Chicken Amount | Butter Amount | Pan Size |
|---|---|---|---|
| 2 People | 0.75 lbs | 2 tbsp | 8 inch skillet |
| 4 People | 1.5 lbs | 4 tbsp | 12 inch skillet |
| 8 People | 3 lbs | 8 tbsp | Two 12 inch skillets |
When scaling up, never try to fit 3 lbs of chicken in one pan. You'll end up with a stew. Use two pans or work in three separate batches to maintain that over high heat sear we’re looking for.
Freshness and Temperature Control Tips
- Fridge: Store in an airtight container for up to 4 days. The butter will solidify, so it's best to reheat gently.
- Freezer: You can freeze the cooked chicken for up to 3 months. However, the garlic butter sauce may lose its silky texture upon thawing.
- Reheating: Avoid the microwave if possible; it makes chicken rubbery. Instead, toss the bites in a skillet over low heat with a splash of water or chicken broth to loosen the sauce.
- Zero Waste: Save any leftover garlic butter sauce! It's incredible drizzled over roasted potatoes or used as a spread for toasted sourdough the next morning. If you have extra parsley stems, don't toss them finely chop them and add them to the pan with the garlic for extra flavor.
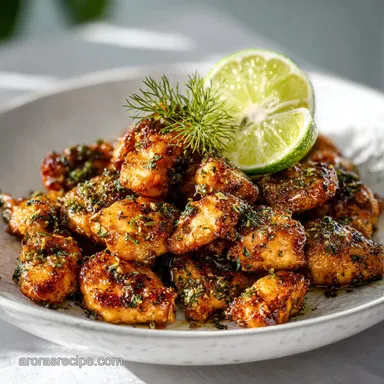
Plating for a Nashville Kitchen
When it comes to presentation, I like to keep it simple and rustic. Serve the chicken directly out of the cast iron skillet if you're having a casual family dinner. The black iron makes the golden brown chicken and bright green parsley really pop.
If you're plating individually, use shallow bowls rather than flat plates. This keeps the garlic butter sauce pooled around the chicken rather than running all over the plate.
Don't forget those numeric checkpoints for the best results: Pull the chicken when it hits an internal temp of 165°F, ensure your sear is at least 2 minutes per side, and don't skimp on those 4 tablespoons of butter.
It sounds like a lot, but it’s what creates that decadent, restaurant style finish. It's a meal that feels fancy but takes less time than ordering takeout. Right then, let's get that skillet hot!

Recipe FAQs
Is it necessary to dry the chicken thoroughly before searing?
Yes, absolutely necessary for a good crust. Excess surface moisture steams the meat instead of searing it, leading to a pale and rubbery texture.
How do I prevent the garlic butter sauce from separating or looking oily?
Use chilled butter and whisk constantly off the heat. The cold butter emulsifies slowly with the lemon juice, creating a stable, velvety glaze.
Can I use chicken thighs instead of breasts for this recipe?
Yes, chicken thighs are an excellent substitution. They are higher in fat, making them much more forgiving, though they usually require about 2 3 minutes longer to cook through.
What is the best way to reheat leftovers to maintain texture?
Reheat gently in a skillet over low heat with a splash of broth. Avoid the microwave, as it tends to make the chicken rubbery after the initial cooking process.
How do I ensure the chicken cooks evenly throughout the pan?
Cut the chicken into uniform 1 inch cubes and sear in batches. Overcrowding the pan lowers the temperature, forcing the meat to steam rather than brown.
Should I use fresh garlic or pre-minced garlic from a jar?
No, stick strictly to fresh garlic for this recipe. Fresh cloves provide the intense, sweet aromatic base needed when hitting hot fat; jarred alternatives lack the necessary depth.
What side dish pairs well with the rich garlic butter sauce?
Serve it over simple starch to soak up the sauce. This rich sauce is perfect for drizzling over rice or alongside roasted root vegetables; you could even use the technique for our Chicken Gnocchi Soup recipe to build a creamier base.
Garlic Butter Chicken Bites
Ingredients:
Instructions:
Nutrition Facts:
| Calories | 454 kcal |
|---|---|
| Protein | 53.2 g |
| Fat | 24.8 g |
| Carbs | 2.4 g |
| Fiber | 0.4 g |
| Sugar | 0.2 g |
| Sodium | 615 mg |
