Garlic Butter Pull Apart Bread: Homestyle Comfort
- Time: Active 25 minutes, Passive 2 hours, Total 2 hours 25 minutes
- Flavor/Texture Hook: Shatter crisp golden edges with a soft, buttery, herb infused center
- Perfect for: Weekend family dinners, hearty soup nights, or impressive holiday sides
- Bake This Homestyle Garlic Butter Pull Apart Bread for Comfort
- The Secret to Those Pillowy Garlic Butter Layers
- Component Analysis of Our Favorite Bread Ingredients
- Selecting Your Hearty Elements and Smart Ingredient Swaps
- Essential Tools for Your Stress Free Baking Experience
- Simple Steps to Create Your Layered Bread Loaf
- Solutions for Common Baking Hiccups and Texture Issues
- Adjusting Portions for Small Groups or Large Crowds
- Budget Conscious Swaps for Your Herb Butter
- Debunking Old School Baking Rumors and Myths
- Smart Storage Methods and Using Every Single Crumb
- Perfect Occasions for Sharing This Warm Bread
- Recipe FAQs
- 📝 Recipe Card
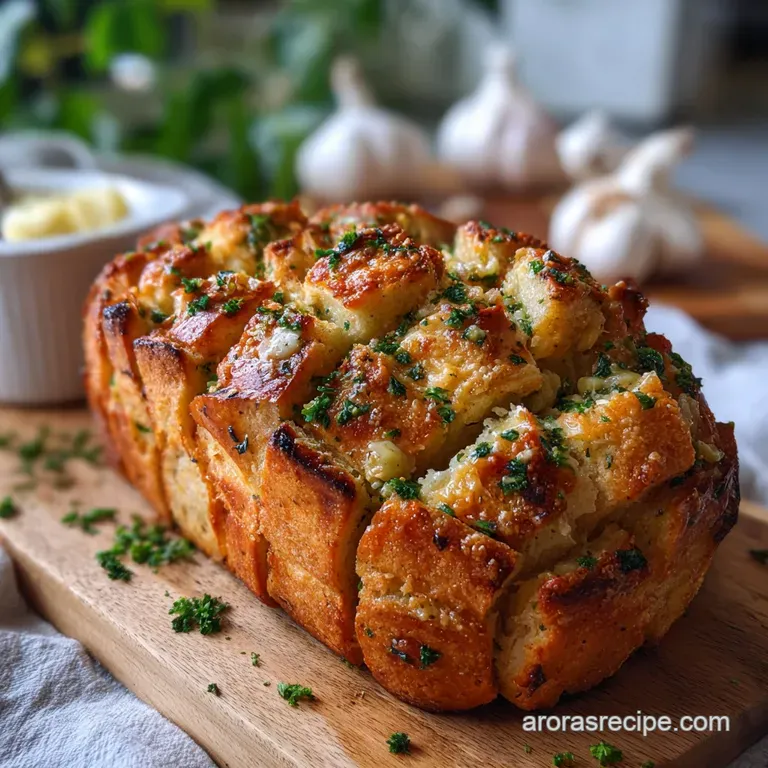
Bake This Homestyle Garlic Butter Pull Apart Bread for Comfort
Imagine walking into your kitchen and the air is thick with the scent of 30g of fresh garlic sizzling in 85g of melting butter. That’s the exact moment I knew this recipe was a winner.
I remember the first time I pulled this loaf from the oven; the top was so golden and crackling that I didn't even wait for it to cool before tearing into a corner. It was a total mess, but the texture was everything I’d ever wanted in a side dish.
This isn't your average grocery store garlic bread. We’re going from scratch with 500g of bread flour and a little secret ingredient 60g of Greek yogurt to make sure every single bite stays soft for days.
You don't need fancy equipment or a professional bakery setup to get those iconic vertical layers. It’s all about the stack, and I’m going to show you exactly how to do it without losing your mind.
We’ve all had those bakes where the bread turns out like a brick or the garlic tastes bitter. I’ve made every mistake in the book so you don’t have to. We’re focusing on a hearty, Midwestern approach here: simple ingredients, big flavors, and a result that makes your house smell like the best pizzeria in town.
Let’s get that oven preheated and talk about why this method actually works.
The Secret to Those Pillowy Garlic Butter Layers
- Yogurt Tenderization: The 60g of plain Greek yogurt introduces lactic acid, which breaks down tight gluten strands for a velvety interior.
- Honey Activation: Using 15g of honey doesn't just feed the 7g of active dry yeast; it attracts moisture to keep the bread soft.
- Thermal Bloom: Bringing the 300ml water to exactly 105°F ensures the yeast wakes up without being scalded.
- Fat Lamination: Brushing the 85g of butter between layers creates physical barriers, preventing the dough from fusing back into a solid block.
| Method | Time | Texture | Best For |
|---|---|---|---|
| Standard Oven | 30 minutes | Even browning, crispy top | Getting that classic loaf shape |
| Toaster Oven | 25 minutes | Extra crispy edges | Small batches or quick snacks |
| Dutch Oven | 35 minutes | Steam infused, softest crumb | Recreating a rustic bakery style |
Choosing your cooking vessel really depends on how much crunch you want on the outside. If you’re like me and you live for those little "shatter" sounds when you bite into the crust, the standard oven is your best friend. But if you want something that feels almost like a steamed bun on the inside, a covered Dutch oven is brilliant. It’s a bit like the texture you’d find in a high-quality Homemade Stuffing recipe where the edges get toasted but the middle stays lush.
Component Analysis of Our Favorite Bread Ingredients
| Ingredient | Science Role | Pro Secret |
|---|---|---|
| Bread Flour (500g) | High protein for structure | Use a scale; volume measurements vary by 20% |
| Active Dry Yeast (7g) | Carbon dioxide production | Bloom in warm water with honey first |
| Greek Yogurt (60g) | Fat and acidity source | Full fat yogurt gives the richest mouthfeel |
| Unsalted Butter (85g) | Flavor and layer separation | Freeze 10 mins before grating into the mix |
Chef's Note: If you really want to deepen the flavor of the garlic, let the minced cloves sit in the melted butter for 20 minutes before brushing it onto the dough. This "cold steep" removes the harsh bite and leaves you with a mellow, roasted sweetness.
Selecting Your Hearty Elements and Smart Ingredient Swaps
- Bread Flour (500g): This provides the "chew" we need. Why this? Higher protein content (12-14%) creates stronger gluten bonds than all purpose flour.Substitute: All purpose flour (1:1), but the bread will be slightly less bouncy.
- Active Dry Yeast (7g): The engine of the rise. Why this? Reliable fermentation that stands up to the heavy fats in the butter.Substitute: Instant yeast (use 25% less), skip the 10 minute bloom time.
- Plain Greek Yogurt (60g): Our secret for softness. Why this? Adds moisture without making the dough too sticky to handle.Substitute: Sour cream or full fat buttermilk for a similar tang.
- Unsalted Butter (85g): The star of the show. Why this? Controls the salt level while adding rich, homestyle fat.Substitute: Salted butter (just reduce the added sea salt by half).
- Fresh Garlic (30g): Don't use the jarred stuff. Why this? Fresh garlic has oils that emulsify better with the parsley and butter.Substitute: 1 tbsp garlic powder mixed with 2 tbsp water if fresh isn't available.
- Low Moisture Mozzarella (100g): For that cheese pull. Why this? It melts smoothly without releasing excess water that makes bread soggy.Substitute: Provolone or a mild white cheddar for extra bite.
Essential Tools for Your Stress Free Baking Experience
You don't need a kitchen full of gadgets, but a few basics make this much easier. A standard 9x5 inch loaf pan is the classic choice, but I've even used a round cake pan in a pinch. If you have a stand mixer with a dough hook, use it! It saves your arms from the 10 minute workout.
Otherwise, a large bowl and a sturdy wooden spoon will get the job done.
A digital thermometer is actually the most important tool here. You want your 300ml water at 105°F. Too cold and the yeast stays asleep; too hot and you’ll kill it. Also, grab a pastry brush.
If you don't have one, the back of a spoon works, but a brush really helps you get that garlic butter into every nook and cranny.
Simple Steps to Create Your Layered Bread Loaf
- Hydrate the yeast. Stir 15g honey and 7g yeast into 300ml warm water (105°F) and let it foam for 10 minutes. Note: If it doesn't foam, your yeast is likely dead.
- Combine the base. Mix 500g bread flour and 10g sea salt in a large bowl, then pour in the yeast mixture and 60g Greek yogurt.
- Knead the dough. Work the dough for 8-10 minutes until it feels smooth and elastic. Note: It should bounce back slowly when poked.
- Initial proof. Place dough in an oiled bowl, cover, and let rise in a warm spot for 1 hour until doubled in size.
- Prepare the emulsion. Melt 85g butter and whisk in 15ml olive oil, 30g minced garlic, 15g parsley, 2g oregano, and 0.5 tsp red pepper flakes.
- Shape and roll. Punch down the dough and roll it out on a floured surface into a large rectangle, roughly 12x18 inches.
- Layer the flavor. Brush the garlic butter over the entire surface and sprinkle with 100g shredded mozzarella.
- The stack technique. Cut the dough into 6 long strips, stack them on top of each other, then cut the stack into 6 squares.
- Final proof. Arrange the squares vertically in a greased loaf pan and let rise for 45 minutes until puffy and filling the pan.
- The golden bake. Bake at 375°F for 30 minutes until the top is deeply bronzed and fragrant.
Solutions for Common Baking Hiccups and Texture Issues
Remedying a Dense Loaf
If your bread feels more like a brick than a cloud, the issue is usually under proofing or cold water. Yeast is a living thing; it needs warmth and time to create the air bubbles that make bread light. If your kitchen is cold, try putting the dough in the oven with just the light turned on.
That little bit of warmth makes a huge difference.
Preventing an Underbaked Core
Pull apart bread is notorious for being done on the outside while the middle is still raw dough. This happens because the layers are so tightly packed. If the top is getting too dark but the center feels soft, tent the pan with aluminum foil.
This allows the internal temperature to reach 190°F without burning the crust.
| Problem | Root Cause | Solution |
|---|---|---|
| Dough won't rise | Water was too hot (killed yeast) | Start over with water at 105°F |
| Butter leaks out | Layers weren't pinched or pan was too small | Use a 9x5 pan and chill dough 10 mins before baking |
| Garlic tastes bitter | Garlic was burnt during the bake | Tent with foil halfway through cooking |
- ✓ Always use a thermometer to check water temperature (105°F is the sweet spot).
- ✓ Don't skip the second rise; it’s where the "pull apart" texture actually develops.
- ✓ Spoon and level your flour if not using a scale to avoid a dry, crumbly dough.
- ✓ Ensure your garlic is minced very finely so it melts into the butter emulsion.
- ✓ Let the bread rest in the pan for 10 minutes after baking to "set" the structure.
Adjusting Portions for Small Groups or Large Crowds
Scaling bread is a bit different than scaling a soup. If you want to double this recipe for a big party, don't just double everything. For the spices and salt, use about 1.5x the amount so the flavor doesn't become overpowering.
You’ll also want to work in two separate loaf pans rather than trying to make one giant loaf, which would never cook through the center properly.
To make a smaller "date night" version, you can halve the ingredients and use a small 6 inch cake pan or even a few jumbo muffin tins. Reduce the baking time by about 20% and keep a close eye on it. Using muffin tins actually creates individual "garlic knots" that are perfect for dipping into a Lemon Pepper Sauce recipe if you want a tangy contrast.
Budget Conscious Swaps for Your Herb Butter
| Premium | Budget | Flavor Impact | Savings |
|---|---|---|---|
| European Butter | Standard Store Brand | Slightly less creamy, still good | Save $3-4 |
| Fresh Herbs | Dried Oregano/Parsley | More concentrated, less "green" | Save $2-3 |
| Fresh Garlic | Garlic Powder + Water | Less pungent, more uniform | Save $1 |
If you're looking for a shortcut, you can actually use store-bought pizza dough as a base. Just roll it out and follow the stacking instructions starting at step 5. It won't have the same yogurt softness as our scratch version, but it's a great "emergency" side dish when you're short on time.
Debunking Old School Baking Rumors and Myths
One of the biggest myths is that you absolutely need sugar to "feed" the yeast. While we use 15g of honey, the yeast can actually eat the starches in the flour just fine. The honey is mostly there for flavor and moisture retention. Another common one is that you must knead dough for 20 minutes.
With the addition of Greek yogurt, the proteins are already more relaxed, so 8-10 minutes is usually plenty to reach that "windowpane" consistency.
You might have heard that salt kills yeast on contact. While it's true that high concentrations of salt aren't great for yeast, mixing 10g of salt into 500g of flour before adding the liquid is perfectly safe.
The salt actually controls the fermentation, preventing the yeast from going crazy and making the bread taste like beer.
Smart Storage Methods and Using Every Single Crumb
This bread is best eaten warm, but it keeps surprisingly well. Store leftovers in an airtight bag at room temperature for up to 2 days. To reheat, don't use the microwave unless you want rubbery bread. Wrap it in foil and pop it in a 350°F oven for 10 minutes.
This restores that "shatter" to the crust.
For long term storage, you can freeze the baked loaf for up to 3 months. Just make sure it’s completely cool before wrapping it tightly in plastic wrap and then foil. If you find yourself with dry leftovers, don't toss them!
Cut the pieces into cubes and toast them in a pan with a little extra olive oil to make the world's best garlic butter croutons. They are spectacular on top of a salad or a bowl of tomato soup.
Perfect Occasions for Sharing This Warm Bread
This pull apart bread is the ultimate "bring along" dish. It’s hearty enough to stand up to a heavy winter stew but fancy enough for a Sunday roast. Because it’s designed to be eaten with your hands, it’s a great icebreaker at potlucks.
People love the interactive nature of tearing off a piece it feels much more communal than just slicing a loaf.
I love serving this alongside a big holiday spread. It’s a fantastic companion to a Southern Cornbread Dressing Recipe during Thanksgiving because the garlic and oregano play so well with sage and onion. Whether you’re making it for a weeknight treat or a special celebration, just be prepared for it to disappear faster than the main course. Honestly, don't even bother with low-fat cheese here; the full fat mozzarella is what gives you that homestyle satisfaction we’re after.

Recipe FAQs
What is the best way to store leftover garlic butter pull apart bread?
Airtight container at room temperature for up to 2 days. To reheat, avoid the microwave; instead, wrap in foil and warm in a 350°F oven for 10 minutes to restore crispness.
Can I make this bread ahead of time?
Yes, the dough and herb butter can be prepared up to 24 hours in advance and kept chilled. This makes it a convenient option for busy schedules or holiday preparations.
Why is my pull apart bread dense or underbaked in the center?
Likely under proofing or an underbaked core due to dense layering. Ensure the second rise allows the dough to become puffy, and tent with foil during baking if the top browns too quickly before the center is cooked.
What's the secret to getting those soft, buttery layers?
The secret lies in the fat lamination and the use of Greek yogurt. Brushing butter between each dough layer creates barriers, while the yogurt's acidity tenderizes the gluten for a velvety interior, similar to the technique used in our Homemade Crescent Roll Breakfast Casserole.
Can I substitute the Greek yogurt in this recipe?
Yes, sour cream or full fat buttermilk can be used as substitutes for Greek yogurt. These ingredients will provide a similar tang and moisture content to keep the bread soft.
How do I prevent the garlic from tasting bitter?
Mince the garlic very finely and consider letting it "cold steep" in the melted butter for 20 minutes before brushing. This process mellows the harsh bite and allows the garlic's natural sweetness to infuse the butter.
What's the best way to reheat leftover garlic butter pull apart bread?
Wrap the bread tightly in aluminum foil and reheat in a 350°F oven for about 10 minutes. This method helps to re-crisp the crust without drying out the soft interior, unlike microwaving which can make it tough.
Garlic Butter Pull Apart Bread

Ingredients:
Instructions:
Nutrition Facts:
| Calories | 299 kcal |
|---|---|
| Protein | 10.1 g |
| Fat | 11.0 g |
| Carbs | 39.4 g |
| Fiber | 1.4 g |
| Sugar | 1.5 g |
| Sodium | 398 mg |
