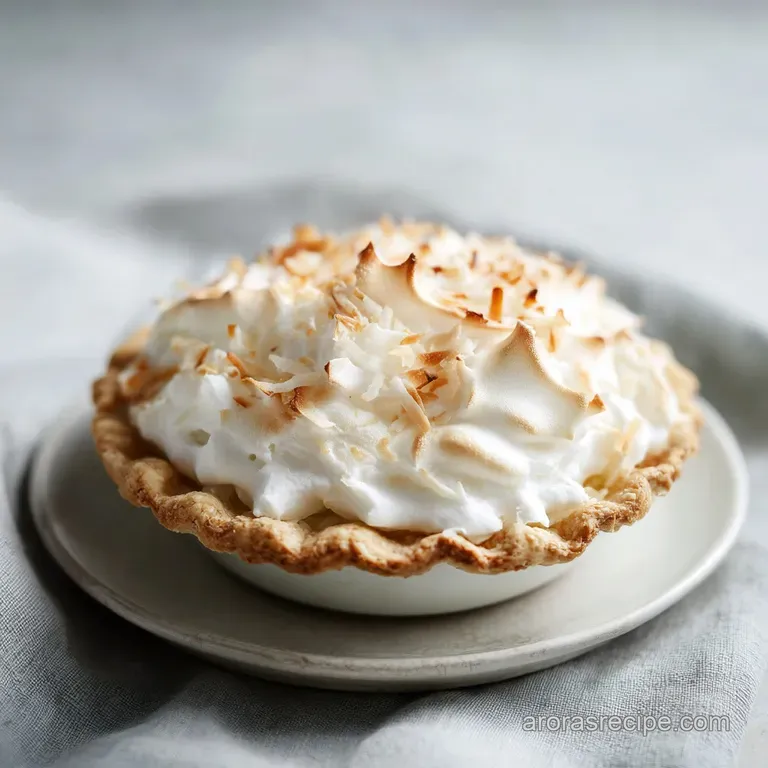
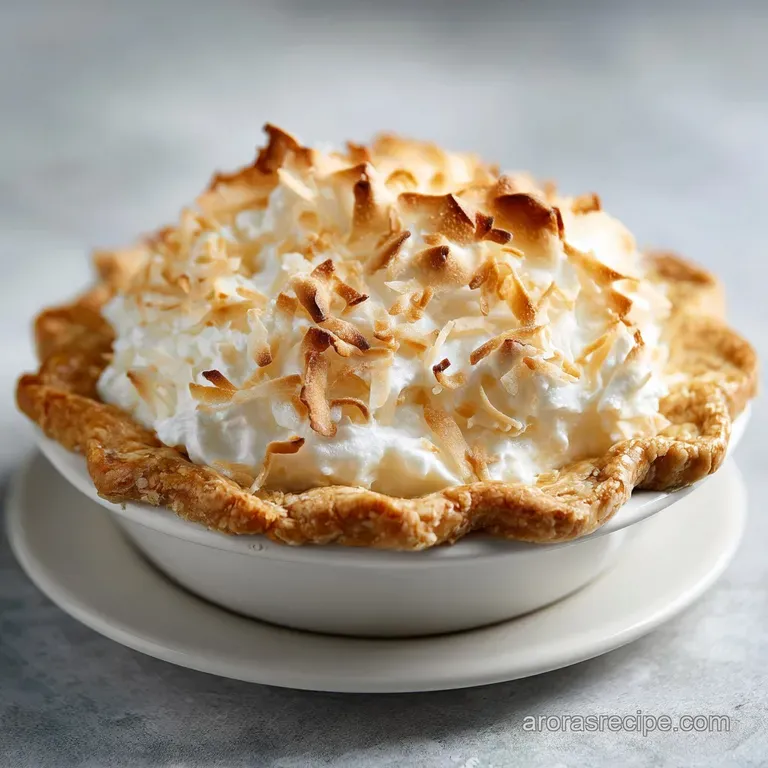
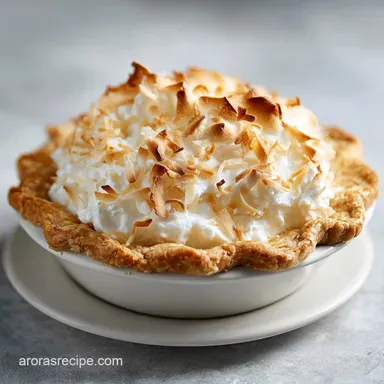
Grandmas Coconut Cream Pie: Silky and Classic
- Time: Active 25 minutes, Passive 20 minutes, Total 45 minutes
- Flavor/Texture Hook: Shattering golden crust with a silky, tropical coconut custard
- Perfect for: Sunday family dinners, holiday dessert tables, or beginner bakers wanting a reliable win
- Mastering the Classic Comfort of Grandmas Coconut Cream Pie
- The Logic Behind a Stable and Velvety Filling
- Breaking Down the Timing and Essential Ratios
- Selecting the Best Components for Homestyle Flavor
- Stocking Your Kitchen for Stress Free Baking Success
- A Step-By-Step Guide to the Perfect Bake
- Fixing Common Pitfalls for a Flawless Result
- Creative Twists to Make the Recipe Your Own
- Storing and Reheating Your Coconut Cream Masterpiece
- The Best Ways to Present Your Hearty Dessert
- Recipe FAQs
- 📝 Recipe Card
Mastering the Classic Comfort of Grandmas Coconut Cream Pie
We have all been there, haven't we? You spend your afternoon hovering over a stove, whisking until your arm aches, only to cut into your pie and watch the filling slumping across the plate in a sad, milky puddle. Or worse, the crust has turned into a damp, flavorless sponge that lacks any of that signature snap.
It's a culinary tragedy that has ruined many a Midwestern potluck. But after years of standing in the kitchen and watching the steam rise from a heavy bottomed pot, I realized that these failures aren't about luck. They are about the little details we often overlook in the rush to get dessert on the table.
This recipe for grandmas coconut cream pie is my absolute favorite way to fix those common kitchen woes. It isn't just a list of ingredients; it's a blueprint for achieving that specific, sky high meringue and the kind of sturdy, velvety custard that slices like a dream.
We are going to focus on a few key moves like brushing the hot crust with egg white and ensuring our cornstarch actually reaches its full thickening potential to make sure your pie is the star of the show.
Right then, let's get into the heart of this dish. We aren't making something "fancy" here; we are making something hearty and honest. This is the kind of pie that makes people close their eyes and sigh after the first bite.
It’s about the smell of toasted coconut wafting through the house and the satisfaction of seeing those stiff, glossy peaks of meringue turn a perfect golden tan in the oven. Trust me, once you see how these simple steps come together, you’ll never go back to a store-bought version again.
The Logic Behind a Stable and Velvety Filling
Understanding why this recipe behaves the way it does is the first step to becoming a stress free baker. We aren't just mixing things together; we are managing moisture and heat to create a specific structure.
The goal is a filling that is firm enough to stand tall but soft enough to melt away the moment it hits your tongue.
- Starch Activation: The cornstarch must reach a full boil for exactly one minute to fully hydrate the granules and neutralize an enzyme in egg yolks that can actually break down starch over time.
- The Moisture Barrier: Brushing the hot, pre baked crust with a thin layer of egg white creates a waterproof seal that prevents the custard from making the pastry soggy.
- Protein Stability: Using cream of tartar in the meringue adds acid, which helps the egg white proteins link together more tightly, creating a foam that won't collapse or weep.
- Fat Emulsification: Adding butter at the very end, off the heat, allows it to melt slowly into the custard, creating a silky mouthfeel without the fat separating.
| Doneness Stage | Stovetop Temp | Timing | Visual Cue |
|---|---|---|---|
| Initial Thicken | ~82°C | 5-7 minutes | Mixture coats the back of a spoon |
| Starch Set | 100°C | Exactly 1 minute | Large, slow bubbles "bloop" to the surface |
| Meringue Finish | 175°C (Oven) | 10-12 minutes | Peaks turn a deep, toasted mahogany brown |
When it comes to cooking the custard, some folks swear by the oven, while others stay true to the stovetop method. For this specific version of grandmas coconut cream pie, we use a hybrid approach that gives us the best of both worlds.
We control the thickness on the stove where we can see it happen, then use the oven just to toast the topping.
| Method | Cook Time | Texture | Best For |
|---|---|---|---|
| Stovetop | 15 minutes | Thick, pudding like | Total control over custard density |
| Oven Bake | 45 minutes | Set, almost custard cake | Traditional egg heavy custards |
| Hybrid (This Recipe) | 20 minutes | Creamy with toasted top | Maximum stability and flavor depth |
The hybrid method is brilliant because it ensures the filling is perfectly set before it even enters the oven. This prevents the "soupy center" problem that often plagues pies baked entirely in a water bath or oven.
By the time we add the meringue, the custard is already doing its job, letting the oven focus entirely on that beautiful, golden finish.
Breaking Down the Timing and Essential Ratios
Getting the proportions right is what separates a "good" pie from an "iconic" one. We aren't just throwing coconut at a pudding; we are building layers of flavor. By using both whole milk and heavy cream, we achieve a fat content that feels indulgent but doesn't coat the palate in a way that hides the delicate coconut aroma.
The salt is also doing heavy lifting here, cutting through the sugar to make the tropical notes pop.
| Component | Role | Pro Secret |
|---|---|---|
| Cornstarch | Primary Thickener | Always whisk into sugar first to prevent lumps. |
| Egg Yolks | Emulsifier & Color | Tempering them slowly prevents "scrambled egg" bits. |
| Shredded Coconut | Texture & Flavor | Toasting half the coconut adds a nutty complexity. |
| Butter | Gloss & Mouthfeel | Use cold butter at the end for a smoother finish. |
It's helpful to think of this recipe as a three act play: the crust, the custard, and the crown. If you rush any part, the whole performance suffers. For example, if you skip the 4 hour chill time, the starch molecules won't have time to fully realign into a solid structure.
Patience is just as much an ingredient here as the sugar or the cream.
If you find yourself craving another classic, you might want to try a Sweet Potato Pie recipe for your next gathering. Much like this coconut version, it relies on that perfect balance of creaminess and a solid, well baked crust to deliver that old-fashioned comfort we all love.
Selecting the Best Components for Homestyle Flavor
When you're standing in the baking aisle, the choices can be a bit overwhelming. For a truly hearty grandmas coconut cream pie, you want ingredients that feel like they came from a farmhouse kitchen. Don't worry about finding the most expensive extracts; the magic happens in how you combine these simple staples.
- 9 inch pie shell: Pre baked and still warm. Why this? A warm crust absorbs the egg white seal better.
- Whole milk: Provides the essential liquid base. Why this? Lower fat milks make the filling too watery.
- Heavy cream: Adds richness and stability. Why this? It creates a velvety texture that milk alone can't reach.
- Sweetened shredded coconut: Use the moist, bagged variety. Why this? It provides both sweetness and a chewy texture.
- Cornstarch: Our reliable thickening agent. Why this? It creates a clearer, cleaner flavor than flour.
- Egg yolks: These provide the yellow hue and rich flavor. Why this? They act as the primary emulsifier for the fats.
- Pure vanilla extract: The backbone of all good baking. Why this? It rounds out the sharp sweetness of the sugar.
| Original Ingredient | Substitute | Why It Works |
|---|---|---|
| Whole Milk | Evaporated Milk | Very creamy result. Note: Can make the pie slightly darker in color. |
| Cornstarch | Arrowroot Powder | Similar thickening power. Note: Filling may become slightly more "jelly like." |
| Sweetened Coconut | Unsweetened Coconut | Reduces sugar. Note: Add 2 extra tablespoons of sugar to the custard to compensate. |
Using the right sugar is also vital. Granulated sugar is the standard, but ensure it's a fine grain so it dissolves quickly in the cold milk mixture before you apply heat. If the sugar doesn't dissolve early, you risk a grainy texture once the custard sets.
Honestly, don't even bother with sugar substitutes here if you want that classic, homestyle finish; the way sugar interacts with the egg proteins is essential for the structure of the meringue.
Stocking Your Kitchen for Stress Free Baking Success
You don't need a kitchen full of gadgets to make a great cream pie, but a few specific tools will make your life a whole lot easier. This is about working smarter, not harder. A heavy bottomed saucepan is probably the most important thing you can have in your arsenal for this recipe.
Thin pans have "hot spots" that can scorch the milk and eggs before the starch has a chance to thicken.
3 Essential Tools
- A Balloon Whisk: You need something that can reach into the corners of the pan to keep that custard moving constantly.
- A Clean Stainless Steel Bowl: For the meringue, even a tiny speck of fat or oil will prevent the egg whites from whipping. Stainless steel or copper is much better than plastic, which can hold onto greasy residues.
- A Silicone Spatula: This is for that final "fold" and for ensuring every bit of the hot custard gets out of the pan and into the crust.
Chef's Tip: If you're worried about your bowl being perfectly clean for the meringue, rub a slice of lemon around the inside and then wipe it dry with a paper towel. The acid cuts through any hidden oils.
A step-by-step Guide to the Perfect Bake
Now we get to the fun part. Put on some music, clear your counter, and let's build this masterpiece. This process moves quickly once the custard starts to thicken, so have all your ingredients measured and ready to go before you even turn on the stove.
- Blind bake the crust. Bake your 9 inch pie shell at 200°C until it’s a deep golden tan. While it’s still piping hot, brush the interior with a beaten egg white. Note: This creates that vital moisture seal.
- Toast the coconut. Put half of your 1.5 cups of shredded coconut in a dry pan over medium heat. Stir constantly until it is mahogany brown and smells like heaven. Set it aside.
- Mix the base. In your heavy saucepan, whisk together 3/4 cup sugar, 1/3 cup cornstarch, and 1/4 tsp salt. Gradually stream in the 2 cups of whole milk and 1/2 cup heavy cream while whisking.
- Thicken the custard. Cook over medium heat, whisking constantly. Watch for the moment it starts to bubble and look glossy.
- Temper the yolks. Slowly whisk a cup of that hot milk mixture into your 4 beaten egg yolks. Then, pour that yolk mixture back into the main saucepan. Note: This prevents the eggs from scrambling.
- The big boil. Bring the custard to a full boil for exactly one minute. Don't skip this! It's when the starch officially sets.
- Add the aromatics. Remove from heat. Stir in 2 tbsp butter, both the toasted and untoasted coconut, 1 tsp vanilla, and 1/2 tsp coconut extract.
- Whip the meringue. In your clean bowl, whip 4 egg whites with 1/2 tsp cream of tartar until soft peaks form. Gradually add 1/2 cup sugar and 1/2 tsp vanilla, whipping until the peaks are stiff and glossy.
- The hot assembly. Immediately pour that steaming hot custard into the shell. Pile the meringue on top while the filling is still hot. Ensure the meringue touches the crust edges to seal it.
- The final bake. Pop it into a 175°C oven for 10-12 minutes until golden and crackling. Let it cool on the counter, then chill for at least 4 hours.
If you love the process of building layers like this, you might also enjoy making a Red Velvet Cake. It uses a similar logic of balancing acidity and fats to create a texture that’s completely unique and incredibly satisfying to serve.
Fixing Common Pitfalls for a Flawless Result
Even the best cooks have days where things don't go according to plan. The trick is knowing how to spot the trouble before it ruins your dinner. Most issues with this cream pie come down to temperature either too much or too little at the wrong time.
Why Your Filling Is Runny
If your pie looks more like soup, you likely didn't let the custard reach a true "blooping" boil. Cornstarch needs that high heat to pop its molecules and create a grid that holds liquid.
Another culprit could be the egg yolks; if they weren't tempered correctly, they won't emulsify the fats, leaving you with a broken, thin mess.
Why the Meringue Shrunk
When the meringue pulls away from the edges, it’s usually because it wasn't "anchored." You have to spread the meringue so it actually touches the pastry crust. This creates a physical bond that keeps it from retreating as it cools.
Also, putting meringue on cold filling causes the bottom of the meringue to stay raw, leading to that annoying layer of water (weeping) between the custard and the foam.
| Problem | Root Cause | Solution |
|---|---|---|
| Beads of syrup on meringue | Overbaked egg whites | Watch the oven closely; remove as soon as golden. |
| Soggy bottom crust | No moisture seal | Brush the hot crust with egg white immediately after baking. |
| Lumpy custard | Added liquid too fast | Pour milk in a very slow, steady stream while whisking. |
Common Mistakes Checklist
- ✓ Never stop whisking the custard; it can scorch on the bottom in seconds.
- ✓ Don't use a plastic bowl for meringue; the hidden oils are a foam killer.
- ✓ Ensure the custard boils for a full 60 seconds to neutralize starch eating enzymes.
- ✓ Avoid making meringue on a very humid day if possible, as it absorbs moisture from the air.
- ✓ Let the pie sit at room temperature for an hour before moving it to the fridge to prevent thermal shock.
Creative Twists to Make the Recipe Your Own
Once you've mastered the classic grandmas coconut cream pie, it's fun to play around with the flavors. The beauty of a homestyle recipe is that it's a canvas for your own creativity. In the Midwest, we love our traditions, but we aren't afraid of a little variety now and then.
- Toasted Nut Crunch: Add 1/2 cup of toasted chopped macadamia nuts or pecans to the filling along with the coconut. It adds a wonderful "shatter" to every bite.
- The "Island" Swap: Use coconut milk (the full fat canned kind) instead of whole milk for an even more intense tropical punch. Just be aware this makes the pie much richer.
- Chocolate Layer: Melt 1/2 cup of chocolate chips and spread them over the bottom of the crust before adding the custard. It’s like a giant candy bar in pie form!
| Serving Size | Ingredient Adjustments | Pan Size | Chill Time |
|---|---|---|---|
| 4 people | Half all ingredients; use 2 egg yolks | 6 inch pan | 3 hours |
| 8 people | Standard recipe (as written) | 9 inch pan | 4 hours |
| 16 people | Double everything; work in two batches | Two 9 inch pans | 6 hours |
When scaling up, it is very important to work in batches for the custard. Trying to cook a double batch of custard in one pot often leads to uneven thickening or scorching because the volume is too great for the heat to penetrate quickly.
It’s better to make two separate pots of filling to ensure that velvety texture remains consistent.
Storing and Reheating Your Coconut Cream Masterpiece
Because this is a dairy and egg based dessert, you have to be smart about storage. This isn't the kind of pie that can sit out on the counter all day. The meringue is also quite delicate; it’s at its peak the day it’s made, but with the right care, you can stretch the enjoyment.
- Fridge: Keep the pie in the refrigerator for up to 3 days. To prevent the meringue from sticking to a cover, stick a few toothpicks into the pie and drape plastic wrap loosely over them.
- Freezer: Honestly, I don't recommend freezing this pie. The custard will likely separate and become grainy when thawed, and the meringue will turn into a spongy, unappealing mess.
- Zero Waste Tip: If you have leftover egg whites that didn't make it into the meringue, don't toss them! You can freeze raw egg whites in an ice cube tray for up to 3 months. They are perfect for a quick healthy breakfast or for your next baking project.
Searing heat is the enemy of a set cream pie, so if you're taking this to a picnic, keep it in a cooler until the very moment you are ready to serve. If the custard gets too warm, it will lose its structural integrity and start to weep.
The Best Ways to Present Your Hearty Dessert
The way you serve this pie is the final flourish on all your hard work. Since this is a "Sunday Best" kind of dessert, I like to use a sharp, thin bladed knife dipped in hot water to get those clean, professional looking slices.
Wipe the knife between every single cut it sounds fussy, but it makes a huge difference in how the pie looks on the plate.
A little extra sprinkle of that mahogany toasted coconut on top of the meringue right before serving adds a beautiful contrast to the white peaks. If you're feeling extra indulgent, a small dollop of unsweetened whipped cream on the side can help balance the sweetness of the meringue.
This recipe is more than just food; it's a way to bring people together. There is something about the combination of a flaky crust and a cool, creamy filling that feels like a hug in dessert form.
Whether you are fixing a soggy crust problem or just trying to recreate a childhood memory, this version of grandmas coconut cream pie is the stress free way to get there. Enjoy every velvety, coconut filled bite!

Recipe FAQs
Is it true I can use a plastic bowl to whip the egg whites for the meringue?
No, this is a common misconception. Plastic surfaces often harbor hidden oil residues that prevent egg whites from achieving a stable, stiff foam. Always use a clean copper or stainless steel bowl to ensure the best results.
How to prevent the bottom crust from getting soggy?
Brush the interior of the hot, blind baked crust with a beaten egg white immediately. This creates a protective moisture seal that keeps your pastry crisp, a technique that also helps maintain a firm structure in our shatter crust apple pie.
How to ensure the custard thickens properly?
Bring the custard to a full, rolling boil for exactly one minute. This precise duration is required to fully hydrate the cornstarch and neutralize enzymes that would otherwise break down the filling's structure.
Is it necessary to toast the coconut before adding it to the custard?
Yes, toasting half of the coconut provides a critical depth of flavor. Toasting the shreds to a mahogany brown in a pan over medium heat adds a complex, nutty note that raw coconut lacks.
How to avoid weeping meringue?
Spread the meringue over the hot custard while it is still steaming. Spreading it to the edges of the crust to create a complete seal prevents steam from escaping and stops moisture from accumulating between the filling and the topping.
How to store the pie if I have leftovers?
Refrigerate the pie for up to 3 days in a covered container. To protect the delicate topping, stick several toothpicks into the filling and drape plastic wrap loosely over them to prevent it from sticking to the meringue.
Is it true I can skip the tempering process for the egg yolks?
No, you must temper the egg yolks to prevent curdling. Slowly whisking a cup of the hot milk mixture into your beaten yolks before adding them back to the saucepan gradually raises their temperature, ensuring a smooth, emulsified custard.
Grandmas Coconut Cream Pie
Ingredients:
Instructions:
Nutrition Facts:
| Calories | 497 kcal |
|---|---|
| Protein | 8.1 g |
| Fat | 25.8 g |
| Carbs | 59.9 g |
| Fiber | 0.6 g |
| Sugar | 39.4 g |
| Sodium | 125 mg |
