Mackinac Island Fudge: Creamy and Authentic
- Time: Active 30 minutes, Passive 180 minutes, Total 210 minutes
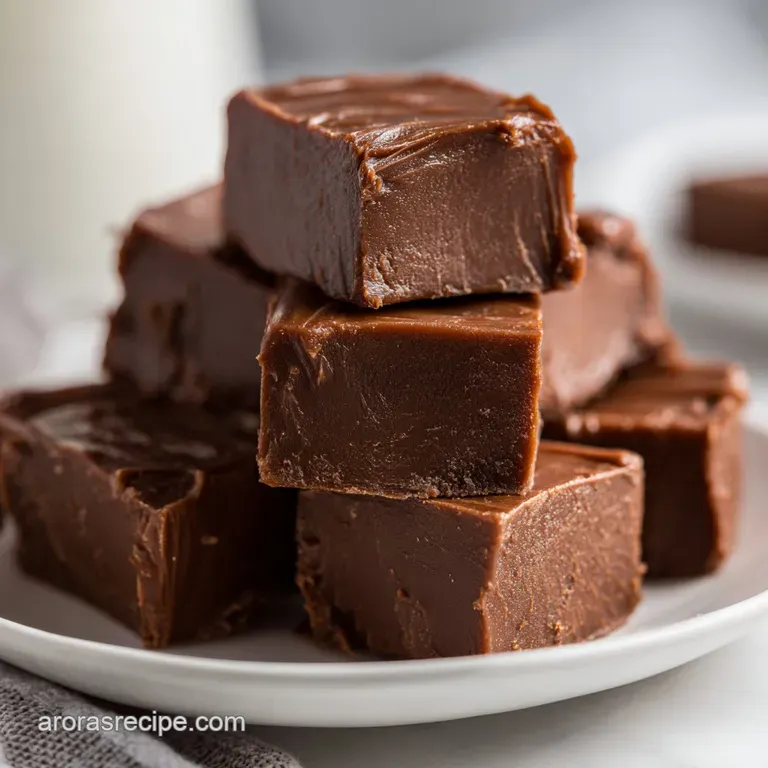
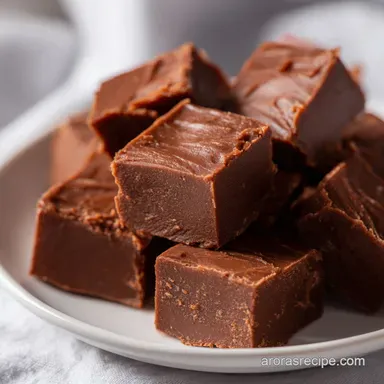
- Flavor/Texture Hook: Silky, deep cocoa profile with a matte, velvety finish that yields to a soft bite.
- Perfect for: Holiday gifting, Midwestern nostalgia, and serious chocolate enthusiasts.
- Recreating the Velvety Mackinac Island Fudge Texture at Home
- The Secret Behind That Signature Smooth Fudge Melt
- Necessary Ingredients for Authentic Midwestern Style Candy
- Essential Kitchen Tools for a Stress Free Boiling Process
- Step by Step Methods for Boiling and Beating Fudge
- Correcting Common Texture Errors and Boiling Mistakes
- Adjusting Recipe Portions for Small Batches and Crowds
- Common Misconceptions About Candy Temperatures and Stirring
- Proper Storage Techniques and Using Up Fudge Scraps
- Creative Presentation and Serving Ideas for Party Platters
- Recipe FAQs
- 📝 Recipe Card
Recreating the Velvety Mackinac Island Fudge Texture at Home
If you've ever stepped off the ferry onto the docks of Mackinac Island, you know that smell. It’s an intoxicating, heavy cloud of melting butter, rich Dutch cocoa, and sugar caramelizing in massive copper kettles.
It follows you down Main Street, past the horse drawn carriages, and draws you into the shops where "fudgies" that’s what we locals call the tourists stand pressed against the glass watching the theatrical "slabbing" process.
I remember standing there as a kid, mesmerized by the rhythm of the wooden paddles scraping the cooling chocolate across massive marble tables until it transformed from a liquid river into a thick, matte log of pure joy.
For a long time, I thought that specific, airy yet-dense texture was impossible to achieve in a regular home kitchen. I assumed you needed the specific thermal mass of a three hundred pound slab of stone and years of forearm burning apprenticeship.
But after plenty of trial and error in my own Midwestern kitchen, I discovered that it isn't about the expensive equipment; it’s about the thermal dance between the fats and the sugar crystals.
This version gives you that exact "Island" experience that specific way the fudge yields to your teeth and then dissolves into a silky pool of dark chocolate on your tongue using just a heavy bottomed saucepan and a bit of elbow grease.
We’re going to skip the shortcuts like marshmallow fluff or sweetened condensed milk here. While those are fine for a quick fix, they don't produce the authentic grain free structure of a true Mackinac Island Fudge.
We are going the traditional route, which relies on a precise boil and a very specific cooling period. Trust me, once you see that glossy sheen turn into a soft matte finish as you stir, you’ll feel like a professional candy maker.
It’s a hearty, stress free process once you know the checkpoints, and the payoff is a batch of fudge that’ll have your friends asking which Michigan shop you ordered it from.
The Secret Behind That Signature Smooth Fudge Melt
The magic of this recipe lies in managing sugar crystals. When we boil sugar and water (in the form of cream), the crystals dissolve, but they desperately want to reform as they cool. If they reform too quickly or while the mixture is too hot, you get a gritty, sandy mess.
By letting the mixture cool undisturbed to a specific temperature, we create a "supersaturated" environment where we can force the sugar to form millions of microscopic crystals instead of a few large ones. This is what creates that velvety, melt on-your tongue sensation.
Crystal Suppression: The combination of brown sugar and corn syrup (often found in the sugars) provides "interfering agents" that physically block sugar molecules from bonding too early.
Fat Emulsification: High fat European butter and heavy cream coat the sugar crystals, acting as a lubricant that ensures the final texture feels silky rather than dry or crumbly.
The Aeration Phase: Vigorous stirring at exactly 110°F introduces tiny air bubbles and initiates "seed" crystal formation, which turns the glossy syrup into a stable, matte solid.
Fast vs. Classic Comparison
| Feature | Shortcut Fudge | Mackinac Style Fudge |
|---|---|---|
| Texture | Chewy/Gummy | Velvety/Soft snap |
| Effort | Low (Microwave) | Moderate (Stovetop) |
| Ingredients | Condensed Milk/Marshmallow | Fresh Cream/Butter |
| Shelf Life | 1 week (Fridge) | 3 weeks (Room Temp) |
Necessary Ingredients for Authentic Midwestern Style Candy
Selecting the right components is the difference between a "good" fudge and a "world class" one. In a Midwestern kitchen, we value quality fats. Using European style butter is non negotiable here because it contains less water and more butterfat than standard grocery store sticks.
This extra fat is what keeps the fudge from feeling "sticky" and instead gives it that luxurious, clean break when you bite into a square.
The cocoa choice is equally vital. Dutch processed cocoa has been treated with alkali to neutralize its natural acidity, resulting in a darker color and a smoother, more mellow chocolate flavor that pairs perfectly with the high sugar content. If you use natural cocoa, the fudge might taste a bit sharp or acidic. For the ultimate deep flavor, the addition of finely chopped dark chocolate at the end adds a layer of complexity that purely cocoa based recipes often lack. If you're looking for a simpler version for a quick craving, you might want to check out this 3 Ingredient Chocolate Fudge, but for the real deal experience, stick with the list below.
| Component | Science Role | Pro Secret |
|---|---|---|
| Heavy Cream (36%) | Provides the liquid base and essential milk solids. | Don't use "Half and Half"; the lower fat content leads to a grainy finish. |
| European Butter | Acts as a crystal inhibitor and adds a rich, savory backbone. | Keep it cold until the moment it goes into the pan to slow the initial melt. |
| Dutch Cocoa | Provides the primary flavor and structural bulk. | Sift it first! Cocoa clumps are the enemy of a velvety fudge. |
| Dark Chocolate (60%) | Adds "snap" and stabilizes the final set with cocoa butter. | Chop it into tiny shards so it melts instantly without needing extra heat. |
Ingredients & Substitutes
- 1 cup heavy cream (36% fat): Why this? High fat prevents "sugar burning" and creates the richest mouthfeel.
- Substitute: Whole milk mixed with 2 tbsp melted butter (will be slightly less creamy).
- 0.5 cup European style butter: Why this? Higher fat content (82%+) ensures a smoother emulsification.
- Substitute: Regular unsalted butter (fudge may be slightly softer).
- 1.5 cups granulated cane sugar: Why this? The primary structure; cane sugar melts more cleanly than beet sugar.
- Substitute: Standard white sugar is fine.
- 0.5 cup light brown sugar: Why this? Molasses content adds depth and helps prevent crystallization.
- Substitute: Dark brown sugar for a more intense, toffee like flavor.
- 0.5 tsp sea salt: Why this? Cuts through the intense sweetness and highlights the cocoa.
- Substitute: Standard table salt (use slightly less).
- 0.5 cup Dutch processed cocoa powder: Why this? Gives that dark, professional "Island" look and smooth taste.
- Substitute: Natural cocoa powder (will be lighter in color and tangier).
- 2 oz dark chocolate (60% cacao), finely chopped: Why this? Provides real chocolate solids for a better set.
- Substitute: Semi sweet chocolate chips (note: will be slightly sweeter).
- 1 tbsp pure vanilla extract: Why this? Rounds out the chocolate notes.
- Substitute: Vanilla bean paste for a fancy look.
Essential Kitchen Tools for a Stress Free Boiling Process
You don't need a marble slab, but you do need a heavy bottomed pot. Thin pans are the enemy of candy making because they create hot spots that can scorch the cream or cause the sugar to "seize." A 3 quart stainless steel or enameled cast iron pot is perfect.
It provides enough room for the mixture to bubble up without boiling over and believe me, sugar burns are no joke.
The only other "must have" is a reliable digital candy thermometer. While our grandmothers used the "cold water test" to find the soft ball stage, a digital probe removes the guesswork.
When we're looking for that specific 235°F to 240°F window, being off by just three degrees can mean the difference between a fudge that never sets and one that turns into a brick.
Chef's Tip: Before you start, "butter" the sides of your saucepan about an inch above the liquid line. This creates a slick barrier that prevents stray sugar crystals from clinging to the sides and falling back into the mix, which is the number one cause of grainy fudge.
step-by-step Methods for Boiling and Beating Fudge

- Prepare the landing zone. Line an 8x8 inch square baking pan with parchment paper, leaving an overhang on the sides. Note: This ensures you can lift the entire block out for clean slicing later.
- Combine the base. In your heavy bottomed 3 quart saucepan, whisk together the 1 cup heavy cream, 0.5 cup European style butter, 1.5 cups granulated sugar, 0.5 cup brown sugar, 0.5 tsp sea salt, and 0.5 cup Dutch processed cocoa.
- Melt and dissolve. Place the pan over medium heat. Stir constantly with a silicone spatula until the butter is completely melted and you no longer feel the "grit" of sugar against the bottom of the pan.
- Initiate the boil. Once the mixture reaches a full rolling boil, stop stirring immediately. Clip your digital candy thermometer to the side, ensuring the tip isn't touching the bottom of the pot.
- The Precision Boil. Continue boiling without any agitation until the thermometer reads 235°F to 240°F (soft ball stage). This usually takes about 10-15 minutes depending on your stove's power.
- The Flavor Add. Remove the pan from the heat immediately. Gently sprinkle the 2 oz of chopped dark chocolate and 1 tbsp vanilla extract over the top. Do not stir them in yet!
- The Cooling Window. Allow the pan to sit undisturbed on a heat proof surface. Wait patiently until the temperature drops to exactly 110°F. This can take up to 45-60 minutes.
- The Transformation. Once it hits 110°F, grab a sturdy wooden spoon or silicone spatula. Stir vigorously and continuously. You’ll notice the mixture is thick and glossy at first, but after 5-10 minutes of beating, it will suddenly lose its shine and become thick and matte.
- The Set. Immediately pour the thickened fudge into your prepared pan. Smooth the top quickly before it sets.
- Room Temp Rest. Let the fudge sit at room temperature for at least 3 hours. Wait until it is completely firm to the touch before lifting it out to slice.
Correcting Common Texture Errors and Boiling Mistakes
The biggest heartbreak in candy making is a batch that doesn't cooperate. If your fudge ends up grainy, it’s usually because a stray sugar crystal fell into the pot during the boiling phase, or you stirred it while it was still too hot.
On the flip side, if it’s too soft, you likely pulled it off the heat before it reached the full 235°F. Don't worry, though fudge is surprisingly forgiving if you're willing to re melt it.
If you find yourself struggling with consistency, you might appreciate this Easy Fudge Recipe which uses a slightly different method to ensure a creamy result every time. But if you're determined to master the Mackinac style, use the table below to diagnose your batch.
Quick Fix Table
| Problem | Root Cause | Solution |
|---|---|---|
| Gritty Texture | Premature crystallization from stirring. | Re melt with 2 tbsp cream, bring back to boil, and start over. |
| Fudge Won't Set | Didn't reach the "soft ball" temperature. | Scrape back into pot, add 1 tbsp cream, and re boil to 238°F. |
| Oily Surface | Mixture separated due to high heat. | Stir in 1 tsp of very hot water while beating at the 110°F stage. |
Common Mistakes Checklist
- ✓ Don't stir during the boil: Once it bubbles, leave it alone. Stirring encourages large crystals to form.
- ✓ Check your thermometer: Test it in boiling water first (it should read 212°F at sea level) to ensure accuracy.
- ✓ Be patient during cooling: If you start beating at 130°F instead of 110°F, you will almost certainly end up with a grainy texture.
- ✓ Use a heavy pot: Thin pots scorch the milk solids, leaving burnt black specks in your chocolate.
- ✓ Watch the weather: Making fudge on a very humid or rainy day can prevent it from setting properly as sugar absorbs moisture from the air.
Adjusting Recipe Portions for Small Batches and Crowds
Scaling fudge isn't quite as simple as doubling everything and calling it a day. When you increase the volume, the surface area of your pot changes, which affects evaporation rates. If you're looking to feed a huge crowd at a Midwestern potluck, I recommend making two separate batches rather than one massive one.
It’s much easier to control the cooling and beating process of a single batch than it is to manage a giant cauldron of molten sugar.
Scaling Down (Making a Half Batch): If you only want a little treat, you can halve the ingredients and use a smaller loaf pan. Be aware that the mixture will reach the target temperature much faster (sometimes in 5-7 minutes), so keep a very close eye on that thermometer.
Scaling Up (Doubling the Batch): If you must double the batch, use a much larger pot (at least 6 quart) to prevent boil overs. You’ll need to increase your "beating" time at the end, as it takes much longer to aerate a larger mass of fudge.
Note: Reduce the total liquid (cream) by about 10% to ensure a firm set in larger batches.
Common Misconceptions About Candy Temperatures and Stirring
There’s a lot of "kitchen folklore" surrounding fudge that can actually lead you astray. One of the most common myths is that you should "shock" the fudge by putting the pot in an ice bath to cool it down faster. Please, don't do this! Cooling fudge too rapidly causes uneven temperature zones in the pot.
The edges will get too cold while the center stays hot, leading to a weird, inconsistent texture. Let it cool naturally at room temperature for that perfect, uniform "Island" crumb.
Another big one is the idea that "more stirring is always better." While you do need to beat the fudge vigorously once it hits 110°F, stirring it before that point is a recipe for disaster. I've seen many a batch ruined by someone "just checking" on the mixture with a spoon.
Once you hit that soft ball stage, put the spoon down and walk away until it’s time for the final transformation.
If you want X, do Y
- If you want a firmer "snap": Boil the mixture to the higher end of the range (240°F).
- If you want a softer, fudge sauce like bite: Aim for the lower end (235°F).
- If you want a matte finish: Beat the mixture for an extra 2 minutes after it loses its gloss.
Proper Storage Techniques and Using Up Fudge Scraps
Mackinac Island Fudge is best stored at room temperature. Many people make the mistake of putting it in the fridge, but the cold air can actually dry out the fudge and cause it to become crumbly or pick up "fridge smells" from your leftovers. Wrap the fudge tightly in wax paper, then place it in an airtight container.
It will stay velvety and fresh for up to 3 weeks on your counter.
If you somehow end up with scraps or a batch that turned out a bit too crumbly, don't throw it away! Midwesterners hate waste. Those chocolatey bits are absolute gold.
- Zero Waste Tip: Chop up any "failed" or dry fudge and fold it into vanilla ice cream for a homemade "Mackinac Island Fudge" flavor.
- The Coffee Hack: Stir a square of fudge into your morning coffee or hot cocoa for a rich, mocha style upgrade.
- Freezing: If you want to save it for a rainy day, fudge freezes beautifully. Wrap it twice in plastic wrap and once in foil. It will last for up to 3 months. Just be sure to thaw it slowly at room temperature while still wrapped to prevent condensation from making the surface sticky.
Creative Presentation and Serving Ideas for Party Platters
When it comes to serving, the "Island Style" is all about the rustic, thick slice. Instead of tiny perfect squares, try cutting long, 1 inch thick wedges. It feels more substantial and authentic.
If you're putting together a dessert board, pair this fudge with something salty like pretzels or some tart dried cherries (another Michigan staple!). The contrast between the deep, dark cocoa and the salty crunch is hard to beat.
For a stress free gift, I like to place three or four large slices in a tin lined with parchment paper. It’s a hearty, homestyle gift that looks like it came straight from a boutique candy shop.
Just remember to slice it while it's at room temperature using a warm, dry knife will give you those clean, professional edges without the fudge sticking to the blade. Whether you're making this for a holiday or just because you're missing the lakeshore, this recipe brings a little piece of Michigan right to your table.

Recipe FAQs
What is special about Mackinac Island fudge?
It relies on a precise cooling and agitation process to achieve its signature smooth, creamy texture. Unlike standard fudge, this method requires cooling the mixture undisturbed to 110°F before beating it to create the perfect crystalline structure.
What is the original fudge on Mackinac Island?
The original is a rich, dark chocolate confection defined by Dutch processed cocoa and high fat cream. It is traditionally crafted using a heavy bottomed pan and specific temperature control to ensure a shelf stable, velvety finish without the use of artificial fillers.
What are the ingredients in Mackinac Island fudge?
This recipe uses eight specific ingredients: heavy cream, European style butter, granulated cane sugar, light brown sugar, sea salt, Dutch processed cocoa powder, 60% cacao dark chocolate, and pure vanilla extract.
What does Mackinac Island fudge taste like?
Expect a deep, intense chocolate flavor balanced by the richness of European style butter and heavy cream. The texture is dense and smooth, offering a decadent melt-in-your mouth experience that is characteristic of authentic, high-quality fudge.
How to prevent my fudge from becoming grainy?
Wait until the mixture reaches exactly 110°F (43°C) before you begin vigorous stirring. Stirring while the temperature is too high can cause sugar crystals to grow too large, leading to a gritty texture instead of the smooth consistency you want.
Is it true I should stir the fudge while it is boiling?
No, this is a common misconception. You must stop stirring immediately once the mixture reaches a boil to prevent premature crystallization, which will ruin the final texture of your fudge.
How to ensure the fudge sets properly?
Pour the mixture into your parchment lined 8x8 inch square pan immediately after beating it to a thick consistency. Let the fudge set undisturbed at room temperature for at least 3 hours to ensure it firms up into a clean slicing block.
Homemade Mackinac Island Fudge
Ingredients:
Instructions:
Nutrition Facts:
| Calories | 151 kcal |
|---|---|
| Protein | 0.8 g |
| Fat | 8.6 g |
| Carbs | 19.2 g |
| Fiber | 0.8 g |
| Sugar | 17.8 g |
| Sodium | 53 mg |
