One Hour French Bread: Crusty and Soft
- Time: Active 35 minutes, Passive 25 minutes, Total 60 minutes
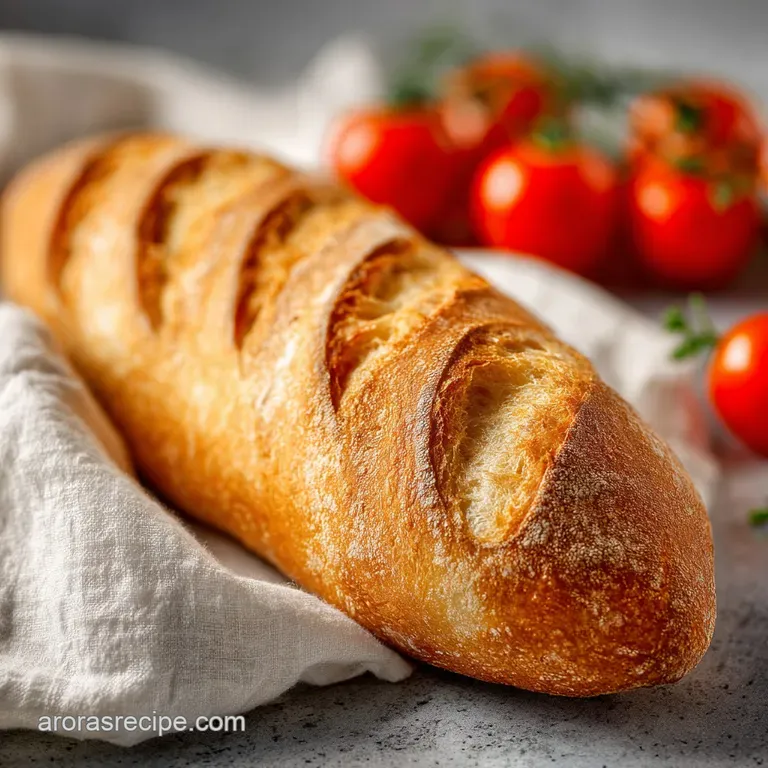
- Flavor/Texture Hook: A shatteringly crisp golden crust with a soft, hearty interior
- Perfect for: Last minute dinner guests or hearty Midwestern soup nights
- Master This One Hour French Bread Recipe
- Why This One Hour Recipe Works
- The Components Of Hearty Loaves
- Essential Gear For Stress Free Baking
- Step-By-Step To Golden Loaves
- Avoiding Common Bread Baking Blunders
- Customizing Your Homestyle Bread
- Debunking Bread Baking Myths
- Storing Your Fresh French Bread
- Perfect Pairings For Your Meal
- Recipe FAQs
- 📝 Recipe Card
Master This One Hour French Bread Recipe
There is absolutely nothing that hits quite like the smell of yeast blooming in a warm kitchen on a Tuesday afternoon. I remember a few months back, I had a big pot of slow cooker beef stew bubbling away, and it just felt wrong not to have a crusty loaf to drag through that rich gravy.
But I didn't have four hours to wait on a traditional baguette. I needed a win, and I needed it before the sun went down.
That is how I ended up leaning into this specific method. It turns the house into a bakery in less time than it takes to watch a couple of sitcom episodes. You get that classic "shatter" when you bite into the crust, but the middle stays dense enough to hold up to a heavy swipe of salted butter.
It is stress free baking at its finest, meant for real life when you're hungry and short on time.
You don't need to be a professional baker to pull this off. We are going for homestyle comfort here, not a fancy competition loaf. This recipe relies on a few simple tricks to cheat the clock without sacrificing that yeasty, soulful flavor we all crave.
It's about getting a warm loaf on the table while the stew is still hot, and honestly, your family won't believe you made it from scratch in an hour.
Why This One Hour Recipe Works
Getting bread to behave in sixty minutes usually sounds like a tall order, but it really comes down to managing the environment for your yeast. Most traditional recipes use very little yeast and a long, cold ferment to build flavor. Here, we do the opposite.
We use a generous amount of rapid rise yeast and a bit of sugar to give those little organisms an immediate energy boost, forcing them to produce carbon dioxide at lightning speed.
- High Octane Fermentation: Rapid rise yeast is milled into smaller particles, allowing it to dissolve and activate much faster than active dry varieties.
- Thermal Acceleration: Using water specifically between 110°F and 115°F acts like a warm bath, waking the yeast up instantly without scalding it.
- Gluten Structure: The use of bread flour provides a higher protein content, which creates a stronger "net" to trap those fast forming air bubbles quickly.
When you compare this to something like my Homemade Naan Bread, which also works on a relatively quick timeline, the French loaf requires a more intense burst of heat at the start to set that iconic crust.
| Method | Total Time | Texture Outcome | Best For |
|---|---|---|---|
| Traditional Baguette | 4 - 6 hours | Airy, large holes | Sandwiches |
| This One Hour Method | 60 minutes | Hearty, tight crumb | Soups and stews |
| No Knead Pot Bread | 12 - 18 hours | Sour, chewy crust | Charcuterie |
The magic of this specific process is the cornmeal on the bottom of the pan. It doesn't just prevent sticking; it provides a tiny air gap between the bread and the hot metal. This allows the heat to circulate, giving you a professional looking bottom crust without a fancy pizza stone.
The Components Of Hearty Loaves
When I say this is a stress free recipe, I mean it. The ingredient list is probably sitting in your pantry right now. I’ve found that using bread flour is the single best decision you can make here because it has more "muscle" than all purpose. It handles the fast rise without collapsing.
| Ingredient | Science Role | Pro Secret |
|---|---|---|
| Bread Flour | Protein structure | Provides the "chew" and prevents a crumbly texture. |
| Rapid Rise Yeast | Leavening agent | Skips the long first rise required by active dry yeast. |
| Granulated Sugar | Yeast fuel | Speeds up CO2 production for a faster volume increase. |
| Vegetable Oil | Crumb softener | Keeps the interior velvety and prevents it from drying out. |
- 2.25 cups warm water (110°F-115°F)
- Why this? Essential for waking up the yeast without killing the living cultures. (Sub: Warm milk for a softer, richer crumb)
- 2 tablespoons granulated sugar
- Why this? Provides instant energy for the yeast to work quickly. (Sub: Honey for a floral undertone)
- 2 tablespoons rapid rise yeast
- Why this? Specially formulated for fast acting, one rise baking methods. (Sub: 3 tablespoons active dry yeast, but add 20 minutes to rise)
- 1.5 teaspoons salt
- Why this? Tightens gluten and balances the flavor of the flour. (Sub: Sea salt for a cleaner mineral taste)
- 2 tablespoons neutral vegetable oil
- Why this? Adds a hint of moisture and improves the shelf life. (Sub: Melted butter for a classic Midwestern flavor)
- 6 cups bread flour
- Why this? High protein ensures the bread rises tall and stays sturdy. (Sub: All purpose flour, but the loaf will be shorter)
- 1 large egg white
- Why this? Creates a shiny, professional looking golden finish on the crust. (Sub: Milk wash for a matte, softer crust)
- 1 tablespoon water
- Why this? Thins the egg white for easier brushing. (Sub: Use heavy cream for a darker brown)
- 1 tablespoon cornmeal
- Why this? Prevents sticking and adds a rustic crunch to the base. (Sub: Parchment paper or a dusting of flour)
Essential Gear For Stress Free Baking
You don't need a lot of fancy equipment, but a stand mixer like a KitchenAid makes the 5 to 7 minutes of kneading a total breeze. If you don't have one, don't sweat it; you can do it by hand on a floured counter, it just counts as your workout for the day.
You will also need a reliable instant read thermometer. I used to guess the water temperature, but after killing my yeast a few times, I realized that 115°F is a hard limit.
A large, sturdy baking sheet is a must, along with a pastry brush for that egg wash. If you don't have a pastry brush, you can use a clean paper towel or even the back of a spoon to gently spread the wash.
The only other "special" tool is a very sharp knife or a razor blade (called a lame) to score the top of the dough. This isn't just for looks it controls where the bread expands so it doesn't "blow out" the bottom.
step-by-step To Golden Loaves

- Bloom the yeast. Mix 2.25 cups warm water (110°F-115°F), 2 tablespoons sugar, and 2 tablespoons rapid rise yeast in your mixer bowl. Let it sit for 5 minutes until a thick, foamy head appears. Note: If it doesn't foam, your yeast is dead or the water was too hot.
- Start the paste. Add 2 tablespoons oil, 1.5 teaspoons salt, and 3 cups of bread flour. Mix on low until it looks like a thick, shaggy glue.
- Knead the dough. Gradually add the remaining 3 cups of flour, 1/2 cup at a time. Knead with the dough hook for 5–7 minutes until the dough pulls away from the sides and feels elastic.
- Shape the loaves. Divide the dough in half and roll into two 12 inch long logs. Place them on a baking sheet dusted with 1 tablespoon cornmeal.
- Proof the bread. Cover with a warm, damp cloth and let rise in a draft free spot for 20 minutes until the loaves have nearly doubled in size. Preheat your oven to 400°F (205°C) during this time.
- Score the tops. Use a sharp knife to cut 3-4 diagonal slashes across the top. Note: This prevents the crust from cracking in random places.
- Apply the wash. Whisk 1 egg white with 1 tablespoon water. Brush this generously over the tops and sides of the loaves.
- Bake to perfection. Place in the center of the oven and bake for 20-25 minutes until the crust is deep golden and the internal temperature reaches 190°F.
- The thump test. Tap the bottom of the loaf; it should sound hollow like a drum.
- Cool slightly. Let the bread rest for at least 10 minutes before slicing to let the internal steam settle.
Avoiding Common Bread Baking Blunders
The biggest mistake I see people make with this one hour french bread recipe is adding too much flour. It is tempting to keep dumping flour in if the dough feels a little tacky, but stop once the dough clears the sides of the bowl. If you add too much, you'll end up with a brick instead of a loaf.
The dough should feel like a sticky note it sticks to your finger but pulls away cleanly.
Why Your Bread Is Too Dense
If your loaf feels heavy and didn't rise, it’s usually a temperature issue. Either the water was too cold to wake the yeast up, or it was so hot it killed it. Another culprit is a drafty kitchen. If your house is chilly, turn your oven on for 60 seconds, turn it off, and then put your dough inside to rise.
That trapped, residual warmth is a game changer for a fast proof.
| Problem | Root Cause | Solution |
|---|---|---|
| Crust is pale | Not enough egg wash | Brush more thoroughly or add a pinch of sugar to the wash. |
| Bread is gummy | Sliced too early | Let it cool for 10 minutes so the starch sets properly. |
| Bottom is burnt | Oven rack too low | Move the baking sheet to the middle or top third of the oven. |
Common Mistakes Checklist
- ✓ Always check your yeast expiration date; old yeast won't rise in an hour.
- ✓ Use a thermometer for the water; "warm" is too subjective and risky.
- ✓ Don't skip the sugar, as the yeast needs that fast acting fuel.
- ✓ Score the bread at least half an inch deep to allow for "oven spring."
- ✓ Let the oven fully preheat for 15 minutes before the bread goes in.
Customizing Your Homestyle Bread
Once you've mastered the basic loaf, you can really play around with the flavors. Sometimes I’ll toss in a tablespoon of dried rosemary and some roasted garlic cloves during the final minute of kneading. It makes the whole house smell like a high end bistro. If you're looking for something different but still quick, I often swap this out for my Homemade Cornbread recipe when I’m serving chili or ribs.
If you want to scale this recipe down for a smaller household, you can easily cut everything in half to make just one loaf. For a larger crowd, I wouldn't recommend doubling the recipe in one mixer bowl unless you have a professional sized 7 quart machine.
It’s better to make two separate batches to ensure the gluten develops correctly and the motor doesn't burn out.
Chef Tip: For a truly "shattering" crust, place a small metal pan on the bottom rack of the oven while it preheats. Right after you slide the bread in, toss half a cup of ice cubes into that hot pan.
The steam will keep the surface of the dough moist for the first few minutes, allowing it to expand fully before the crust hardens.
| Original Ingredient | Substitute | Why It Works |
|---|---|---|
| Bread Flour | All Purpose Flour | Lower protein. Note: Results in a softer, less chewy loaf. |
| Vegetable Oil | Melted Butter | Adds milk solids. Note: Creates a richer flavor but the crust stays softer. |
| Sugar | Honey | Natural sugar. Note: Retains more moisture and browns the crust faster. |
Debunking Bread Baking Myths
One big myth is that you need a specialized "bread machine" to get good results at home. That's just not true. A standard oven and a baking sheet are all you need for a rustic French loaf.
In fact, many people prefer the texture of oven baked bread because the dry, circulating heat creates a much better crust than the steamy environment of a bread machine.
Another misconception is that you have to punch the dough down aggressively. You actually want to handle the dough gently after the rise so you don't collapse all those hard earned air bubbles. When you're shaping your logs, think of it more like folding a letter rather than squishing play dough.
Keeping that air inside is what gives you a light, hearty crumb.
Storing Your Fresh French Bread
Because this bread doesn't have the preservatives of store-bought loaves, it is best eaten within 24 hours. If you have leftovers, keep them in a paper bag rather than plastic. Plastic traps moisture and will turn that beautiful crust soft and rubbery within a few hours.
If it does go a bit stale, it makes the absolute best French toast or homemade croutons you've ever had.
- Fridge
- Not recommended, as it stales the bread faster.
- Freezer
- Wrap tightly in plastic wrap and then foil. It stays fresh for up to 3 months. To reheat, bake at 350°F (180°C) for 10 minutes straight from the freezer.
- Zero Waste Tip
- Take any leftover ends, pulse them in a blender, and freeze the crumbs. Use them later for breading chicken or topping a Midwestern style casserole.
Perfect Pairings For Your Meal
This bread is designed to be a "workhorse" loaf. It’s hearty enough to be the star of the show but simple enough to pair with almost anything. I personally love it sliced thick and served alongside a pot of white bean and kale soup.
The tight crumb of the bread acts like a sponge, soaking up the broth without falling apart into a soggy mess.
For a simple snack, try a "Midwestern Bruschetta." Toast a thick slice, rub a raw garlic clove over the warm surface, and top it with a thick layer of salted butter and a sprinkle of dried parsley. It’s homestyle, stress free, and incredibly satisfying.
Whether you're serving it with a holiday roast or just a simple weeknight pasta, this loaf is the ultimate shortcut to making a meal feel special.

Recipe FAQs
Why is my dough not rising during the 20-minute window?
Check your water temperature and yeast viability. If the water was above 115°F, it likely killed the yeast, or your yeast may have passed its expiration date. If you enjoyed mastering the rising technique here, you can apply similar temperature sensitivity principles to ensure your proofing is consistent across other bakes.
How to achieve a crispy golden crust?
Whisk one egg white with one tablespoon of water and brush it over the shaped loaves. This protein rich wash encourages a deep, shiny, golden color while the bread bakes at 400°F.
Is it true I can use all-purpose flour instead of bread flour?
No, this is a common misconception. Bread flour has a higher protein content, which is necessary to create the strong gluten structure required for the dough to rise properly in only one hour.
How to tell when the loaves are fully baked?
Insert an instant read thermometer into the center of the loaf. The bread is done once it reaches an internal temperature of 190°F and the crust sounds hollow when tapped.
How to store leftovers so the crust stays crunchy?
Place the bread in a paper bag at room temperature. Avoid plastic bags, which trap moisture and cause the crust to become soft and rubbery within a few hours.
Can I proof the dough in the refrigerator overnight?
How to score the bread properly before baking?
Use a very sharp knife or razor blade to make 3-4 diagonal slashes. Ensure these cuts are at least half an inch deep to control expansion and allow for proper oven spring during the 25-minute bake.
One Hour French Bread
Ingredients:
Instructions:
Nutrition Facts:
| Calories | 197 kcal |
|---|---|
| Protein | 5.8 g |
| Fat | 2.2 g |
| Carbs | 38.2 g |
| Fiber | 1.4 g |
| Sugar | 1.6 g |
| Sodium | 221 mg |
