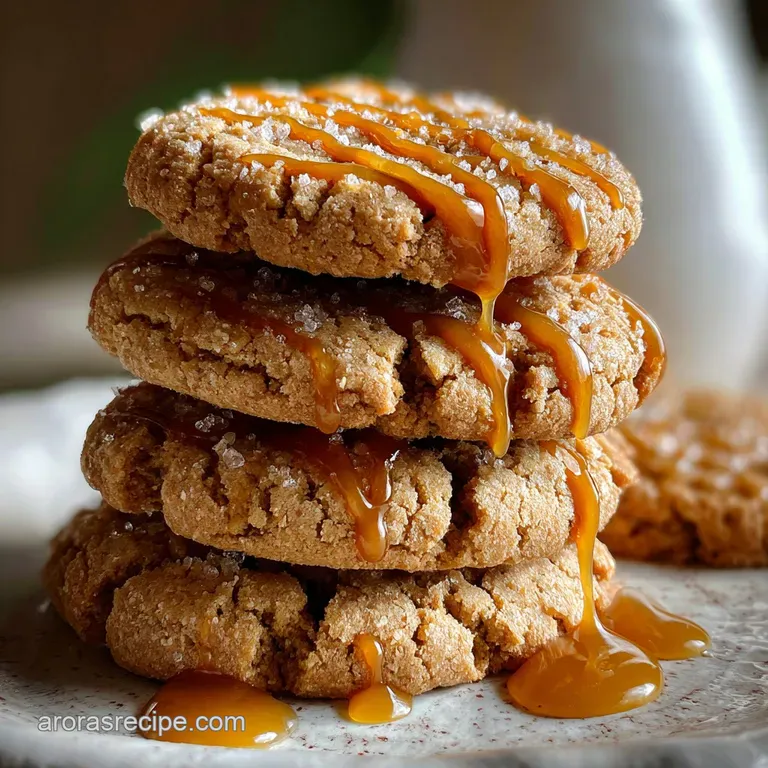
Salted Caramel Cookies: Velvety Molten Centers
- Time: Active 15 minutes, Passive 10 minutes, Total 25 minutes
- Flavor/Texture Hook: Velvety molten centers with a buttery, crispy edge crunch
- Perfect for: Weekend baking, holiday gift tins, or a cozy Midwestern Sunday
- Bake the Perfect Chewy Salted Caramel Cookies
- The Science Behind the Texture
- Component Analysis for Every Ingredient
- Essential Components for Sweet Balance
- Simple Tools for Stress Free Baking
- Step-By-Step Assembly and Baking
- Common Cookie Baking Mistakes Fixed
- Adjusting the Batch Size Correctly
- Debunking Popular Kitchen Myths
- Storage and Waste Prevention Tips
- Ideal Ways to Serve Treats
- Salted Caramel Cookies FAQs
- 📝 Recipe Card
Bake the Perfect Chewy Salted Caramel Cookies
Right then, let's talk about the specific joy of a warm cookie that actually has a gooey surprise inside. I used to struggle with caramel cookies because the caramel would always find a way to escape, burning into a sticky, bitter mess on my baking sheet.
It was frustrating, but after a few messy trials in my own kitchen, I figured out that the secret isn't just the caramel itself it's how you wrap it.
We've all been there, standing in the kitchen with flour on our aprons, hoping for that bakery style finish. This version is my absolute favorite because it uses simple, Midwestern staples to create something that tastes like it came from a high end boutique.
We aren't doing anything fancy or difficult here; we're just being smart with our ingredients and our time.
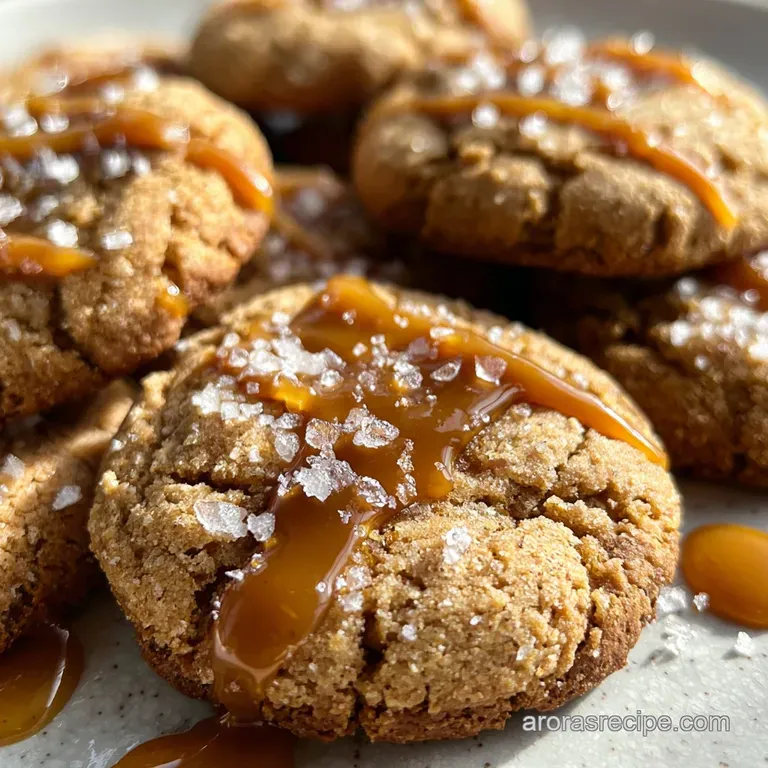
Trust me on this, once you see that first cookie pull apart to reveal a silky, molten core, you'll be hooked. These Salted Caramel Cookies aren't just about the sugar; they're about that beautiful contrast between the savory Maldon salt and the deep, molasses heavy dough.
Let’s get into why this method actually works every single time without any stress.
The Science Behind the Texture
The secret to a cookie that doesn't fall apart lies in the chemistry of your mixing bowl. When we combine the fats and sugars, we aren't just mixing; we're creating a structure that can support a heavy caramel center without collapsing.
Sugar Hygroscopy: Dark brown sugar attracts more moisture than white sugar, which keeps the crumb soft and pliable even after the cookies have cooled down.
Starch Gelatinization: The small addition of cornstarch helps the flour absorb liquid more efficiently, creating a sturdy "crumb" that traps the caramel inside.
Protein Denaturation: The extra egg yolk adds fat and protein without the water content of a full white, resulting in a richer, more velvety mouthfeel.
Maillard Reaction: The combination of dark brown sugar and baking soda encourages rapid browning, giving us those crispy, caramelized edges that shatter when you bite into them.
| Baking Method | Chill Time | Resulting Texture | Best For |
|---|---|---|---|
| Room Temp Dough | 0 minutes | Wide spread, thinner edges | Crispy cookie lovers |
| Quick Chill | 30 minutes | Controlled spread, soft center | The standard "chewy" goal |
| Overnight Chill | 12 hours | Deep flavor, thick and puffy | Gourmet, bakery style look |
Chilling the dough is one of those steps people love to skip, but it's the difference between a puddle and a prize winner. When the fat is cold, it takes longer to melt in the oven, giving the flour time to set its structure before the cookie spreads too thin.
This is especially vital when you have a caramel square tucked inside.
Component Analysis for Every Ingredient
Understanding what goes into your bowl helps you troubleshoot on the fly. We're using unsalted butter so we can control the salt ourselves nothing ruins a cookie faster than a "salty" dough combined with a "salted" caramel.
| Ingredient | Science Role | Pro Secret |
|---|---|---|
| Unsalted Butter | Provides fat for tenderness and carry flavor | Use room temp butter for a fluffier, more aerated dough |
| Dark Brown Sugar | Adds moisture and deep molasses notes | Pack it tight into the cup to ensure the ratio is right |
| All Purpose Flour | Builds the gluten skeleton of the cookie | Weigh your flour (315g) to avoid a dry, crumbly mess |
| Cornstarch | Interferes with gluten to keep things tender | Don't skip this; it's the key to that velvety "melt in-mouth" feel |
If you find yourself out of dark brown sugar, you can use light brown, but the flavor won't be quite as hearty. The dark version has more molasses, which is what gives these Salted Caramel Cookies their signature Midwestern soul.
Essential Components for Sweet Balance
When gathering your supplies, stick to the classics. I always keep a bag of those soft caramel squares in the pantry for emergencies, and they work beautifully here. You don't need to spend a fortune on artisanal caramels; the ones in the clear wrappers are reliable and melt at a predictable rate.
- 1 cup (225g) unsalted butter: Why this? Provides the foundational fat for a rich, buttery crumb.
- 1 cup (200g) dark brown sugar, packed: Why this? The high molasses content ensures a chewy, fudge like texture.
- 0.5 cup (100g) granulated sugar: Why this? Creates the crispy, caramelized edges we love.
- 1 large egg + 1 large egg yolk: Why this? The extra yolk adds richness without making the dough cakey.
- 1 tbsp vanilla bean paste: Why this? Offers a deeper, more aromatic floral note than extract.
- 2.5 cups (315g) all purpose flour: Why this? The perfect protein balance for structure and softness.
- 1 tsp cornstarch: Why this? Keeps the cookies soft for days by slowing down staling.
- 1 tsp baking soda: Why this? Provides lift and helps with the browning process.
- 0.5 tsp fine sea salt: Why this? Sharpens the flavors inside the dough itself.
- 24 soft caramel squares: Why this? The molten heart of the recipe; they hold their shape well.
- 2 tbsp salted caramel sauce: Why this? Used for a final drizzle to add visual flair.
- 1 tsp Maldon flaky sea salt: Why this? Essential for that crunchy, savory finish on top.
| Original Ingredient | Substitute | Why It Works |
|---|---|---|
| Dark Brown Sugar | Light Brown Sugar | Similar moisture, but has a milder, less toasted flavor profile |
| Vanilla Bean Paste | Vanilla Extract | Same flavor impact, though you'll lose the pretty black specks |
| Maldon Flaky Salt | Coarse Kosher Salt | Provides the necessary salt crunch without being overbearingly salty |
If you're in the mood for something different, you might find that the base of this dough reminds you of my Peanut Butter Cookies recipe, which also focuses on that perfect chewy to crisp ratio.
Simple Tools for Stress Free Baking
You don't need a kitchen full of gadgets to make these Salted Caramel Cookies happen. I'm a big fan of the "less is more" approach. A standard hand mixer or a sturdy wooden spoon is really all you need for the dough.
The most important tool is actually your parchment paper or a silicone baking mat. Caramel is like glue once it cools, and if a little bit leaks out, you'll be glad you didn't have to scrub it off the bare metal of your cookie sheet.
I also recommend a medium cookie scoop (about 1.5 to 2 tablespoons) to keep your portions even. Even sizing means even baking, which is the secret to getting every cookie in the batch just right.
Chef's Tip: Freeze your caramel squares for 10 minutes before you stuff them into the dough. This delays their melting point in the oven, ensuring the cookie sets before the caramel gets too liquid and tries to escape.
step-by-step Assembly and Baking
- Cream the 1 cup (225g) unsalted butter with both the 1 cup (200g) dark brown sugar and 0.5 cup (100g) granulated sugar. Note: Beat for at least 3 minutes until the mixture looks pale and fluffy.
- Add the 1 large egg, 1 large egg yolk, and 1 tbsp vanilla bean paste. Note: Scrape the sides of the bowl to ensure every bit of egg is fully incorporated.
- Whisk together the 2.5 cups (315g) flour, 1 tsp cornstarch, 1 tsp baking soda, and 0.5 tsp fine sea salt. Note: Sifting isn't necessary, but a good whisking removes any flour lumps.
- Slowly mix the dry ingredients into the wet. Note: Stop mixing the moment you see no more white flour streaks to avoid tough cookies.
- Scoop about 1.5 tablespoons of dough and flatten it in your palm. Note: This creates a "wrapper" for your caramel center.
- Place one soft caramel square in the center and fold the dough around it. Note: Pinch the seams tightly until the caramel is completely hidden.
- Roll the stuffed dough into a smooth ball. Note: A smooth surface prevents the dough from cracking and leaking during the bake.
- Place on a lined baking sheet and chill for at least 30 minutes. Note: This is the most important step for preventing excess spread.
- Bake at 350°F for 10 minutes until the edges are golden and the tops look set but slightly soft.
- Drizzle with 2 tbsp caramel sauce and sprinkle with 1 tsp Maldon flaky sea salt. Note: Do this while they are still warm so the salt sticks.
Much like the assembly of my favorite Sweet Potato Casserole recipe, the key is in the layering of flavors sweet, buttery, and salty all working together.
Common Cookie Baking Mistakes Fixed
Even the best of us have bad days in the kitchen. If your cookies aren't looking quite right, don't panic! Most cookie issues are easily solved once you know what's happening behind the scenes.
Why Your Caramel Leaked
If you see a puddle of caramel on the pan, the dough was likely too thin or the caramel wasn't centered. When the caramel heats up, it seeks the path of least resistance. If your dough ball has a thin spot on the bottom, the caramel will melt right through it.
Why Your Cookies Spread
Flat, thin cookies are usually the result of butter that was too soft or dough that wasn't chilled long enough. If your kitchen is warm, that butter starts melting before it even hits the oven. Always aim for a "cool room temp" for your butter it should give slightly when pressed but still hold its shape.
| Problem | Root Cause | Solution |
|---|---|---|
| Caramel Leakage | Thin dough walls | Ensure the caramel is perfectly centered and the seams are pinched shut. |
| Hard Caramel | Overbaking | Reduce bake time by 1-2 minutes; caramel hardens as it reaches higher temps. |
| Gritty Texture | Under creaming | Beat butter and sugar longer to fully dissolve the sugar crystals. |
Common Mistakes Checklist:
- ✓ Ensure your baking soda is fresh (it loses potency after 6 months).
- ✓ Don't overcrowd the pan - leave 2 inches between dough balls for airflow.
- ✓ Use a kitchen scale for the flour to prevent dry, cakey results.
- ✓ Let the cookies rest on the pan for 5 minutes before moving to a wire rack.
- ✓ Check your oven temperature with a thermometer; many ovens run hot or cold.
Adjusting the Batch Size Correctly
If you're baking for a big Midwestern potluck or just a quiet night for two, you can easily scale this recipe. Just remember that baking is more like chemistry than cooking, so ratios matter.
Cutting the Recipe in Half (12 cookies): Use 0.5 cup butter, 0.5 cup brown sugar, 1/4 cup white sugar, 1 egg yolk (skip the whole egg), 1.25 cups flour, and half measurements for the leavening agents. Reduce the bake time by about 1 minute since a smaller batch often means a more consistent oven temp.
Doubling the Recipe (48 cookies): Keep the leavening agents (soda/salt) at 1.5x rather than a full 2x to prevent a metallic aftertaste. You will need to bake in batches.
Never try to crowd two sheets in the oven at once unless you have a high end convection oven, as the bottom sheet won't brown correctly.
If you have leftover nuts from making The Kensington Crunch recipe, you can chop them up and roll the dough balls in them before baking for an extra layer of texture.
Debunking Popular Kitchen Myths
There are a lot of "rules" in baking that don't actually hold up when you get down to the brass tacks. Let's clear up a few things so you can bake with confidence.
Myth: You must use room temperature eggs. While room temp eggs incorporate slightly better, cold eggs won't ruin your Salted Caramel Cookies. In fact, using cold eggs can help keep the overall dough temperature lower, which actually helps prevent that dreaded spreading we talked about earlier.
Myth: Salt in the dough makes the cookies salty. Salt is a flavor enhancer, not just a seasoning. In this recipe, the salt in the dough makes the chocolate (if you add it) or the caramel taste more like itself.
It cuts through the cloying sweetness of the sugar so you can actually taste the butter and vanilla.
Myth: Sifting flour is mandatory for cookies. For delicate cakes? Sure. For a hearty, chewy cookie like this? A quick whisk in the bowl is more than enough to aerate the flour and remove any clumps. Save yourself the extra dishes!
Storage and Waste Prevention Tips
Keeping these cookies fresh is all about fighting off air. Store them in an airtight container with a single slice of white bread. The bread will give up its moisture to the cookies, keeping them soft and chewy for up to 5 days.
For long term storage, these cookies freeze beautifully. You can freeze the baked cookies for up to 3 months just thaw them at room temperature for an hour. If you want that "just out of the oven" feel, pop a thawed cookie in the microwave for 8 seconds to re melt that caramel core.
Zero Waste Tip: If you have broken cookie pieces or a batch that spread too much, don't throw them away! Crunch them up and use them as a topping for vanilla ice cream, or fold them into a cheesecake crust for a salted caramel twist.
You can even use leftover caramel squares by melting them with a splash of cream to make a dip for apple slices.
Ideal Ways to Serve Treats
Serving these is all about the "wow" factor of the molten center. I always tell people to eat them while they're still slightly warm. If you're hosting a dinner, serving these Salted Caramel Cookies alongside a bitter drink is the way to go.
- The Espresso Pairing: The bitterness of a dark roast coffee or a shot of espresso cuts right through the rich caramel, making each bite feel fresh.
- The A La Mode Experience: Place a warm cookie in a shallow bowl, top with a scoop of high-quality vanilla bean ice cream, and add one extra pinch of Maldon salt.
- The Midnight Snack: Honestly, sometimes the best way is just standing in the kitchen with a cold glass of milk. The cold milk and the warm, buttery cookie are a classic for a reason.
If you want X, do Y: If you want a deeper flavor, brown the butter in a skillet first, then let it solidify back to room temp before mixing. If you want a crunchier edge, roll the dough balls in extra granulated sugar before baking.
If you want a stretchy caramel pull, use high-quality soft caramels (like Werther's Soft) rather than the harder, cheaper varieties.
Baking should be a joy, not a chore. These cookies are my go to when I want something that feels special but doesn't require a whole day in the kitchen. Just remember to pinch those seams tight, chill that dough, and don't be shy with the flaky salt!

Salted Caramel Cookies FAQs
Can I make the dough ahead of time?
Yes, absolutely. You can form the dough balls and chill them in the refrigerator for up to 3 days before baking. This actually enhances the flavor development.
Why did my caramel leak out of the cookies?
This usually happens if the dough wasn't thick enough to fully encase the caramel or if the seams weren't pinched tightly enough. Ensure the caramel is centered and fully covered before rolling into a ball.
How can I prevent my cookies from spreading too much?
Chill the dough thoroughly for at least 30 minutes before baking. Cold dough melts slower in the oven, giving the cookies time to set their structure before spreading too thin. If you enjoyed mastering this technique for texture control, see how the same principle applies to our Classic Sweet Noodle Pudding Kugel Ultra Creamy and Crunchy Top.
My caramel turned hard, what went wrong?
This typically means they were overbaked. Try reducing your bake time by 1-2 minutes. Caramel hardens as it reaches higher temperatures, so precise baking is key.
Can I substitute dark brown sugar for light brown sugar?
Yes, but the flavor will be milder. Dark brown sugar has more molasses, contributing a deeper, more robust caramel flavor. Light brown sugar will work but yield a less intense taste.
How should I store leftover salted caramel cookies?
Store them in an airtight container with a slice of white bread. The bread helps maintain moisture, keeping the cookies soft and chewy for up to 5 days. For longer storage, freeze baked cookies for up to 3 months.
Are these cookies good for holiday gift tins?
Yes, they are excellent for gift tins. Their rich flavor and beautiful presentation make them a perfect addition to any holiday assortment. They also pair wonderfully with other comforting baked goods like those found in our Southern Sweet Potato Casserole: Rich Creamy with Crunchy Pecan Streusel.
Salted Caramel Cookies

Ingredients:
Instructions:
Nutrition Facts:
| Calories | 206 kcal |
|---|---|
| Protein | 2.0 g |
| Fat | 8.9 g |
| Carbs | 29.7 g |
| Fiber | 0.4 g |
| Sugar | 19.2 g |
| Sodium | 126 mg |
