Baked Teriyaki Chicken: Ultimate Glazed Recipe

- Mastering Baked Teriyaki Chicken: Why Homemade Glaze Wins
- The Science of the Perfect Sticky Glaze and Tender Texture
- Essential Pantry Staples for the Teriyaki Marinade
- Step-by-Step Guide to Foolproof Baked Teriyaki Chicken
- Troubleshooting and Advanced Tips for the Home Cook
- Making the Most of Leftovers: Storage, Reheating, and Freezing
- Creative Serving Suggestions to Complement the Sticky Teriyaki
- Recipe FAQs
- 📝 Recipe Card
Mastering Baked Teriyaki Chicken: Why Homemade Glaze Wins
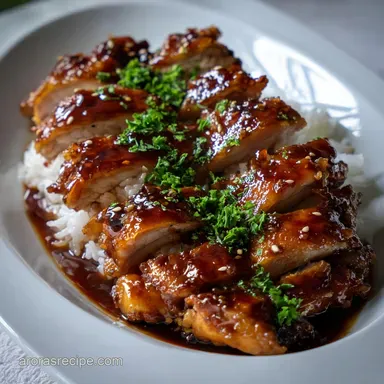
The moment you open the oven door, that smell hits you: sweet, savory, and intensely umami. It’s the aroma of perfectly caramelized sugar mingling with fresh ginger and garlic, coating every glorious piece of the Baked Teriyaki Chicken thighs.
When it emerges, the surface is sticky, shiny, and the most magnificent mahogany color.
Trust me, this isn't some thin, watery sauce poured from a plastic bottle. This Easy Baked Teriyaki Chicken recipe is an absolute weeknight lifesaver that requires minimal cleanup and delivers maximum flavor complexity.
It's cheap, fast, and so much better than takeout, making it a guaranteed crowd pleaser for the whole family.
So ditch the guesswork, because I’m sharing all the little tricks I’ve learned and all the mistakes I made to achieve that flawless, clingy, restaurant quality sticky glaze at home. Let's crack on and master the art of the perfect, juicy, Baked Teriyaki Chicken .
The Science of the Perfect Sticky Glaze and Tender Texture
If you’ve ever tried making Baked Teriyaki Chicken at home and ended up with dry poultry sitting in a puddle of watery brown sauce, you know the frustration. This method solves all of that.
We focus on baking slowly to keep the interior tender, while using a reserved, reduced glaze for the signature sticky finish.
Decoding the Teriyaki Glaze: Sweet, Savory, and Umami
Teriyaki literally translates to teri (luster/glaze) and yaki (broil/grill). The key to the luster is the careful balance of sugar and moisture. By creating the glaze separately in a saucepan, we control the reduction, ensuring that the final sauce is thick and ready to coat, not just hydrate, the meat.
This is the foundation of any great Homemade Teriyaki Glaze .
What Makes This the Ultimate Weeknight Dish?
It’s all about the hands off approach. Unlike pan-frying, where you have to stand over a splattering wok, placing the Baked Teriyaki Chicken Thighs in the oven frees you up to cook your sides.
You need about 15 minutes of active prep time, and then the oven does the heavy lifting while your kitchen fills with incredible smells.
Oven Baking vs. Pan-Frying: The Texture Advantage
Oven baking is the champion for juiciness, especially when dealing with slightly uneven cuts. Because chicken thighs have higher fat content, baking them at 400°F (200°C) allows the fat to render slowly, naturally basting the meat.
This guarantees incredibly tender, moist results every single time, far exceeding what pan-frying often yields.
Achieving Maximum Caramelization During Baking
The beautiful mahogany color comes from the Maillard reaction mixing with the caramelization of the brown sugar in the sauce. The trick? Don't glaze too early! Sugar burns fast.
We reserve the thick glaze for the last 10– 12 minutes of baking, which allows the heat to transform the glaze into that gorgeous, sticky lacquer without turning it bitter.
The Role of Cornstarch (or Thickener) in Glaze Adhesion
This is where the magic really happens for the home cook. Traditional Japanese teriyaki relies on intense, slow reduction. We cheat slightly by using a simple cornstarch slurry. This rapidly thickens the reserved marinade base into a syrupy texture, ensuring that when you brush it onto the Baked Teriyaki Chicken , it actually sticks and forms a proper coating.
Balancing Acidity and Sweetness for Depth
To avoid a one-note sweet sauce, we introduce complexity through the liquid ingredients. Mirin provides sweet depth, while a small amount of sake (or dry sherry) adds necessary alcoholic complexity and acidity. This layering of flavor is what takes the final dish from "nice" to "wow."
Chef's Note: If your finished glaze tastes too sweet, a tiny squeeze of fresh lemon juice or a splash of rice vinegar stirred in at the end can instantly brighten the flavor profile.
Essential Pantry Staples for the Teriyaki Marinade
A proper Simple Teriyaki Chicken depends entirely on the quality of your sauce base. Don’t skimp on these core components!
Choosing the Right Soy Sauce (Low Sodium vs. Traditional)
Teriyaki sauce is inherently salty. If you use traditional, full sodium soy sauce, you run the risk of an overpowering saltiness that masks the ginger and sweetness. Always opt for low-sodium soy sauce. This gives you maximum flavor control.
If you only have regular soy, you may want to cut the measurement slightly and add a splash of water.
Sake vs. Mirin: Flavor Profiles Explained
These two rice wines are non-negotiable for authenticity. Mirin is a sweet cooking wine, crucial for that signature luster and sweetness. Sake, on the other hand, is a drier rice wine that carries the flavors deeper into the meat and adds essential complexity.
If you skip the sake, you can substitute with dry sherry or chicken broth, but the flavor will be a bit shallower.
Fresh vs. Powdered Ginger and Garlic
While you can use powdered, please don't. The fresh, punchy zing of grated ginger and minced garlic is vital to cut through the richness of the soy and sugar. If you use dried, halve the amount and mix it thoroughly into the liquid before simmering.
Fresh ingredients yield exponentially better results for this Baked Teriyaki Chicken Recipe.
Quick Swaps and Substitutions for Dietary Needs
I know ingredients can be tricky, especially midweek. Here are the easiest swaps to make sure you can still get this delicious Baked Teriyaki Chicken on the table tonight.
| If You Don't Have... | Use This Instead... |
|---|---|
| Mirin | Equal parts honey/brown sugar dissolved in water |
| Sake | Dry Sherry, White Wine, or Chicken Broth |
| Brown Sugar | Honey or Maple Syrup (Use slightly less) |
| Soy Sauce | Tamari or Coconut Aminos (for gluten-free options) |
| Cornstarch | Arrowroot Powder (use half the amount) |
step-by-step Guide to Foolproof Baked Teriyaki Chicken

This recipe is designed for maximum flavor and minimum fuss. Follow these steps closely, especially the separation of the glaze!
Preparing the Glaze Base and Marinating for Flavor Infusion
Start by whisking all your marinade ingredients together: the soy sauce, mirin, sake, brown sugar, ginger, garlic, and pepper. This is your magic liquid. Now, here is the most crucial move: Pour half of the mixture into a separate saucepan and reserve it.
Do not let the raw poultry touch the reserved glaze that sauce is for coating! Marinate the pat-dried chicken thighs in the remaining half for at least 30 minutes.
The Initial Bake: Setting the Internal Temperature
Preheat the oven to 400°F (200°C). Line a baking sheet trust me, the cleanup is worth it and remove the chicken from the marinade, letting the excess drip off (discard the used marinade). Place the chicken on the tray and bake for 15 minutes.
This gives the Baked Teriyaki Chicken a solid head start on cooking before the thick glaze is applied.
Brushing and Glazing Technique for a Sticky Finish
While the chicken bakes, put your reserved glaze base on medium heat. In a small cup, make your cornstarch slurry (cornstarch mixed with cold water). Pour the slurry into the simmering glaze base and whisk vigorously for about 60 to 90 seconds until it thickens into a heavy syrup.
Now, pull the partially cooked chicken out of the oven. Brush on a generous layer of the reduced glaze. Return to the oven for 5 minutes.
Resting Period: Why It’s Crucial for Juiciness
After the second glaze and another 5– 7 minutes of baking, your Baked Teriyaki Chicken should be deep, burnished brown, and look incredibly sticky. Crucially, check the internal temperature with a thermometer.
It needs to hit 165°F (74° C) . Once cooked, transfer the chicken to a clean cutting board. Let it rest, uncovered, for 5 minutes. Slicing too early lets all those beautiful juices run out onto the board.
Troubleshooting and Advanced Tips for the Home Cook
Preventing the Glaze from Burning or Thinning
If you find your glaze is burning quickly, your oven temperature might be running hot, or you applied the thick sauce too early. Solution: Turn the heat down to 375°F (190°C) for the last 10 minutes and wrap the exposed edges of the tray in foil if necessary.
If the glaze is too thin even after the slurry, simply return the saucepan to the stove and let it reduce gently for a few more minutes until it coats the back of a spoon thickly.
How to Achieve That Restaurant Quality Shine
This involves two things: Glaze Layering and Fat Content . Using chicken thighs ensures enough fat renders to keep the surface moist. Layering the glaze (two thick coats) in the last 10 minutes ensures maximum depth and stickiness.
Once you remove the dish from the oven, brush any remaining glaze left on the sheet pan back onto the chicken for the ultimate shine.
Temperature Checks: Ensuring the Dish is Perfectly Cooked
I cannot stress this enough: use a digital thermometer. Guessing means you either end up with dangerously undercooked poultry or dry, rubbery meat. The internal temperature must register 165°F (74° C). Insert the thermometer into the thickest part of the meat, avoiding bone.
This is the simplest way to guarantee the Best Baked Chicken Recipe every time.
Making the Most of Leftovers: Storage, Reheating, and Freezing
Safe Storage Guidelines for Cooked Poultry
Properly cooked Baked Teriyaki Chicken stores beautifully. Place the cooled leftovers in an airtight container and refrigerate for up to 3 4 days. Store it whole or sliced; the important part is getting it into the fridge within two hours of cooking.
Best Methods for Reheating Without Drying Out
Reheating can be tricky, as the glaze can dry out. My favorite method is wrapping the leftover portions loosely in foil and heating them in a 350°F (175°C) oven for about 10– 12 minutes.
You can also splash a teaspoon of water or broth into the foil packet to create steam, keeping the poultry wonderfully moist. The microwave works, but the texture suffers dramatically.
Freezing Components: Sauces vs. Cooked Dish
The cooked Simple Teriyaki Chicken freezes well for up to 3 months. Let it cool completely, slice it, and place it in a freezer safe bag, pressing out all the air. Thaw it overnight in the fridge before reheating. The glaze itself freezes brilliantly too! If you make a double batch of Homemade Teriyaki Glaze , just portion and freeze it for later use with Grilled Chicken Margherita: Juicy Chicken Perfection or as a marinade for future weeknight meals.
Creative Serving Suggestions to Complement the Sticky Teriyaki
The sweetness and deep savory notes of the Baked Teriyaki Chicken mean it pairs perfectly with simple, light sides that offer a textural contrast.
- Rice Base: Serve over steamed white rice, or for a heartier meal, use brown rice or quinoa to soak up all that gorgeous residual sauce.
- Crisp Vegetables: A simple side of blanched green beans, steamed broccoli, or even some quick sautéed cabbage works wonders.
- The Perfect Potato: If you want something richer, this sticky glaze is incredible alongside Instant Pot Baked Potatoes: Crispy Skin, Fluffy Inside . The fluffy interior is perfect for catching the glaze.
- Noodle Bowl: Shred the chicken and toss it into a bowl of ramen noodles or lo mein, perhaps alongside some Stuffed Poblano Peppers: Cheesy Chicken and Black Bean Dinner for an extra kick of spice!
- Teriyaki Chicken Skewers: You can adapt this exact recipe by cutting the meat into cubes and threading them onto skewers before baking (reduce cooking time by 5 minutes). Just ensure you brush the glaze thoroughly between the pieces.
This Baked Teriyaki Chicken recipe is truly one of the simplest ways to get a stunning dinner on the table. Once you master the homemade glaze, you’ll never go back to the bottled stuff again. Enjoy!

Recipe FAQs
Why did my baked teriyaki chicken turn out dry?
Chicken often dries out if it is cooked past its required internal temperature. For chicken breasts, remove them from the oven immediately when they register 165°F (74°C) with a meat thermometer, and ensure they rest for at least 5 to 10 minutes to redistribute the juices.
Basting the chicken during the last 10 minutes of baking also helps to seal in moisture and flavor.
How do I ensure my teriyaki glaze is thick, sticky, and not watery?
The secret to a sticky glaze is properly reducing the sauce and using a starch thickener. After simmering your sauce base, whisk in a slurry made of equal parts cornstarch and cold water, then bring the sauce back to a rapid boil for 60 seconds to fully activate the thickener.
If it is still too thin, repeat the cornstarch slurry process with half the original amount.
Can I use chicken thighs instead of breasts for this recipe?
Absolutely; chicken thighs are excellent for baking as their higher fat content keeps them extremely moist and flavorful under high heat. Thighs typically require 5 to 10 minutes longer to bake than breasts, and should be cooked to an internal temperature of 175°F (80°C) for the best texture.
The richer flavor profile of the thighs pairs wonderfully with the sweet glaze.
I don't have sake or mirin; what are good substitutes for the sauce?
Mirin (sweet rice wine) adds necessary sweetness and complexity to the glaze. If unavailable, you can substitute it with dry sherry mixed with a pinch of sugar, or simply use white wine mixed with a slightly increased amount of honey or brown sugar. The subtle alcohol flavor cooks off during the reduction process.
How should I store and reheat leftover teriyaki chicken?
Leftover baked teriyaki chicken should be stored in an airtight container in the refrigerator for up to 3 to 4 days. To reheat, the best method is to gently warm the slices in a covered skillet on medium low heat or reheat briefly in a low oven (300°F/150°C), often adding a spoonful of water or reserved sauce to prevent further drying.
Why is broiling recommended for the final step of baking?
Broiling is vital because it delivers a quick blast of intense heat necessary to caramelize the sugars in the teriyaki glaze. This creates the signature glossy, sticky, and slightly charred crust that differentiates a truly great teriyaki dish.
Watch the chicken carefully under the broiler, as the glaze can burn very quickly usually in 1 to 3 minutes.
Can I make this teriyaki sauce gluten-free?
Yes, achieving a gluten-free teriyaki sauce is very straightforward by replacing the traditional soy sauce with tamari, which is naturally gluten-free and has a very similar flavor profile.
Alternatively, you can use coconut aminos, but you may need to slightly decrease the added sugar since coconut aminos are naturally sweeter.
Ultimate Baked Teriyaki Chicken
Ingredients:
Instructions:
Nutrition Facts:
| Calories | 226 kcal |
|---|---|
| Protein | 3.6 g |
| Fat | 6.5 g |
| Carbs | 38.5 g |
