Authentic Colorado Green Chili with Pork
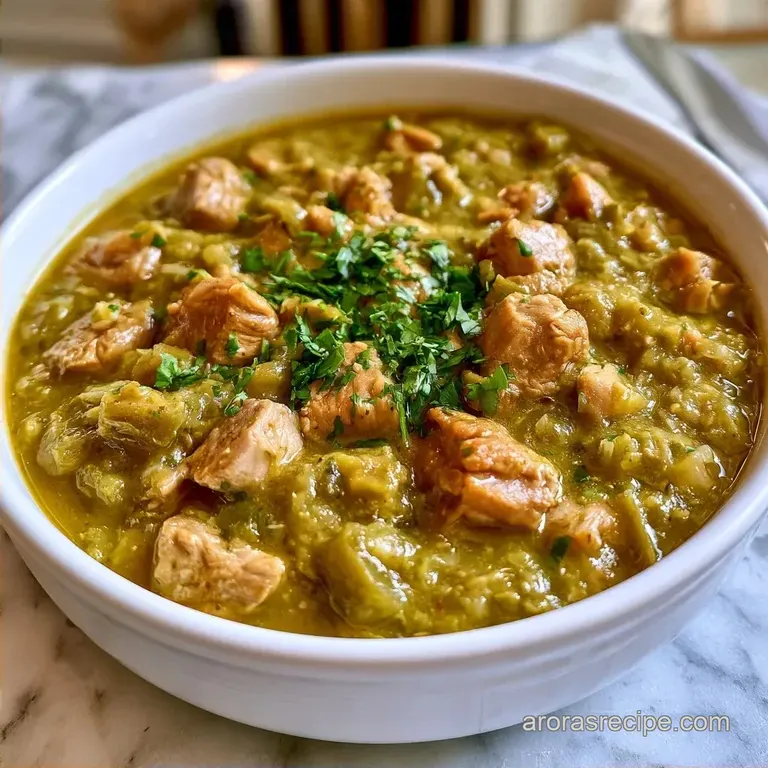
- Time:30 minutes active + 1 hours 45 mins simmering
- Flavor/Texture Hook: Smoky, hearty, and rich with tender pork
- Perfect for: Weekend comfort meals or meal prep for the week
- Making an Authentic Colorado Green Chili
- What Makes This Stew Work
- Deep Dive Into Ingredients
- The Essential Recipe Specs
- Minimal Tools For This Dish
- Simple Step-by-Step Instructions
- Fixing Common Cooking Issues
- Preserving Your Leftovers
- Best Ways To Serve It
- Easy Flavor Swaps
- Recipe FAQs
- 📝 Recipe Card
Making an Authentic Colorado Green Chili
The aroma of Hatch chiles charring under a hot broiler is truly unforgettable. It's a pungent, smoky scent that permeates the kitchen, promising a comforting meal for a cold evening.
I first encountered this flavor at a modest diner near Denver, where I realized the heat wasn't just a burn, it tasted of the mountains and the soil.
For a while, I relied on canned diced chiles, but they never delivered the same impact. The real transformation occurs when you blister the skins of fresh peppers and roast the garlic in its husk. This shifts the profile from mere heat to something deeply nuanced and fulfilling.
If you're new to making Colorado Green Chili, don't be intimidated by the roasting process. It's actually the most straightforward part. You simply let the fire do the hard work, then blend the mixture into a thick, chunky sauce that clings to tender cubes of pork.
What Makes This Stew Work
Pork Shoulder: The collagen in the shoulder melts during the simmer, giving the Colorado Green Chili a velvety mouthfeel that lean meat can't touch.
Roasted Base: Charring the vegetables removes the raw, grassy taste of the peppers and adds a smoky layer. This is why a Hatch green chili sauce is so much more flavorful than using raw ingredients.
| Method | Time | Texture | Best For |
|---|---|---|---|
| Fresh Roast | 2 hours 15 mins | Chunky & Smoky | Maximum flavor |
| Shortcut (Canned) | 1 hour 15 mins | Smoother/Milder | Weeknight rush |
Right then, you've got the foundation. The combination of the pork fat and the roasted aromatics creates a thick, hearty consistency that holds up perfectly whether you're eating it in a bowl or pouring it over eggs.
Deep Dive Into Ingredients
When building a Colorado Green Chili, every ingredient has a job. You aren't just adding things for bulk, you're building a flavor profile that balances heat, acidity, and fat.
| Ingredient | Role | If You Don't Have It |
|---|---|---|
| Hatch Chiles | Primary heat and smoke | Poblano peppers (milder) |
| Pork Shoulder | Fat and heartiness | Pork butt or chicken thighs |
| Chicken Bone Broth | Body and salt | Regular chicken stock |
| Roma Tomatoes | Acidity to cut the fat | Canned crushed tomatoes |
The pork shoulder is really the star here. Honestly, don't even bother with pork loin; it'll dry out and turn into cardboard during the simmer. You want the fat to render down and mingle with the chiles.
The Essential Recipe Specs
Before we start, let's get the numbers straight. This recipe makes a massive batch, which is great because this kind of stew always tastes better the next day.
- Prep time: 30 minutes
- Cook time: 1 hours 45 mins
- Total time: 2 hours 15 mins
- Yield: 16 servings
- Pork temp: Sear until mahogany brown
| Original Ingredient | Substitute | Why It Works |
|---|---|---|
| Pork Shoulder (3 lbs) | Chicken Breast (3 lbs) | Leaner protein. Note: Cook for less time to avoid dryness |
| Bone Broth (4 cups) | Vegetable Broth (4 cups) | Similar liquid base. Note: Lacks the collagen for thickness |
| All Purpose Flour (2 tbsp) | Cornstarch (1 tbsp) | Thickening agent. Note: Results in a glossier, clearer sauce |
Trust me on the bone broth. Using the bone in version adds a layer of richness that makes the sauce feel more like a meal and less like a soup.
Minimal Tools For This Dish
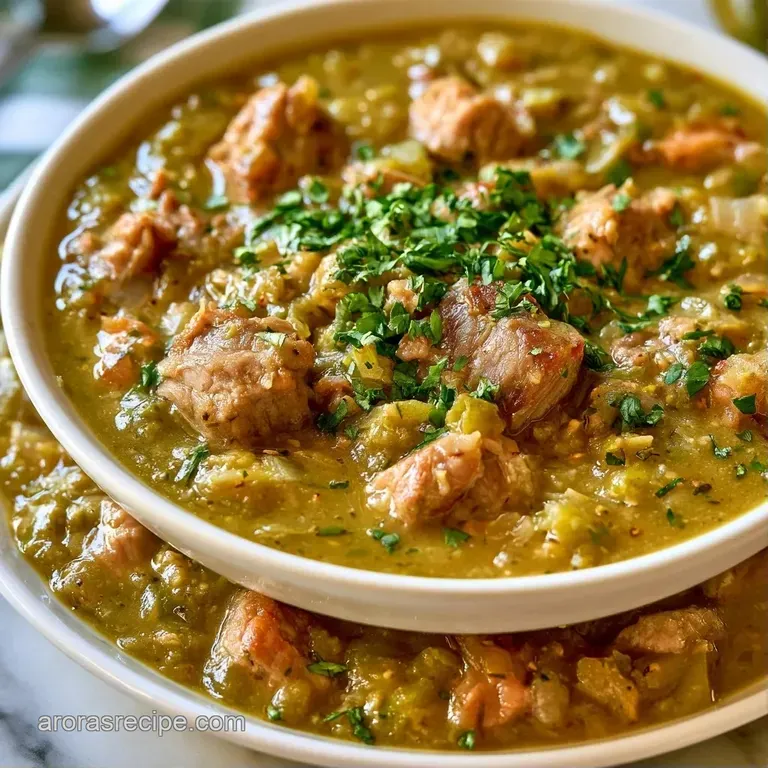
This recipe relies on standard equipment, meaning you can achieve great results without creating a mountain of cleanup.
- Dutch Oven: A heavy-bottomed pot is essential for achieving a proper sear on the meat.
- Sheet Pan: Used for broiling the vegetables.
- Blender: To process the charred vegetables into a signature chunky sauce.
- Tongs: For flipping the pork and handling the roasted peppers.
Chef's Tip: If you own a cast iron skillet, use it to sear the pork. Because it retains heat better than stainless steel, you'll get a deep mahogany crust instead of the meat steaming in its own juices.
Simple step-by-step Instructions
Let's get into it. Make sure your pork is cut into consistent 1 inch cubes so they all cook at the same rate.
Phase 1: The Char and Blend
- Broil the vegetables. Place the chiles, tomatoes, onion, and garlic on a sheet pan. Broil on high for 5-7 minutes per side until the skins are blackened and blistered.
- Steam the skins. Put the roasted vegetables in a bowl and cover with plastic wrap for 10 minutes. Note: The steam loosens the skins for easy peeling.
- Prepare the puree. Peel off the charred skins and remove the garlic husks. Toss the chiles, tomatoes, onion, and garlic into a blender with the cilantro. Pulse until a chunky, thick sauce forms.
Phase 2: The Golden Sear
- Dry the pork. Pat the pork cubes completely dry with paper towels. Note: Wet meat won't brown, it just boils. Season with salt and pepper.
- Brown the meat. Heat vegetable oil in the Dutch oven over medium high heat. Sear the pork in batches until mahogany colored on all sides, then remove and set aside.
- Toast the spices. In the remaining pork fat, stir in the cumin and oregano for 30 seconds until they smell nutty and toasted.
Phase 3: The Slow Simmer
- Deglaze the pot. Pour in the blended green sauce. Stir and scrape up all the brown bits from the bottom. Note: Those bits are where the concentrated flavor lives.
- Combine and simmer. Return the seared pork to the pot and pour in the chicken bone broth.
- Cook until tender. Simmer on low heat until the pork is fork tender (usually about 1 hour 30 mins).
- Thicken the sauce. Whisk the flour with a splash of broth to make a slurry, then stir it into the pot. Simmer for 5 more minutes until the sauce coats the back of a spoon.
Fixing Common Cooking Issues
Even if you follow the instructions perfectly, variances happen. Cooking is all about making real-time adjustments.
Thin Sauce Fix
If your Colorado Green Chili is too thin, simmer it without a lid for the final 20 minutes. This helps the liquid evaporate and concentrates the flavors. For a faster result, stir in an additional teaspoon of the flour slurry.
Overpowering Heat Fix
If the peppers provided too much kick, don't panic. Stir in one tablespoon of brown sugar or a squeeze of lime juice. The acidity and sweetness will balance the capsaicin without compromising the overall taste of the Colorado Green Chili.
Tough Meat Fix
If the pork is still chewy, it simply needs more time. Because of its connective tissue, pork shoulder requires steady low heat to tenderize. Simmer it for another 30 minutes on low until the meat falls apart.
| Goal | What to change |
|---|---|
| More Heat | Add 1/2 tsp cayenne |
| Thicker Sauce | Simmer uncovered |
| Milder Flavor | Add 1 tbsp butter |
Keep in mind that the flavor of Colorado Green Chili deepens as it sits. If it tastes a bit dull immediately after cooking, allow it to sit for 10 minutes before plating.
Preserving Your Leftovers
This recipe yields a generous amount, which is exactly the goal. It's perfect for meal prepping.
Fridge Storage: Keep your Colorado Green Chili in a glass jar in the fridge for a maximum of 4 days. The taste improves after sitting overnight, so it's often even better on the second day.
Freezer Storage: This holds up well in the freezer. Use airtight, freezer-safe containers or bags and store it for 3 months. To serve, let it defrost in the refrigerator overnight.
Zero Waste: Save the roasted garlic skins and onion ends. Toss them into a bag in the freezer along with other vegetable trimmings for a future homemade stock. Any remaining pork is delicious in tacos.
Best Ways To Serve It
Depending on the time of day, this dish changes completely.
The Traditional Dinner: Serve a big bowl of Colorado Green Chili with a side of warm flour tortillas and a scoop of sour cream. A side of cilantro lime rice helps soak up the extra sauce.
The Colorado Breakfast: This is a regional staple. Pour the chili over a heap of crispy hash browns and top it with two over easy eggs. The runny yolk mixes with the spicy sauce to create something truly special.
The Low Carb Option: Serve it in a bowl topped with sliced avocado and a sprinkle of cotija cheese. Skip the tortillas and you've got a protein packed meal that hits the spot.
Easy Flavor Swaps
Once you've mastered the basics, feel free to customize the ingredients to suit your taste.
For a Lighter Protein
You can create a Colorado Green Chili Chicken by replacing the pork with boneless, skinless chicken thighs. Follow the same roasting process for the vegetables, but reduce the simmering time to approximately 45 minutes to ensure the chicken doesn't overcook. For an even lighter option in a smaller batch, try my Green chicken chili.
For the Set and Forget Method
This recipe is easily adapted for a slow cooker. Start by searing the meat and toasting the spices in a pan, then transfer everything into the slow cooker. Cook on low for 7-8 hours.
Since slow cookers don't evaporate liquid as quickly as a Dutch oven, remember to whisk in your flour slurry at the very end.
For a Smoky Twist
Blend in a teaspoon of smoked paprika or a small piece of chipotle in adobo. This enhances the "roasted" essence of the Colorado Green Chili and introduces a subtle sweetness. For another take on spicy stews, a classic beef chili is always a crowd favorite.
For a dairy-free Version
This recipe is naturally dairy-free as written. To maintain this while adding a creamy texture, stir in a tablespoon of cashew cream or simply add extra avocado.
Now you have everything you need to bring the flavors of the Rockies into your own home. The best part about Colorado Green Chili is how forgiving it is. Provided you roast your peppers and give the pork enough time to become tender, you'll end up with a deeply comforting meal.
Keep a few portions in the freezer to always have a hearty dinner ready.
Recipe FAQs
Is green chili a Colorado staple?
Yes, it is a regional favorite. While other states use chiles, Colorado's version is traditionally a thick, hearty stew served as a main meal.
What is the difference between Colorado and New Mexico styles?
Colorado green chili is typically chunkier. New Mexico versions often lean toward sauces, while Colorado's style is a rich, meat-heavy meal. If you enjoyed the flavor profile of this pork stew, you'll love how we use the same roasted chile base in our green chile chicken enchiladas.
Can chile verde be confused with Chile Colorado?
No, they use different peppers. Chile verde relies on green chiles for a tangy heat, whereas Chile Colorado uses dried red chiles for a deep, smoky flavor.
How to thicken the sauce if it's too thin?
Whisk in flour mixed with a small amount of broth. Stir this slurry into the pot during the final simmering stage to reach a velvety consistency.
Would using a food processor be mandatory for the sauce?
False. A standard blender works perfectly to pulse the roasted vegetables into the required chunky, thick sauce.
Colorado Green Chili with Pork