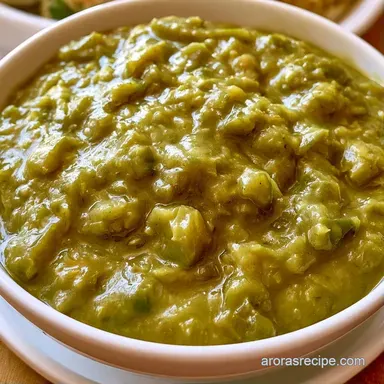
Hatch Green Chili Sauce: Smoky and Bold
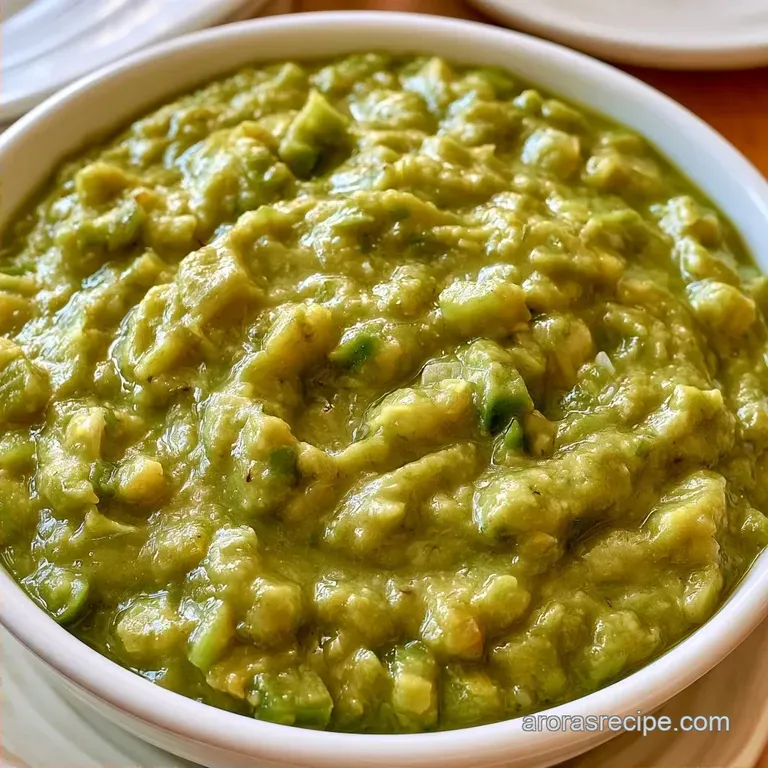
- Time: 20 minutes prep and 25 minutes cooking
- Taste & Feel: Smoky, deep, and glossy
- Best for: Taco nights, breakfast burritos, or a comforting stew
Homemade Hatch Green Chili
There is something uniquely satisfying about the scent of pepper skins charring under a hot broiler. That bold, smoky fragrance drifts through the entire house, signaling that tonight's meal will be extraordinary.
I still remember serving this at a neighborhood potluck in Nashville, where guests were convinced I had sourced it from a specialty New Mexican market.
Store-bought canned options are often disappointing, typically tasting too acidic or like they've been preserved in vinegar. Preparing your own Hatch Green Chili allows you to customize the spice level and consistency, ensuring a rustic, chunky texture instead of a thin, watery sauce.
This recipe provides a highly flexible base. Use it as a savory dip, a topping for morning eggs, or the starting point for a filling meal. It takes about 45 minutes from start to finish, yet the final result has the rich depth of a sauce that simmered for hours.
What Makes It Work
- The Char: Blistering the skins under the broiler removes that raw, grassy taste. It replaces it with a toasted, earthy flavor that defines the whole dish.
- The Roux: Using butter and flour prevents the sauce from separating. It gives the liquid a smooth and glossy body that clings to whatever you're serving it.
- The Acid: Stirring in lime juice at the very end cuts through the richness of the butter. It wakes up the flavors of the peppers and cumin.
| Texture Goal | Blend Time | Consistency | Best For |
|---|---|---|---|
| Rustic | 3-4 pulses | Chunky | Stews and Bowls |
| Smooth | 30 seconds | Pourable | Enchilada Sauce |
| Thick | 15 seconds | Heavy | Dip or Topping |
Picking Your Ingredients
When you're looking for peppers, try to find a mix of mild and hot. Most Hatch green chiles come in these varieties, and blending them gives you a more complex heat profile. If you can't find fresh ones, frozen roasted chiles are a decent backup, but you'll miss that fresh charred scent.
The onion and garlic provide a savory backbone. I prefer a white onion here because it has a cleaner, sharper bite that doesn't compete with the peppers. The chicken broth adds depth, but you can swap it for vegetable broth if you're avoiding meat.
The butter and flour create the thickness. I don't recommend using oil for the roux alone, as the butter adds a creamy quality that softens the edge of the heat. Finally, a pinch of cumin adds that classic Southwestern warmth.
Shopping List Breakdown
- 1 lb fresh Hatch green chiles, stemmed and seeded Why this? Delivers a signature smoky, regional taste
- 1 medium white onion, diced Why this? Offers a crisp, sharp aromatic foundation
- 4 cloves garlic, minced Why this? Builds a deeper savory dimension
- 2 tbsp avocado oil Why this? Stable at high temperatures for roasting
- 3 tbsp unsalted butter Why this? Ensures a rich, smooth roux
- 3 tbsp all purpose flour Why this? Thickens the consistency without lumps
- 3 cups low sodium chicken broth Why this? Supplies necessary body and saltiness
- 1 tsp ground cumin Why this? Contributes toasted, earthy warmth
- 1 tsp kosher salt Why this? Balances and elevates the overall taste
- 1 tbsp fresh lime juice Why this? Lifts the heavy, smoky elements
Substitutions: Butter → Vegan butter or coconut oil (comparable fat levels, slightly different flavor) Chicken Broth → Vegetable broth (preserves liquid volume with a mild taste shift) White Onion → Yellow onion (a bit sweeter, but a great alternative) All purpose Flour → Cornstarch
(use as a slurry for a more translucent result)
The Right Gear
You'll need a broiler pan or a sturdy baking sheet. A broiler pan with slats is better because it lets the heat circulate and prevents the peppers from sitting in their own juices, which can lead to steaming instead of charring.
A standard blender or food processor is necessary for the puree. You don't need a high end Vitamix, but you want something that can pulse. Over blending turns the sauce into a puree, and we want some of those rustic bits of pepper for texture.
Finally, a medium saucepan with a heavy bottom is your best bet. This prevents the roux from burning in the corners and gives you enough room to whisk in the broth without splashing.
Cooking step by step
- Place the whole Hatch chiles on a broiler pan under the high broiler. Rotate them every 3-5 minutes until the skins are blistered and blacken in spots.
- Move the hot peppers to a bowl and cover with plastic wrap for 10 minutes. Note: The captured steam allows the skins to slide right off.
- Carefully rub away the charred skins and remove the seeds.
- Combine the peeled chiles, diced onion, and minced garlic in a blender. Pulse until the mixture is broken down but retains a rustic consistency.
- Set aside roughly 1 cup of the puree. Note: This stops the final sauce from being too uniform.
- In a saucepan over medium heat, melt the butter. Stir in the flour and cook for 2 minutes until the roux smells nutty and looks pale gold.
- Gradually whisk in the chicken broth to ensure the sauce remains smooth and lump-free.
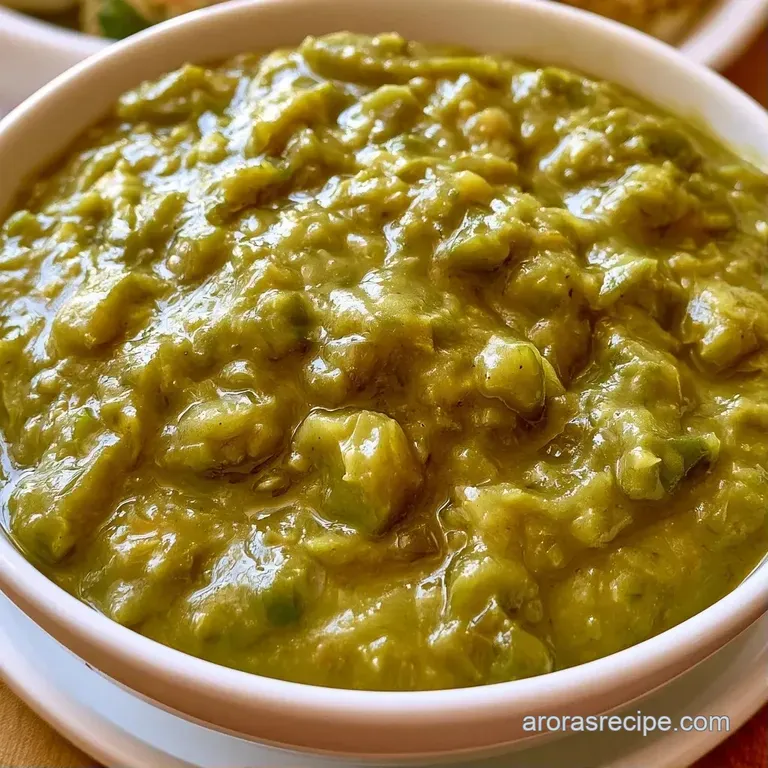
- Mix in the blended chile puree and cumin. Simmer on low for 15-20 minutes until the sauce thickens and becomes a deep, glossy green.
- Take off the heat and stir in the salt and lime juice.
Fixing Common Issues
If your Hatch Green Chili ends up a bit too hot, don't worry. You can temper the heat by stirring in a bit of heavy cream or a spoonful of sour cream at the end. This doesn't just mask the spice; it creates a more luxurious flavor.
If the sauce tastes a bit flat, it likely needs more acidity. A small amount of extra lime juice or a teaspoon of apple cider vinegar can brighten the whole dish. If you're accustomed to the heartier, meatier notes of an Authentic Texas Chili recipe, this sauce will seem more vibrant and zesty.
If the sauce doesn't thicken as expected, it's usually because the roux wasn't cooked long enough or the broth was added too quickly. Simply simmering it uncovered for a few extra minutes usually does the trick.
Sauce Stays Thin
If it hasn't thickened after 20 minutes, simmer it without a lid to reduce the liquid. Alternatively, you can whisk in a slurry of 1 tsp cornstarch and 1 tbsp water.
Heat is Too Intense
The seeds hold most of the spice. If it's too hot, stir in some cream or serve it over a neutral base like white rice.
Bitter Aftertaste
This usually happens if the roux burns. If the butter turned dark brown or black, your best bet is to start the roux over.
| Problem | Root Cause | Solution |
|---|---|---|
| Lumpy Sauce | Broth added too fast | Whisk vigorously or strain through a sieve |
| Dull Color | Overcooked lime juice | Add fresh lime juice after removing from heat |
| Too Grassy | Peppers not charred enough | Re broil a few peppers and blend them in |
Adjusting Your Batch
For smaller portions of one or two people, you can easily cut the recipe in half. Use a smaller saucepan to prevent the roux from spreading too thin and scorching. Since there is less liquid to thicken, shorten the simmering time by roughly 20%.
To feed a crowd, doubling or tripling the ingredients is straightforward. However, avoid tripling the salt and cumin right away; start with 1.5x the spices and adjust to taste. While liquids can be tripled, you may find you need 10% less broth as larger batches retain moisture more effectively.
If you prefer using a slow cooker for the simmer, skip the saucepan steps after preparing the roux. Simply whisk the roux into the broth, stir in the puree, and cook on low for 4 hours.
| Ingredient | Budget Option | Impact | Savings |
|---|---|---|---|
| Fresh Hatch Chiles | Frozen Roasted Chiles | Less smoky, still spicy | Moderate |
| Avocado Oil | Vegetable Oil | Same result, slightly less flavor | Low |
| Fresh Lime | Bottled Lime Juice | Slightly more tart, less fresh | Low |
Common Misconceptions
Some people think you have to remove every single seed to make the sauce mild. That's not true. A few seeds provide a nice background heat. The real trick is how much you char the skin, which changes the flavor profile more than the seeds do.
Another myth is that you need a professional torch to get the peppers blackened. Your home broiler is actually better because it heats the pepper evenly across the top. Just keep a close eye on them so they don't turn into charcoal.
Keeping it Fresh
Store your Hatch Green Chili in a glass jar in the cooler for up to 4 days. The flavor actually improves after a day as the cumin and chiles settle in. When you're ready to use it, just warm it up in a small pot over low heat.
For longer storage, this sauce freezes beautifully. Put it in freezer safe bags or containers for up to 3 months. When thawing, let it sit in the fridge overnight, then reheat it on the stove. If it looks a bit separated after freezing, just whisk in a tablespoon of water or broth to bring back the gloss.
To avoid waste, don't throw away the pepper stems. If you have enough of them, you can toss them into a pot of simmering water with some onion scraps to make a light, spicy vegetable stock for your next soup.
Different Ways to Cook
You can easily turn this sauce into a White Meat Chicken Chili by adding shredded chicken, white beans, and a bit more broth. It transforms from a condiment into a full, comforting meal in minutes.
For a dairy-free version, swap the butter for avocado oil or a vegan butter alternative. The thickness will remain the same, though the flavor will be slightly less creamy. Use vegetable broth to make it entirely plant based.
If you want a "Fire Eater" version, leave all the seeds in and add a diced habanero to the blender. For those who prefer things mild, use "mild" labeled Hatch peppers and increase the amount of onion to dilute the heat.
You can also use this as a Hatch Green Chili Enchilada Sauce. Just thin it with a bit more broth, pour it over rolled corn tortillas filled with cheese, and bake until bubbling. If you prefer a dip, blend it with four ounces of softened cream cheese for a Hatch Green Chili Salsa that's great with chips.
Whether you're making a quick Hatch Green Chili for a weeknight dinner or prepping a big batch of Hatch Green Chili Stew for a winter gathering, the key is the roast. Once you have that charred base, the rest is just a simple simmer.
Trust your nose and taste as you go, and you'll have a sauce that tastes like the heart of the Southwest.
High in Sodium
824 mg 824 mg of sodium per serving (36% 36% of daily value)
The American Heart Association recommends a daily limit of no more than 2,300mg of sodium to reduce the risk of high blood pressure and heart disease.
Tips to Reduce Sodium
-
Swap the Broth-30%
Replace the low-sodium chicken broth with no-salt-added chicken broth or a homemade salt-free vegetable stock.
-
Omit Added Salt-25%
Remove the 1 tsp of kosher salt completely; the natural flavors of the Hatch chiles and broth provide a sufficient base.
-
Increase Acidity-5%
Double the fresh lime juice to 2 tbsp to provide a 'bright' flavor that tricks the palate into needing less salt.
-
Amplify Aromatics
Increase the ground cumin or add a pinch of smoked paprika to deepen the savory profile without adding sodium.
Recipe FAQs
What is the difference between green chili and Hatch green chili?
Hatch chiles are a specific variety grown in the Hatch Valley of New Mexico. While green chili is a general term, Hatch varieties possess a unique earthy and smoky profile tied to the region's soil.
How hot are Hatch green chilies?
They range from mild to extra hot. The heat level varies by crop, but you can control the spice by removing more or fewer seeds during preparation.
Is a Hatch chili hotter than a jalapeño?
Not necessarily. While both can vary in heat, Hatch chiles are prized more for their complex, smoky flavor than for raw intensity.
Why are Hatch green chiles so prized?
The unique climate and soil of New Mexico create a distinct taste. This specific terroir results in a flavor that is difficult to replicate with peppers grown elsewhere.
How to roast the chiles for this recipe?
Arrange whole chiles on a broiler pan under high heat. Turn them every 3-5 minutes until the skins are blistered and blackened in spots.
How to get a glossy, thick texture?
Whisk flour into melted butter for 2 minutes to create a roux. Slowly stir in chicken broth to prevent lumps. If you enjoyed mastering this roux for thickness here, see how the same flavor-building principle works in our Beef Chili Verde.
Is it true that roasting doesn't require peeling the skins?
False. The charred skins are tough and bitter, so you must steam them in a bowl for 10 minutes and rub them off before blending.
Hatch Green Chili in 45 Minutes