Old Fashioned Chewy Peanut Butter Cookies
- Time:10 minutes active + 10 minutes baking = 20 minutes total
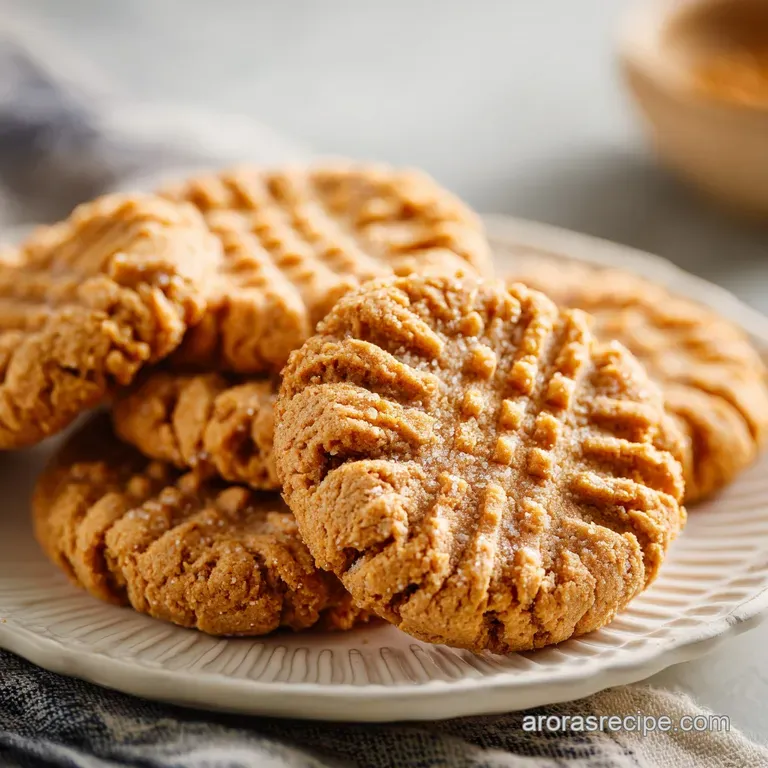
- Flavor/Texture Hook: Intensely nutty, salty sweet, and tender crumbed
- Perfect for: Last minute bake sales, afternoon snacks, or beginner bakers
- How to Bake Easy Peanut Butter Cookies for a Crowd
- Why This Simple Technique Works
- The Essential Component Deep Dive
- The Ingredients for Success
- From Prep to Plate: Step-By-Step
- Troubleshooting Your Batch
- Scaling for Any Occasion
- Dispelling Common Kitchen Myths
- Storage and Zero Waste
- Serving Suggestions for the Best Experience
- Recipe FAQs
- 📝 Recipe Card
How to Bake Easy Peanut Butter Cookies for a Crowd
The smell of these cookies hitting the oven is a sensory trigger like no other, it's that warm, toasted aroma of roasting peanuts that immediately makes the kitchen feel like home.
I remember making these on a rainy Tuesday in my small Midwestern kitchen, the kind of day where you just need something hearty and stress free. I reached for the creamy peanut butter, not the fancy artisanal kind with the oil on top, but the classic, shelf stable stuff we all grew up with.
That choice is the heart of this dish, it provides the perfect amount of fat and sugar to keep the crumb tender without being greasy.
We've all been there, standing in front of the pantry wondering if we can pull off a dessert in under half an hour. This recipe is the answer because it celebrates the humble jar of peanut butter as the hero ingredient.
It's not just there for flavor, it acts as a structural foundation that interacts with the butter to create that iconic melt in-your mouth feel. Trust me on this, using the creamy variety ensures the dough stays cohesive and easy to handle, which is exactly what you want when you're in a hurry.
While some people might try to overcomplicate things with complex chilling times, I've found that these easy peanut butter cookies thrive on simplicity. They are the quintessential "no fuss" bake that reminds me of church potlucks and grandmother's cookie jars.
You don't need a professional degree to get these right, you just need a sturdy bowl and a good fork for those classic criss cross marks. Let's get into why this specific ratio of ingredients works so well to deliver that soft, chewy result we all crave.
Why This Simple Technique Works
Understanding the "why" behind your baking helps you avoid those crumbly or rock hard disasters we've all seen before. Here is the lowdown on the mechanics of this dough.
- Fat Stabilization: The combination of dairy butter and peanut butter provides two different melting points, which helps the cookies hold their shape while remaining incredibly soft.
- Sugar Interaction: Using both white and brown sugar creates a balance where the white sugar crisps the edges and the brown sugar keeps the middle moist.
- Leavening Power: The duo of baking soda and powder ensures a quick lift in a short 10 minute bake, preventing the cookies from becoming dense pucks.
- Gluten Management: Folding the flour in gently at the end prevents the dough from becoming tough, keeping that homestyle texture intact.
| Cook Method | Time | Texture | Best For |
|---|---|---|---|
| Standard Oven | 10 minutes | Soft center, golden edge | Traditional homestyle results |
| Convection Oven | 8 minutes | Evenly crisp and browned | Batch baking multiple sheets |
| Air Fryer | 6 minutes | Extra crunchy exterior | Small batches or quick snacks |
Choosing the right method depends on how much time you have and what texture you prefer. Most of the time, I stick with the standard oven because it gives the sugar that perfect "shatter" on the outside while keeping the inside velvety. If you're looking for more classic Midwestern treats to add to your rotation, my Homemade Cornbread recipe is another one bowl wonder that pairs surprisingly well with a nutty dessert.
The Essential Component Deep Dive
Before we start mixing, let's look at what's actually happening inside that bowl. Choosing the right components is the difference between a "meh" cookie and one people beg for.
| Component | Science Role | Pro Secret |
|---|---|---|
| Creamy Peanut Butter | Provides fat, protein, and structure | Use shelf stable brands for consistent oil content |
| Light Brown Sugar | Adds moisture and molasses flavor | Pack it tightly to ensure correct volume and acidity |
| Large Egg | Acts as the primary emulsifier | Use at room temperature so it bonds with the fats easily |
| All Purpose Flour | Provides the necessary gluten framework | Sift or fluff before measuring to avoid "heavy" cookies |
The Ingredients for Success
Right then, let's gather our supplies. These are simple pantry staples, but the quality of your peanut butter and the temperature of your butter make all the difference.
- 1 cup creamy peanut butter: Why this? Provides the foundational flavor and fat for a soft, stable crumb. (Substitute: Almond butter for a different nut profile, though it may be oilier.)
- 0.5 cup unsalted butter, softened: Why this? Allows for better aeration during the creaming process than salted butter. (Substitute: Salted butter, but reduce the added kosher salt to a pinch.)
- 0.75 cup light brown sugar, packed: Why this? The molasses content keeps the cookies chewy and adds a deep caramel note. (Substitute: Dark brown sugar for an even richer, more intense flavor.)
- 0.5 cup granulated sugar: Why this? Helps the edges get that slight crispness we all love. (Substitute: Coconut sugar, though the texture will be slightly grainier.)
- 1 large egg, room temperature: Why this? Binds the dough together and provides a slight rise. (Substitute: 1/4 cup applesauce, but the cookie will be much softer and cake like.)
- 1 tsp vanilla extract: Why this? Rounds out the nuttiness and makes the sugars taste more complex. (Substitute: Almond extract for a very bold, nutty aroma.)
- 1.5 cups all purpose flour: Why this? The perfect protein content for a cookie that isn't too bread like. (Substitute: 1:1 gluten-free baking flour blend for a sensitive friendly version.)
- 0.75 tsp baking soda: Why this? Reacts with the brown sugar to create browning and lift. (Substitute: 2 tsp baking powder if you are completely out of soda.)
- 0.5 tsp baking powder: Why this? Provides an extra boost of fluffiness for that soft baked feel. (Substitute: Omit if necessary, but the cookie will be slightly denser.)
- 0.25 tsp kosher salt: Why this? Cuts through the sweetness and makes the peanut flavor pop. (Substitute: Fine sea salt, but use slightly less.)
- 2 tbsp granulated sugar (for rolling): Why this? Gives the cookies that classic sparkly, crunchy exterior. (Substitute: Demerara sugar for a bigger crunch.)
From Prep to Plate: step-by-step

Follow these steps exactly to ensure your easy peanut butter cookies come out looking like they belong in a bakery window.
- Cream the fats and sugars. In a large mixing bowl, combine the softened unsalted butter, 1 cup creamy peanut butter, 0.75 cup light brown sugar, and 0.5 cup granulated sugar. Beat on medium high for 2–3 minutes until the mixture turns a pale tan color and appears fluffy. Note: This aeration is what makes the cookies light instead of greasy.
- Incorporate the liquids. Add the large egg and vanilla extract to the creamed mixture, beating until just incorporated and smooth.
- Whisk the dry components. In a separate small bowl, whisk together the all purpose flour, baking soda, baking powder, and kosher salt.
- Combine the mixtures. Gradually fold the dry ingredients into the wet ingredients using a silicone spatula. Stop mixing immediately once no streaks of white flour remain. Note: Overmixing here will develop too much gluten and make the cookies tough.
- Heat the oven. Preheat your oven to 350°F (175°C) and line a baking sheet with parchment paper.
- Roll the dough. Scoop 1.5 tablespoons of dough and roll into a smooth ball. Roll each ball in the extra 2 tbsp granulated sugar until evenly coated and sparkly.
- Create the pattern. Place dough balls on the prepared baking sheet. Use a dinner fork to press a criss cross pattern into the top of each ball, flattening it until it is about half an inch thick.
- Bake to perfection. Bake for 10 minutes until the edges are golden but the centers still look slightly soft. Note: They will firm up as they cool on the hot pan.
- Cool properly. Transfer to a wire rack after 5 minutes of cooling on the sheet.
Troubleshooting Your Batch
Even with a stress free recipe, things can go sideways. Here is how to fix the most common issues when making easy peanut butter cookies at home.
Why Your Cookies Spread Too Much
If your cookies turned into one giant pancake on the tray, it's usually a temperature issue. If the butter was too warm (almost melty) when you started, or if the dough got too warm in your hands while rolling, the fat will leak out before the structure sets.
Next time, try chilling the dough for 20 minutes before rolling.
| Problem | Root Cause | Solution |
|---|---|---|
| Dry/Crumbly | Too much flour | Use the "spoon and level" method for measuring flour |
| No Criss Cross | Dough too soft | Chill the dough or dip the fork in flour first |
| Burnt Bottoms | Dark baking sheet | Use parchment paper or move the rack to the middle |
Why Is My Dough Too Sticky?
Sometimes, a brand of peanut butter might have more oil than others, making the dough hard to handle. If it's sticking to your palms, don't just add more flour that will make them dry. Instead, pop the bowl in the fridge. Cold dough is much easier to roll into those 1.5 tablespoon balls.
Common Mistakes Checklist
- ✓ Ensure the butter is "softened" (indents with a finger) but not shiny or melted.
- ✓ Always use a room temperature egg to prevent the butter from seizing up.
- ✓ Don't skip the extra sugar for rolling; it provides the necessary texture contrast.
- ✓ Avoid using "Natural" peanut butter that requires stirring, as the oil separation ruins the bake.
- ✓ Check your baking soda for freshness if it's over six months old, the cookies won't rise.
Scaling for Any Occasion
Whether you're baking for a quiet night in or a massive school event, adjusting this recipe is straightforward. For a half batch, you can beat one egg in a cup and use exactly half by weight or volume.
When doubling the recipe, I recommend staying at 1.5x for the baking soda and powder to avoid a metallic aftertaste, then work in batches so the oven temperature doesn't drop too much from overcrowding.
If you are looking for a variation that adds a bit more flair to the presentation, check out my Peanut Butter Blossom Cookies which use a very similar base but add a chocolate surprise in the center.
Dispelling Common Kitchen Myths
One of the biggest myths is that the fork criss cross is just for decoration. In reality, peanut butter dough is very dense and doesn't spread naturally like a chocolate chip cookie would.
The fork marks actually press the dough down to a uniform thickness, ensuring the heat penetrates the center at the same rate as the edges. Without it, you'd end up with a burnt outside and a raw middle.
Another misconception is that "more peanut butter is always better." While it sounds logical, adding too much actually disrupts the ratio of flour to fat, leading to a cookie that won't hold its shape. Stick to the 1 cup measurement for that perfect homestyle balance.
Storage and Zero Waste
These easy peanut butter cookies stay fresh in an airtight container at room temperature for up to 5 days. If they start to get a little firm, popping one in the microwave for 10 seconds brings back that "just baked" softness. For long term storage, you can freeze the baked cookies for up to 2 months.
To reduce waste, if you have leftover dough that isn't enough for a full cookie, crumble it over vanilla ice cream. You can also save the crumbs from the bottom of the container to use as a crust for a cheesecake or a topping for yogurt. If you have a near empty jar of peanut butter, don't throw it out!
Mix your warm cookie dough right in the jar to get every last bit of nutty goodness before baking.
Serving Suggestions for the Best Experience
For the ultimate Midwestern experience, serve these cookies warm with a tall glass of cold milk. The fats in the milk help cleanse the palate between bites of rich peanut butter. If you're feeling a bit fancy, you can sandwich two cookies together with a layer of grape jelly or even a bit of chocolate ganache for a "PB&J" or "Reese's" style treat.
They also make a hearty addition to a dessert board. Pair them with some sliced apples and sharp cheddar cheese. It might sound unusual, but the salty sweet profile of the easy peanut butter cookies matches perfectly with the tang of the cheese.
Honestly, don't even bother with low-fat milk here go for the full fat stuff for a truly hearty snack. It's the simple pleasures that make home baking so rewarding, and these cookies are the king of simple pleasures.

Recipe FAQs
What are the three ingredients for peanut butter cookies?
This recipe requires ten pantry staples, not just three. To achieve the proper texture and flavor, you must use creamy peanut butter, butter, light brown sugar, granulated sugar, one egg, vanilla, all-purpose flour, baking soda, baking powder, and kosher salt.
How to make 3 ingredient cookies easy?
Combine one cup of creamy peanut butter, one cup of sugar, and one large egg. Mix until smooth, scoop into balls, and bake at 350°F for 10 minutes; however, this simplified version lacks the structure and leavening provided by the no yeast dough handling techniques used in our more complex recipes.
Is it true Snoop Dogg has a specific peanut butter cookie recipe?
No, this is a common misconception. While he has released various culinary content, there is no official, widely recognized three ingredient peanut butter cookie recipe associated with him.
Can I use honey in these three ingredient cookies?
No, substituting honey will ruin the texture. Honey adds excess moisture and changes the chemical composition, which prevents the cookies from setting correctly with a standard peanut butter-to-sugar ratio.
Can the cookies be frozen?
Yes, they freeze exceptionally well. You can store the baked cookies in an airtight container in the freezer for up to two months.
Why do my cookies spread too much on the baking sheet?
The butter may be too warm before mixing. Ensure your unsalted butter is just softened rather than greasy, and always preheat your oven to 350°F before the dough enters, as a cold oven causes premature spreading.
How do I know when the cookies are finished baking?
Remove them after exactly 10 minutes when the edges look golden but the centers appear slightly soft. Carry over heat from the pan will finish the cooking process while they cool on the wire rack.
Easy Peanut Butter Cookies

Ingredients:
Instructions:
Nutrition Facts:
| Calories | 172 kcal |
|---|---|
| Protein | 3.5 g |
| Fat | 9.4 g |
| Carbs | 19.6 g |
| Fiber | 0.8 g |
| Sugar | 11.5 g |
| Sodium | 115 mg |
