Greek Smashed Pita Recipe
- Time: Active 15 minutes, Passive 0 minutes, Total 23 minutes
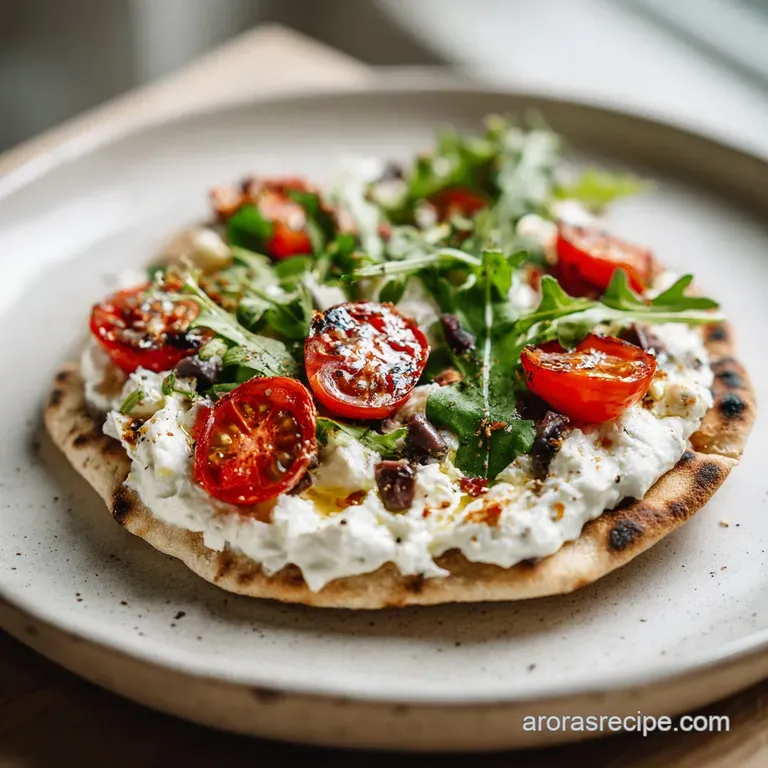
- Flavor/Texture Hook: A shatter crisp pita base topped with succulent, charred beef and velvety tzatziki.
- Perfect for: Busy weeknights or a fun, interactive weekend lunch with friends.
- Mastering My Crispy Greek Smashed Pita Recipe
- The Science of Seared Protein and Dough
- Deep Dive into Component Analysis
- Gathering Fresh Ingredients for Bold Flavor
- Simple Tools for a Pressed Pita
- Stepping Through the Sizzling Smash Technique
- Solving Common Kitchen Mishaps with Ease
- Tasty Variations for Every Simple Palate
- Keeping Leftovers Fresh and Crispy Later
- Beautiful Ways to Plate Your Creation
- Debunking Common Preparation Myths
- High in Sodium
- Recipe FAQs
- 📝 Recipe Card
Mastering My Crispy Greek Smashed Pita Recipe
The first time I tried making a Greek Smashed Pita, the aroma of dried oregano hitting a hot cast iron skillet filled my Nashville kitchen and took me straight back to a tiny stall I visited in Athens.
I remember standing over the stove, spatula in hand, wondering if the beef would actually stick to the bread or if I’d end up with a greasy mess. As soon as I heard that aggressive sizzle and saw the edges of the pita begin to curl and brown, I knew I was onto something special.
This dish is all about the contrast between the hot, seasoned meat and the cold, crisp toppings. You get that salty, savory hit from the beef, followed immediately by the cool burst of cherry tomatoes and the sharp tang of crumbled feta.
It is a messy, hands on experience that feels much more sophisticated than the twenty minutes of effort it actually requires.
We have all had those nights where we want something substantial but don't want to wait an hour for the oven to preheat or a pot to boil. This recipe skips the fuss. By the time you have diced your cucumbers and sliced your red onion, the meat is ready to hit the pan.
It is fast, it is reliable, and honestly, the way the pita "shatters" when you bite into it is far more satisfying than any standard burger bun.
The Science of Seared Protein and Dough
Conductive Fusion: When you press the raw beef directly onto the pita, the rendering fat is absorbed by the bread, frying it from the inside out while simultaneously "gluing" the protein to the starch.
Maillard Acceleration: The weight applied during the "smash" creates maximum surface contact with the pan, ensuring every millimeter of the beef develops a deeply charred, brown crust rather than steaming in its own juices.
Pita Pore Structure: Greek style pitas are thicker and more porous than thin pocket pitas, acting as a structural sponge that holds the beef’s moisture without becoming structurally compromised.
Before we get into the nitty gritty of the components, let's look at how the cooking method changes the final bite. Choosing the right heat source is the difference between a soggy wrap and a restaurant quality meal.
| Method | Time | Texture | Best For |
|---|---|---|---|
| Cast Iron Skillet | 8 minutes | Ultra crispy, charred edges | Maximum flavor development |
| Stainless Steel Pan | 10 minutes | Even browning, less char | Cooks who prefer a lighter sear |
| Outdoor Griddle | 6 minutes | Smokey, very crispy | Large batches and summer parties |
Choosing the right pan is half the battle, but understanding what each ingredient does in the heat will help you master the process every single time you cook.
Deep Dive into Component Analysis
The magic happens when simple pantry staples meet high heat. I used to think the meat was the only thing that mattered, but I’ve learned that the oil and the aromatics do the heavy lifting in terms of fragrance.
| Ingredient | Science Role | Pro Secret |
|---|---|---|
| 80/20 Ground Beef | Fat for frying | Keep it cold until the very second you press it onto the pita. |
| Extra Virgin Olive Oil | Heat conductor | Brush the pita edges to ensure a golden, "shatter" finish. |
| Dried Oregano | Volatile oil release | Rub it between your palms before adding to "wake up" the scent. |
| Greek Style Pita | Structural base | Use fresh, pillowy pitas; stale bread will crack during the smash. |
While these components are the foundation, the beauty of this dish lies in how you can adapt it to what you have in the fridge without losing that signature crunch.
Gathering Fresh Ingredients for Bold Flavor
- 500g 80/20 ground beef: Why this? The 20% fat content is non negotiable for frying the pita in beef tallow.
- Substitute: Ground lamb for a more traditional, gamey flavor profile.
- 4 large Greek style pitas: Why this? These are thick and "pocketless," providing a sturdy base for the meat.
- Substitute: Flatbreads or naan, though they may be slightly softer.
- 15ml extra virgin olive oil: Why this? Provides a high flavor fat for the initial pan coating.
- Substitute: Avocado oil if you prefer a higher smoke point.
- 3 cloves garlic, minced: Why this? Adds a sharp, pungent kick that cuts through the rich beef.
- Substitute: 5g garlic powder if fresh isn't available.
- 5g dried oregano: Why this? The quintessential Greek herb that provides earthy, floral notes.
- Substitute: Dried marjoram for a slightly sweeter, milder herb hit.
- 15g fresh parsley, finely chopped: Why this? Brings a bright, grassy finish to the cooked meat.
- Substitute: Fresh cilantro for a non traditional, zesty twist.
- 2g ground cumin: Why this? Provides a warm, nutty backbone to the beef seasoning.
- Substitute: Ground caraway for a more anise forward earthiness.
- 2g ground coriander: Why this? Adds a subtle citrusy undertone that complements the lemon.
- Substitute: Ground fennel seeds for a similar bright profile.
- 120g tzatziki sauce: Why this? The velvety yogurt base acts as the essential cooling element.
- Substitute: Plain Greek yogurt mixed with a squeeze of lemon and salt.
- 1 medium cucumber, diced: Why this? Provides the necessary crunch and watery freshness.
- Substitute: Diced zucchini for a similar texture with less moisture.
- 100g cherry tomatoes, quartered: Why this? These offer sweet tart pops of acidity.
- Substitute: Diced Roma tomatoes if cherry tomatoes are out of season.
- 0.5 small red onion, thinly sliced: Why this? Adds a sharp, biting contrast to the savory beef.
- Substitute: Sliced shallots for a more delicate onion flavor.
- 50g feta cheese, crumbled: Why this? Delivers salty, creamy pockets of intensity.
- Substitute: Goat cheese for a tarter, spreadable alternative.
- 1 lemon wedge: Why this? The final squeeze of acid brightens every single component.
- Substitute: A splash of red wine vinegar.
Simple Tools for a Pressed Pita
You don't need a professional kitchen for this. In fact, my favorite way to make these is with a simple cast iron skillet. The heavy bottom retains heat like a champ, which is exactly what you need when you're introducing cold meat to a hot surface.
If you don't have a burger press, just grab a heavy saucepan or even a sturdy, flat bottomed plate.
Chef's Tip: If you find your spatula sticking to the raw meat when you try to smash it, place a small square of parchment paper between the meat and the spatula. It prevents the protein from tearing and keeps your tools clean!
Another trick I learned the hard way: if you want that pita to be truly crispy, don't crowd the pan. I usually cook one at a time. It feels slower, but the heat remains consistent, and you won't end up steaming the bread.
If you're serving a crowd, you can keep the finished ones on a wire rack in a low oven (about 90°C) to maintain that "shatter" texture.
Stepping Through the Sizzling Smash Technique
- Season the beef. In a large bowl, mix the 500g ground beef with minced garlic, oregano, cumin, coriander, salt, and pepper. Note: Use your hands for even distribution but don't overwork the meat or it will become tough.
- Portion the meat. Divide the beef into 4 equal balls, roughly 125g each. Note: Keeping them in round balls makes it easier to center them on the pita later.
- Spread the protein. Take a pita and press one beef ball onto it, spreading it in a thin, even layer that reaches almost to the very edge. Note: The meat will shrink as it cooks, so go further than you think you need to.
- Heat the skillet. Add 15ml olive oil to your pan over medium high heat until the oil shimmers and barely begins to smoke.
- The initial smash. Place the pita meat side down into the hot oil. Immediately press down firmly with a heavy spatula or press for 10 seconds.
- Sear the beef. Cook for 3-4 minutes until the beef is deeply browned and a crust has formed. Note: Resist the urge to peek; let the Maillard reaction do its thing.
- The flip. Carefully flip the pita so the bread side is down. Note: Use a wide spatula to ensure the meat stays fused to the bread.
- Crisp the base. Cook for another 2 minutes until the bottom of the pita is golden and crackling.
- Prepare the toppings. While the pita rests for a minute, toss your diced cucumber, tomatoes, and red onion with a pinch of salt.
- Final assembly. Spread 30g of tzatziki over the hot meat, pile on the vegetable mix, sprinkle with feta and fresh parsley, and finish with a lemon squeeze.
Solving Common Kitchen Mishaps with Ease
The biggest hurdle with a Greek Smashed Pita is often the "separation anxiety" where the meat decides it likes the pan more than the bread. This usually happens if the pan wasn't hot enough or if the meat was too lean.
Using the 80/20 beef from the schema ensures there is enough fat to fry the pita and bond the two layers together.
But what if things go sideways? Don't worry, even a "failed" smash still tastes incredible. If the meat detaches, just serve it as a deconstructed pita bowl. It won't have the same "shatter" factor, but the flavors will still be there. Pair it with a side of my Greek Rice Recipe to turn a mishap into a feast.
Why Your Meat is Falling Off
If your beef is sliding around, it usually means there was too much moisture in the meat or the pan wasn't preheated. Ensure you pat the surface of the meat dry if it looks damp before pressing it onto the pita.
Also, make sure you are pressing down hard during those first few seconds of cooking; that physical pressure is what creates the bond.
| Problem | Root Cause | Solution |
|---|---|---|
| Soggy Pita | Meat was too fatty or cooked too low | Increase heat and press firmly to render fat quickly. |
| Burnt Bread | Heat was too high after the flip | Turn the burner down to medium once you flip the pita. |
| Dry Beef | Overcooked or used lean meat | Stick to 80/20 beef and pull from heat at 3-4 minutes. |
Common Mistakes Checklist
- ✓ Preheat your pan for at least 3 minutes before adding the oil.
- ✓ Don't use "pocket" pitas; they are too thin and will tear under the pressure of the smash.
- ✓ Spread the meat in a thin, uniform layer; thick patches will cook unevenly.
- ✓ Let the meat rest for 60 seconds before adding the tzatziki so the sauce doesn't immediately melt and run off.
Tasty Variations for Every Simple Palate
If you want to try something different, the Turkey Smashed Pita is a fantastic lighter option. Since turkey is leaner, you'll want to add a teaspoon of olive oil directly into the meat mixture to prevent it from becoming sawdust dry. You might also want to check out my Honey Mustard Crispy recipe if you're looking for a side dish that matches this recipe's crunch level.
Implementing a Spicy Harissa Kick
For those who like a bit of heat, mix 10g of harissa paste into the raw beef. The chili and caraway in the harissa play beautifully with the cumin and coriander. You can also swap the tzatziki for a spicy feta dip (tirokafteri) to double down on the zing.
Transitioning to a Vegetarian Version
You can actually use a plant based ground meat substitute for this. The key is to add a little extra binder, like a teaspoon of tomato paste, to help the plant based protein stick to the pita. The cooking time remains roughly the same, but keep an eye on the browning as plant based meats can char faster.
Keeping Leftovers Fresh and Crispy Later
- Storage: Store any leftover assembled pitas in the fridge for up to 2 days, but keep the toppings (tzatziki, tomatoes, etc.) separate. The bread will soften over time, so you'll need to re crisp it.
- Freezing: You can freeze the pitas once the meat has been pressed onto them but before cooking. Wrap them individually in plastic wrap and freeze for up to 2 months. Cook directly from frozen, adding 2 minutes to the meat side cook time.
- Reheating: Avoid the microwave! It will turn your pita into a rubbery disc. Instead, place the pita in a dry skillet over medium heat for 3-4 minutes until the bottom is crunchy and the meat is warmed through.
- Zero Waste: If you have leftover meat mix, roll them into small meatballs and fry them up. Use leftover pita scraps to make homemade pita chips by tossing them with olive oil and oregano and baking at 180°C for 10 minutes.
Beautiful Ways to Plate Your Creation
Presentation is everything when you're serving something that is essentially a "smashed" burger. I like to serve these on a large wooden board to give it that rustic, Nashville meets Mediterranean feel. Instead of leaving the pita whole, I often slice them into quarters.
This makes them feel like a shared appetizer and allows guests to see the beautiful layers of charred meat and fresh toppings.
Mastering the Color Contrast
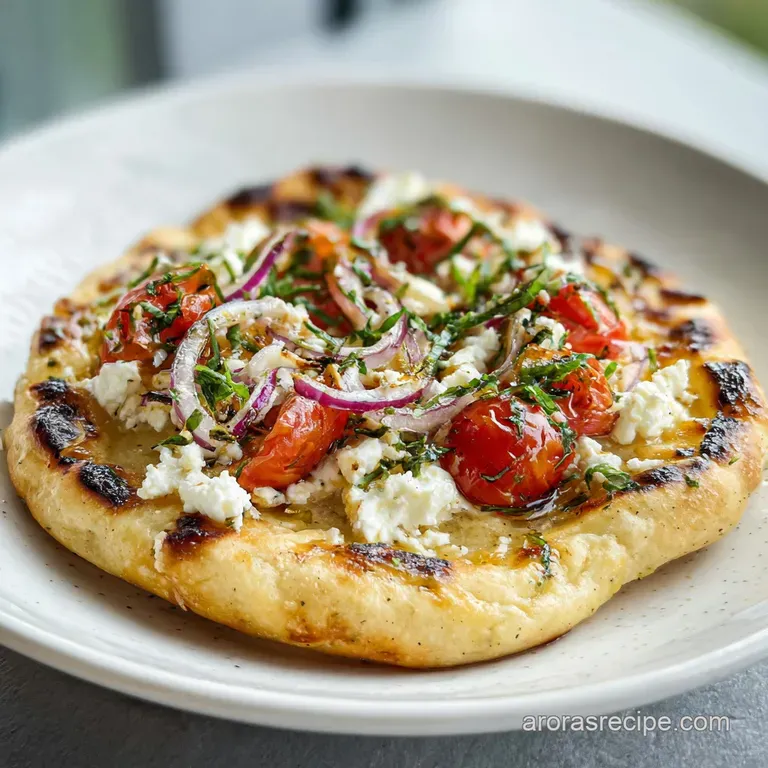
The secret to a "wow" plate is the color. Don't just dump the toppings on. Start with the white tzatziki, then add the green cucumbers, the bright red tomatoes, and finally the purple slivers of red onion. The contrast against the dark, seared beef is stunning.
Slicing for Shareability
Using a pizza cutter is the easiest way to get clean slices through the crispy pita and the meat. If you're hosting a party, you can set up a "build your own" station. Place the hot, meat pressed pitas on a platter and have bowls of the toppings laid out. It keeps the bread from getting soggy while people mingle. And if you need a hearty side to round out the meal, my Ravioli Casserole with recipe is a crowd pleaser that fits the comfort food vibe perfectly.
Debunking Common Preparation Myths
"You need a specialized burger press to get a good smash." Honestly, this is just marketing. A heavy cast iron skillet or a flat bottomed pot works just as well. The key isn't the tool, but the consistent pressure you apply during those first few seconds when the meat proteins are beginning to set.
"Smashed meats are always dry." This only happens if you keep smashing the meat throughout the entire cooking process. You only want to press down at the very beginning to establish the bond and the crust. After that, leave it alone! This allows the internal juices to stay trapped within the thin layer of beef.
"Fresh herbs are always better than dried." While I love fresh parsley for the finish, dried oregano is actually superior for the meat mix itself. Dried herbs have a more concentrated flavor that stands up better to the intense, direct heat of the smash technique without burning and becoming bitter.

High in Sodium
845 mg mg of sodium per serving (37% % of daily value)
The American Heart Association recommends limiting sodium intake to approximately 2,300mg per day.
Tips to Reduce Sodium in Your Greek Pita
-
Lower Sodium Feta-15%
Feta cheese is a significant source of sodium. Use a lower sodium feta or reduce the amount by half. You can also try substituting with ricotta salata in smaller quantities.
-
Reduce Added Salt-25%
Eliminate or significantly reduce the amount of sea salt added 'to taste'. Instead, rely on the herbs and spices to flavor the ground beef. Remember, even a pinch adds up!
-
DIY Tzatziki-20%
Prepared tzatziki sauces can be high in sodium. Make your own using plain Greek yogurt, cucumber, garlic, lemon juice, and dill for a fresher, lower sodium option. Consider using sodium free garlic powder.
-
Leaner Ground Beef-5%
While not a major contributor in this recipe, using a leaner ground beef (e.g., 90/10) can slightly reduce sodium content as well as fat content.
-
Spice It Up!
Experiment with a wider variety of fresh and dried herbs and spices like dill, mint, or smoked paprika to enhance flavor without adding sodium.
Recipe FAQs
What is the most critical element for fusing the beef to the pita?
Maximum heat and immediate, firm pressure. You must have a shimmering hot pan so the fat renders instantly, frying the bread and "gluing" the meat to the surface upon initial contact.
How can I prevent the meat from sticking to my spatula when I flip the pita?
Use parchment paper or a scraper. Placing a small square of parchment between the spatula and the raw meat surface during the initial press prevents sticking; alternatively, use a wide, sturdy metal scraper to gently lift the newly formed crust.
Is using lean ground beef acceptable for this recipe?
No, 80/20 ground beef is required. The 20% fat content is essential not just for flavor, but because that fat renders out to actively fry and crisp the pita bread base.
How to properly incorporate dried herbs into the ground beef mixture?
Rub the dried herbs between your palms first. This friction releases the volatile oils, intensifying the flavor of the oregano and cumin before mixing it into the cold meat.
Can I cook these smashed pitas ahead of time for a party?
Yes, but only cook the meat and pita base. Assemble the meat-on-pita stage, wrap them, and freeze; toppings must be added fresh, as the moisture from the tzatziki will ruin the crispness if stored assembled.
Is it true that thick pita bread prevents the final product from shattering?
False. Thicker, pocketless Greek style pitas are ideal because their porous structure absorbs the rendered beef fat, resulting in a satisfyingly crispy, shattering crust.
What is the best way to reheat leftovers while preserving the crunch?
Use a dry skillet over medium heat. Avoid the microwave entirely; reheat the pita for 3 4 minutes per side until the bread base is audibly crisp again.
Greek Smashed Pita Recipe
Ingredients:
Instructions:
Nutrition Facts:
| Calories | 602 kcal |
|---|---|
| Protein | 32.6 g |
| Fat | 31.4 g |
| Carbs | 47.8 g |
| Fiber | 3.2 g |
| Sugar | 4.1 g |
| Sodium | 845 mg |
