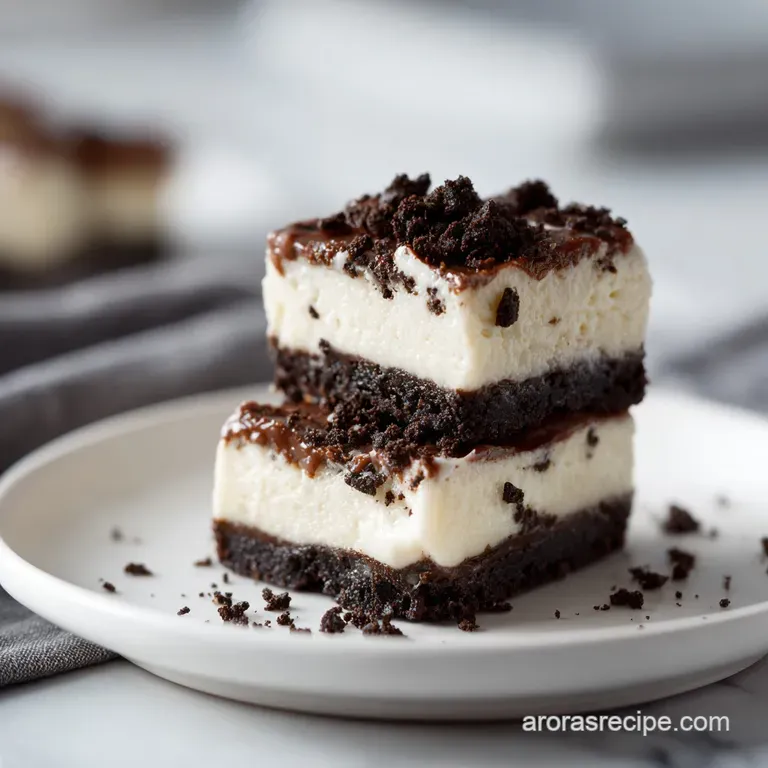
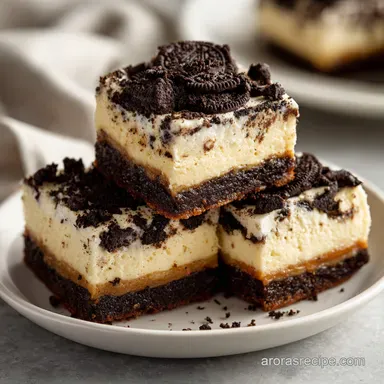
Oreo Cheesecake Bars
- Time: Active 20 minutes, Passive 35 minutes, Total 55 minutes
- Flavor/Texture Hook: Velvety cream cheese with a cookie shatter
- Perfect for: Neighborhood potlucks or weekend bake sales
- Baking the Best Oreo Cheesecake Bars Recipe
- Why This Cheesecake Recipe Works
- Calculated Batch Sizes for Parties
- Essential Ingredients for Creamy Filling
- Minimal Tools for Effortless Baking
- Step-by-Step Baking Guide
- Solving Common Cheesecake Baking Mishaps
- Smart Variations and Flavor Twists
- Scaling This Recipe Up or Down
- Debunking Common Baking Myths
- Storage and Reducing Kitchen Waste
- Perfect Pairings for These Treats
- Recipe FAQs
- 📝 Recipe Card
Baking the Best Oreo Cheesecake Bars Recipe
The sound of 30 Oreo cookies hitting a food processor is music to my ears, but it's the smell of that dark cocoa mixing with melted butter that really gets the kitchen feeling like home.
I remember the first time I brought these to a neighborhood block party in Ohio; the tray was empty before the hot dogs even hit the grill. There's something about that deep chocolate "shatter" of the crust against the velvety, tangy filling that people just can't resist.
We aren't doing anything fancy or difficult here. This is straight up homestyle baking that relies on simple ingredients and a bit of patience while it chills. If you've ever struggled with a whole cheesecake cracking or being underbaked in the middle, these bars are your stress free solution.
They bake faster, cut easier, and honestly, they taste more like childhood than a traditional cake ever could.
You'll love how the chopped cookies inside the batter soften just enough to become fudgy, while the crushed ones on top stay crispy. It's a texture party that doesn't require a bain marie or any special equipment beyond a basic baking pan and a hand mixer.
Trust me, once you see how easy it is to get that professional looking swirl of white and black, you'll be the designated dessert person for every family gathering.
Why This Cheesecake Recipe Works
- Fat Emulsification: Mixing room temperature cream cheese with sour cream creates a stable fat in-water emulsion that stays silky after baking.
- Starch Suspension: The cocoa solids in the Oreo chunks act as tiny stabilizers within the filling, helping the cheesecake hold its shape without extra flour.
- Moisture Migration: A brief pre bake of the crust ensures the butter binds the crumbs, preventing the filling from making the base soggy.
- Protein Denaturation: Adding eggs last and mixing minimally prevents trapped air, which is the primary cause of those annoying surface cracks.
The Physics of the Crunch
The sugar in the cookie filling melts slightly during the first bake and then re solidifies as it cools. This creates a structural "sugar glass" that keeps the crust from crumbling when you bite into it.
Chef's Tip: Freeze your butter for 10 minutes before melting it. It sounds odd, but colder butter that is then melted quickly has a slightly different water to fat ratio that helps the crust set firmer.
Calculated Batch Sizes for Parties
| Servings | Ingredient Adjustments | Pan Size | Cook Time |
|---|---|---|---|
| 8 people | Half all ingredients (use 1 egg) | 8x4 inch loaf pan | 25-30 minutes |
| 16 people | Standard recipe (as written) | 8x8 inch square | 35 minutes |
| 32 people | Double all ingredients | 9x13 inch pan | 45-50 minutes |
Whether you're just feeding the family or the whole church choir, sticking to these pan sizes ensures your bars aren't too thin or dangerously wobbly in the middle. Just like our Oreo Balls Recipe, these are incredibly easy to scale once you know the ratio.
Essential Ingredients for Creamy Filling
| Component | Science Role | Pro Secret |
|---|---|---|
| Cream Cheese (450g) | Primary structure | Use full fat brick style only; tub spread contains too much water. |
| Sour Cream (120g) | Tang and moisture | Adds lactic acid which tenderizes the protein for a "melt in-mouth" feel. |
| Large Eggs (100g) | Protein binder | Bring to room temperature in a bowl of warm water for 5 minutes for better mixing. |
Component Analysis
- 30 whole Oreo cookies (300g): These form the structural base. Don't scrape the cream out; it acts as the glue!
- 5 tbsp unsalted butter (70g): Melted to bind the crumbs. Use unsalted so the sea salt can do its job.
- 1/4 tsp sea salt: This cuts through the heavy sugar and makes the chocolate flavor pop.
- 1/2 cup granulated sugar (100g): Just enough to sweeten the cheese without making it cloying.
- 1 tsp pure vanilla extract: Adds a floral backnote that balances the tang of the sour cream.
- 15 additional Oreo cookies: Divided between the fold in chunks and the topping.
Why this? Using full fat sour cream ensures the bars don't become rubbery or dry after chilling.
Minimal Tools for Effortless Baking
To keep this stress free, we are avoiding the fancy stuff. You really only need an 8x8 inch baking pan and some parchment paper. I've seen people try to grease the pan with just butter, but please, save yourself the heartache and use parchment with a little "overhang" so you can lift the whole block out.
A simple hand mixer is actually better here than a big stand mixer because you have more control over not whipping too much air into the eggs. If you don't have a food processor for the crust, just throw the cookies in a gallon sized freezer bag and give them a good thumping with a rolling pin.
It’s a great way to get out any workday frustration!
step-by-step Baking Guide

1. The Crust Prep
Pulse 30 Oreo cookies in a processor until they look like fine, dark sand. Stir in 70g melted butter and 1/4 tsp sea salt until combined. Press this firmly into the bottom of your lined 8x8 pan. Note: Use the bottom of a flat measuring cup to get a perfectly even, packed layer.
2. The Pre Bake
Bake the crust at 175°C for 8-10 minutes until it smells toasted and looks set. This prevents a soggy bottom once the wet filling is added. Let it cool slightly while you make the batter.
3. Creaming the Base
In a large bowl, beat 450g softened cream cheese and 100g sugar until completely smooth and velvety. Note: Scraping the sides of the bowl is the only way to avoid tiny white lumps.
4. Adding Moisture
Mix in 120g sour cream and 1 tsp vanilla extract on low speed. You want it combined but not frothy.
5. Incorporating the Binder
Add 2 large eggs one at a time, mixing only until the yellow yolk disappears. Over mixing at this stage is what causes the bars to puff up and then sink.
6. The Cookie Fold
Gently fold in 113g coarsely chopped Oreos using a spatula. If you use the mixer, you'll turn the whole batter grey!
7. The Final Bake
Pour the mixture over the crust and top with 57g crushed cookies. Bake for 35 minutes until the edges are slightly puffed but the center still jiggles like firm gelatin.
8. The Critical Chill
Let the pan cool on a wire rack for 1 hour, then refrigerate for at least 4 hours. Note: Skipping the chill time results in a "mushy" bar rather than a clean, creamy slice.
Solving Common Cheesecake Baking Mishaps
Why the Filling is Lumpy
If your cream cheese was even slightly cold, it won't emulsify with the sugar. You end up with tiny "cheese beads" that don't melt away in the oven. Always leave your ingredients on the counter for at least 2 hours before starting.
Why the Bars Cracked
Cracks usually mean two things: too much air or too much heat. If you beat the eggs like you're making a meringue, they will expand and then collapse. Also, if you overbake them, the protein tightens and pulls apart. Pull them out while they still wobble!
| Problem | Root Cause | Solution |
|---|---|---|
| Soggy Crust | Butter pooled at bottom | Pre bake the crust for a full 10 minutes until set. |
| Filling is Gritty | Sugar didn't dissolve | Beat cheese and sugar for 3 mins before adding liquids. |
| Bars Stick to Pan | No parchment overhang | Use two strips of parchment in a "cross" pattern for easy lifting. |
Common Mistakes Checklist:
- ✓ Never use "light" or "spreadable" cream cheese (too much moisture).
- ✓ Don't open the oven door constantly; the heat loss ruins the even set.
- ✓ Always tap the filled pan on the counter 3 times before baking to pop air bubbles.
- ✓ Let the bars reach room temperature before putting them in the fridge to avoid condensation.
Smart Variations and Flavor Twists
If you're feeling a bit adventurous, these bars are a fantastic canvas for other flavors. My kids love a "Peanut Butter Blast" version where we swap the sour cream for creamy peanut butter. It makes the bars a bit denser, but the flavor is incredible. For another crowd pleaser that uses that same tangy cheese base, my Banana Bars recipe is a total Midwestern staple that never fails.
Stovetop Prep vs. Oven Prep
| Method | Use Case | Result |
|---|---|---|
| Stovetop | Melting butter/salt | Faster, but watch for browning or scorching. |
| Oven | Pre baking the crust | Essential for a "shatter" texture that doesn't crumble. |
- Golden Oreo Bars: Swap the standard cookies for Golden Oreos and add a pinch of lemon zest to the filling for a "summer" version.
- Minty Twist: Use Cool Mint Oreos and add a drop of green food coloring to the batter for a festive holiday treat.
- Condensed Milk Swap: Replace the sugar and sour cream with 1/2 can of sweetened condensed milk for a much sweeter, fudgier texture. Note: This will be significantly richer.
Scaling This Recipe Up or Down
Scaling Down (Small Batch): If you're just baking for two, cut the recipe in half and use a standard loaf pan. You'll need to beat one egg and only use half of it (about 25g). Reduce the baking time by about 8-10 minutes. It's a bit of a fiddle, but perfect for a quiet Friday night.
Scaling Up (Crowd Pleaser): Doubling this for a 9x13 pan is my go to for bake sales. When you double, don't double the vanilla use 1.5 teaspoons instead so it doesn't overpower the cheese. You’ll need to extend the bake time to roughly 45-50 minutes.
The center will still need that signature "wobble" when you pull it out.
Debunking Common Baking Myths
Myth: You need a water bath for bars. Actually, because these are thin bars and not a 4 inch thick cake, the heat penetrates evenly enough that a water bath is just extra work for no reward. The sour cream provides enough moisture to keep the top from drying out.
Myth: Oreos need to be finely ground for the filling. Nope! You want big, chunky pieces inside the batter. If you grind them too fine, you'll just end up with a grey colored cheesecake. The "chunk" is where the flavor lives.
Storage and Reducing Kitchen Waste
Fridge Life: These stay fresh in an airtight container for up to 5 days. I actually think they taste better on day 2 when the cookie bits have softened into the cream. If you have leftovers, they make a great base for a "cheesecake milkshake" blend!
Freezing: These bars freeze beautifully for up to 3 months. Wrap individual squares in plastic wrap, then place them in a freezer bag. Thaw in the fridge overnight. It's much better than grabbing a processed snack, similar to how I store my Chewy Granola Bars recipe for quick school lunches.
Zero Waste Tip: Don't throw away the broken "cookie dust" at the bottom of the Oreo pack. Stir it into your morning yogurt or use it as a garnish for vanilla ice cream.
Perfect Pairings for These Treats
Since these bars are very rich and hearty, I like to serve them with something a little acidic or fresh. A big bowl of macerated strawberries (strawberries sat in a little sugar for 20 minutes) cuts right through the heavy cream cheese.
If you're serving these at a party, they go great alongside a salty snack tray. Think pretzels, nuts, or even a sharp cheddar cheese. The contrast between the sweet, dark chocolate and something salty is what makes a dessert spread feel balanced.
And of course, a cold glass of milk or a strong cup of black coffee is the classic way to wash down all that Oreo goodness!
If you want a cleaner cut, dip your knife in hot water.If you want a firmer base, use 10g more butter in the crust.If you want a tangier bar, add 1 tsp of fresh lemon juice.
 : PIN FOR LATER")
Recipe FAQs
What is the required chilling time before slicing these bars?
At least 4 hours. Skipping the chill time results in a mushy bar rather than a clean, creamy slice because the filling needs time to set firm.
How to prevent the cheesecake filling from cracking after baking?
Mix the eggs minimally. Over beating the eggs incorporates too much air, causing the batter to puff significantly and then collapse and crack as it cools.
Can I substitute full fat cream cheese with light cream cheese?
No, stick with full fat brick style. Light or spreadable versions contain too much water, which negatively affects the structure and can result in a rubbery texture.
How to achieve a perfectly non-soggy, firm Oreo crust?
Pre-bake the crust for 8 to 10 minutes. This sets the melted butter and crumb structure, creating a barrier that prevents moisture migration from the filling.
What is the trick to getting clean slices when cutting the chilled bars?
Dip your knife in hot water between each cut. Wiping the knife clean and reheating it ensures the creamy filling melts slightly on contact, releasing cleanly from the blade.
Is it necessary to use room temperature ingredients for the filling?
Yes, for the cream cheese. Cold cream cheese will not emulsify properly with the sugar, leaving you with small, unappetizing lumps in the final texture.
How can I make these bars tangier without adding more sour cream?
Add 1 teaspoon of fresh lemon juice to the batter. The acid in the lemon enhances the inherent tanginess of the cream cheese for a brighter flavor profile.
Oreo Cheesecake Bars Recipe
Ingredients:
Instructions:
Nutrition Facts:
| Calories | 324 kcal |
|---|---|
| Protein | 4.1 g |
| Fat | 21.6 g |
| Carbs | 31 g |
| Fiber | 0.8 g |
| Sugar | 18.3 g |
| Sodium | 252 mg |
