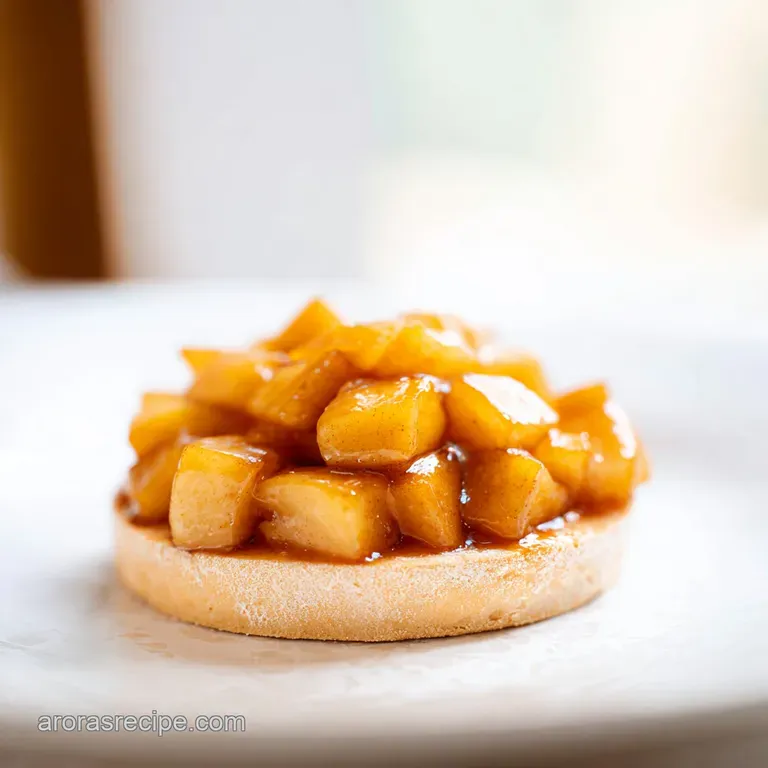
Apple Pie Bars: Buttery Shortbread Crust
- Time:30 minutes active + 45 minutes baking = Total 75 minutes
- Flavor/Texture Hook: Shatter crisp crumble topping with a velvety apple center
- Perfect for: Potlucks, autumn gatherings, or a hearty weekend treat
The scent of cinnamon and simmering apples hitting a hot skillet is enough to make anyone in the house run to the kitchen. I remember the first time I tried making a traditional pie for a family get together.
I spent hours rolling out a crust, only to have the bottom turn into a mushy mess because the apples released too much juice during the bake. It was a total letdown, and I honestly felt like I'd failed the dessert assignment.
That's why I shifted my focus to these Apple Pie Bars. By cooking the filling on the stove first, we get rid of that excess moisture and concentrate the flavor. The result is a sturdy, buttery base that doesn't give up under the weight of the fruit.
These Apple Pie Bars are my go to because they give you all the comfort of a slice of pie but with a much more reliable result.
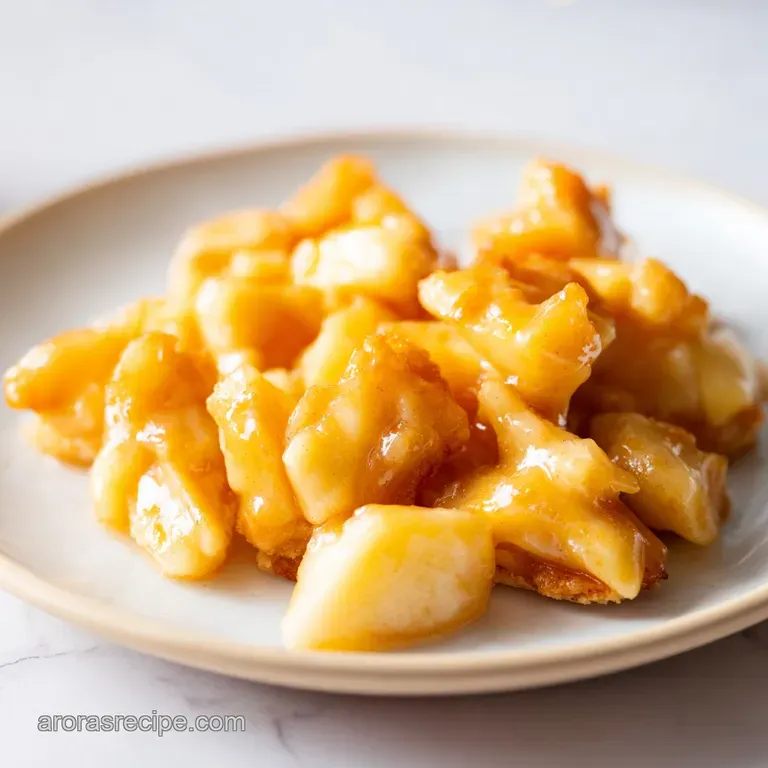
You can expect a dessert that balances the sharp tang of Granny Smith apples with a rich, sweet crumble. It's a hearty, homestyle treat that feels like a hug in every bite. We're skipping the stress of a rolling pin and focusing on a press in crust that stays crisp.
Trust me, once you try this method, you'll never go back to the fussy nature of a traditional pie crust.
Apple Pie Bars
Right then, let's get into why this specific approach works. Most people just dump raw apples into a crust and hope for the best, but that's a gamble. Here, we're using a few smart tricks to ensure every square is consistent.
- Moisture Control
- Sautéing the apples evaporates the water and thickens the sugars, so the crust stays crisp.
- Fat Barrier
- The high butter content in the shortbread creates a dense layer that resists soaking up fruit juices.
- Starch Binding
- A cornstarch slurry locks the remaining juices into a glossy gel, preventing the filling from running.
- Temperature Contrast
- Using cold butter for the crumble and softened butter for the base creates two entirely different textures.
If you're looking for other ways to use autumn fruit, you might enjoy a traditional apple cobbler, but these bars are much easier to transport to a party.
| Method | Prep Time | Texture | Best For |
|---|---|---|---|
| Classic Pie | 60 mins | Flaky/Soft | Sunday Dinner |
| Apple Pie Bars | 30 mins | Crisp/Chewy | Potlucks/Quick Treats |
| Apple Crisp | 15 mins | Gooey/Crunchy | Casual Weeknights |
The secret to the "hero" ingredient here is the Granny Smith apple. I've tried using Gala or Fuji, and while they're sweet, they often turn into applesauce in the oven. Granny Smiths have a firmer cell structure and a tartness that cuts through the sugar of the shortbread.
| Ingredient | Science Role | Pro Secret |
|---|---|---|
| Unsalted Butter | Structural Fat | Use softened for base, cold for crumble |
| Cornstarch | Thickening Agent | Always mix with water first (slurry) |
| Lemon Juice | Acid Balance | Prevents browning and brightens the flavor |
| Granny Smith | Flavor Base | Dice them small for a more uniform bite |
Shopping List Breakdown
For the shortbread crust, you'll need basics that you probably already have in your pantry. The goal here is a simple, budget friendly base that doesn't require expensive specialty flours.
For the Shortbread Crust:
- 1 cup (225g) unsalted butter, softenedWhy this? Provides the rich, melt in-your mouth texture
- 1/2 cup (100g) granulated sugarWhy this? Creates a crisp, caramelized edge
- 2 cups (250g) all purpose flourWhy this? Standard protein level for a sturdy base
- 1/4 tsp (1.5g) saltWhy this? Balances the sweetness of the butter
- Substitute: Use salted butter and skip the extra salt.
For the Apple Filling:
- 6 cups (1kg) Granny Smith apples, peeled and dicedWhy this? Holds shape and adds tartness
- 1/2 cup (100g) light brown sugar, packedWhy this? Adds a deep, molasses note
- 2 tbsp (16g) cornstarchWhy this? Thickens the apple juices into a sauce
- 1 tsp (2g) ground cinnamonWhy this? The classic warm spice pairing
- 1 tbsp (15ml) lemon juiceWhy this? Keeps apples bright and cuts sugar
- Substitute: Use Honeycrisp apples if you prefer a sweeter profile. Note: They may be softer.
For the Crumble Topping:
- 1/2 cup (60g) all purpose flourWhy this? Binds the crumble together
- 1/2 cup (100g) brown sugarWhy this? Helps the top brown deeply
- 1/4 cup (55g) cold unsalted butter, cubedWhy this? Creates the "sand" texture for crunch
- 1/2 tsp (1g) ground cinnamonWhy this? Echoes the flavor in the filling
- Substitute: Add 1/4 cup of rolled oats for a more rustic, "crisp" style topping.
Equipment Needed
You don't need a fancy kitchen to make these Apple Pie Bars. A few basic tools will do the job. I recommend using a 9x13 pan because it's the standard for sheet pan desserts and ensures the bars aren't too thick to bake through.
First, grab a large skillet. This is where the magic happens with the apples. A wide pan allows moisture to evaporate faster, which is key to avoiding a soggy result. You'll also need a mixing bowl for the dough and a smaller bowl for the crumble.
Don't forget the parchment paper. I always line my pan with it, leaving an overhang on the sides. This allows you to lift the entire block of bars out of the pan once they've cooled, making it way easier to cut clean squares.
If you don't have parchment, grease the pan heavily with butter, but the lift out method is much better.
Finally, a sturdy spatula is essential for pressing the dough into the corners. You want an even layer so the bars bake at the same rate. If the center is thicker than the edges, you'll end up with burnt sides and a raw middle.
Step-by-step Instructions
Let's crack on with the process. I've broken this down into phases so you can organize your workspace.
Phase 1: The Press In Crust 1. Preheat your oven to 350°F (175°C) and line your 9x13 pan with parchment paper. 2. Cream together the softened butter and granulated sugar until smooth. Stir in the flour and salt until a soft dough forms.
Note: Don't overmix, or the crust will be tough. 3. Press the dough evenly into the bottom of the pan. 4. Bake for 12-15 minutes until the edges are a pale gold. Remove from the oven and set aside.
Phase 2: The Sautéed Apple Filling 5. In a large skillet over medium heat, combine diced apples, brown sugar, cinnamon, and lemon juice. 6. Cook for 5-8 minutes, stirring occasionally, until the apples are translucent and fragrant. 7.
Whisk the cornstarch with a teaspoon of water to create a slurry; stir it into the apples. Note: Adding cornstarch directly to hot apples creates lumps. 8. Simmer for 2 more minutes until the sauce is thick and glossy. Pour the mixture evenly over the pre baked crust.
Phase 3: The Final Bake & Crumble 9. In a small bowl, rub the cold butter into the flour, brown sugar, and cinnamon using your fingers until it looks like coarse wet sand. 10. Sprinkle the crumble evenly over the apple layer. 11.
Bake for 25-30 minutes until the topping is a deep mahogany brown.
Chef's Tip: For an extra layer of flavor, add a pinch of nutmeg to the crumble. It adds a subtle, woody warmth that complements the cinnamon without overpowering it.
Common Mistakes & Troubleshooting
Even the best of us mess up sometimes. I once forgot to pre bake the crust, and the whole thing turned into a giant apple sponge. It was edible, but it wasn't a "bar." Let's make sure that doesn't happen to you.
| Issue | Solution |
|---|---|
| Why Your Filling Is Runny | If your apple layer is too liquid, it usually means the cornstarch slurry wasn't simmered long enough. The cornstarch needs to reach a certain temperature to "activate" and thicken the juices. If this |
| Why Your Crust Is Soggy | Sogginess usually comes from two things: skipping the pre bake or using apples that are too watery. By baking the crust for those first 12-15 minutes, you create a seal that prevents the fruit from so |
| Why Your Crumble Is Flat | If the topping melts into a solid sheet instead of staying crumbly, your butter was likely too warm. The butter needs to be cold so that it creates little pockets of fat. When these pockets melt in th |
Essential Checkpoints for Success:
- ✓ Pre bake the crust until it's pale gold, not brown.
- ✓ Dice apples into uniform 1/2 inch cubes for even cooking.
- ✓ Use a 9x13 pan to maintain the correct thickness.
- ✓ Let the bars cool completely before cutting.
- ✓ Use a sharp knife and wipe it between cuts.
Dietary Adaptations
Since we're keeping things budget friendly and accessible, you can easily tweak this recipe to fit different needs without spending a fortune on specialty ingredients.
For gluten-free Options: You can replace the all purpose flour in both the crust and crumble with a 1:1 gluten-free flour blend. Since these Apple Pie Bars don't rely on gluten for a "rise" (like a cake would), the substitution is very straightforward.
The crust might be slightly more crumbly, so be extra gentle when pressing it into the pan.
For Vegan Variations: Replace the butter with a chilled vegan butter stick. Avoid using oil, as you need the structural integrity of the solid fat to get that shortbread snap.
You can use maple syrup instead of brown sugar in the filling for a more natural sweetness, though it will make the sauce slightly thinner.
Adding Extra Crunch: If you want to move away from the simple crumble, try adding 1/4 cup of chopped pecans or walnuts to the topping. This adds a nutty depth that works well with the tartness of the Granny Smith apples. Just toss them in with the flour and butter in step 9.
Adjusting the Apple Type: If you can't find Granny Smiths, a mix of Braeburn and Jonagold works well. The Braeburn holds its shape, while the Jonagold adds a bit more sweetness. Avoid using Red Delicious, as they will essentially dissolve into a mushy paste.
Scaling Guidelines
Sometimes you need to make a huge batch for a church social, and other times you just want a few treats for yourself. Adjusting these Apple Pie Bars is simple, but there are a few rules to follow.
Scaling Down (Half Batch): To make a half batch, use an 8x8 or 9x9 inch square pan. Reduce the bake time for the crust by about 20%, but keep a close eye on it. For the eggless dough, simply halve the butter and flour.
The apple filling will cook slightly faster in a smaller skillet, so be ready to stir it more frequently to avoid burning the sugars.
Scaling Up (Double Batch): When doubling the recipe, I recommend working in batches rather than trying to fit 12 cups of apples into one skillet. If the skillet is too crowded, the apples will steam instead of sauté, and you'll lose that concentrated flavor. Use two 9x13 pans.
Baking Adjustments for Large Batches: If you are baking two pans at once, lower the oven temperature to 325°F (160°C) and extend the final bake time by 5-10 minutes.
This ensures that the heat circulates evenly around both pans and you don't get "hot spots" that burn the edges while the centers stay raw.
| Original | Half Batch | Double Batch | Note |
|---|---|---|---|
| Pan Size | 8x8 inch | 2x 9x13 inch | Maintain thickness |
| Prep Time | 20 mins | 50 mins | Batch cook apples |
| Bake Time | -20% crust | +10% total | Lower temp for 2 pans |
Baking Myths Debunked
There's a lot of noise out there about how to make the "perfect" dessert, but most of it is just fancy talk. Let's clear a few things up.
Myth: You must use a stand mixer for a smooth crust. Honestly, don't even bother. A sturdy spoon or a handheld mixer is plenty. The shortbread crust is a "press in" style, meaning it doesn't need the aeration that a cake does.
Over mixing with a stand mixer can actually develop too much gluten, making your crust tough instead of tender.
Myth: Freshly squeezed lemon juice is mandatory. While fresh is great, bottled lemon juice works just as well here. The goal is simply to introduce an acid to balance the sugar and keep the apples from oxidizing.
You won't notice a massive difference in the final result, so use what's in your fridge to keep costs down.
Myth: You have to peel the apples for the texture to be right. You can actually leave the peels on if you're in a rush, but it changes the vibe. The peels add a bit of extra fiber and a more rustic look, but they can sometimes feel "papery" in the mouth.
For that velvety, professional feel, peeling is the way to go.
Storage & Reheating
To keep your Apple Pie Bars tasting fresh, you need to be smart about how you store them. Because of the high moisture content in the apples, they can get soft if left out in a humid kitchen.
Fridge Storage: Store the bars in an airtight container in the fridge for up to 5 days. I recommend placing a piece of parchment paper between layers if you stack them; this prevents the crumble from sticking to the bottom of the bar above it.
Freezer Instructions: These freeze surprisingly well. Wrap individual bars in plastic wrap and then place them in a freezer safe bag. They'll stay good for about 3 months. When you're ready to eat one, let it thaw in the fridge overnight.
Best Reheating Method: To get that "just baked" feel, avoid the microwave, which can make the crust rubbery. Instead, pop a bar in a 300°F (150°C) oven for about 5-10 minutes.
This crisps up the shortbread and warms the apple filling without overcooking it.
Zero Waste Tips: Don't throw away those apple peels! You can simmer them with a bit of water and sugar to make a simple apple syrup for pancakes. Alternatively, if you have a compost bin, apple peels are great "green" material that breaks down quickly.
If you have leftover crumble topping before baking, you can sprinkle it over a bowl of Greek yogurt for a quick breakfast.
What to Serve This With
These bars are rich and tart, so they pair best with something creamy or something bitter to balance the sweetness.
A scoop of vanilla bean ice cream is the classic choice. The cold, melting cream against the warm, spiced apples is a match made in heaven. If you're serving these at a brunch, a strong cup of black coffee or a bold espresso is the way to go.
The bitterness of the coffee cuts through the butter of the shortbread perfectly.
If you're putting together a larger dessert spread, these Apple Pie Bars sit nicely alongside a homemade white cake for a variety of textures. The light, airy cake balances the dense, hearty nature of the bars.
For a more adventurous pairing, try a drizzle of salted caramel sauce over the top. The salt enhances the apple flavor and adds a professional touch to a simple homestyle dessert. Just warm the sauce slightly so it seeps into the nooks and crannies of the crumble topping.
Recipe FAQs
Can I use apples other than Granny Smith?
Yes, though tart varieties are preferred. Granny Smith is ideal for its structure and acidity, but any firm, tart apple will work well.
Why is my apple filling runny?
The cornstarch slurry wasn't simmered long enough. You must simmer the mixture for 2 minutes after adding the slurry to activate the thickening agent and create a glossy sauce.
Is it true I can skip pre-baking the crust?
No, this is a common misconception. Skipping this step results in a soggy, sponge like base rather than a distinct bar.
How to store these bars?
Store them in an airtight container in the fridge for up to 5 days. Place parchment paper between layers to prevent the crumble from sticking.
Why did my crust turn out tough?
You likely overmixed the dough. Stir the flour and salt into the creamed butter and sugar only until a soft dough forms to maintain a tender texture.
How to achieve the correct crumble texture?
Rub cold cubed butter into the flour and sugar using your fingers. Continue until the mixture resembles coarse wet sand before sprinkling it over the filling.
Why is lemon juice added to the apples?
It prevents browning and balances the sweetness of the brown sugar. If you loved the sweet tart balance here, see how we apply a similar flavor balancing technique in our honey chipotle chicken.
Apple Pie Bars

