Apple Pie: Shatter Crisp Crust
- Time: Active 45 minutes, Passive 55 minutes, Total 1 hours 40 mins
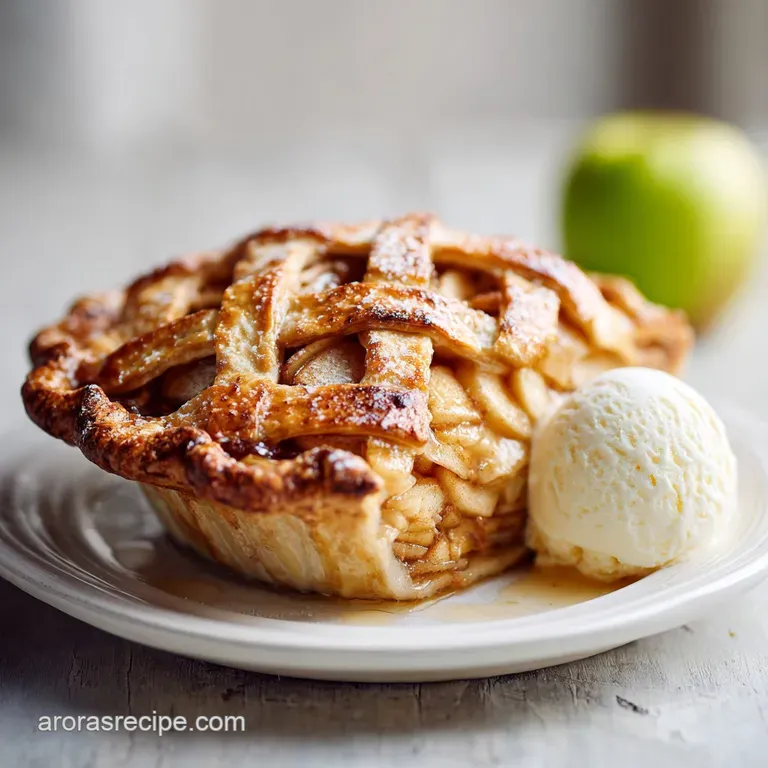
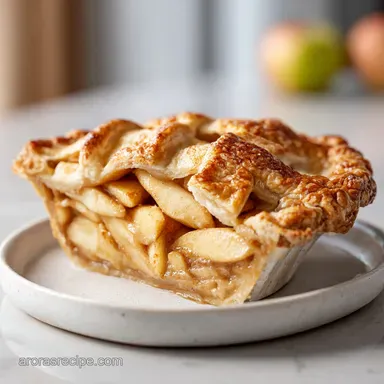
- Flavor/Texture Hook: Shatter crisp buttery crust with a velvety cinnamon spiced apple center.
- Perfect for: Sunday family dinners, holiday dessert tables, or beginner bakers looking for a win.
- Baking the Perfect Classic Apple Pie
- Why This Crust Always Shatters
- Key Timing and Recipe Specs
- Smart Grocery List and Swaps
- Best Tools for the Job
- Simple Steps for Flaky Results
- Solving Common Baking Problems
- Creative Flavor and Texture Twists
- Storing and Reheating Your Pie
- Perfect Pairings for Every Slice
- Apple Pie FAQs
- 📝 Recipe Card
Baking the Perfect Classic Apple Pie
The first time I tried making a pie from scratch, I ended up with what can only be described as apple soup in a soggy blanket. I remember the smell of burnt sugar hitting the bottom of my oven, that sharp, acrid scent that mocks your hard work.
I sat on the kitchen floor and ate the filling with a spoon because the bottom crust was essentially raw dough. It was a mess, but it taught me that temperature is everything in a Nashville kitchen.
We've all been there, staring at a recipe that looks simple but results in a pile of frustration. This version is different because it’s the result of all those watery fillings and tough crusts I made in my twenties. I've stripped away the fancy, expensive ingredients and focused on the physics of the flake.
We're talking about a crust that actually makes a sound when your fork hits it.
You don't need a degree in pastry arts or a hundred dollars worth of organic heirloom fruit to make this work. We are going to use basic pantry staples and some smart techniques to get a result that looks like it belongs in a window display.
Trust me, once you hear that first crack of the crust, you'll never go back to the store-bought frozen stuff. Let's get into the details that actually matter.
Why This Crust Always Shatters
The Steam Engine: Frozen butter chunks create tiny pockets of steam during baking, which physically lift the layers of flour to create a flaky, layered structure.
Pectin Management: Using a mix of Granny Smith and Honeycrisp apples ensures the filling stays intact because the acid in the tart apples keeps the pectin from breaking down too fast.
Starch Activation: Tapioca starch binds with the natural apple juices only when the internal temperature hits a specific point, creating a thick, velvety sauce instead of a watery puddle.
Acidic Gluten Control: A splash of apple cider vinegar limits gluten development in the dough, ensuring the crust stays tender and "short" rather than chewy or bread like.
| Method | Time | Texture | Best For |
|---|---|---|---|
| Hand Crumpled | 1 hours 40 mins | Shaggy, rustic flakes | Beginners/Budget |
| Food Processor | 1 hours 25 mins | Uniform, sandy crumb | Speed and consistency |
| Stand Mixer | 1 hours 35 mins | Large, visible butter chunks | Maximum "shatter" effect |
The method you choose really depends on how much you like getting your hands dirty. If you're looking for that old-fashioned Southern feel, doing it by hand with a pastry cutter or just your fingers is the way to go. It gives you a feel for the dough that a machine just can't replicate.
If you've got a KitchenAid stand mixer, it's great for keeping the butter cold because your warm hands stay out of the bowl.
Key Timing and Recipe Specs
When we talk about baking, precision is our best friend, especially when we're trying to save money by not wasting ingredients. I've timed this down to the minute so you aren't guessing if it's done. You want to look for that deep mahogany color on the crust. If it’s just pale gold, it’s going to be tough.
We want it dark and crisp.
Component Analysis
| Ingredient | Science Role | Pro Secret |
|---|---|---|
| European Butter | High fat, low water | Freeze it for 20 mins before cubing to prevent melting |
| Coconut Sugar | Lower glycemic, deep flavor | Adds a toasted caramel note without needing expensive extracts |
| Tapioca Starch | Clear thickening agent | Keeps the filling transparent rather than cloudy like flour |
| Apple Cider Vinegar | Gluten inhibitor | Use it ice cold to keep the dough temperature down |
The choice of European style butter is one of those small upgrades that pays off. It has a higher fat content than standard American butter, which means less water. Less water equals less steam too early and a much more tender result.
It's a bit more per pack, but it's the one place I suggest not pinching pennies if you want that bakery level crunch.
Smart Grocery List and Swaps
Right then, let's talk about what's actually going into the bowl. We are using 2 ½ cups (315g) of chilled all purpose flour. Don't grab the bread flour; it has too much protein and will make your pie tough. For the fat, we need 1 cup (225g) of unsalted European style butter. Make sure it's cubed and frozen.
A teaspoon of sea salt and a tablespoon of granulated sugar round out the dry bits for the dough.
For the liquid, you'll need ½ cup (120ml) of ice cold water and 1 tsp of apple cider vinegar. The filling is where the bulk of the weight is. Grab 3 lbs (1.4kg) of mixed apples. I like a mix of Granny Smith and Honeycrisp.
You'll also need ½ cup (100g) of coconut sugar, 2 tbsp of tapioca starch, and our spices: 1 ½ tsp Ceylon cinnamon and ¼ tsp ground nutmeg. A tablespoon of lemon juice keeps the fruit bright, and 1 tbsp of browned butter adds a nutty depth.
Finally, 1 large egg, 1 tsp water, and 1 tsp demerara sugar are for the wash and sparkle.
| Original Ingredient | Substitute | Why It Works |
|---|---|---|
| European Butter | Standard Unsalted Butter | Works fine, but the crust will be slightly less flaky. |
| Coconut Sugar | Light Brown Sugar | Same moisture level. Note: Adds more molasses flavor than coconut sugar. |
| Tapioca Starch | Cornstarch | Similar thickening. Note: Can make filling slightly cloudy or "stiff." |
| Ceylon Cinnamon | Cassia (Standard) Cinnamon | Stronger, spicier flavor. Note: Use 25% less as it can be overpowering. |
If you're making this during the holidays and want a variety on the table, this pie pairs beautifully with a Festive Cranberry Pecan Pie recipe because the tartness of the apples balances the heavy sweetness of the pecans. It's all about that contrast on the dessert plate.
Best Tools for the Job

You don't need a kitchen full of gadgets, but a few specific items make this much easier. A solid rolling pin is a must. I prefer the French tapered style because you have more control over the edges of the dough.
A 9 inch glass pie dish is actually better than ceramic for beginners because you can peek at the bottom to see if it’s browned.
A pastry blender is helpful, but honestly, two knives or your fingers work just as well. What you really want is a sharp vegetable peeler. Peeling 3 pounds of apples with a dull blade is a recipe for a bad mood. If you have a kitchen scale, use it for the flour.
Volume measurements with cups can vary wildly depending on how packed the flour is.
Controlling Pectin with Acid
The lemon juice isn't just for flavor. It lowers the pH of the filling, which helps the pectin in the apple cell walls stay firm. This is why some pies turn into applesauce while others keep their shape. We want a bit of a bite in our fruit, not a mushy paste.
Engineering the Shattering Crust
The secret to a crust that shatters like glass is keeping everything cold. When that frozen butter hits the 400°F (200°C) oven, it explodes with steam. That's what creates the air pockets.
If the butter is room temperature when it goes in, it just soaks into the flour and you get a greasy, flat crust.
Simple Steps for Flaky Results
- Prep the fat. Cube the 1 cup of butter and put it in the freezer for at least 20 minutes Note: This ensures it doesn't melt during mixing.
- Mix dry ingredients. Whisk 2 ½ cups flour, 1 tsp salt, and 1 tbsp sugar in a large bowl.
- Cut in butter. Add frozen butter to flour and use a pastry cutter until the largest pieces are the size of peas.
- Hydrate the dough. Mix ice water and cider vinegar, then drizzle in 1 tablespoon at a time until the dough just holds together when squeezed.
- Chill the discs. Divide dough into two, wrap in plastic, and refrigerate for at least 1 hour.
- Macerate apples. Peel and slice 3 lbs of apples, then toss with lemon juice, coconut sugar, cinnamon, nutmeg, and starch until every slice is coated and glossy.
- Roll and fill. Roll out the bottom crust, fit into the pan, and pile the apples high until they form a rounded mound in the center.
- Top and seal. Add the second crust (or lattice), crimp the edges, and brush with the egg wash until the entire surface is thinly coated.
- Bake high then low. Start at 400°F (200°C) for 20 mins, then drop to 375°F (190°C) until the juices bubble slowly and the crust is dark mahogany.
- Cool completely. Rest the pie for at least 4 hours until the filling has fully set and the pan is cool to the touch.
Wait, I know 4 hours sounds like an eternity when the house smells like heaven, but if you cut it early, the juice will run everywhere. It needs that time for the starch to finish its job. If you really can't wait, at least give it 2 hours. If you're looking for a different kind of comfort food project while the pie cools, you might enjoy checking out this Grandmas Sweet Potato recipe for your next baking session.
Solving Common Baking Problems
The most frustrating thing about baking is that sometimes things go wrong even when you follow the steps. Most of the time, it's a temperature issue. If your kitchen is hot, your dough will be sticky. If your oven isn't calibrated, the timing will be off. Don't panic; most pie "failures" are still edible and delicious.
Why Your Crust Is Tough
If the crust feels like cardboard or is hard to chew, you likely over mixed it. When you add water to flour, gluten starts to form. The more you stir and knead, the stronger that gluten gets. You want to stop mixing the second the dough stays together.
It should look a little shaggy and even have some dry spots before you wrap it up to chill.
Why Your Filling Is Watery
A runny filling usually happens for two reasons: the apples weren't cooked long enough, or you used the wrong variety. If you use only soft apples like McIntosh or Red Delicious, they release all their water and collapse. Stick to the Granny Smith and Honeycrisp mix.
Also, make sure those juices are actually bubbling in the oven; that’s the sign that the starch has activated.
| Problem | Root Cause | Solution |
|---|---|---|
| Soggy Bottom | Undercooked base or too much moisture in fruit | Bake on the lowest oven rack on a preheated baking sheet. |
| Shrinking Crust | Dough was stretched too thin or not chilled | Let the dough rest in the pan for 10 mins before filling. |
| Burnt Edges | High sugar content or uneven oven heat | Cover the edges with aluminum foil or a pie shield halfway through. |
Common Mistakes Checklist
- ✓ Forgetting to chill the dough - results in a greasy, tough crust.
- ✓ Using room temperature water - melts the butter bits before they hit the oven.
- ✓ Slicing apples too thick - they won't soften at the same rate the crust browns.
- ✓ Peeking too often - opening the oven door drops the temp and ruins the "lift" of the flakes.
- ✓ Not venting the top crust - steam gets trapped and turns the filling into mush.
Creative Flavor and Texture Twists
Once you've got the basic version down, you can start playing with the flavors. A classic Southern trick is to add a handful of sharp cheddar cheese to the crust dough. It sounds weird, but the salty, savory fat of the cheese against the sweet apples is incredible.
You just grate about 1/2 cup of sharp cheddar and toss it in with the flour.
If you want a deeper flavor, try browning the butter before you add it to the apple filling. You just melt the butter in a pan until it smells nutty and turns brown, then let it cool slightly before tossing it with the fruit. It adds a toasted quality that makes people wonder what your "secret ingredient" is.
Adding a Savory Twist
If you're feeling adventurous, add a teaspoon of fresh thyme or rosemary to the apple mixture. It brings out the floral notes of the Honeycrisp apples. Just make sure to mince the herbs very finely so you don't end up with a twig in your mouth.
Swapping the Fats
For a budget version, you can replace half the butter with high-quality lard. Lard has even larger fat crystals than butter, which can lead to an even flakier crust. However, you lose that signature buttery flavor, so it's a trade off. Some folks swear by a 50/50 mix for the ultimate texture flavor balance.
Storing and Reheating Your Pie
Apple pie is one of those rare things that might actually be better the second day. The flavors have had time to settle, and the crust softens just a tiny bit while staying crisp. You can keep it on the counter at room temperature for up to 2 days, as long as it's covered. After that, it needs to go in the fridge.
- Storage
- Fridge for up to 5 days. Wrap it tightly in plastic wrap or foil to keep it from picking up fridge smells.
- Freezing
- You can freeze the unbaked pie for up to 3 months. Bake it straight from frozen, adding about 15-20 minutes to the total bake time.
- Zero Waste
- Don't throw away those apple peels! Toss them with a little cinnamon sugar and bake them at 300°F (150°C) for 15 minutes for a quick "apple skin chip" snack. Or, simmer them with water and a cinnamon stick to make a quick stovetop potpourri.
Perfect Pairings for Every Slice
While a slice of pie is a meal in itself in my book, it's always better with a little something on the side. The classic choice is vanilla bean ice cream (à la mode), but if you want to be truly Southern, a slice of sharp cheddar cheese on the side is the way to go.
The saltiness cuts through the sugar perfectly.
If you're serving this at a big gathering, it goes great alongside other classic bakes. I often serve it with my Birria Egg Rolls recipe if I'm doing a "fun food" night, or with a Chicken Pot Pie recipe for the ultimate "pie themed" dinner party. There’s something so comforting about a table full of golden, flaky pastry.
For a drink pairing, a hot cup of black coffee is hard to beat. The bitterness of the coffee balances the sweetness of the coconut sugar. If it’s evening, a small glass of tawny port or a spiced apple cider (with a splash of bourbon if you're feeling fancy) makes for a great ending to the night.
Just keep it simple and let the pie be the star of the show.

Apple Pie FAQs
What's the secret to a good apple pie?
Use frozen butter and a mix of apple varieties. Keeping all dough ingredients ice cold creates steam pockets when baking, ensuring a flaky crust, while mixing tart and sweet apples prevents the filling from becoming uniformly mushy.
Do you need to cook apples before putting them in a pie?
No, par-cooking is generally unnecessary if you use the right apples. Toss them raw with sugar and a thickener like tapioca starch; the apples cook fully inside the pie shell, helping to maintain shape rather than becoming soup.
Why do people add lemon juice to apple pie?
Lemon juice prevents discoloration and aids texture setting. The acid lowers the filling's pH, which helps the natural pectin in the apples set properly, resulting in a firmer filling rather than a watery one.
Is it true that you must use bread flour for a stronger crust?
False. You should avoid bread flour in pie crust. Bread flour has too much protein, which develops too much gluten, leading to a tough, chewy crust instead of the desired tender, flaky texture.
How do I prevent the bottom crust from becoming soggy?
Bake the pie on a preheated, lower oven rack. Placing the pie dish directly onto a hot surface draws heat into the bottom crust immediately, helping it cook through before the filling fully releases its moisture.
Why are McDonald's apple pies so good?
Their success comes from high sugar content and deep frying. The commercial version uses a very high concentration of sugar and often pre-cooks the filling significantly before sealing and frying, which creates a unique texture contrast.
How do I get a deeply browned, shiny top crust?
Apply a simple egg wash and bake at a high initial temperature. Whisk one egg with one teaspoon of water and lightly brush it over the entire top crust before baking; this promotes superior browning and gloss, much like the technique used for our Classic Kentucky Derby Pie recipe.
Best Homemade Apple Pie Recipe
Ingredients:
Instructions:
Nutrition Facts:
| Calories | 498 kcal |
|---|---|
| Protein | 4.8 g |
| Fat | 24.8 g |
| Carbs | 64.2 g |
| Fiber | 2.6 g |
| Sugar | 31.5 g |
| Sodium | 294 mg |
