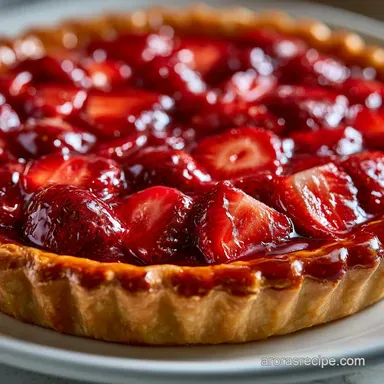
Strawberry Pie: Crisp and Fresh
- Time: 20 min active + 2 hours chilling = Total 2 hours 40 mins
- Flavor/Texture Hook: Shatteringly crisp crust with a velvety, fresh berry glaze
- Perfect for: Summer potlucks, family Sunday dinners, or a simple homestyle treat
- The Best Strawberry Pie Recipe
- Breaking Down the Core Components
- The Exact Filling and Crust Specs
- Minimal Tools for a Stress Free Bake
- The Step by Step Baking Process
- Fixing Common Pie Problems and Errors
- Troubleshooting Common Issues
- Easy Swaps and Scaling the Recipe
- Strawberry Pie Truths
- Storage Guidelines and Zero Waste Tips
- The Best Way to Serve Your Slice
- Recipe FAQs
- 📝 Recipe Card
That sharp, sweet smell of simmering berries hitting the air is enough to bring anyone into the kitchen. For years, I thought you had to throw everything in a pan and bake it for an hour, but that usually just leads to a watery mess and a crust that feels like wet cardboard.
Forget the idea that a fruit pie needs a long oven stay to be "authentic." The real secret to a sturdy, vibrant slice is treating the crust and the filling as two different projects. By cooking a concentrated glaze on the stove and folding in raw berries, you keep the fruit tasting like fruit, not jam.
This Strawberry Pie Recipe is all about that Midwestern, no fuss approach. We're using minimal tools and a few reliable shortcuts to make sure the result is hearty and consistent every time. You'll get a base that snaps and a filling that's silky and bright.
The Best Strawberry Pie Recipe
Right then, let's talk about what's happening under the hood. Most people struggle with this dish because strawberries are basically water balloons. If you bake them raw in a crust, they leak everywhere.
The Glaze Method: By simmering a portion of the berries first, we create a thick syrup that traps the remaining raw fruit. This prevents the filling from weeping.
The Fat Barrier: Using chilled, cubed butter in the crust creates tiny pockets of fat. When these hit the oven, they steam and push the flour apart, which is what gives you that shatter effect instead of a hard cookie.
Acid Balance: The lemon juice isn't just for flavor, it helps the cornstarch set more firmly and keeps the red color from turning a dull brown.
| Method | Time | Texture | Best For |
|---|---|---|---|
| Fully Baked | 60 mins | Jammy and Soft | Warm, cozy winter vibes |
| Stovetop Glaze | 20 mins | Fresh and Velvety | Summer parties and clean slices |
This approach is a lifesaver for busy cooks. You don't have to babysit the oven for an hour, and you can actually prep the filling while the crust is cooling. It's a much more reliable way to ensure your slices don't collapse the moment they hit the plate.
Breaking Down the Core Components
Before we get into the mix, let's look at what each part is actually doing. I've found that when you understand the role of the ingredient, you stop stressing about the "exact" measurement and start cooking by feel.
| Ingredient | Science Role | Pro Secret |
|---|---|---|
| Cornstarch | Thickener | Always mix with water first to avoid lumps |
| Chilled Butter | Flakiness | Keep it in the fridge until the very second you need it |
| Lemon Juice | Brightness | Use fresh lemons to keep the berry color vibrant |
| Ice Water | Binder | Add one tablespoon at a time; stop as soon as it clumps |
Honestly, don't even bother with low-fat butter here. You need that full fat content to get the richness that balances the tartness of the berries. If the butter is too soft, your crust will be tough, and that's the one mistake we're going to avoid today.
The Exact Filling and Crust Specs
Here is everything you'll need for this Strawberry Pie Recipe. Stick to these quantities to keep the moisture levels in check.
For the Crust:
- 1 1/2 cups (190g) all purpose flourWhy this? Standard protein level for a sturdy but flaky base
- 1/2 cup (115g) unsalted butter, chilled and cubedWhy this? Cold fat creates the steam pockets for flakiness
- 1/2 tsp (3g) saltWhy this? Cuts through the richness of the butter
- 3-4 tbsp (45-60ml) ice waterWhy this? Binds the dough without overworking the gluten
For the Filling:
- 2 lbs (900g) fresh strawberries, hulled and slicedWhy this? Fresh berries provide the best texture and snap
- 3/4 cup (150g) granulated sugarWhy this? Balances the natural tartness of the fruit
- 1/4 cup (30g) cornstarchWhy this? Essential for a clean, non runny slice
- 1 tbsp (15ml) lemon juiceWhy this? Prevents oxidation and adds a zingy finish
- 1 tsp (5g) vanilla extractWhy this? Adds a floral depth to the berries
Quick Substitutes:
- All purpose flour → gluten-free 1:1 blend (Note: Crust may be more fragile)
- Granulated sugar → Honey (Note: Reduce by 1/4 cup; adds a floral note)
- Fresh strawberries → Frozen berries (Note: Thaw and drain excess liquid first)
Minimal Tools for a Stress Free Bake
You don't need a professional kitchen to pull this off. I usually just use a couple of bowls and a single pan.
- 9 inch pie dish (Glass or ceramic works best)
- Medium saucepan (For the glaze)
- Mixing bowl (Large enough to toss the dough)
- Pastry cutter or two forks (To cut in the butter)
- Spatula (For smoothing the top)
Trust me on this: don't use a food processor for the crust if you have the time to do it by hand. It's way easier to tell when the butter is the right size, and you're less likely to overwork the dough into a brick.
The step by step Baking Process
Let's crack on. Follow these steps, and keep an eye on the cues so you know exactly when to move forward.
- Combine flour and salt in a bowl, then cut in the chilled butter using a pastry cutter or forks until the mixture resembles coarse crumbs. Note: You want some pea sized chunks of butter remaining.
- Gradually stir in ice water, one tablespoon at a time, until the dough just holds together when pressed.
- Press the dough evenly into the bottom and sides of a 9 inch pie dish. Note: Use your fingers to push it into the corners.
- Bake at 425°F (220°C) for 10-12 minutes until the edges are a light golden brown.
- In a saucepan, combine 2 cups of the sliced strawberries, sugar, and lemon juice.
- Heat over medium, stirring occasionally, until the berries break down and the liquid begins to bubble.
- Whisk in the cornstarch (dissolved in a tiny bit of water) and simmer for 2-3 minutes until the glaze is clear and thick.
- Remove from heat and stir in the vanilla and the remaining raw sliced strawberries. Note: This keeps the pie looking fresh and textured.
- Pour the warm strawberry mixture into the pre baked crust, smoothing the top with a spatula.
- Let the pie cool to room temperature on the counter before transferring it to the refrigerator.
- Chill for at least 2 hours to ensure the slices hold their shape.
For the best results with cornstarch thickening, make sure the liquid is actually simmering before you decide it's done. If it's just warm, the starch won't fully activate, and you'll end up with a runny filling.
Fixing Common Pie Problems and Errors
Even the best of us hit a snag. Usually, it comes down to moisture or temperature.
Troubleshooting Common Issues
| Issue | Solution |
|---|---|
| Why Your Crust Is Tough | If you over mix the dough or use warm butter, the gluten develops too much and the fat melts into the flour. This results in a hard, cracker like crust instead of something that shatters. |
| Why Your Filling Is Runny | This usually happens if the cornstarch wasn't simmered long enough or if the berries were too watery. If you use frozen berries, they release more liquid, so you might need an extra teaspoon of starch |
| Why Your Base Is Soggy | If you don't pre bake the crust (blind baking), the fruit juices soak directly into the raw flour. The pre bake creates a seal that keeps the crust crisp. |
Reliability Checklist:
- ✓ Butter is chilled and cubed
- ✓ Cornstarch was mixed into a slurry first
- ✓ Crust was pre baked until golden
- ✓ Pie chilled for a full 2 hours before slicing
Easy Swaps and Scaling the Recipe
If you're making this for a crowd or just a couple of people, you can adjust the Strawberry Pie Recipe easily.
Scaling Down (Half Recipe): Use a 6 inch pan. Reduce the baking time for the crust by about 20%. For the egg (if you were using a wash), beat one egg and use half.
Scaling Up (Double Recipe): Work in batches for the filling to ensure the glaze thickens evenly. If you're baking two crusts, lower the oven temp to 400°F (200°C) and extend the time by 5 minutes to account for the extra moisture in the oven.
If you're in the mood for something with a bit more crunch, my strawberry shortcake recipe is a great alternative for using up extra berries.
Strawberry Pie Truths
Let's clear up a few things I see people arguing about in the comments of cooking blogs.
The "Blind Baking" Myth: Some say pre baking the crust makes it tough. That's only true if you overbake it. A quick 10 minute sear at high heat actually protects the crust from the fruit.
The "Frozen Fruit" Myth: You'll hear that you can't use frozen strawberries for a pie. You absolutely can, but you must drain the excess juice first, or your filling will be too thin.
Storage Guidelines and Zero Waste Tips
This Strawberry Pie Recipe lasts about 3-4 days in the fridge. Keep it covered with a loose piece of foil or plastic wrap to prevent it from picking up "fridge smells."
Freezing: I don't recommend freezing the finished pie because the fresh berries in the filling can change texture and become mushy. However, you can freeze the pre baked crust for up to a month.
Zero Waste: Don't toss the strawberry hulls! Put them in a jar with some water and a slice of lemon in the fridge for 24 hours to make a refreshing, infused berry water.
The Best Way to Serve Your Slice
To get those clean, professional looking slices, dip your knife in hot water and wipe it clean between every single cut. This prevents the velvety glaze from smearing across the crust.
For a big party, this pie sits beautifully next to a velvety white cake for a full dessert spread. If you want to keep it simple, a dollop of unsweetened whipped cream or a scoop of vanilla bean ice cream is all you need.
Decision Shortcut:
- If you want a tart contrast → serve with a dollop of Greek yogurt
- If you want it decadent → add a drizzle of salted caramel
- If you're serving at a party → slice into 12 thinner wedges for easier grabbing
Recipe FAQs
What's the best thickener for strawberry pie?
Cornstarch. Whisk it with a bit of water and simmer for 2-3 minutes until the glaze is clear and thick.
What are some common mistakes when making strawberry desserts?
Overmixing the dough or under simmering the thickener. Overmixing leads to a tough crust, while insufficient simmering causes a runny filling.
What are the ingredients for strawberry pie?
Flour, butter, salt, ice water, fresh strawberries, sugar, cornstarch, lemon juice, and vanilla extract. These create a buttery crust and thick glaze; if you enjoy fruit desserts, try our peach cobbler.
Why is my strawberry pie filling runny?
The cornstarch wasn't simmered long enough. Ensure the mixture bubbles for 2-3 minutes to fully activate the starch's thickening properties.
Why did my pie crust turn out tough?
The dough was overmixed or the butter was too warm. This develops too much gluten and melts the fat, resulting in a cracker like texture.
Is it true I can skip pre-baking the crust without making it soggy?
No, this is a common misconception. Skipping the pre-bake allows moisture from the strawberries to soak into the raw dough, resulting in a soggy base.
How do I store a strawberry pie?
Cover with foil or plastic wrap and keep it in the refrigerator. It stays fresh for 3-4 days, but avoid freezing the finished pie to prevent the berries from becoming mushy.
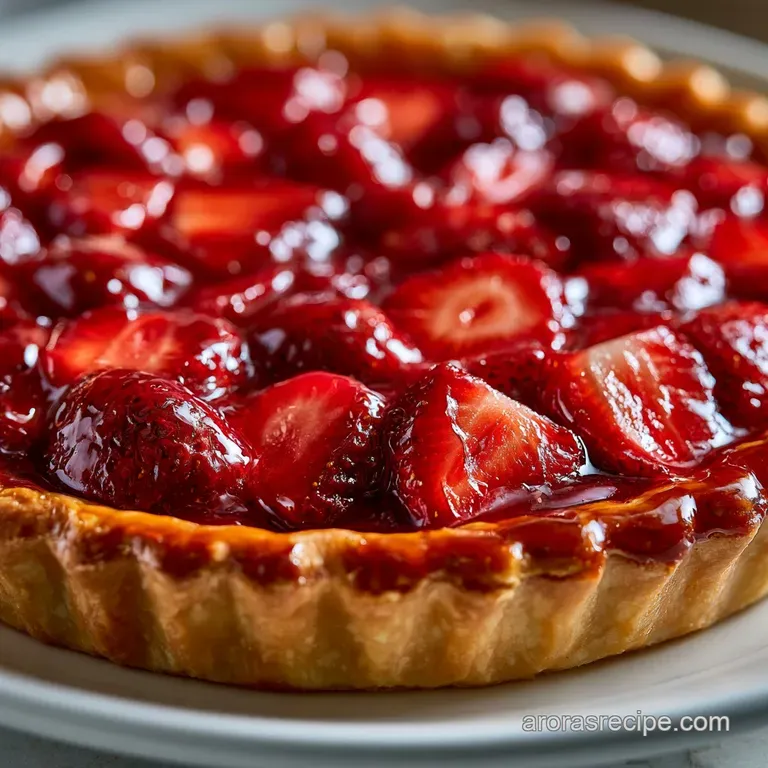
Fresh Strawberry Pie Recipe