Magnolia Bakery Banana Pudding: from Scratch
- Time: Active 20 minutes, Passive 8 hours, Total 8 hours 20 mins
- Flavor/Texture Hook: Airy, velvety, and nostalgic
- Perfect for: Potlucks, birthdays, and Sunday dinners
- Crafting Magnolia Bakery Banana Pudding from Scratch
- Why This Velvet Dessert Works
- Planning Your Pudding Timing
- Gathering Your Essential Ingredients
- Tools for the Best Results
- Step by Step Assembly Guide
- Troubleshooting Your Pudding Layers
- Creative Swaps and Variations
- Storing Your Banana Leftovers
- Perfect Serving and Presentation
- Recipe FAQs
- 📝 Recipe Card
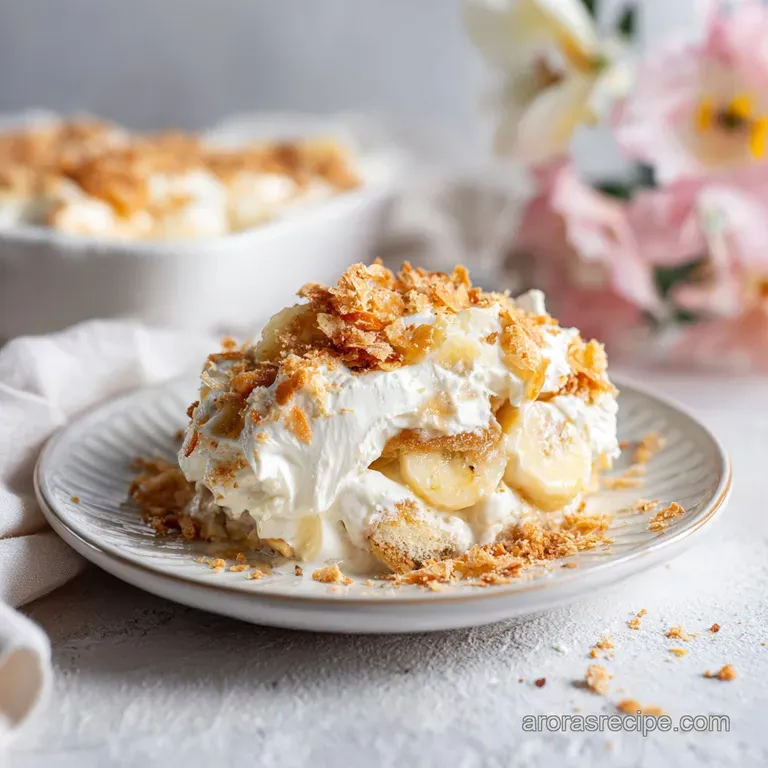
Crafting Magnolia Bakery Banana Pudding from Scratch
There is a specific sound that happens when you press a spoon into a bowl of this pudding. It is not a crunch, but a soft, airy sigh as the spoon glides through layers of whipped clouds and softened wafers.
The aroma hits you next the scent of sweet cream and perfectly ripened bananas that have spent hours mingling in the fridge. I still remember the first time I saw a line wrapping around the block in New York City just for a paper cup of this stuff. I thought it was hype, until I took that first bite.
Back home in Nashville, we take our banana pudding seriously. It is a staple at every church social and backyard barbecue. But there is something about the Magnolia version that changed the game for me. It is not a heavy, thick custard that sits like a lead weight in your stomach.
Instead, it is light, almost ethereal, yet rich enough to satisfy that deep craving for Southern comfort. When I realized I could recreate this magnolia bakery banana pudding from scratch right in my own kitchen, it became my go to "wow" dish for every family gathering.
This recipe is remarkably simple, but it relies on patience. You cannot rush the chill, and you certainly cannot skip the real whipped cream. We are talking about six basic ingredients that, through the magic of a long rest in the refrigerator, become something entirely new.
The wafers lose their snap and become tender, cake like discs that hold the whole structure together. It is a dessert that feels like a hug in a bowl, and I am so excited to walk you through exactly how to get it right every single time.
Why This Velvet Dessert Works
The genius of this pudding lies in the specific interaction between the moisture of the pudding base and the dry structure of the cookies. It is less about cooking and more about a controlled softening process.
- Hydration Timing: The Nilla Wafers absorb moisture from the pudding and cream over 8 hours, transforming from crunchy cookies into a soft, sponge cake texture.
- Cold Stability: Using ice cold water ensures the instant pudding mix sets firmly and quickly, providing a sturdy foundation that won't collapse when the whipped cream is folded in.
- Fat Aeration: High fat heavy cream creates a stable foam that adds volume and a silky mouthfeel, lightening the dense sweetened condensed milk.
- Enzymatic Marriage: The long chill allows the banana oils to seep into the surrounding cream, flavoring the entire dish rather than just the fruit slices.
| Servings | Ingredient Adjustments | Container Size | Chill Time |
|---|---|---|---|
| 6 people | Half all ingredients | 2 quart bowl | 8 hours |
| 12 people | Standard recipe | 4 quart trifle dish | 8 hours |
| 24 people | Double all ingredients | Two large bowls | 12 hours |
Choosing the right container is just as important as the ingredients. A deep glass bowl or a trifle dish allows those beautiful layers to be visible, making the presentation just as satisfying as the taste.
If you are serving a smaller crowd, half the recipe works perfectly in a 2 quart bowl, though I find that even with a small group, people always go back for thirds.
Planning Your Pudding Timing
Success with this pudding comes down to your schedule. You cannot make this and serve it 30 minutes later, or you will just be eating crunchy cookies in cold cream. We need that passive time to work its magic. I like to start the pudding base the night before I plan to serve it.
This gives the condensed milk and pudding mix plenty of time to bond and firm up.
The second phase happens on the morning of your event. That is when you whip the cream and do the assembly. Once the layers are built, the dish needs at least 4 to 8 hours to rest.
If you are aiming for that true "bakery" texture where the wafers are indistinguishable from cake, a full 24 hour rest in the fridge is the gold standard. It is the ultimate make-ahead dessert because it actually gets better the longer it sits, up to a certain point.
Gathering Your Essential Ingredients
When you are making magnolia bakery banana pudding from scratch, quality matters because the list is so short. Every component has a job to do, and choosing the right versions of these items will determine if your pudding is a success or a soggy mess.
| Ingredient | Science Role | Pro Secret |
|---|---|---|
| Sweetened Condensed Milk | Fat and sugar source | Use full fat for the creamiest mouthfeel and best set. |
| Instant Vanilla Pudding | Structural thickener | Must be "instant" to react correctly with the cold water. |
| Heavy Whipping Cream | Aeration and volume | Keep it in the back of the fridge so it stays as cold as possible. |
- 14 oz sweetened condensed milk: This is the backbone of the sweetness. Why this? It provides a dense, syrupy texture that water alone cannot achieve.
- 1.5 cups ice cold water: This must be truly cold. Why this? It prevents the pudding mix from clumping and ensures a rapid set.
- 3.4 oz instant vanilla pudding mix: The starch here is key. Why this? It binds the liquid into a gel that holds the whipped cream's air bubbles.
- 3 cups heavy whipping cream: Do not use pre made whipped topping. Why this? Real cream provides a rich flavor and a stable structure that doesn't melt.
- 11 oz Nilla Wafers: The classic choice. Why this? These specific wafers have the perfect porosity to absorb moisture without disintegrating.
- 4 large ripe bananas, sliced: Look for yellow skins with a few brown freckles. Why this? This stage of ripeness offers the highest sugar content and best aroma.
For the cream, you want something with at least 36% milkfat. If you want to try a twist, I sometimes swap the vanilla pudding for a different flavor. For a more intense fruit experience, you might enjoy my strawberry banana pudding which uses a similar layering technique but adds a bright, tart contrast to the sweet bananas.
Tools for the Best Results
You do not need a fancy kitchen to pull this off, but a few specific tools will make the process much smoother. A large glass bowl or a trifle dish is the traditional way to show off the layers.
If you don't have one, any deep bowl will do, but there is something so satisfying about seeing those wafers and bananas stacked up through the glass.
You will also want a stand mixer or a hand mixer for the heavy cream. Doing it by hand with a whisk is possible, but your arm will certainly feel it! A large silicone spatula is essential for the folding process. You want to be gentle so you don't deflate all that lovely air you just whipped into the cream.
Finally, make sure you have some plastic wrap to cover the pudding while it chills this prevents a "skin" from forming on the pudding and keeps it from absorbing any stray onion or garlic smells from the fridge.
step-by-step Assembly Guide
- Combine the base. Whisk the 14 oz sweetened condensed milk and 1.5 cups ice cold water in a large bowl. Note: Whisk until the milk is completely dissolved into the water with no streaks.
- Thicken the mixture. Add the 3.4 oz instant vanilla pudding mix. Whisk vigorously for 2 minutes until the mixture is smooth and begins to thicken.
- Initial chill. Cover the bowl and refrigerate for at least 4 hours. Note: This allows the starches to fully hydrate and firm up into a semi solid state.
- Whip the cream. In a separate chilled bowl, whip the 3 cups heavy whipping cream on medium high speed until stiff peaks form and the whisk leaves clear tracks.
- Fold carefully. Gently add the set pudding mixture to the whipped cream. Use a spatula to fold until the color is uniform and no white streaks of cream remain.
- Start the layers. Place one third of the 11 oz Nilla wafers in the bottom of your dish, followed by one third of the 4 sliced bananas.
- Add the cream. Spread one third of the pudding mixture over the bananas until they are completely covered.
- Repeat the process. Create two more layers of wafers, bananas, and pudding.
- Smooth the top. Finish with a final layer of the pudding mixture, smoothing it with your spatula.
- Final rest. Cover tightly and refrigerate for 4 to 8 hours until the wafers have softened to a cake like consistency.
Chef's Tip: If you want a truly professional look, save a few wafers and crush them into a fine dust. Sprinkle this over the top of the pudding just before serving to add a bit of visual texture and a hint of extra vanilla flavor.
Troubleshooting Your Pudding Layers
Even the most seasoned home cooks can run into a few hiccups when making pudding from scratch. The most common issue people face is the texture of the bananas or the consistency of the final set.
Preventing Brown Bananas
The biggest fear with banana pudding is opening the fridge to find grey, unappealing fruit. The secret to keeping them bright is twofold. First, ensure the bananas are completely submerged in the pudding and cream mixture. Air is the enemy!
When the fruit is sealed away from oxygen, the browning process slows down significantly. Second, use bananas that are ripe but still firm. Overly soft bananas have more broken down cell walls, which makes them brown much faster once sliced.
Fixing Watery Pudding
If you find your pudding is a bit too loose, it usually comes down to the temperature of the water or the whipping of the cream. If the cream wasn't whipped to stiff peaks, it won't have the structural integrity to hold up the heavy pudding base.
On the other hand, if you used lukewarm water, the pudding mix might not have set properly.
| Problem | Root Cause | Solution |
|---|---|---|
| Thin or runny pudding | Cream was under whipped | Whip the cream until it stands straight up on the whisk. |
| Soggy/Mushy wafers | Chilled for too long (over 48 hours) | Aim for the 8-24 hour window for the best texture. |
| Lumpy pudding base | Added pudding mix too slowly | Whisk vigorously as soon as the powder hits the liquid. |
One mistake I once made was trying to use a low-fat condensed milk substitute. Honestly, don't even bother. The fat content is what gives this pudding its "set." Without it, you’ll end up with a delicious soup, but it won't have that iconic scoopable quality.
Common Mistakes Checklist
- ✓ Use "Instant" pudding mix only; the "Cook and Serve" kind will not work with cold water.
- ✓ Chill your mixing bowl and whisk attachment before whipping the heavy cream for more volume.
- ✓ Don't slice the bananas until you are ready to layer; they start oxidizing the moment they hit the air.
- ✓ Ensure the pudding base is completely set (like a firm Jell O) before folding it into the cream.
- ✓ Cover the dish with plastic wrap pressed directly onto the surface to prevent a skin if you aren't serving it immediately.
Creative Swaps and Variations
While the classic version is iconic, there is plenty of room to play around once you have mastered the basic technique. For instance, if you want a bit of a salty kick, you can sprinkle a little sea salt or crushed pretzels between the layers. It cuts through the sweetness beautifully and adds a surprising crunch.
If you find yourself with extra bananas that are a bit too ripe for slicing into pudding, don't let them go to waste. You could easily whip up some banana bars for a different kind of treat. Or, if you want to stay in the pudding realm but need something a little more indulgent, try swapping out the vanilla pudding for chocolate. It’s not traditional, but a "black and white" banana pudding is a total crowd pleaser.
Southern Salted Twist
Add a layer of crushed salted peanuts between the bananas and the pudding. The salt enhances the vanilla notes and provides a great texture contrast.
The "Double Banana" Method
For an even stronger fruit flavor, you can mash one of your four bananas and whisk it directly into the pudding and condensed milk base before the initial chill. This ensures that every single bite has a punch of banana, even the parts without a slice of fruit.
Storing Your Banana Leftovers
This pudding is a bit like a ticking clock. It reaches its peak between 8 and 24 hours. After that, the bananas will inevitably start to release moisture and turn brown, and the wafers will begin to lose their structure and become a bit too soft.
Store any leftovers in an airtight container in the refrigerator for up to 2 days. I don't recommend freezing this dish. The cream will lose its aeration and the bananas will turn to mush when thawed, resulting in a separated, unappealing texture.
If you have leftover Nilla Wafers, keep them in a sealed bag; they make a great snack or can be crushed up to use as a crust for a future pie.
To reduce waste, if you see your bananas getting too brown before you’re ready to make the pudding, you can peel them and freeze them for smoothies or baking. But for this specific recipe, fresh is the only way to go.
Perfect Serving and Presentation
When it's time to serve your magnolia bakery banana pudding from scratch, don't be afraid to go for big, messy scoops. This isn't a dessert meant for neat little squares. It’s a comfort food, and it should look like it!
I love serving it in clear glass dessert cups so everyone can see the layers they are about to dive into.
If you are taking this to a party, keep it in the cooler until the very last second. Real whipped cream is sensitive to heat, and you don't want your beautiful cloud like creation to turn into a puddle on a warm afternoon. A final sprinkle of extra wafer crumbs or even a drizzle of my brown butter rum glaze can add a sophisticated touch that will have everyone asking for your secret recipe.
Right then, you are all set! Trust me on this once you taste the difference between the boxed stuff and this homemade version, there is no going back. It’s simple, it’s classic, and it’s the kind of recipe that creates memories. Let's crack on and get that pudding in the fridge!

Recipe FAQs
How to recreate magnolia bakery banana pudding?
Whisk 14 oz sweetened condensed milk with 1.5 cups ice-cold water, then add 3.4 oz instant vanilla pudding mix and whisk for 2 minutes. Refrigerate for at least 4 hours before folding in 3 cups of whipped heavy cream and layering with 11 oz Nilla Wafers and 4 sliced bananas.
What kind of pudding does Magnolia Bakery use?
They use an instant vanilla pudding mix. This specific product is essential for achieving the correct set and texture when combined with sweetened condensed milk and water.
Does magnolia banana pudding taste like banana?
Yes, it has a distinct banana flavor. The flavor profile relies entirely on the 4 large ripe bananas sliced into the layers, which infuse the pudding and wafers as they sit.
What is the most famous item at Magnolia Bakery?
Their banana pudding is widely considered their signature dessert. If you enjoy working with classic, comforting ingredients, you might also like the molasses cornmeal custard, which shares a similar nostalgic appeal.
Is it true I must let it sit for 24 hours?
No, this is a common misconception. While 24 hours is ideal for the wafers to reach a perfect cake like consistency, the dessert is ready to eat after a minimum of 4 to 8 hours in the refrigerator.
How to prevent the bananas from turning brown?
Slice the bananas immediately before assembly and ensure they are completely covered by the pudding mixture during layering. Because this dish is best consumed within 24 hours, the rapid turnover prevents significant browning.
Can I freeze the leftover pudding?
No, do not freeze this dessert. Freezing destroys the aeration in the whipped cream and causes the bananas to turn to mush, resulting in a separated and unappealing texture upon thawing.
Magnolia Bakery Banana Pudding
Ingredients:
Instructions:
Nutrition Facts:
| Calories | 494 kcal |
|---|---|
| Protein | 5.4 g |
| Fat | 28.1 g |
| Carbs | 56.3 g |
| Fiber | 1.3 g |
| Sugar | 38.2 g |
| Sodium | 245 mg |
