Papas Con Huevos Recipe: Crispy and Savory
- Time: 10 min active + 20 min cook
- Flavor/Texture Hook: Crispy potato edges with a silky, buttery egg finish
- Perfect for: budget-friendly weekend brunch or a hearty family breakfast
- Papas con Huevos Recipe
- The Secret To Success
- Component Analysis
- Ingredients You'll Need
- Essential Kitchen Gear
- Simple Cooking Steps
- Fixing Common Issues
- Troubleshooting Common Issues
- Easy Dietary Swaps
- Adjusting the Batch Size
- Kitchen Myths
- Storage and Reheating
- Best Serving Ideas
- Recipe FAQs
- 📝 Recipe Card
That loud, aggressive sizzle when a cold potato cube hits shimmering oil is the sound of a breakfast win. For the longest time, I struggled with this dish. I used to crowd the pan or toss the potatoes too early, and I'd end up with these sad, gray, steamed lumps that felt more like boiled potatoes than a fry.
It was a mushy mess that lacked any real character, and honestly, it made me want to just order takeout.
Then I realized the mistake: I was treating the potatoes like a sauté instead of a sear. The trick is to let them sit, undisturbed and lonely, in the hot oil until they develop a deep crust. Once you nail that "shatter" effect on the outside of the potato, the rest of the dish just falls into place.
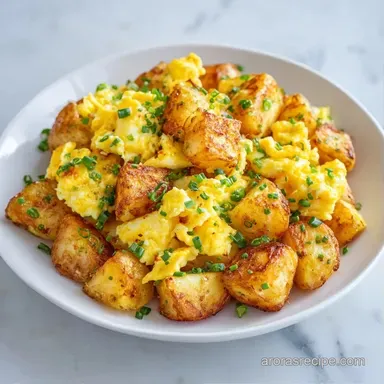
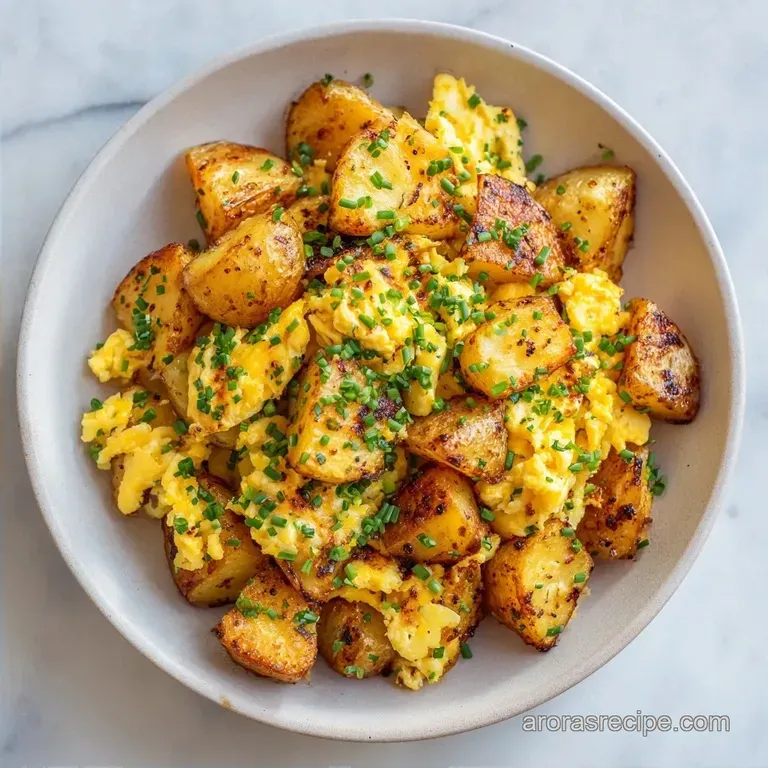
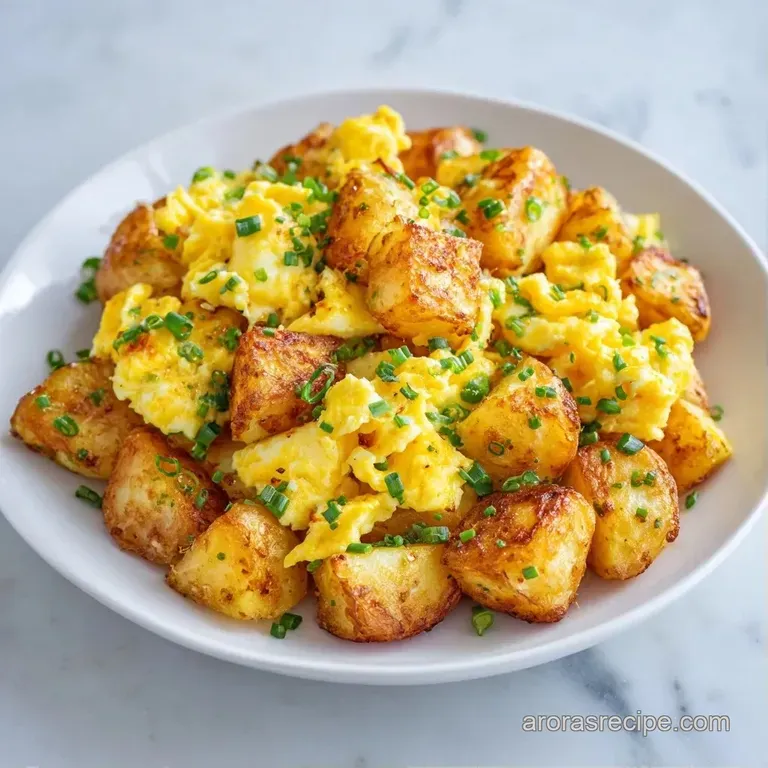
This Papas con Huevos Recipe is all about the contrast. You have the salty, crisp potatoes meeting the soft, creamy eggs. It's a budget smart meal that uses basic pantry staples but tastes like something you'd pay twenty bucks for at a trendy cafe.
Trust me, once you see those potatoes turn that deep gold, you'll never go back to the mushy version.
Papas con Huevos Recipe
The secret to a great breakfast is managing the heat. Most people make the mistake of cooking the eggs and potatoes at the same temperature, but they have completely different needs. Potatoes need a blast of heat to brown, while eggs need a gentle touch to stay velvety.
By separating these phases, we ensure the potatoes don't get soggy and the eggs don't turn into rubbery sponges.
I've found that using a cast iron skillet is the way to go here. It holds heat way better than a thin non stick pan, which means those potatoes get a more consistent crust. If you're on a budget, don't worry about buying fancy organic gold potatoes; standard Russets work beautifully and actually get crispier because of their higher starch content.
Right then, let's look at what's actually happening in the pan. We're not just cooking; we're building layers of flavor. From the initial sear to the aromatic punch of the jalapeño and garlic, every step serves a purpose. Let's crack on with the details.
The Secret To Success
- The Dry Sear: Leaving potatoes undisturbed for 5 minutes allows moisture to evaporate, creating a crisp crust instead of steaming the veg.
- Butter Finishing: Adding butter at the end creates a velvety emulsion with the eggs, which prevents them from drying out.
- Residual Carryover: Removing the pan from heat while eggs are "wet" uses the skillet's stored energy to finish the cook without overcooking.
- Fat Ratio: Using oil for the over high heat sear and butter for the eggs ensures the butter doesn't burn while the potatoes brown.
Understanding these little tweaks changes everything. For example, if you've ever wondered why restaurant potatoes are so much crispier, it's usually because they avoid crowding the pan, which keeps the temperature high.
| Method | Time | Texture | Best For |
|---|---|---|---|
| Stovetop | 30 mins | Crispy edges, silky eggs | Quick weeknight meals |
| oven-roasted | 45 mins | Uniformly crisp, drier | Large crowds/batches |
While the oven is great for huge groups, the stovetop method gives you that immediate sensory feedback and a better texture for the eggs.
Component Analysis
| Ingredient | Science Role | Pro Secret |
|---|---|---|
| Russet Potato | Starch Structure | Pat them bone dry after cutting to speed up browning |
| Whole Milk | Protein Buffer | Prevents egg proteins from bonding too tightly (keeps them soft) |
| Butter | Flavor Carrier | Add it just before the eggs to create a rich, glossy sauce |
| Jalapeño | Acid/Heat Balance | Deseed for mild flavor, keep seeds for a real kick |
The interaction between the starch in the potatoes and the fat in the butter is what makes this dish feel so comforting. It's a simple balance of textures that satisfies both the craving for crunch and the need for something creamy.
Ingredients You'll Need
- 2 lbs Russet or Yukon Gold potatoes, diced into ½ inch cubes Why this? Russets provide more crunch; Gold is creamier
- 3 tbsp vegetable oil Why this? High smoke point for searing
- 1 tsp salt Why this? Draws out moisture for better crisping
- ½ tsp black pepper Why this? Adds a subtle woody heat
- ½ small onion, finely diced Why this? Provides a sweet, aromatic base
- 2 cloves garlic, minced Why this? Pungent depth that hits the back of the palate
- 1 medium jalapeño, seeded and minced Why this? Fresh heat to cut through the fat
- 6 large eggs Why this? Main protein and binding agent
- 2 tbsp unsalted butter Why this? Adds a rich, nutty finish
- ¼ cup whole milk Why this? Keeps the scramble tender
- ¼ tsp salt Why this? Seasoning for the egg mixture
Budget friendly Swaps
| Original Ingredient | Substitute | Why It Works |
|---|---|---|
| Yukon Gold Potatoes | Russet Potatoes | More starch. Note: Result is crispier but less "buttery" |
| Whole Milk | Greek Yogurt (2 tbsp) | Similar fat content. Note: Adds a slight tang and thickness |
| Unsalted Butter | Margarine or Oil | Provides fat. Note: Loses the nutty flavor and velvety gloss |
Honestly, don't even bother with low-fat cheese or skim milk here. This dish relies on fat for its texture, and cutting it out just makes the eggs rubbery. If you're looking for a healthier side, maybe try pairing this with some roasted vegetables or a [Homemade Tomato Soup](https://arorasrecipe.com/recipes/homemade tomato-soup/) for a full brunch spread.
Essential Kitchen Gear
- 12 inch Cast Iron Skillet: My top pick for heat retention. A non stick pan works, but you won't get that same mahogany crust.
- Large Mixing Bowl: For whisking eggs without splashing.
- Sturdy Spatula: Silicone or metal (if using cast iron) to flip the potatoes.
- Chef's Knife: For those precise ½ inch cubes.
Using a skillet that's too small is a recipe for disaster. If the potatoes are piled on top of each other, they'll steam instead of sear. If you don't have a 12 inch pan, just work in two batches.
Simple Cooking Steps
- Heat the vegetable oil in a 12 inch cast iron or non stick skillet over medium high heat until it shimmers. Note: This ensures the potatoes don't stick.
- Add the diced potatoes in a single layer. Let them sit undisturbed for 4-5 mins until the bottoms are mahogany colored and crisp.
- Toss and cook for another 5-7 mins until all sides are golden.
- Lower the heat to medium. Push the potatoes to the edges of the pan and add the diced onion and jalapeño to the center.
- Sauté for 3 mins until the onions are translucent and fragrant, then stir in the minced garlic and cook for 30 seconds.
- Mix the potatoes and aromatics together so the potatoes are coated in the oils.
- Whisk the eggs, milk, and salt in a bowl until fully combined.
- Melt the butter into the potato mixture, then pour the egg mixture over the potatoes.
- Let the eggs sit for 20 seconds, then gently fold them from the outside in using a spatula.
- Remove the pan from the heat while the eggs still look slightly wet to allow residual heat to finish cooking.
Chef's Tip: If you want a deeper flavor, add a pinch of smoked paprika to the potatoes during step 3. It gives them a "chorizo style" vibe without the extra cost.
Fixing Common Issues
Troubleshooting Common Issues
| Issue | Solution |
|---|---|
| Why Your Potatoes Are Mushy | This usually happens because of "pan crowding." When too many potatoes occupy the space, they release steam that gets trapped, effectively boiling the potatoes in their own juices. |
| Why Your Eggs Are Rubbery | Overcooking is the enemy of the egg. If you keep the pan on the heat until the eggs look "done," they'll be overcooked by the time they hit the plate. According to [King Arthur Baking](https://www. |
| Why The Garlic Burned | Garlic has a much lower burn point than onions. If you add it too early, it turns bitter and black. Always add it in the final 30 seconds of the aromatic sauté. |
Quick Success Checklist:
- ✓ Potatoes are patted dry before hitting the pan.
- ✓ Pan is not crowded (single layer of potatoes).
- ✓ Heat is lowered before adding eggs.
- ✓ Eggs are removed while still slightly wet.
Easy Dietary Swaps
If you're looking to tweak this Papas con Huevos Recipe for different needs, you can do so without losing the essence of the dish. For a protein boost, I highly recommend adding cooked chorizo or crumbled sausage during the onion sauté phase. It adds a smoky depth that's just brilliant.
For those avoiding dairy, you can swap the butter for an equal amount of avocado oil and replace the milk with a splash of unsweetened almond milk. You'll lose a bit of that velvety richness, but the texture remains quite soft.
If you want a zesty kick, stir in some fresh cilantro and a squeeze of lime juice right before serving. It brightens the whole dish and cuts through the richness of the butter and eggs.
Adjusting the Batch Size
Scaling Down (Half Batch) When making this for just one or two people, use a smaller 8 inch skillet. Reduce the cooking time for the potatoes by about 20% since they'll heat through faster.
Since you can't really use "half an egg" easily, beat one egg in a bowl and measure out half, or just use the extra egg for a more protein heavy scramble.
Scaling Up (Double or Triple Batch) Trust me on this: do NOT just double the ingredients in one pan. You'll end up with the mushy potato problem again. Work in batches for the potatoes, searing them in two turns, then combine them in the pan for the final egg stage.
Only increase the salt and spices by 1.5x, as flavors can intensify when scaled.
| If you want... | Do this... |
|---|---|
| Extra Crispiness | Use Russet potatoes and an extra tbsp of oil |
| Creamier Eggs | Add an extra tablespoon of butter |
| More Heat | Keep the jalapeño seeds in the pan |
Kitchen Myths
Searing "seals in" the juices. This is a common misconception. Searing doesn't create a waterproof seal; it actually causes more moisture loss. However, it creates a flavorful crust through browning that makes the dish taste far more complex.
Milk is necessary for fluffiness. While milk helps, the "fluff" actually comes from incorporating air during whisking and managing the temperature. The milk primarily serves to dilute the proteins, which prevents them from bonding too tightly and becoming rubbery.
Storage and Reheating
Storage Guidelines Store leftovers in an airtight container in the fridge for up to 3 days. I don't recommend freezing this dish, as the potatoes can become grainy and the eggs often separate or turn watery upon thawing.
Reheating Tips To keep the texture, avoid the microwave if possible. Instead, toss the leftovers into a non stick skillet over medium heat with a tiny knob of butter. This helps bring back some of that crispness to the potatoes.
If you must use a microwave, heat in 30 second bursts and stir in between to avoid "hot spots" that overcook the eggs.
Zero Waste Ideas Don't throw away those potato peels! Toss them in a bit of oil and salt, then bake them at 400°F for 10 minutes for a quick, salty snack.
Also, any leftover diced onion or jalapeño can be frozen in an ice cube tray with oil to create "flavor bombs" for future sautéing.
Best Serving Ideas
This dish is a powerhouse on its own, but it really sings when paired with the right sides. I love serving it with a side of sliced avocado and some warm corn tortillas. For an authentic touch, drizzle some Huevos Rancheros Sauce over the top to add a tangy, spicy layer that wakes up the palate.
If you're hosting a larger brunch, try serving it alongside some fresh fruit or a crisp green salad. The acidity of a vinaigrette balances the richness of the butter and eggs perfectly. For those who love a meat heavy breakfast, a side of crispy bacon or a well seared Ribeye Steak can turn this into a feast.
Ultimately, the beauty of this Papas con Huevos Recipe is its simplicity. Whether you're eating it straight from the pan on a Tuesday morning or plating it up for guests on a Sunday, it's a comforting, budget friendly win every single time. Just remember: let those potatoes sear, and pull the eggs off the heat early.
Happy cooking!
Recipe FAQs
Which potatoes are best for this recipe?
Russet or Yukon Gold. These varieties hold their shape best when diced into half inch cubes and brown beautifully in the skillet.
How to cook papas with huevos?
Sauté diced potatoes in shimmering vegetable oil until crisp, then stir in aromatics. Pour in whisked eggs and milk, folding gently and removing the pan from heat while the eggs still look slightly wet.
Is it true I should stir the potatoes immediately after adding them to the pan?
No, this is a common misconception. Let the potatoes sit undisturbed for 4 5 minutes to develop a mahogany colored crust before tossing.
Why are my potatoes turning out mushy instead of crispy?
You are likely crowding the pan. When too many potatoes occupy the space, they release steam that boils the vegetables in their own juices instead of searing them.
Why are my eggs turning out rubbery?
You are overcooking them. Remove the pan from the heat before the eggs look fully done, as residual heat will finish the cooking process without toughening the texture.
Can I freeze leftovers of this egg and potato dish?
No, avoid freezing. Potatoes often become grainy and the eggs typically separate or turn watery upon thawing.
What is the secret to perfect breakfast potatoes?
Patience during the initial sear. If you enjoyed mastering this crust technique here, see how the same principle works in our crispy fries.
Papas Con Huevos Recipe