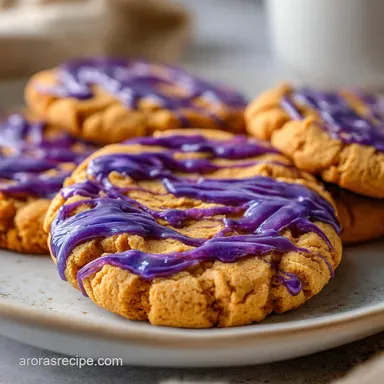
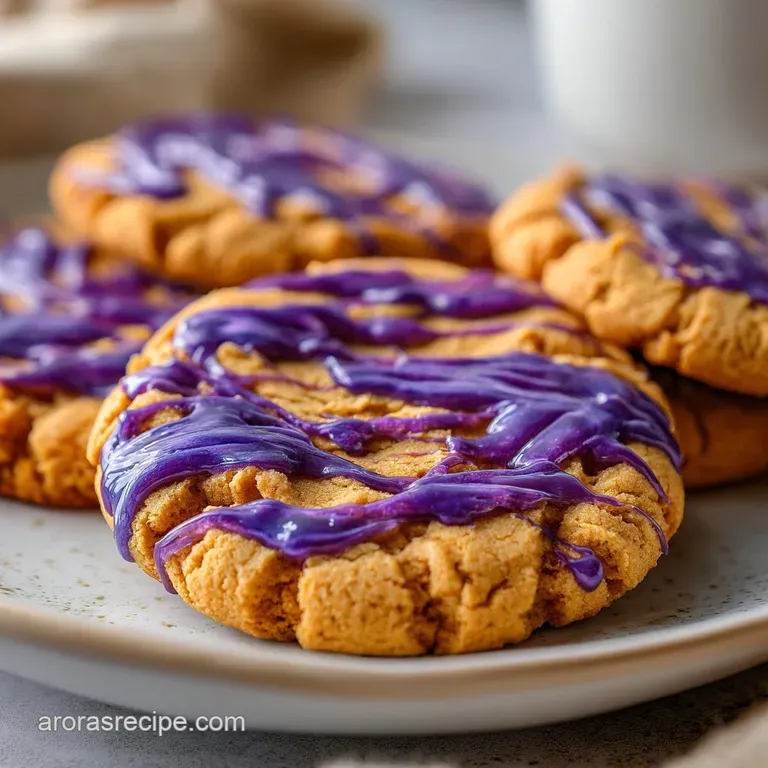
Peanut Butter and Jelly Cookies: Chewy and Crisp

- Time: 10 min active + 13 min baking = Total 23 mins
- Flavor/Texture Hook: Velvety peanut butter base with bubbling, tart fruit centers
- Perfect for: After school snacks or a budget-friendly dessert party
That toasted, nutty scent hitting you the second the oven door opens is just unbeatable. It's that specific smell that reminds me of being a kid in the Midwest, where a peanut butter and jelly sandwich wasn't just a lunch box staple, it was practically a food group.
Growing up, my grandma always said that the best things in life are simple, and she lived by that in the kitchen. She didn't do fancy desserts, but she could make a plain cookie feel like a hug.
I remember the first time I tried to turn that sandwich flavor into a cookie. I just dumped everything in a bowl and hoped for the best, but the jam leaked everywhere and the cookies turned into flat, oily pancakes.
It took a bit of trial and error to realize that the balance of fats and sugars is what keeps the cookie from collapsing under the weight of the fruit.
Now, these peanut butter and jelly cookies are my go to when I want something hearty and stress free. They've got that comforting, homestyle vibe that makes everyone feel welcome at the table. You don't need expensive equipment or rare ingredients, just some pantry staples and a bit of patience while the jam sets.
The secret to peanut butter and jelly cookies
To get that specific texture, we're playing with how the dough reacts to heat. It's not about fancy techniques, but about how the ingredients behave in the pan.
- Split Sugar Logic: Granulated sugar helps the edges crisp up, while powdered sugar keeps the middle velvety and soft.
- Fat Stability: The combination of butter and peanut butter creates a sturdy wall that prevents the jam from soaking into the dough.
- Air Incorporation: Beating the butter and PB until pale traps tiny air bubbles, which keeps the cookie from becoming a dense brick.
- Moisture Barrier: Using a seedless jam reduces excess water, meaning your cookies won't get soggy bottoms.
Since we're keeping things budget friendly, you might wonder if you can cut corners. Here is how the approach differs depending on your time and budget.
| Approach | Prep Time | Texture | Best For |
|---|---|---|---|
| Freshly Made | 10 mins | Soft center, crisp edge | Fresh dessert |
| Frozen Dough | 2 mins | Slightly denser | Quick cravings |
| Budget Swap | 10 mins | Hearty and rustic | Large crowds |
Right then, let's look at what's actually happening inside the dough. Most people think peanut butter is just for flavor, but it actually does a lot of the heavy lifting here.
Component Analysis
| Ingredient | Science Role | Pro Secret |
|---|---|---|
| Creamy Peanut Butter | Provides structure and fat | Use a brand that isn't too oily to avoid spreading |
| Powdered Sugar | Softens the crumb | Sift it if you see lumps to keep the dough smooth |
| Baking Powder | Creates the lift | Check the expiration date for a proper rise |
| All Purpose Flour | Provides the skeleton | Measure by weight for consistent results every time |
Gathering your baking essentials
I've always preferred using metric measurements because it's just easier and more accurate. If you're using cups, just be careful not to pack the flour down too hard. For a budget friendly approach, you can use any store brand peanut butter, as long as it's the creamy kind.
- 1/2 cup (115g) unsalted butter, softened Why this? Provides the classic buttery base
- 1/2 cup (125g) creamy peanut butter Why this? Adds heartiness and the core flavor
- 1/4 cup (50g) granulated sugar Why this? Creates those golden, crisp edges
- 1/2 cup (60g) powdered sugar Why this? Ensures a velvety, tender interior
- 1 large egg Why this? Binds everything and adds structure
- 1 tsp (5ml) vanilla extract Why this? Rounds out the nutty notes
- 1 1/2 cups (190g) all purpose flour Why this? The primary structure provider
- 1/2 tsp (3g) baking powder Why this? Gives the cookies a gentle lift
- 1/4 tsp (1.5g) salt Why this? Balances the sweetness of the jam
- 1/3 cup (80g) seedless raspberry or grape jam Why this? Provides the tart contrast
If you're looking for swaps to fit your budget or diet, keep in mind that changing the fat source can change the "spread" of the cookie. According to Serious Eats, the temperature of your butter is key to how much a cookie spreads in the oven.
| Original Ingredient | Substitute | Why It Works |
|---|---|---|
| Unsalted Butter | Margarine | Similar fat content. Note: Slightly softer texture |
| All Purpose Flour | 1:1 GF Blend | Mimics wheat structure. Note: Use for gluten free peanut butter and jelly cookies |
| Raspberry Jam | Apricot Preserves | Similar sugar levels. Note: Offers a milder, honey like sweetness |
| Creamy PB | Almond Butter | Similar fat ratio. Note: Changes flavor to a nuttier, less salty profile |
Trust me on this, don't bother with low-fat peanut butter. The oils in the full fat version are what make these cookies feel like a treat rather than a health snack.
Necessary kitchen tools
You don't need a fancy setup for this. A simple bowl and a spoon will do, but a hand mixer makes the creaming process a lot faster.
- Large mixing bowl (or a stand mixer such as KitchenAid)
- Whisk or small bowl for dry ingredients
- Baking sheets (lined with parchment paper)
- Measuring cups and spoons (or a digital scale)
- Tablespoon for scooping
- Small spoon for filling the jam
Key steps for success
Let's crack on with the actual baking. The goal here is to keep the dough tender, so don't overwork it once the flour goes in.
1. Creaming the base
Beat the softened butter, creamy peanut butter, granulated sugar, and powdered sugar together. Keep going until the mixture is pale and fluffy. Now, mix in the egg and vanilla extract, making sure to scrape the sides of the bowl so no butter pockets remain.
2. Incorporating dry ingredients
Whisk the flour, baking powder, and salt together in a separate bowl. Slowly add this to the wet mixture on low speed. Mix only until the flour disappears. If you overmix here, your cookies will be tough instead of tender.
3. Shaping the thumbprints
Scoop about 1 tablespoon of dough and roll it into a ball. Place it on your prepared baking sheet. Use your thumb or a rounded measuring spoon to press a deep indentation into the center. Note: Make the hole deep enough so the jam doesn't overflow.
4. Filling and baking
Spoon about 1/4 teaspoon of jam into each crater. Bake at 350°F (175°C) for 10-13 minutes until edges are light mahogany gold and jam is bubbling.
5. Cooling and setting
Allow the cookies to cool on the pan for 5 minutes. This is critical to let the jam set so it doesn't run. Then, transfer them to a wire rack to cool completely.
Chef's Note: To get a really clean thumbprint, dip your thumb in a tiny bit of flour before pressing. It prevents the dough from sticking and keeps the edges of the crater sharp.
What can go wrong (and how to fix it)
Even the most experienced cooks hit a snag now and then. Most issues with this recipe come down to temperature or measurements.
Troubleshooting Common Issues
| Issue | Solution |
|---|---|
| Why your cookies spread too much | If your butter was too soft (almost melted) or your oven wasn't fully preheated, the dough will melt before it sets. This results in flat discs instead of plump cookies. You can fix this by chilling t |
| Why your jam overflows | This usually happens if you overfill the crater or use a jam that is too watery. When the jam heats up, it expands. If it's too full, it boils over the sides and can burn on the pan. Stick to the 1/4 |
| Why your cookies are cracked | Over mixing the flour develops too much gluten, which can cause the tops to crack or become too hard. Always mix on low speed and stop the moment the streaks of flour vanish. |
Common Mistakes Checklist
- ✓ Checked that butter is softened, not melted.
- ✓ Used seedless jam to avoid chunky leaks.
- ✓ Pressed the thumbprint deep enough.
- ✓ Stopped mixing as soon as flour disappeared.
- ✓ Allowed 5 mins of cooling on the pan.
Creative twists and swaps
If you're feeling adventurous, you can easily tweak this. For a more decadent version, try my Peanut Butter Blossom Cookies for that classic chocolate kiss finish.
For the peanut butter dough
You can add a pinch of cinnamon or a dash of espresso powder to the flour. This deepens the flavor and makes the peanut butter taste more roasted. If you want a crunch, use chunky peanut butter, but be aware that the dough might be slightly harder to roll.
For the jelly center
While raspberry and grape are the classics, apricot or orange marmalade work brilliantly. If you want something more "adult," try a seedless fig preserve. For those who want a different vibe, these pair well with other nutty treats, similar to Traditional Buttery Shortbread Cookies.
Adjusting the batch size
If you're just baking for yourself, you can halve the recipe. Beat one egg in a small bowl and use only half of it. Reduce the baking time by about 20% since there's less mass in the oven.
If you're doubling or tripling the batch for a party, don't just triple the salt and baking powder. Increase those to 1.5x instead to avoid a metallic taste. Work in batches so your mixer doesn't overflow.
Decision Shortcut: If you want a tart flavor, use raspberry jam. If you want a softer cookie, increase the powdered sugar by 1 tablespoon. If you want a crunchier edge, bake for the full 13 minutes.
Make-ahead and leftover tips
These cookies stay fresh for a surprisingly long time if you store them right. Since they have fruit in them, they can attract moisture from the air, which makes them sticky.
Storage Guidelines Store the cooled cookies in an airtight container at room temperature for up to 5 days. If you live in a very humid place, keep them in the fridge to prevent the jam from becoming too runny.
Freezing for Later You can freeze the dough balls before you add the jam. Place them on a tray to freeze for an hour, then toss them in a freezer bag. When you're ready, bake from frozen, add 2 minutes to the cook time, and add the jam halfway through the baking process.
The finished cookies also freeze well for up to 3 months.
Zero Waste Tips If you have a little bit of jam left in the jar that's too small to spoon out, add a teaspoon of hot water to the jar, shake it up, and use it as a glaze for other desserts or stir it into some Greek yogurt. Any leftover peanut butter can be swirled into oatmeal for a hearty breakfast.
Perfect complements
These cookies are quite rich, so they go best with something that cuts through the sweetness. A cold glass of milk is the obvious choice, but a hot cup of black tea or a strong coffee works wonders.
If you're planning a full spread of homestyle treats, these make a great companion to something savory. I've found they actually pair surprisingly well with a slice of Homemade Cornbread during a casual weekend brunch. It's that sweet and salty combination that just works.
Right then, you're all set. These peanut butter and jelly cookies are proof that you don't need a fancy culinary degree to make something that tastes like home. Just keep your butter soft, your jam centered, and your oven ready. Happy baking!
Recipe FAQs
Is there such a thing as a peanut butter and jelly cookie?
Yes, and they combine the classic sandwich flavors into a single baked treat. These cookies use a peanut butter dough base with a jam-filled center.
How to prevent the jam from overflowing during baking?
Spoon exactly 1/4 teaspoon of jam into each crater. Overfilling or using a watery jam causes the filling to expand and boil over the sides.
Why did my cookies spread too much and become flat?
Your butter was likely too soft or the oven wasn't fully preheated. This causes the dough to melt before it sets, resulting in flat discs instead of plump cookies.
Why are my cookies cracked on top?
You likely overmixed the flour. Mix only until the flour disappears to maintain a smooth surface.
How to store these cookies to keep them fresh?
Place them in an airtight container at room temperature. They stay fresh for several days if kept away from excess humidity.
Can I use chunky peanut butter instead of creamy?
Yes, though the texture will be coarser. If you enjoy adjusting dough consistency, see how we manage a different texture in our naan bread.
How to get the perfect indentation for the jam?
Use your thumb or a rounded measuring spoon to press a deep crater. This ensures the jam stays contained while baking at 350°F.
Peanut Butter And Jelly Cookies