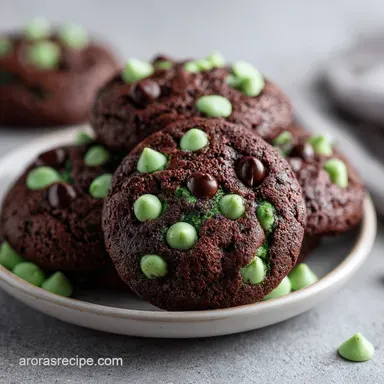
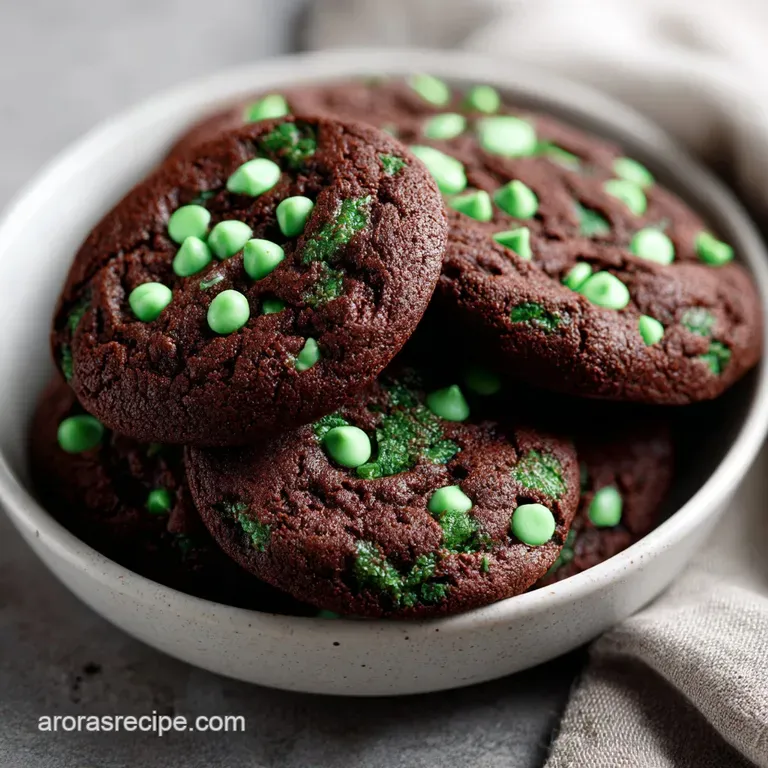
Double Chocolate Mint Cookies: Fudgy and Dense
- Time:15 minutes active + 10 minutes baking = 25 minutes total
- Flavor/Texture Hook: Velvety, dense centers with a slight crackle on top
- Perfect for: Last minute holiday gifts or a cozy weekend treat
- The Secret to Chewy Chocolate Mint Cookies
- The Logic Behind the Texture
- Smart Budget Choices for Better Baking
- Component Analysis for Better Baking
- Pantry Staples for a Minty Treat
- The Simple Tools You'll Actually Use
- Step-by-Step Guide to Baking Success
- Fixing Common Texture Issues
- Troubleshooting Common Issues
- Creative Twists on the Classic
- Adjusting the Batch Size
- Common Baking Misconceptions
- Keep Your Treats Fresh Longer
- Best Ways to Pair and Plate
- Recipe FAQs
- 📝 Recipe Card
The Secret to Chewy Chocolate Mint Cookies
That smell of peppermint and cocoa hitting the air is usually great, but I remember one December where I went way too heavy on the extract. I ended up with a batch of cookies that tasted exactly like a mouthful of peppermint toothpaste.
It was an absolute disaster, and I couldn't even bring myself to give them to the neighbors. I realized then that the balance between the cooling mint and the heavy chocolate is a tightrope walk, and most recipes just guess.
I spent a few weekends messing around with the ratios, trying to find that sweet spot where the mint enhances the chocolate rather than fighting it. The real fix was in the butter.
By switching from the traditional creaming method to using melted butter, I stopped getting those cakey, airy disks and started getting something dense and velvety.
This recipe is all about that contrast. You get the deep, bitter notes of the cocoa powder and then a hit of fresh mint that cuts through the richness. It's a hearty, homestyle treat that doesn't require any fancy equipment, just a couple of bowls and a bit of patience while they cool.
Trust me on this, the texture is what makes these stand out.
The Logic Behind the Texture
Melted Butter: Skipping the creaming process prevents too much air from entering the dough, which keeps the center dense and fudgy. It creates a more chewy, brownie like bite.
Sifted Cocoa: Cocoa powder is notorious for clumping, which leads to bitter pockets of dry powder. Sifting ensures the chocolate flavor is velvety and consistent throughout the dough.
Brown Sugar Balance: Using a mix of granulated and light brown sugar provides the best of both worlds. The brown sugar adds moisture and a hint of molasses for that classic chew.
Double Chip Method: Using both semi sweet and mint chips ensures the flavor is baked into the dough and embedded as pockets of melted chocolate. This prevents the mint from fading during the bake.
Smart Budget Choices for Better Baking
Since we're keeping things budget friendly, you don't need the most expensive organic cocoa or name brand chips to get a great result. Some swaps actually help the flavor profile.
| Premium Option | Budget Alternative | Flavor Impact | Savings |
|---|---|---|---|
| Belgian Cocoa | Dutch Processed Cocoa | Slightly more earthy | Save $3-5 |
| Gourmet Mint Chips | Store Brand Mint Chips | More intense sweetness | Save $2-4 |
| Pure Vanilla Bean | Pure Vanilla Extract | Standard flavor profile | Save $10+ |
Right then, let's look at what's actually happening inside your mixing bowl. Understanding the role of each ingredient helps you tweak things without ruining the batch.
Component Analysis for Better Baking
| Ingredient | Science Role | Pro Secret |
|---|---|---|
| Melted Butter | Fat & Texture | Keep it slightly cooled so it doesn't scramble the egg |
| Baking Soda | Leavening | Reacts with brown sugar to create a slight lift |
| Peppermint Extract | Primary Flavor | Add it last to keep the volatile oils from evaporating |
| Cocoa Powder | Structure & Color | Use Dutch processed for a darker, smoother taste |
Pantry Staples for a Minty Treat
I've found that sticking to simple, honest ingredients is the way to go here. Don't bother with low-fat substitutes, as they'll kill the velvety texture we're after.
- 115g unsalted butter, melted and slightly cooled Why this? Provides the fat needed for a fudgy center
- 150g granulated sugar Why this? Helps the edges get that slight crisp
- 50g packed light brown sugar Why this? Adds moisture and chewiness
- 1 large egg Why this? Binds the dough and adds structure
- 5ml vanilla extract Why this? Rounds out the sharp mint notes
- 2.5ml peppermint extract Why this? The core flavor source
- 125g all purpose flour Why this? Standard base for a steady crumb
- 30g unsweetened cocoa powder Why this? Gives the deep chocolate base
- 3g baking soda Why this? Creates the necessary rise
- 1.5g salt Why this? Balances the sweetness
- 130g semi sweet chocolate chips Why this? Rich, melted pockets
- 130g mint chocolate chips Why this? Adds the double mint hit
If you're out of a few things, don't panic. You can usually find a workaround that still tastes great.
| Original Ingredient | Substitute | Why It Works |
|---|---|---|
| All purpose flour | Oat flour (fine) | Similar structure. Note: Result will be denser and nuttier |
| Semi sweet chips | Dark chocolate chunks | Higher cocoa content. Note: Less sweet, more bitter |
| Peppermint extract | 1 tsp finely minced fresh mint | Natural flavor. Note: Much milder than extract |
The Simple Tools You'll Actually Use
You don't need a professional kitchen to make these. I usually just clear off a small spot on my counter and get to work.
- A medium mixing bowl for the wet ingredients.
- A separate bowl or sifter for the dry ingredients.
- A sturdy spatula for folding in the chips.
- Baking sheets lined with parchment paper (trust me, don't skip the paper or you'll be scrubbing pans for an hour).
- A tablespoon or a small cookie scoop for consistent sizing.
Having everything measured out before you start makes the whole process feel much more relaxed. I call it "mise en place," but in my house, we just call it "not forgetting the salt."
Step-by-step Guide to Baking Success

Let's crack on with the actual baking. Follow these steps closely, especially the doneness cues, because a minute too long in the oven can turn a fudgy cookie into a dry biscuit.
- Whisk the melted butter with granulated and brown sugars until smooth. Note: Make sure there are no sugar clumps left.
- Stir in the egg, vanilla, and peppermint extract until the mixture is glossy. Whisk until the batter looks like a thick syrup.
- Sift in the flour, cocoa powder, baking soda, and salt. Note: Sifting prevents those annoying cocoa lumps.
- Fold the ingredients together using a spatula just until no streaks of flour remain. Stop mixing as soon as the flour disappears to avoid a tough cookie.
- Fold in the semi sweet and mint chocolate chips, ensuring they are evenly distributed throughout the dough.
- Scoop rounded tablespoons of dough onto parchment lined baking sheets. Leave about 2 inches of space between each one.
- Bake at 350°F (175°C) for 9–11 minutes.
- Remove the tray when the edges are set and matte but the centers still look slightly soft. They will firm up on the hot pan.
If you're looking for more chocolatey inspiration, you might like these Vanilla and Sea Salt recipe which uses a different base for a lighter feel.
Fixing Common Texture Issues
Even for experienced bakers, cookies can be finicky. Most of the time, the problem is either temperature or over mixing.
Troubleshooting Common Issues
| Issue | Solution | |||||||
|---|---|---|---|---|---|---|---|---|
| Why Your Cookies Spread Too Much | This usually happens if your butter was too hot when you added the sugars or if your oven isn't fully preheated. The fat melts too quickly before the flour can set. | |||||||
| Why the Mint Tastes Like Medicine | Using too much extract or a low quality brand can lead to that "medicinal" taste. Always start with the exact measurement and add more only after tasting the raw dough. | |||||||
| Why the Centers Stay Raw | If your oven runs cold or you've overcrowded the pan, the heat can't circulate. This leaves the centers gooey while the edges burn. | Problem | Root Cause | Solution | --------- | ------------ | -------- |
Creative Twists on the Classic
Once you've got the base down, you can start playing around. I love making these for the holidays, but they work year round. If you want a different vibe, try these ideas.
For a Fudgy, Brownie Like Texture
Increase the brown sugar by 20g and reduce the all purpose flour by 10g. This increases the moisture and creates a denser, more decadent bite.
For a Festive Holiday Look
Roll the chilled dough balls in a mixture of granulated sugar and a pinch of matcha powder. This gives them a green exterior that looks great on a Christmas platter.
For the Mix Ins
Swap the semi sweet chips for white chocolate chips. The creaminess of the white chocolate pairs beautifully with the sharpness of the mint. This is similar to how Chocolate in 25 Minutes recipe balance flavors.
If you're feeling adventurous, you can add a pinch of espresso powder to the dry ingredients. It doesn't make them taste like coffee, but it deepens the chocolate flavor significantly.
Adjusting the Batch Size
Scaling a recipe isn't always as simple as doubling the numbers. Baking is more like a science experiment than a stew.
Scaling Down (Half Batch): When making half a batch, the hardest part is the egg. Crack one egg into a small bowl, beat it well, and then use exactly half of it by weight or volume.
Use a smaller baking sheet and reduce the baking time by about 1-2 minutes, as smaller batches often heat up faster.
Scaling Up (Double Batch): If you're doubling the recipe, don't double the baking soda or salt exactly. Use 1.5x the amount of leavening agents to prevent a metallic taste.
Work in batches rather than trying to fit 46 cookies on one tray, as overcrowding the oven will lead to uneven baking and soggy bottoms.
Common Baking Misconceptions
I've heard a lot of "rules" over the years that just aren't true. Let's clear a few of them up.
The idea that you must "cream" butter and sugar for 5 minutes to get a good cookie is a myth. While creaming adds air for a cakey texture, melting the butter is what gives these Chocolate Mint Cookies their signature fudgy chew.
Another one is that you should wait until the center is firm before taking them out of the oven. If you do that, you've overbaked them. The carryover heat from the baking sheet continues to cook the center for another 5 minutes after they're out.
Keep Your Treats Fresh Longer
These cookies stay soft for a surprisingly long time if you store them correctly.
Storage: Keep them in an airtight container at room temperature for up to 5 days. I like to put a small piece of white bread in the container; the cookies absorb the moisture from the bread, keeping them velvety. In the fridge, they'll last 2 weeks, but the mint flavor becomes more muted.
Freezing: You can freeze the baked cookies for up to 3 months. Just wrap them individually in parchment paper before putting them in a freezer bag. To eat, let them thaw at room temperature for 30 minutes or pop them in the microwave for 10 seconds.
Zero Waste Tips: If you have a little bit of dough left over that isn't enough for a full cookie, don't toss it. Roll it into a tiny ball and bake it as a "tester" to check the oven temp. If you have leftover cocoa powder in the bag, whisk it into your morning coffee for a quick mocha.
Best Ways to Pair and Plate
The way you serve these can change the whole experience. Since they're quite rich, you want something to cut through that sweetness.
The Coffee House Pairing: A hot cup of black coffee or a strong espresso is the classic choice. The bitterness of the coffee highlights the dark notes of the cocoa. If you're feeling fancy, a splash of peppermint syrup in your latte makes it a themed treat.
The Cold Contrast: Serve these warm from the oven with a scoop of cold vanilla bean ice cream on the side. The way the ice cream melts into the warm chocolate creates a velvety sauce that's hard to beat.
The Party Platter: For a holiday spread, arrange these on a platter with fresh strawberries and raspberries. The tartness of the berries balances the richness of the Chocolate Mint Cookies and adds a pop of color to the table.
Recipe FAQs
How to prevent the cookies from spreading too much?
Cool the melted butter slightly before mixing with sugars. Ensure your oven is fully preheated so the fat doesn't melt too quickly before the flour can set.
How to tell when the cookies are perfectly baked?
Remove them when edges are set and matte. The centers should still look slightly soft to avoid turning a fudgy cookie into a dry biscuit.
Why do my cookies taste like medicine?
You likely used too much peppermint extract. Stick to the exact 2.5ml measurement and only add more after tasting the raw dough.
Can I use white chocolate chips instead of semi sweet?
Yes, white chocolate adds a creamier sweetness. If you enjoy this flavor profile, you might also like the rich taste of our Butterfinger cookies.
How to store these cookies to keep them soft?
Place them in an airtight container at room temperature. This prevents the moisture from escaping and keeps the centers tender.
Is it true that I must chill the dough before baking?
No, this is a common misconception. This recipe uses melted butter and is designed for immediate baking at 350°F.
How to stop the centers from staying raw?
Space the cookies further apart on the baking sheet. Overcrowding the pan prevents heat from circulating, which leaves the middle undercooked.
Chocolate Mint Cookies