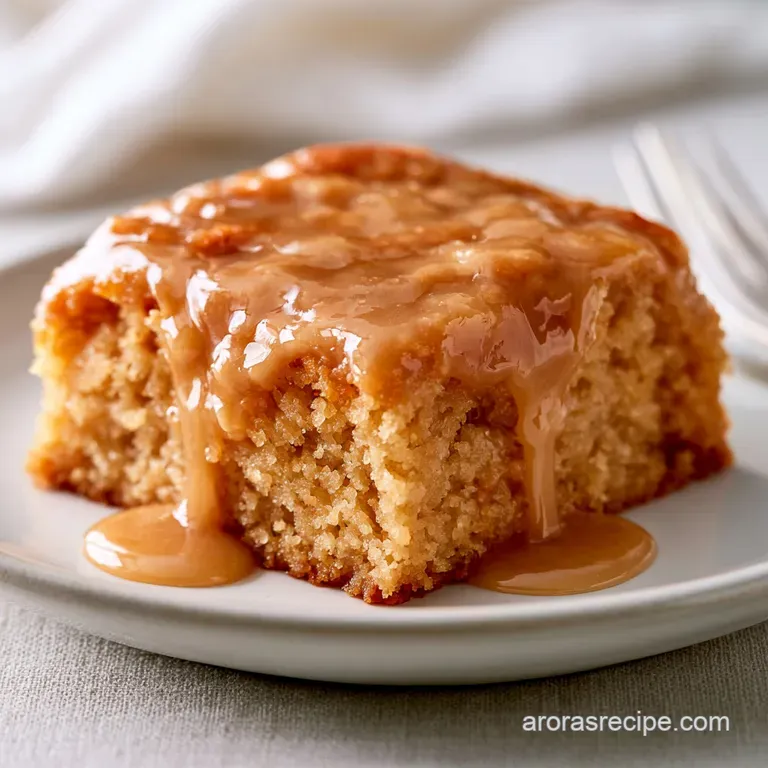
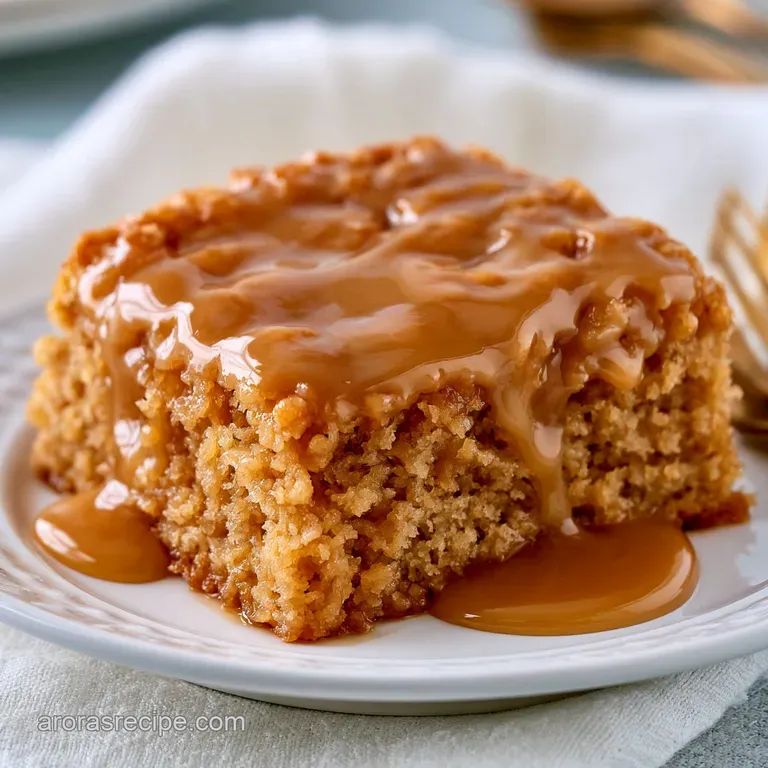
Maple Bars: Pillowy and Golden
- Time: 30 min active + 2 hours 20 mins rising/chilling = Total 2 hours 50 mins
- Flavor/Texture Hook: Velvety maple glaze over a pillowy, golden brown base
- Perfect for: Weekend family brunches, holiday mornings, or a cozy treat for guests
- The Secret to Fluffy Maple Bars
- Component Analysis
- Essential Ingredients for Maple Bars
- Kitchen Tools You'll Need
- Making Your Maple Bars Step-by-Step
- Fixing Common Maple Bars Problems
- Troubleshooting Common Issues
- Fun Ways to Twist the Flavor
- Adjusting the Batch Size
- Common Baking Beliefs
- Keeping Maple Bars Fresh Longer
- Making Your Bars Look Professional
- Recipe FAQs
- 📝 Recipe Card
That first crackle of the oven door opening and the rush of warm, maple scented steam hitting your face is honestly the best part of the morning. It’s a smell that just feels like home, especially if you grew up with those old school bakeries where the treats are piled high in glass cases.
I remember visiting a tiny shop in a small Midwestern town where the baker didn't use a timer, just a "feeling" in the air, and those bars were the kind of treats that made the whole town wake up early.
I used to think making something like this at home was too much of a chore, but once you get the rhythm of the dough, it's actually pretty relaxing. These Maple Bars aren't about being fancy, they're about that hearty, homestyle comfort that makes a Saturday morning feel special.
You get that soft, cloud like bite followed by a glaze that's thick enough to satisfy a sweet tooth but doesn't feel overwhelming.
Whether you're hosting a big family gathering or just want something better than a store-bought pastry, this approach works every time. We're going for a texture that's halfway between a donut and a brioche, topped with a glaze that stays glossy and smooth.
Let's get into how to make these a regular part of your weekend routine.
The Secret to Fluffy Maple Bars
Getting the texture right is all about how we handle the dough and the heat. It's not just about mixing ingredients, it's about giving the yeast time to do its thing without rushing it.
Yeast Wake up: Warm milk creates a cozy environment for the yeast to activate, which is what gives the bars their lift. If the milk is too hot, you'll kill the yeast, but if it's too cold, they'll just sleep through the process.
Fat Distribution: Adding softened butter into the dough keeps the crumb tender and velvety. The fat coats the flour proteins, which stops too much gluten from forming, meaning your bars won't be chewy like a bagel.
Double Proofing: Letting the dough rise twice creates those tiny air pockets that make the bars feel light. The first rise builds the structure, and the second rise ensures they're plump before they hit the heat.
Glaze Viscosity: The mix of melted butter and heavy cream creates a stable emulsion with the powdered sugar. This prevents the glaze from soaking entirely into the bread, leaving a distinct, creamy layer on top.
Since we are dealing with a yeasted dough, the precision of your environment matters. If your kitchen is chilly, the dough might take a bit longer to rise, which is totally fine, just give it more time.
| Freshly Baked | store-bought Shortcut | Impact on Experience |
|---|---|---|
| Active Dry Yeast | Chemical Leaveners | Fresh has a deeper, bread like flavor |
| Pure Maple Syrup | Maple flavored Syrup | Pure syrup has a complex, woody sweetness |
| Double Proofed | Single Rise/Frozen | Homemade is significantly fluffier |
The difference in quality is huge when you use real ingredients. Using a high-quality flour, as suggested by King Arthur Baking, ensures the protein content is just right for a soft but stable rise.
Component Analysis
To get these Maple Bars right, you have to understand what each part is doing. It's not just about the flavor, it's about the structure.
| Ingredient | Science Role | Pro Secret |
|---|---|---|
| Active Dry Yeast | Gas Producer | Always check for "foam" before adding flour |
| Unsalted Butter | Tenderizer | Use softened butter for the dough, melted for the glaze |
| Pure Maple Syrup | Flavor & Moisture | Don't boil the syrup or it will lose its floral notes |
| Heavy Cream | Glaze Stabilizer | Add one tablespoon at a time to avoid a "soup" glaze |
The balance of salt in both the dough and the glaze is what keeps this from being cloyingly sweet. That tiny pinch of salt in the frosting is what makes the maple flavor actually pop.
Essential Ingredients for Maple Bars
Here is everything you need to get these going. I've kept it simple, using standard pantry staples that you likely already have.
For the Yeasted Dough
- 3 cups (375g) all purpose flour Why this? Balanced protein for a soft but sturdy bar
- 2 ¼ tsp (7g) active dry yeast Why this? Reliable lift for home bakers
- ¼ cup (50g) granulated sugar Why this? Feeds the yeast and adds mild sweetness
- ½ tsp (3g) salt Why this? Controls yeast growth and adds flavor
- ¾ cup (180ml) warm milk (110°F/43°C) Why this? Provides fat and sugars for the yeast
- 4 tbsp (56g) unsalted butter, softened Why this? Creates a tender, rich crumb
- 1 large egg (50g), room temperature Why this? Adds structure and a golden color
Substitute for milk: Unsweetened soy milk works well, though the rise might be slightly slower.
For the Maple Glaze
- 2 cups (240g) powdered sugar Why this? Creates a smooth, thick coating
- ½ cup (120ml) pure maple syrup Why this? Authentic, deep maple flavor
- 4 tbsp (56g) unsalted butter, melted Why this? Adds richness and a glossy finish
- 1 tsp (5ml) maple extract Why this? Intensifies the maple aroma
- 2 tbsp (30ml) heavy cream Why this? Controls the thickness and creaminess
- ¼ tsp (1.5g) salt Why this? Balances the sugar
Substitute for maple syrup: Honey can work, but it will change the flavor profile to a honey bar.
If you love these kinds of sweet bakes, you might also enjoy my Homemade Cornbread recipe, which uses a similar balance of sweetness and salt.
Kitchen Tools You'll Need
You don't need a professional bakery to make these Maple Bars, but a few basics will make your life way easier.
- Stand Mixer with Dough Hook: You can knead by hand, but a mixer saves your arms.
- Baking Sheet: A standard rimmed sheet works best.
- Parchment Paper: This is non negotiable if you don't want your bars sticking.
- Rolling Pin: To get that even 1 inch thickness.
- Whisk: For a lump free glaze.
- Bench Scraper or Knife: For clean cuts into bars.
- Pastry Brush: To lightly grease your bowls.
Chef's Note: If you don't have a stand mixer, just use a sturdy wooden spoon to get the dough shaggy, then move to a floured counter for about 10 minutes of hand kneading. Trust me, it's a great workout.
Making Your Maple Bars step-by-step
Now we get to the fun part. Just follow the flow, and don't rush the rises.
Phase 1: The Rapid Rise Dough
- Whisk warm milk and a pinch of the sugar in a mixer bowl; sprinkle yeast on top and let sit for 5-10 minutes until it looks foamy and smells like beer. Note: This confirms your yeast is alive.
- Add the remaining sugar, salt, egg, and softened butter to the yeast mixture. Gradually incorporate flour until a shaggy dough forms.
- Using a dough hook on medium low, knead for 5-7 minutes until the dough is smooth and pulls away from the sides of the bowl. Note: Avoid adding too much extra flour or the bars will be dense.
Phase 2: Shaping and Second Proof
- Place dough in a greased bowl, cover with a damp cloth, and let rise in a warm spot for 60-90 minutes, or until doubled in size.
- Gently punch down the dough to release air pockets. Note: Don't smash it too hard, just a firm press to let the air out.
- On a lightly floured surface, roll the dough into a rectangle approximately 1 inch (2.5cm) thick.
- Slice the dough into 12 equal bars (roughly 2x4 inches) using a sharp knife or bench scraper.
- Place bars on a parchment lined baking sheet, cover loosely, and let rise for another 30-45 minutes until they look plump and soft.
Phase 3: The Golden Bake
- Preheat oven to 375°F (190°C) and bake bars for 12-15 minutes until they are pale golden brown and springy to the touch. Note: Don't overbake them or they'll lose that donut like softness.
Phase 4: The Velvety Glaze
- Prepare glaze by combining melted butter and maple syrup, then whisking in powdered sugar, salt, and maple extract.
- Add heavy cream one tablespoon at a time until the glaze is glossy and thick enough to coat the back of a spoon.
- Dip the tops of the slightly cooled bars into the glaze and lift straight up for a clean finish.
Fixing Common Maple Bars Problems
Even for experienced cooks, yeast can be finicky. Here are the things that usually go sideways and how to handle them.
Troubleshooting Common Issues
| Issue | Solution |
|---|---|
| Why Your Dough Isn't Rising | If your dough is just sitting there, it's usually a temperature issue. If the milk was too hot (over 130°F), you might have killed the yeast. If it's too cold, the yeast is just sluggish. Try moving t |
| Why The Glaze is Too Runny | This usually happens when the heavy cream is added too quickly. You want a thick, dip able glaze, not a pourable syrup. If it's too thin, just whisk in another tablespoon of powdered sugar until it th |
| Why Bars are Too Dense | Dense bars usually come from under proofing or over flouring. If you added too much flour during the kneading process, the dough becomes too heavy for the yeast to lift. Next time, keep the dough slig |
Common Mistakes Checklist:
- ✓ Did you check the milk temp? (110°F is the sweet spot)
- ✓ Did you wait for the second rise? (Skipping this makes them heavy)
- ✓ Is the oven truly at 375°F? (Use a thermometer for accuracy)
- ✓ Did you dip the bars while they were slightly warm? (Too hot = melted glaze, too cold = thick clumps)
Fun Ways to Twist the Flavor
Once you've nailed the basic Maple Bars, you can start playing around with the ingredients. This is where it gets really fun.
Salted Bacon Maple
For a savory sweet combo, fry up some thick cut bacon until it's shatter crisp. Chop it into tiny bits and press them into the glaze immediately after dipping the bars. The saltiness of the bacon cuts through the sweetness of the maple perfectly.
Cinnamon Infused Dough
Add 1 tsp of ground cinnamon to your flour mixture. This gives the bars a warm, spiced interior that pairs beautifully with the maple topping. It makes them feel a bit more like a cinnamon roll but with that classic maple finish.
Maple Pecan Crunch
Toast some crushed pecans in a pan with a bit of butter. After glazing your bars, sprinkle the toasted pecans on top. This adds a needed textural contrast to the softness of the dough.
Vegan Maple Swap
To make these plant based, swap the milk for soy milk and the butter for a high-quality vegan butter stick. Use a flax egg (1 tbsp ground flax + 3 tbsp water) instead of the chicken egg. The texture will be slightly denser, but the flavor remains fantastic.
If you enjoy these types of breakfast treats, you might want to try my The Crepes Recipe for a lighter morning option.
Adjusting the Batch Size
Sometimes you only want a few bars, or you're feeding a whole neighborhood. Here is how to scale these Maple Bars without ruining the chemistry.
Scaling Down (Half Batch): If you're making 6 bars instead of 12, use a smaller baking sheet (like a quarter sheet). Reduce the bake time by about 2-3 minutes since smaller batches can sometimes cook faster. For the egg, crack one into a bowl, beat it, and use exactly half (about 25g).
Scaling Up (Double Batch): When doubling the recipe, don't just double the salt and spices - increase them to about 1.5x first, then taste. I recommend working in two separate batches for the kneading process unless you have a very large professional mixer.
If you bake them all on one huge tray, lower the oven temp to 350°F and extend the time by 5 minutes to ensure the middle bars are cooked through.
| Scaling | Pan Size | Temp Adjustment | Time Adjustment |
|---|---|---|---|
| 1/2 Batch | 9x13 inch | None | Reduce by 20% |
| 2x Batch | Two 13x18 sheets | Lower by 25°F | Increase by 10% |
Common Baking Beliefs
There are a few things people always say about yeasted sweets that aren't actually true. Let's clear those up.
The "Sugar Kills Yeast" Myth: Some people think too much sugar in the dough will stop the yeast from working. While a massive amount of sugar (like in a brioche) can slow them down, the amount in these Maple Bars is actually a food source for the yeast.
It helps them produce gas and creates that golden crust.
The "More Kneading is Better" Myth: You might think that kneading the dough for 20 minutes will make it "better," but you're actually risking over developing the gluten. Once the dough is smooth and pulls away from the bowl, stop.
Over kneading leads to a tough, bread like bar instead of a tender, cakey one.
The "Fridge Rise" Myth: Some say you can't rise dough in the fridge. Actually, a cold ferment (letting it rise slowly in the fridge overnight) often creates a more complex flavor and a more consistent crumb. If you're short on time today, just use the warm spot method.
Keeping Maple Bars Fresh Longer
Because these contain yeast and butter, they have a specific shelf life. You want to store them in a way that keeps the moisture inside the dough but keeps the glaze from getting sticky.
Fridge Storage: Store your bars in an airtight container for up to 3 days. The fridge keeps the glaze stable, but it can dry out the bread. Always wrap them tightly in plastic wrap or put them in a sealed Tupperware.
Freezer Guide: These freeze surprisingly well. Wrap each bar individually in parchment paper, then place them all in a freezer bag. They'll stay fresh for up to 2 months.
Reheating Tips: Don't microwave them for too long or the glaze will turn into a puddle. Instead, pop them in a 300°F oven for about 5-8 minutes. This refreshes the butter in the dough and makes them feel like they just came out of the oven.
Zero Waste Tips: If you have a bit of leftover glaze, don't toss it! Use it as a dip for apple slices or drizzle it over a bowl of oatmeal the next morning. If you have leftover dough, you can roll it into small balls and bake them as mini maple bites.
Making Your Bars Look Professional
The difference between a "home cook" bar and a "bakery" bar is all in the finish. A few small tweaks make these Maple Bars look like they cost $5 a piece.
First, the dip is everything. Don't just pour the glaze over the top. Dip the bar straight down into the glaze, hold it for a second, and lift it straight up. This creates a clean, sharp line at the top and prevents the glaze from running down the sides in messy streaks.
Second, pay attention to the cut. Use a very sharp knife or a bench scraper. If you pull or tear the dough while cutting the bars, you'll get jagged edges that don't rise evenly. A clean, vertical slice ensures a professional, rectangular shape.
Finally, consider the garnish. A tiny sprinkle of flaky sea salt on top of the wet glaze not only adds flavor but gives it a high end look. If you're feeling fancy, a single toasted pecan half placed dead center on each bar makes them look like they came from a boutique shop.
When you serve these, arrange them on a wooden platter or a slate board. The contrast between the pale golden dough and the glossy, creamy glaze is beautiful. Pair them with a strong black coffee or a cold glass of milk to balance the sweetness.
Trust me, once you see the look on your friends' faces when they bite into these, you'll be making them every single weekend.
Recipe FAQs
Are maple bars a West coast thing?
Yes, they are deeply rooted in the West Coast. While maple syrup originates from the East, these specific glazed yeast bars are bakery staples across the Western US.
What are maple bars?
They are soft, yeast risen dough bars topped with a thick maple glaze. Think of them as a rectangular, maple flavored relative of the classic glazed donut.
Are maple bars a PNW thing?
Yes, they are a regional favorite in the Pacific Northwest. You will frequently find them in local coffee shops and bakeries throughout Washington and Oregon.
How do I make maple bars?
Whisk warm milk and sugar, then activate the yeast. After kneading and proofing the dough, bake the bars at 375°F and dip them into a glossy maple glaze.
Why is my maple glaze too runny?
Whisk in more powdered sugar. This usually happens if heavy cream is added too quickly; keep adding sugar until the glaze is thick enough to coat the back of a spoon.
Can I substitute the all-purpose flour?
Stick with all-purpose flour for the proper structure. If you enjoyed the soft crumb of easy cinnamon rolls, you'll find this dough relies on the same flour protein balance to rise correctly.
Why did my dough fail to rise?
Check your milk temperature. If the milk was hotter than 130°F, the yeast was likely killed; if it was too cold, the yeast will remain sluggish and fail to double in size.
Homemade Maple Bars

