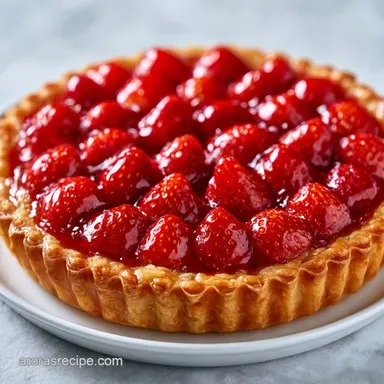
Copycat Piccadilly Strawberry Pie: Velvety Filling
- Time: 10 min active + 60 min cook + 4 hrs chilling = Total 5 hours 10 mins
- Flavor/Texture Hook: Shattering buttery crust with a thick, ruby red glaze
- Perfect for: Sunday family dinners or a nostalgic potluck dessert
- The Best Strawberry Pie Picadilly Recipe
- Secrets Behind the Texture
- Picking Your Ingredients
- Essential Baking Gear
- Step by Step Execution
- Fixing Common Pie Problems
- Troubleshooting Common Issues
- Customizing Your Pie
- Adjusting the Batch Size
- Truth About Strawberry Pies
- Preserving and Reheating Guide
- The Best Serving Pairings
- Recipe FAQs
- 📝 Recipe Card
The first thing you'll notice is the smell. Not just fresh berries, but that deep, jammy aroma that fills the kitchen when strawberries hit the heat and start to break down. It's a warm, nostalgic scent that reminds me of old school Midwestern diners where the pie was always thick and the coffee was always hot.
I remember the first time I tried to recreate this. I thought I could just toss fresh berries in a crust and bake it, but I ended up with a "strawberry soup" that soaked right through the bottom. It was a mess.
After spending a few weekends tinkering with the thickening process and the crust timing, I realized the trick is all in the pre bake and the simmer.
Once you get this Strawberry Pie Picadilly Recipe down, you'll see why it's a favorite. We're aiming for a specific contrast: a crust that practically shatters when your fork hits it, paired with a filling that holds its shape but remains silky on the tongue. Trust me on this, the chilling time is non negotiable, but the result is worth every single minute of the wait.
The Best Strawberry Pie Picadilly Recipe
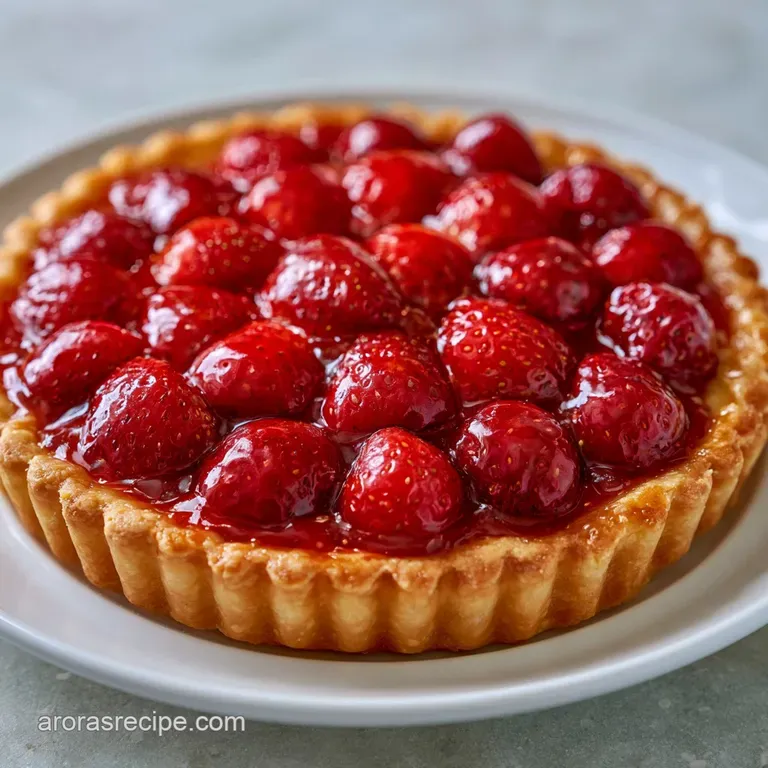
Right then, let's get into what makes this particular version stand out. Unlike a rustic galette or a loose berry crumble, this is a structured dessert. It's designed to be sliced into clean, beautiful wedges that look as good as they taste.
The secret is treating the filling like a custard style glaze rather than a chunky fruit bake.
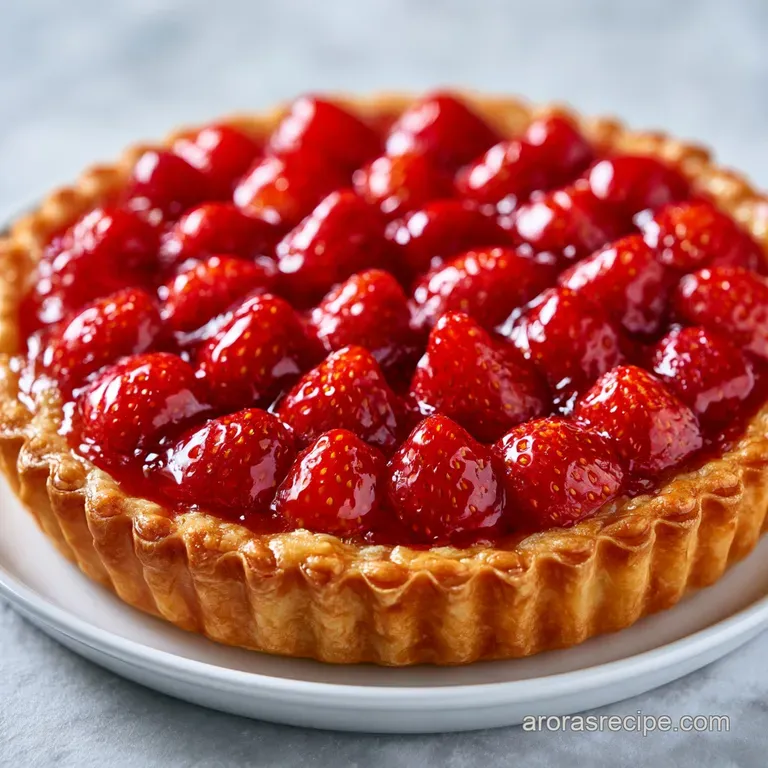
If you're looking for that specific cafeteria style texture, you have to embrace the stove. We aren't just baking fruit; we're concentrating the flavor. By simmering the berries first, we evaporate the excess water that usually makes pie crusts soggy, leaving behind a concentrated strawberry punch that feels hearty and homestyle.
Most people shy away from cooking the filling before it goes into the crust, but that's exactly how you get that professional finish. It's a stress free way to ensure your pie is stable.
Plus, it allows you to taste and adjust the sweetness before the pie ever hits the oven, so you're never guessing if it's "done" enough.
Secrets Behind the Texture
You might wonder why we don't just bake everything together. It comes down to how the ingredients react to heat. If you've ever tried my Classic Cheesecake Recipe, you know that getting a clean slice requires a specific kind of structural set. This pie follows a similar logic.
Starch Gelatinization: Cornstarch granules swell and burst when heated with liquid, creating a web that traps strawberry juice. This is what turns a runny sauce into a velvety glaze.
Fat Pockets: By using chilled butter and not overworking the dough, we leave tiny clumps of fat. When these hit the heat, they steam and create layers, which is why the crust shatters rather than crumbling like a cookie.
Moisture Barrier: Pre baking the crust creates a toasted "seal" on the bottom. This prevents the strawberry glaze from soaking into the flour, keeping the base crisp and flaky.
Acid Balance: The lemon juice doesn't just add tang, it helps stabilize the natural pectins in the fruit, ensuring the filling doesn't separate over time.
| Berry Type | Texture | Flavor Profile | Best For |
|---|---|---|---|
| Fresh Strawberries | Firm, chunky | Bright and tart | Traditional slices |
| Frozen Strawberries | Softer, jammy | Concentrated, sweet | Quick prep/Winter |
| Dried/Rehydrated | Chewy, dense | Very intense | Experimental twists |
Picking Your Ingredients
When you're putting together a Strawberry Pie Picadilly Recipe, the quality of your butter and the ripeness of your berries change everything. I always tell my friends to avoid the "perfect" looking supermarket berries if they taste like water.
Go for the ones that smell like a strawberry field, even if they aren't perfectly symmetrical.
For the crust, stick to chilled butter. If the butter melts before it hits the oven, you lose those pockets of air, and your crust becomes tough. It's a common mistake, but it's an easy fix. Just keep your butter in the fridge until the very second you're ready to cube it.
| Ingredient | Science Role | Pro Secret |
|---|---|---|
| Cornstarch | Thickening Agent | Whisk with lemon juice first to avoid lumps |
| Unsalted Butter | Lamination/Flake | Use a pastry cutter for larger "pea sized" bits |
| Fresh Lemon | Flavor/Setting | Use a real lemon, not bottled juice, for the pectin |
| All Purpose Flour | Structure | Chill the flour for 10 mins if your kitchen is hot |
The Shopping List
- 1.5 cups (190g) all purpose flour Why this? Standard protein level for a sturdy yet flaky crust
- 0.5 cup (115g) chilled unsalted butter, cubed Why this? Essential for the shatter effect texture
- 0.25 tsp (1.5g) salt Why this? Balances the richness of the butter
- 4 tbsp (60ml) ice cold water Why this? Binds dough without melting the butter
- 4 cups (600g) fresh strawberries, hulled and halved Why this? Provides the bulk and natural pectin
- 0.5 cup (100g) granulated sugar Why this? Draws out juice and creates the glaze
- 0.25 cup (60ml) cornstarch Why this? The primary stabilizer for a clean slice
- 1 tbsp (15ml) fresh lemon juice Why this? Brightens the berry flavor and aids setting
- 1 tsp (5g) vanilla extract Why this? Rounds out the tartness with warmth
- 0.25 tsp (1.5g) salt Why this? Enhances the fruit's natural sugars
Quick Substitutions
- All purpose flour: Almond flour (Note: Results in a denser, grainier crust)
- Unsalted butter: Coconut oil (Note: Adds a slight coconut flavor, more fragile crust)
- Granulated sugar: Honey (Note: Makes the filling slightly runnier and more floral)
- Fresh strawberries: Frozen berries (Note: Thaw and drain excess liquid first)
Essential Baking Gear
You don't need a professional kitchen for this, but a few tools make it stress free. A 9 inch pie plate is the standard here. If you use a deeper dish, you'll need to increase the filling by about 20% to avoid having a "shallow" pie.
I highly recommend a pastry cutter. If you don't have one, a sturdy fork works, but it takes more arm strength. The goal is to avoid using your hands to mix the butter into the flour. Your palms are warm, and warmth is the enemy of a flaky crust.
Finally,, use a heavy bottomed saucepan for the filling. Strawberries have a lot of sugar, and sugar loves to burn. A thin pot will create "hot spots," leading to scorched berries. A heavy pot distributes the heat evenly, ensuring a velvety consistency.
Step by step Execution
To keep this moving, I like to follow a simple plan. We'll handle the crust first, let it cool, and then tackle the filling. This flow ensures the crust is completely set before we pour in the hot glaze.
- 1. Base Phase
- Mix, press, and pre bake the crust (approx. 30 mins).
- 2. Filling Phase
- Simmer berries and thicken the glaze (approx. 30 mins).
- 3. Setting Phase
- Assemble and chill in the fridge (4 hours).
Detailed Instructions
- Combine all purpose flour and salt in a mixing bowl. Cut in the chilled cubed butter using a pastry cutter or fork until the mixture resembles coarse crumbs. Note: Stop before the butter completely disappears.
- Gradually add ice cold water, stirring until the dough just clings together. Press the dough into a 9 inch pie plate and trim the edges. Note: Don't overwork the dough or it will become tough.
- Pre bake the crust at 375°F (190°C) for 12-15 minutes until pale gold. Set aside to cool.
- In a medium heavy bottomed saucepan, combine strawberries, sugar, and salt. Heat over medium until berries release their juices and soften.
- Whisk in the cornstarch and lemon juice. Continue to simmer, stirring constantly, until the mixture thickens into a velvety glaze and bubbles vigorously. Note: According to Serious Eats, cornstarch must reach a boil to fully activate its thickening power.
- Remove the saucepan from heat and stir in the vanilla extract.
- Pour the thickened strawberry filling into the pre baked crust and smooth the top with a spatula.
- Allow the pie to cool at room temperature for 1 hour, then refrigerate for at least 3 hours until the filling is fully set and firm.
Fixing Common Pie Problems
Even for experienced cooks, things can go sideways. The most common issue with the Strawberry Pie Picadilly Recipe is the "slump," where the filling doesn't hold its shape. This is almost always due to under cooking the cornstarch.
Troubleshooting Common Issues
| Issue | Solution |
|---|---|
| Why Your Filling Remains Runny | If your pie is more like a pudding than a sliceable cake, the cornstarch didn't reach the proper temperature. It needs to bubble vigorously, not just simmer. If you've already poured it into the crust |
| Why Your Crust is Soggy | A soggy bottom usually happens because the crust wasn't pre baked long enough or the filling was poured in while the crust was still steaming hot. The pre bake creates a barrier that keeps the fats in |
| Why Your Crust is Tough | Toughness comes from over mixing. When you stir the dough too much, you develop gluten, which turns a flaky crust into a bread like crust. Use a light touch and stop the moment the dough holds togethe |
The "No Fail" Checklist
- ✓ Butter is ice cold when it hits the flour.
- ✓ Filling reached a vigorous boil before removal.
- ✓ Crust was pre baked to a pale gold color.
- ✓ Pie chilled for at least 3 full hours.
- ✓ Berries were halved for even cooking.
Customizing Your Pie
While the classic version is a winner, I love playing with the flavor profiles. If you want a more zesty version, you can add a teaspoon of lemon zest to the crust. It adds a bright, citrusy note that cuts through the richness of the butter.
For those who want a different fruit experience, this method works great with raspberries or blackberries, though you might need a tiny bit more cornstarch since those berries can be more watery. If you love other berry treats, you might enjoy my Shortcake Recipe for 8 for a lighter, non baked alternative.
If you're avoiding gluten, you can use a 1:1 gluten-free flour blend. Just be aware that gluten-free crusts are more fragile, so I suggest using a removable bottom pie pan. This makes it much easier to get the slices out without the crust shattering prematurely.
Adjusting the Batch Size
Scaling a Strawberry Pie Picadilly Recipe requires a bit of caution, especially with the thickening agents. You can't always just double everything and expect the same result.
Scaling Down (Half Recipe) Use a 6 inch pie pan. Reduce the baking time for the crust by about 20% since the surface area is smaller. For the egg free dough, just halve the water and flour precisely.
Scaling Up (Double Recipe) If you're making two pies, work in batches for the filling. If you crowd a saucepan with too many berries, they will steam rather than sauté, and it will take much longer to reach that vigorous boil.
I suggest keeping the spices and salt at 1.5x rather than 2x to keep the flavor balanced.
For the crust, if you are baking two shells at once, lower your oven temperature to 350°F (175°C) and extend the time by 5 minutes. This ensures both crusts brown evenly without the edges burning.
| Servings | Crust Flour | Berries | Cornstarch | Chill Time |
|---|---|---|---|---|
| 4 Slices | 95g | 300g | 30ml | 3 Hours |
| 8 Slices | 190g | 600g | 60ml | 3 Hours |
| 16 Slices | 380g | 1.2kg | 120ml | 4 Hours |
Truth About Strawberry Pies
There's a lot of chatter online about "raw" strawberry pies. Some people claim that cooking the berries destroys the flavor. In my experience, that's just not true for this style of pie.
Cooking the berries concentrates the sugars and removes the excess water, which is the only way to get that professional Picadilly set.
Another myth is that you must use a specific "pie flour." Honestly, don't even bother. A standard all purpose flour from any grocery store works perfectly as long as you keep your butter cold. You don't need fancy, high protein flours to get a shatter crisp base.
Finally,, some say that frozen berries are "cheating." Actually, in the dead of winter, frozen berries can sometimes have a more intense flavor than the pale, out of-season fresh ones. Just make sure to drain them well so you don't throw off the cornstarch ratio.
Preserving and Reheating Guide
Once your pie is set, you can keep it in the fridge for 3 to 5 days. I recommend covering it with a loose layer of plastic wrap to stop the crust from picking up "fridge smells," but don't wrap it too tightly or you'll trap moisture and soften the crust.
If you want to freeze it, let the pie cool completely and wrap it tightly in foil and plastic. It'll stay great for about 2 months. To reheat, I suggest letting it thaw in the fridge overnight.
If you want the crust crispy again, pop the slice in a 300°F (150°C) oven for about 5-10 minutes.
For zero waste, don't toss the strawberry hulls! I usually put them in a jar with some sugar and a splash of vinegar to make a quick strawberry shrub, or I simmer them with water to make a light, pink hued tea.
Even the leftover flour butter scraps from the crust can be baked into little "cracker bites" with a pinch of extra salt.
The Best Serving Pairings
A Strawberry Pie Picadilly Recipe is rich and sweet, so you want pairings that provide a bit of contrast. A dollop of unsweetened whipped cream is the gold standard. The airiness of the cream cuts through the density of the strawberry glaze.
If you're feeling fancy, a scoop of high-quality vanilla bean ice cream is the way to go. As the ice cream melts into the warm toned red filling, it creates a creamy sauce that's absolutely brilliant.
For a drink pairing, I love a cold glass of sparkling water with a slice of lime. The bubbles and acidity cleanse the palate between bites, making every mouthful feel like the first one. It's a simple, hearty way to end any meal.
Recipe FAQs
How would you make a pie that tastes like springtime?
Combine fresh strawberries with a touch of lemon juice. The acidity brightens the berries, creating a tart, fresh profile that mimics the season.
How would you make a pie that tastes like summer?
Pair peak season strawberries with vanilla extract. This combination emphasizes the deep, natural sweetness of summer berries for a richer flavor.
Why is my strawberry filling runny?
The cornstarch did not reach the necessary temperature. The mixture must bubble vigorously, not just simmer, to fully activate the thickening agent.
Why is my pie crust soggy?
The crust was likely not pre-baked long enough. Bake the crust at 375°F for 12 15 minutes to create a moisture barrier, and ensure it cools before adding the filling.
How to prevent the crust from becoming tough?
Cut in chilled butter and stir only until the dough just clings together. Overworking the dough develops too much gluten; if you enjoyed managing this fat-to-flour ratio, apply the same logic to our peach cobbler.
How to properly set the pie before slicing?
Cool at room temperature for 1 hour and then refrigerate for at least 3 hours. This two-step process ensures the velvety glaze is fully firm.
Is it true that frozen strawberries work just as well as fresh?
No, this is a common misconception. Frozen berries release excessive moisture and bleed color, which prevents the filling from thickening into a proper glaze.
Strawberry Pie Picadilly Recipe