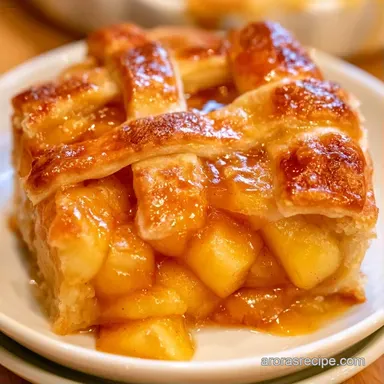
Buttery Fall Apple Pie
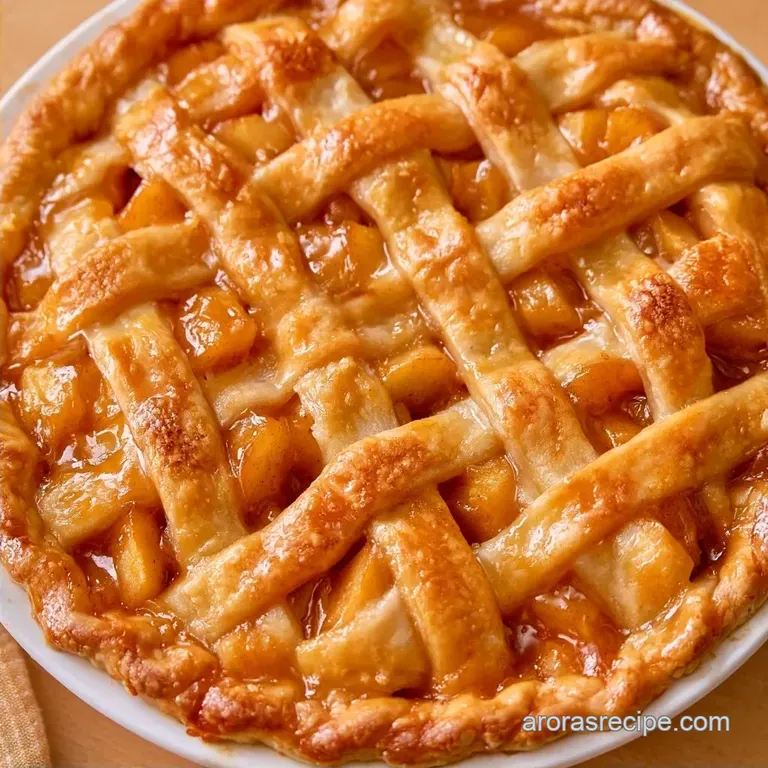
- Time: 30 minutes of active prep plus 1 hour of chilling
- The Appeal: A flaky, buttery crust and a bubbling cinnamon center
- Best for: Family Sunday dinners or autumn get-togethers
Baking a Hearty Fall Apple Pie
The aroma of cinnamon and browned butter filling the room as soon as the oven door opens is pure magic. I still recall those chilly October days in a breezy kitchen, with windows clouded over from the stove's warmth. That specific sound of a crisp crust breaking under a fork always brings me back home.
This recipe focuses on the essentials: a deep, mahogany colored crust and apples that are soft yet maintain their bite. After years of trial and error to prevent a soggy bottom, I've found a solution that is surprisingly straightforward.
This pie captures the essence of a Midwestern autumn balancing a hint of tartness with plenty of sweetness and a satisfying crunch from the coarse sugar topping. Here is everything you need to create this treat without any unnecessary stress.
Key Techniques Explained
Cold Fat Pockets: Keeping the butter chilled prevents it from melting into the flour. When these tiny lumps hit the heat, they steam and push the dough apart, which creates those flaky layers.
Acid Balance: Adding lemon juice keeps the apples from turning brown and cuts through the heavy sugar. This keeps the filling tasting fresh instead of just syrupy.
Temperature Shift: Starting at 425°F sears the bottom crust quickly. Dropping to 375°F then allows the apples to cook through without burning the edges of the dough.
Shopping List Breakdown
For this Fall Apple Pie, you want a mix of apples. Using only one kind usually tastes flat. Granny Smith gives you the tartness, while Honeycrisp adds a honey like sweetness and stays firm.
| Ingredient | Role | If You Don't Have It |
|---|---|---|
| All purpose flour | Structure | Whole wheat (makes it denser) |
| Unsalted butter | Flakiness | Shortening (less buttery taste) |
| Granny Smith/Honeycrisp | Base flavor | Braeburn or Fuji (softer) |
| Lemon juice | Prevents browning | Apple cider vinegar |
| Coarse sugar | Crunch/Color | Granulated sugar (less crunch) |
Right then, you'll need to make sure your butter is truly cold. I usually put my cubed butter back in the freezer for 10 minutes before I start mixing. It makes a huge difference in the final texture.
Choosing Your Apple Blend
The balance of a Fall Apple Pie depends on the fruit. I prefer a 50/50 split of Granny Smith and Honeycrisp. If you want something more tart, lean harder into the Granny Smith. For a sweeter vibe, go with more Honeycrisp or even a Gala apple.
Proper Flour Usage
Standard all purpose flour is the way to go here. It has enough protein to hold the shape of the crust but not so much that it becomes chewy like bread.
| Original Ingredient | Substitute | Why It Works |
|---|---|---|
| Unsalted Butter (1 cup) | Vegetable Shortening (1 cup) | Similar fat content. Note: Lacks the rich, buttery flavor |
| Granulated Sugar (0.75 cup) | Brown Sugar (0.75 cup) | Similar sweetness. Note: Adds a molasses/caramel note |
| All purpose Flour (2.5 cups) | gluten-free 1:1 Blend (2.5 cups) | Mimics structure. Note: Crust will be more fragile |
Don't forget the ice water. Using room temperature water will melt your butter pockets, and you'll end up with a tough, cookie like crust instead of a flaky one.
Equipment Needed
This recipe is easily achievable with standard home tools and a little patience. While a pastry cutter is my go-to, you can also use two knives or a fork to incorporate the butter.
- 9 inch deep dish pie plate
- Large mixing bowl
- Pastry cutter or forks
- Rolling pin
- Vegetable peeler and corer
- Pastry brush
For those with a stand mixer like a KitchenAid, the paddle attachment on low speed works well for mixing the flour and butter. Just be careful not to overprocess the dough, as the goal is to leave pea-sized lumps of butter.
The Cooking Process
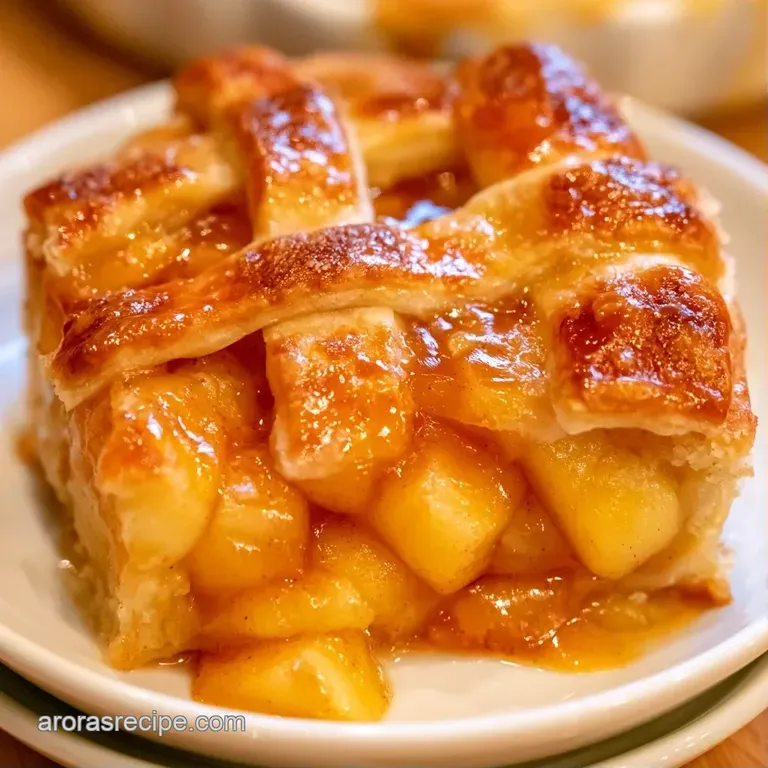
Preparing the Homemade Apple Pie Crust
In a bowl, combine 2.5 cups of flour, 1 tsp of salt, and 1 tbsp of sugar. Use a pastry cutter to work in 1 cup of chilled, cubed butter until the texture resembles coarse crumbs with some pea-sized lumps remaining.
Gradually stir in 8 tbsp of ice water, adding one tablespoon at a time, until the dough just begins to hold together. Separate the dough into two discs, wrap them in plastic, and refrigerate for at least 1 hour. Note: This allows the gluten to relax so the crust doesn't shrink during baking.
Making the Apple Pie Filling
Peel, core, and cut 3 lbs of apples into 1/4 inch thick wedges. In a large bowl, toss the slices with 1 tbsp of lemon juice, 0.75 cup of sugar, 2 tbsp of flour, 1 tsp of cinnamon, and 0.25 tsp of nutmeg. Let the fruit sit for 10 minutes.
Note: This draws out extra moisture to prevent a watery pie.
Assembling the Pie
On a floured surface, roll the first dough disc into a 12 inch circle. Gently place it into your 9 inch deep dish pie plate. Pile the apple filling into the center, forming a slight mound, and dot the top with 2 tbsp of diced butter.
Roll out the second disc and lay it over the filling. Trim any extra dough, fold the edges under, and crimp them firmly to seal your Fall Apple Pie. Cut 4-5 slits in the top crust to allow steam to escape.
Baking Instructions
Preheat your oven to 425°F (218°C). Brush the top crust with beaten egg and sprinkle with 1 tbsp of coarse sugar.
Bake at 425°F (218°C) for 15 minutes. Lower the temperature to 375°F (190°C) and bake for another 60 minutes.
The pie is finished when the crust is a deep mahogany and the filling is bubbling through the vents.
Troubleshooting Guide
It's easy to get frustrated when a pie doesn't look like the picture, but most issues are easy to fix. A wet bottom is the most common complaint, usually caused by the apples releasing too much juice during baking.
Preventing Soggy Bottoms
One trick I use is placing the pie plate on a preheated baking sheet. This sends heat directly into the bottom crust the moment the pie goes in, searing the dough before the juices can soak in.
Fixing Crust Shrinkage
If your crust pulls away from the edges, it's usually because the dough was stretched too thin or not chilled long enough. Be gentle when easing the dough into the plate, and always let it rest in the fridge.
Controlling Filling Gaps
Apples shrink as they cook. If you find a big air gap between the top crust and the fruit, try mounding the filling higher in the center. The "dome" shape allows the apples to settle without leaving a void.
| Problem | Fix |
|---|---|
| Soggy bottom crust | Bake on a preheated baking sheet |
| Crust shrinking | Chill dough for a full hour; don't stretch dough |
| Gaps under top crust | Mound apples higher in the center before covering |
| Burnt edges | Cover edges with foil after 30 minutes |
Flavor Variations to Try
After mastering this Fall Apple Pie, feel free to experiment with the ingredients. I enjoy stirring in a handful of raisins or dried cranberries to the filling for added tartness and texture.
Adding a Crumb Topping
To make a Fall Apple Pie with a crumble, omit the top crust. Instead, combine 0.5 cup flour, 0.5 cup brown sugar, and 4 tbsp cold butter. Sprinkle this mixture over the apples prior to baking. This provides a texture reminiscent of an Apple Cobbler recipe while keeping the solid pie crust.
Infusing Warm Spices
For more intensity, stir in a pinch of allspice or ground cloves. I also suggest adding a teaspoon of vanilla extract to the apples. This enhances the aroma significantly without altering the consistency.
Swapping for Dietary Needs
To make this dairy-free, substitute the butter with chilled coconut oil. While the taste shifts slightly, the crust stays flaky. Ensure the coconut oil is cold and solid before incorporating it into the flour.
Decision Shortcut:
- For a firmer set: add 1 extra tbsp flour to the filling.
- For a sweeter crust: double the coarse sugar on top.
- For softer apples: let sliced apples sit for 20 minutes instead of 10.
Storage & Reheating
Keep your Fall Apple Pie in a cool area at room temperature for roughly 2 days. For extended freshness, seal leftovers tightly in a container or with foil.
Refrigerated slices will last about 4 days. To maintain a crisp crust, skip the microwave when reheating. Instead, warm a piece in the oven at 350°F (175°C) for 5-10 minutes.
Freezing Guidelines
This pie is freezer friendly. I suggest freezing it before baking. Wrap the assembled pie securely in foil and plastic. To prepare, bake directly from the freezer, extending the cooking time by 15-20 minutes. If you're looking for another freezer friendly autumn snack, try slicing and freezing this Pumpkin Bread.
Zero Waste Tips
Save your apple cores and peels. I freeze them in a bag, then simmer them with water and a cinnamon stick to create a light apple syrup. It's a delicious topping for pancakes or oatmeal.
How to Serve and Enjoy
Fall Apple Pie is most enjoyable served warm. As a traditionalist, I always insist on a generous portion of vanilla bean ice cream. Watching the frozen treat melt into the steaming cinnamon filling is the highlight of the experience.
The Classic Pairing
For larger groups, adding a dollop of homemade whipped cream or a drizzle of salted caramel sauce is a great choice. The salty notes in the caramel accentuate the natural sweetness of the Honeycrisp apples.
The Gourmet Touch
For a unique twist, pair your slice with a piece of sharp cheddar cheese. While it may seem unusual at first, the tang of the cheese provides a perfect contrast to the sugar in the Fall Apple Pie.
Slicing for Success
To ensure clean cuts, allow the pie to cool for a minimum of 2 hours. Slicing it while it's still steaming will cause the filling to run and the slices to fall apart. Use a sharp serrated knife to easily cut through the mahogany crust.
Common Baking Myths
A lot of people think you need to "blind bake" the crust to avoid sogginess. In this Fall Apple Pie, that's not necessary if you use the preheated baking sheet trick and let the apples sit for 10 minutes to release their juices.
Another myth is that you should use only one type of apple. Using just Granny Smith is too tart, and using just Honeycrisp can be too sweet. The mix is what creates a balanced flavor.
Finally, some say you have to use a food processor for the crust. While it's faster, doing it by hand with a pastry cutter ensures you don't overprocess the flour. Overprocessing leads to a tough crust, and we want that shattering, flaky texture.
| Method | Fresh Apples | Shortcut (Canned/Frozen) |
|---|---|---|
| Texture | Firm and chunky | Softer, more uniform |
| Flavor | Bright and tart | Syrupy and sweet |
| Prep Time | 20-30 minutes | 5 minutes |
The extra time spent peeling and slicing fresh fruit is always worth it for a real Fall Apple Pie. The brightness of fresh apples just can't be replicated by canned fillings.
Recipe FAQs
Is apple pie traditionally served in the fall?
Yes, it's a seasonal staple. The peak harvest of Granny Smith and Honeycrisp apples makes autumn the ideal time for baking.
Which apples should be avoided for pie filling?
Avoid mealy or overly soft varieties. Red Delicious often collapse into mush during the bake, unlike the firm structure of the selected apples.
What is the secret to a flaky crust?
Keep your butter chilled. Cutting cold butter into coarse crumbs creates steam pockets for a flaky texture. If you mastered temperature precision here, apply it to our crispy skin recipe for perfect results.
Is it true that you must precook apples before filling the pie?
Actually, no. Raw slices tossed with sugar and lemon juice soften perfectly during the 75-minute bake.
How to prevent a soggy bottom crust?
Bake at a high initial temperature. Starting at 425°F (218°C) sets the bottom crust quickly before the fruit releases too much moisture.
Fall Apple Pie for 8 Slices