Peanut Butter Sandwich Cookies: Chewy and Nutty
- Time:20 minutes active + 12 minutes baking = Total 47 minutes
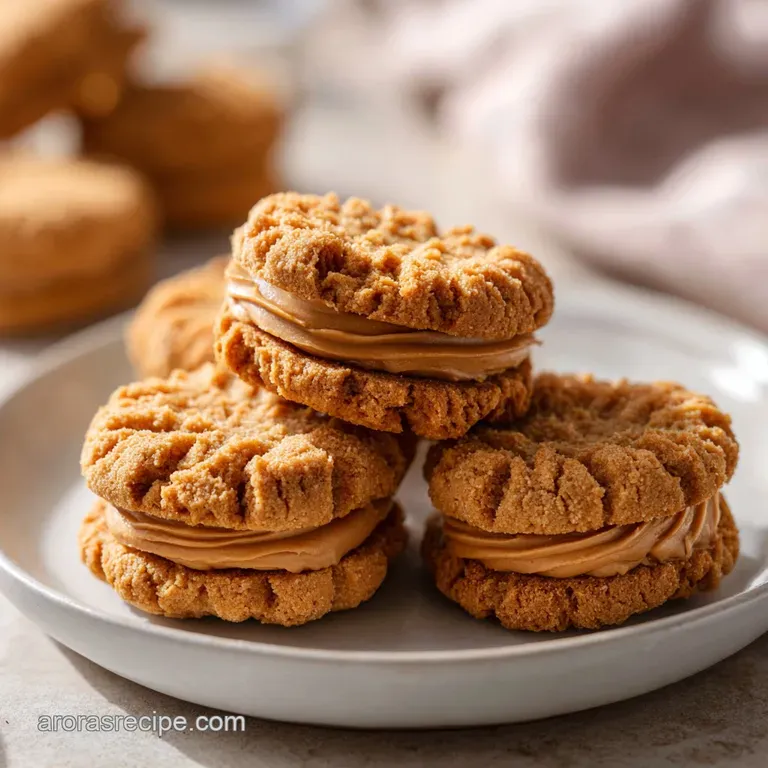
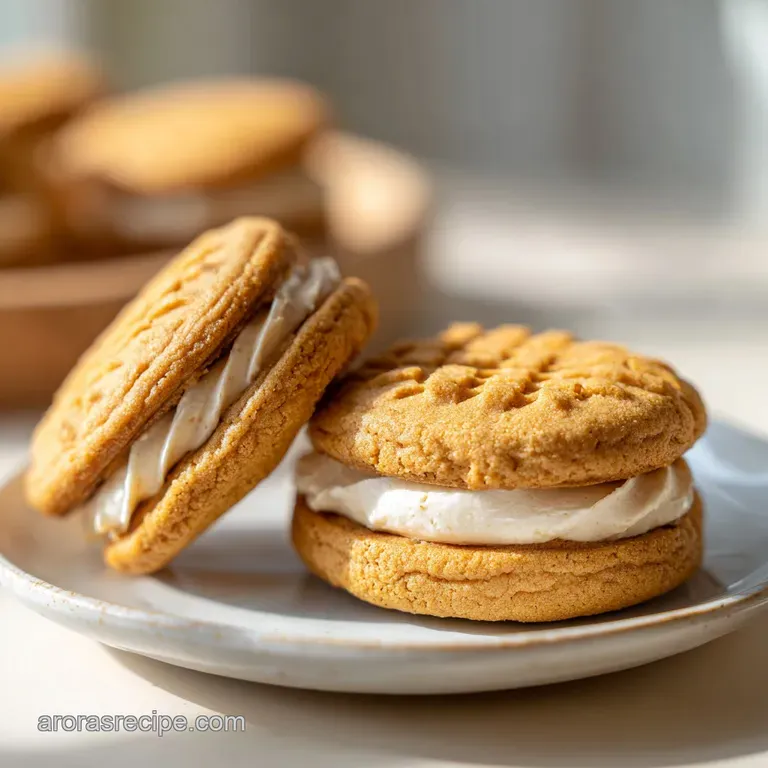
- Flavor/Texture Hook: Salty, nutty cookies with a velvety cocoa center
- Perfect for: School bake sales, cozy movie nights, or simple afternoon snacks
- Peanut Butter Sandwich Cookies
- The Trick Behind the Texture
- Component Analysis
- Gathering Your Essentials
- Equipment Needed
- From Prep to Plate
- Avoiding Kitchen Disasters
- Troubleshooting Common Issues
- Dietary Adaptations
- Adjusting the Batch Size
- Truths About Baking
- Storage and Freshness
- Presentation Tips
- Recipe FAQs
- 📝 Recipe Card
The smell of toasted peanuts and warm sugar hitting the oven air is enough to bring the whole house into the kitchen. I remember the first time I tried making these for a neighborhood get together back home.
I thought I had to be some kind of professional pastry chef to get that clean, sandwiched look, and I spent an hour worrying about my piping skills.
But here is the truth: you don't need fancy frosting tools or a culinary degree to make these look great. Forget everything you've heard about "complex" sandwich cookies. The real secret isn't in the equipment, it's in the dough's stability. If the cookie is too soft, it collapses; too hard, and it cracks.
These Peanut Butter Sandwich Cookies hit that sweet spot where they're sturdy enough to hold a generous dollop of filling but still melt in your mouth.
You can expect a hearty, homestyle cookie that tastes like a classic Midwestern treat. We're going for a velvety chocolate center that contrasts with the salty crunch of the peanut butter base.
It's a stress free process that relies on simple pantry staples, making it one of those recipes you'll keep on a stained index card for years.
Peanut Butter Sandwich Cookies
The real magic here is how we handle the fats. By using both butter and peanut butter, we create a structure that's rich but doesn't spread into one giant pancake on the baking sheet. It's all about that balance of moisture and stability.
Since we're keeping things budget smart, I've focused on ingredients you likely already have. You don't need expensive organic extracts or specialty flours. A standard all purpose flour and store-bought creamy peanut butter do the heavy lifting here. If you're looking for more simple dessert ideas, you might enjoy these traditional buttery shortbread cookies for a different kind of crunch.
The Trick Behind the Texture
I've spent a lot of time figuring out why some cookies turn out like rocks and others like puddles. For this recipe, it comes down to a few simple human level observations about how ingredients behave in a hot oven.
Air Pockets: Beating the butter and sugars until pale traps tiny air bubbles, which keeps the cookies from becoming too dense.
Sugar Balance: The brown sugar adds moisture and a hint of molasses, while the white sugar ensures the edges get that slight, satisfying crisp.
The Fork Press: This isn't just for looks; it creates more surface area and ensures the cookie bakes evenly across the top.
Filling Grip: Using a small amount of heavy cream in the chocolate filling creates a velvety texture that clings to the cookie without sliding off.
Right then, let's look at how this version compares to the more time consuming traditional methods you might find in old cookbooks.
| Feature | Fast Method (This Recipe) | Classic Method | Best For |
|---|---|---|---|
| Prep Time | 20 minutes | 45+ minutes | Weeknight cravings |
| Chilling | Not required | 2 hours minimum | Precise shapes |
| Filling | Quick whip | Cooked buttercream | Stability in heat |
| Texture | Chewy/Soft | Crisp/Snappy | Comfort eating |
It's important to understand that while the classic method gives you a very specific "snap," the fast method is much more forgiving for home cooks who don't want to wait half a day to eat their treats.
Component Analysis
Before we jump into the mixing, let's talk about what's actually happening in the bowl. I like to think of my ingredients as a team where everyone has a specific job to do.
| Ingredient | Science Role | Pro Secret |
|---|---|---|
| Unsalted Butter | Provides structure & fat | Use room temp to avoid "clumps" in the dough |
| Peanut Butter | Flavor & emulsification | Creamy works best for a smooth, uniform crumb |
| Baking Soda | Lift & browning | Don't let it expire or your cookies stay flat |
| Brown Sugar | Moisture & chew | Pack it tight in the cup for consistent sweetness |
This approach ensures that every bite of your Peanut Butter Sandwich Cookies is consistent. If you're ever unsure about a specific ingredient or need a quick swap, this great guide is a fantastic resource for general baking replacements.
Gathering Your Essentials
For the cookie base, keep your ingredients simple. I've found that using a standard brand of peanut butter gives the most predictable results.
For the Cookie Base:
- 1/2 cup (115g) unsalted butter, room temperatureWhy this? Essential for that creamy, pale base.
- 1/2 cup (125g) creamy peanut butterWhy this? Gives the signature salty nutty flavor.
- 1/2 cup (100g) packed brown sugarWhy this? Adds the chewy texture we want.
- 1/4 cup (50g) granulated sugarWhy this? Helps with the crisp edges.
- 1 large egg (50g)Why this? Binds everything together.
- 1 tsp (5ml) vanilla extractWhy this? Rounds out the peanut flavor.
- 1 1/4 cups (155g) all purpose flourWhy this? Standard structure without being too heavy.
- 3/4 tsp (4g) baking sodaWhy this? Provides the necessary lift.
- 1/4 tsp (1.5g) saltWhy this? Enhances the sweetness of the chocolate.
For the Chocolate Filling:
- 1/4 cup (55g) unsalted butter, softenedWhy this? Creates a smooth, spreadable base.
- 1 cup (120g) powdered sugarWhy this? Gives a velvety, dissolve in-your mouth feel.
- 3 tbsp (15g) unsweetened cocoa powderWhy this? Deep chocolate flavor without too much sugar.
- 1 tbsp (15ml) heavy creamWhy this? Prevents the frosting from being too stiff.
- 1/2 tsp (2.5ml) vanilla extractWhy this? Adds a hint of warmth.
If you find yourself missing an ingredient, don't panic. For instance, if you're out of heavy cream, a splash of whole milk works, though the filling will be slightly less rich.
Equipment Needed
You don't need a kitchen full of gadgets. A few basics will get the job done. I personally use a hand mixer, but a stand mixer such as KitchenAid works just as well if you have one.
- Baking sheets (standard size)
- Parchment paper (don't skip this, or you'll be scrubbing pans)
- Hand mixer or stand mixer
- Two mixing bowls (one for wet, one for dry)
- Measuring cups and spoons (or a digital scale for better precision)
- A fork (for that classic crisscross pattern)
- Small offset spatula or a spoon for the filling
From Prep to Plate
Let's get into the actual making of these Peanut Butter Sandwich Cookies. Take your time with the creaming step, as that's where the texture is won or lost.
Phase 1: Building the Base
- Cream together the butter, peanut butter, and both sugars. Use your mixer on medium high until the mixture looks pale and fluffy. Note: This should take about 2-3 minutes; don't rush it.
- Beat in the egg and vanilla extract. Mix until fully emulsified and no streaks of egg remain.
- In a separate bowl, whisk the flour, baking soda, and salt. Note: Whisking removes lumps and distributes the soda evenly.
- Gradually add the dry ingredients to the wet. Mix on low speed just until the white streaks of flour vanish. Note: Overmixing here will make the cookies tough.
Phase 2: Shaping and Baking
- Preheat your oven to 350°F (175°C).
- Scoop rounded tablespoons of dough and roll them into balls. Place them on a parchment lined sheet 2 inches apart.
- Use a fork to press a crisscross pattern into the top of each cookie. Note: Press down about half an inch so they don't flatten too much.
- Bake for 10–12 minutes until the edges are set and the bottoms are lightly browned.
Phase 3: Creating the Core
- Beat the softened butter for the filling until smooth. Gradually add powdered sugar, cocoa powder, vanilla, and heavy cream.
- Mix until velvety and spreadable.
- Once the cookies are completely cool, spoon a dollop of filling onto the flat side of one cookie and press another on top.
Chef's Tip: If your filling feels too stiff, add a tiny drop of heavy cream at a time. If it's too runny, a teaspoon more of powdered sugar will fix it right up.
Avoiding Kitchen Disasters
Even the best of us have days where the cookies come out looking like pancakes. Most of the time, it's a simple fix. When I first started making these Peanut Butter Sandwich Cookies, I used to forget to let the cookies cool completely, and my filling would just melt and slide right off.
Troubleshooting Common Issues
| Issue | Solution |
|---|---|
| Why Your Cookies Are Too Flat | This usually happens if your butter was too soft (almost melted) or if you over creamed the butter and sugar. If the dough feels greasy, pop it in the fridge for 15 minutes before scooping. |
| Why Your Filling Is Too Runny | If the butter for the filling was too warm, it can lose its structure. You want "softened," not "melted." If it happens, chill the filling for 10 minutes and beat it again. |
| Why Your Cookies Crack | Overbaking is the main culprit here. Because peanut butter cookies are dense, they can go from "perfect" to "dry" very quickly. Pull them out when the edges are just barely gold. |
- ✓ Mistake Checklist:
- ✓ Check that your baking soda isn't expired.
- ✓ Ensure butter is room temp, not melted.
- ✓ Cool cookies entirely before filling.
- ✓ Don't overmix after adding flour.
- ✓ Use parchment paper to prevent sticking.
Dietary Adaptations
Depending on who you're serving, you might need to tweak this peanut butter sandwich cookies recipe. Most of these changes are straightforward, but they do alter the final result.
If you're looking for a different texture entirely, you might consider a homemade white cake recipe for a softer dessert, but for these cookies, we want that specific chew.
For a gluten-free version, you can swap the all purpose flour for a 1:1 gluten-free baking blend. Note that these tend to be a bit more fragile, so let them cool longer before assembling.
For a Vegan version, use a plant based butter stick and a flax egg (1 tbsp ground flax + 3 tbsp water). Use a peanut butter that doesn't contain honey. The texture will be slightly denser but still hearty.
For a Salted Caramel twist, omit the cocoa powder from the filling and use a tablespoon of store-bought salted caramel sauce mixed into the butter and powdered sugar.
For Double Chocolate, add 2 tablespoons of mini chocolate chips to the cookie dough before baking.
If you're curious about the nutritional makeup of your ingredients, checking USDA FoodData Central is a great way to see exactly what's in your peanut butter or flour.
Adjusting the Batch Size
Sometimes you only want a few cookies, and other times you're feeding a whole crowd. Scaling these Peanut Butter Sandwich Cookies is pretty easy, but there are a few rules to follow.
Scaling Down (1/2 Batch): When cutting the recipe in half, you'll run into the "half egg" problem. The best way to handle this is to crack one egg into a bowl, beat it well, and then measure out half of it (about 25g).
Use a smaller baking sheet and reduce the bake time by about 1-2 minutes.
Scaling Up (2x Batch): If you're doubling the recipe, don't double the salt or baking soda exactly go to about 1.5x instead to avoid a metallic taste. Work in batches so you don't overcrowd your mixer.
For the baking process, keep the temperature at 350°F (175°C) but be mindful that having two sheets in the oven can create "cold spots," so rotate your pans halfway through.
If you want to change the experience of the cookie, here is a quick decision guide: - If you want a fudgier center, increase the cocoa powder by 1 tsp. - If you want a crispier cookie, replace 1 tbsp of brown sugar with white sugar.
- If you want a saltier profile, sprinkle a pinch of flaky sea salt on top of the filling before sandwiching.
Truths About Baking
There are a lot of "rules" in baking that are actually just suggestions. Let's clear a few things up so you can bake with less stress.
The "Room Temperature" Myth: Some people think butter must be exactly 65°F. In reality, as long as you can press your finger into the butter and leave an indent without it being oily or melting, you're good to go.
The "Natural Peanut Butter" Trap: Many believe natural peanut butter (just peanuts and salt) works better. Actually, for these cookies, stabilized peanut butter (the kind with a bit of palm oil) works more consistently because it doesn't separate, providing a more stable emulsion in the dough.
The "Searing" Logic: You'll often hear that "searing" the bottom of a cookie is bad. Actually, that light brown ring at the bottom is where most of the flavor lives, so don't be afraid of a little color.
Storage and Freshness
To keep your Peanut Butter Sandwich Cookies from going stale, you need to manage the moisture. Because of the fat content in the peanut butter and butter, these actually stay fresh longer than a standard sugar cookie.
Fridge Storage: Keep them in an airtight container for up to 5 days. The chocolate filling becomes slightly firmer, which some people actually prefer.
Freezer Storage: You can freeze these for up to 3 months. I recommend freezing the baked cookies separately first (flash freeze on a tray for 1 hour) and then bagging them. You can assemble them after thawing, or freeze the completed sandwiches.
Reheating: If you want that "fresh from the oven" feel, pop a sandwich cookie in the microwave for 5-10 seconds. Just be careful the filling can get very hot very quickly.
- - Dough Scraps
- If you have a bit of dough left over, roll it into a tiny ball and bake it as a "chef's treat."
- - Filling Leftovers
- Any leftover chocolate filling is basically a frosting. Use it to top a slice of toast or dip some apple slices in it for a quick snack.
- - Butter Wrappers
- If you have small bits of butter left in the wrapper, save them in a small container in the freezer to add to your next batch of sautéed vegetables.
For more inspiration on pairing snacks with beverages, check out The Kitchn's article on perfect pairings here.
Presentation Tips
While these cookies are great just as they are, a little extra effort can make them look like they came from a boutique bakery.
The Chocolate Dip: For a really fancy look, melt some semi sweet chocolate and dip half of the completed sandwich cookie into it. Let it set on parchment paper for 20 minutes.
Nutty Garnish: While the chocolate dip is still wet, sprinkle some crushed roasted peanuts or a tiny pinch of sea salt on top.
The Perfect Stack: When serving, stack them in a pyramid on a platter. It makes the platter look abundant and welcoming.
Packaging for Gifts: If you're giving these away, wrap each sandwich in a small piece of cellophane with a twine bow. It keeps the filling from smudging against other cookies and looks incredibly thoughtful.
Whether you're serving them at a gathering or enjoying them solo, these homemade peanut butter sandwich cookies strike a balance between nostalgic comfort and a touch of indulgence. They are simple, hearty, and honest exactly how a home cooked treat should be.
Just remember to let them cool, don't overmix your flour, and enjoy every bite.
Recipe FAQs
Can I freeze peanut butter sandwich cookies?
Yes, they freeze well for up to 3 months. Flash freeze the baked cookies on a tray for one hour before bagging them to prevent sticking.
Why did my cookies turn out too flat?
Your butter was likely too soft or you over creamed the mixture. If the dough feels greasy, chill it in the fridge for 15 minutes before scooping.
Why is my chocolate filling too runny to pipe?
The butter for the filling was too warm. Chill the filling for 10 minutes and beat it again to restore its structure.
How to prevent the cookies from cracking?
Bake for only 10 12 minutes. Remove them as soon as the edges are set and bottoms are lightly browned to avoid overbaking.
How to store these cookies to keep them from going stale?
Place them in an airtight container. They stay fresh in the fridge for up to 5 days, which also firms up the chocolate center.
Is it true I must chill the dough for several hours to stop them from spreading?
No, this is a common misconception. A quick 15-minute fridge rest is sufficient if the dough feels too warm or greasy.
Can I make these as single cookies instead of sandwiches?
Yes, simply omit the chocolate filling. If you enjoyed mastering the cookie texture here, see how the same peanut butter base works in our classic chewy peanut butter blossoms.
Peanut Butter Sandwich Cookies